Group Members
Abby Tebbenhoff (Lead Designer)
Dyer Pace (Lead Writer)
First Design Iteration
Abby and I wanted to create a design that would reflect our mutual love for JMU. We wanted to make a functional object that would appeal to JMU students. First, we searched for general ideas on thingiverse like, gopro camera holders, toys, and puzzle pieces that could be interactive. However, none of these ideas sparked our interest. We wanted something that could be used on a desk or in our apartments that was decorative, but functional. Our main design we wanted to focus on was designing a functional hinge in tinkercad. Mastering this design would make a functional 3D piece for our model. This would be a design we could apply to many other objects throughout the semester.
Keeping in mind functionality and aesthetic we decided to make a small box with a working hinge. In order to make our design more interesting we are going to take a model of Wilson Hall, and use tinkercad to hollow it out for a box a student could put their class ring, sticky notes, or other small office supplies in. We believe this is an exciting design that once we master and finalize can be practical for a student to use. The design will not be mundane as it is an iconic building on campus, and will have surprise factor when the roof unexpectedly opens up into a box. Using the ruler tools, holes, and other various tools we have mastered, as well as tools we have yet to explore, will be essential in making this intricate design. Although our object includes interlocking parts, and will need to go through many iterations we are excited to see the working hinge. Our design process could be more difficult, but we are excited about the potential final result.
When it comes to designing a hinge Thingiverse offered many different design ideas. There are designs that require pieces to be printed separately, and others that are interlocked perfectly and printed in one piece. We found inspiration in the classroom with the printed “hinged dodec” with vertex edges printed by mathgrrl. These hinges require precise measurements and prints to make sure they will print as one piece, but able to pivot as a working hinge. Our approach to this design is our first trial run is a print in one piece of interlocked pieces to make the hinge.
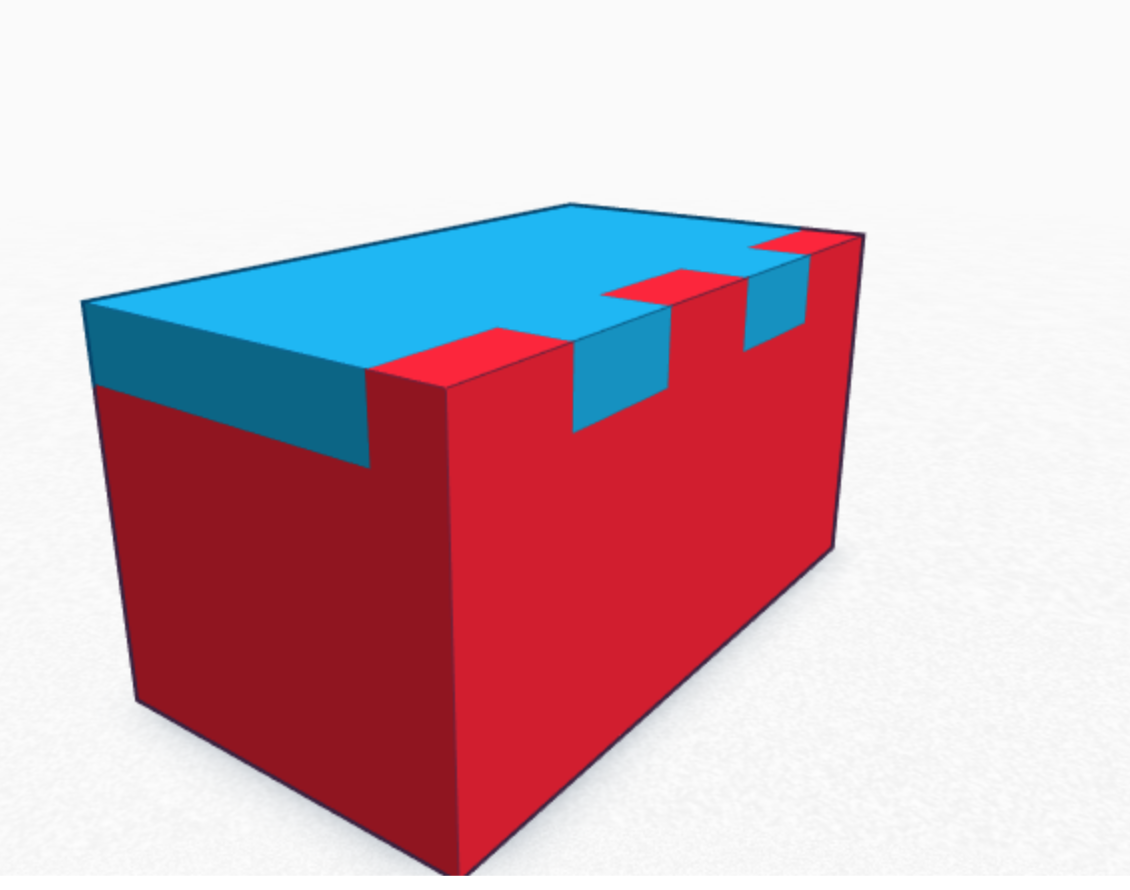
This is an example of the interlocking hinge that can be taken apart to be printed separately. The blue part will open into the hollow red box.
This is the first iteration of our hinge we will test printing.
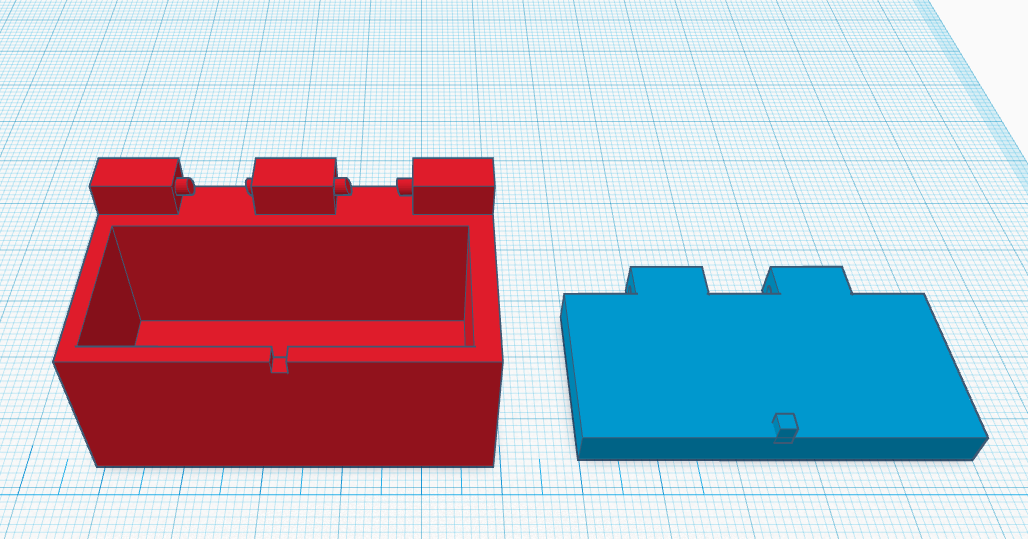
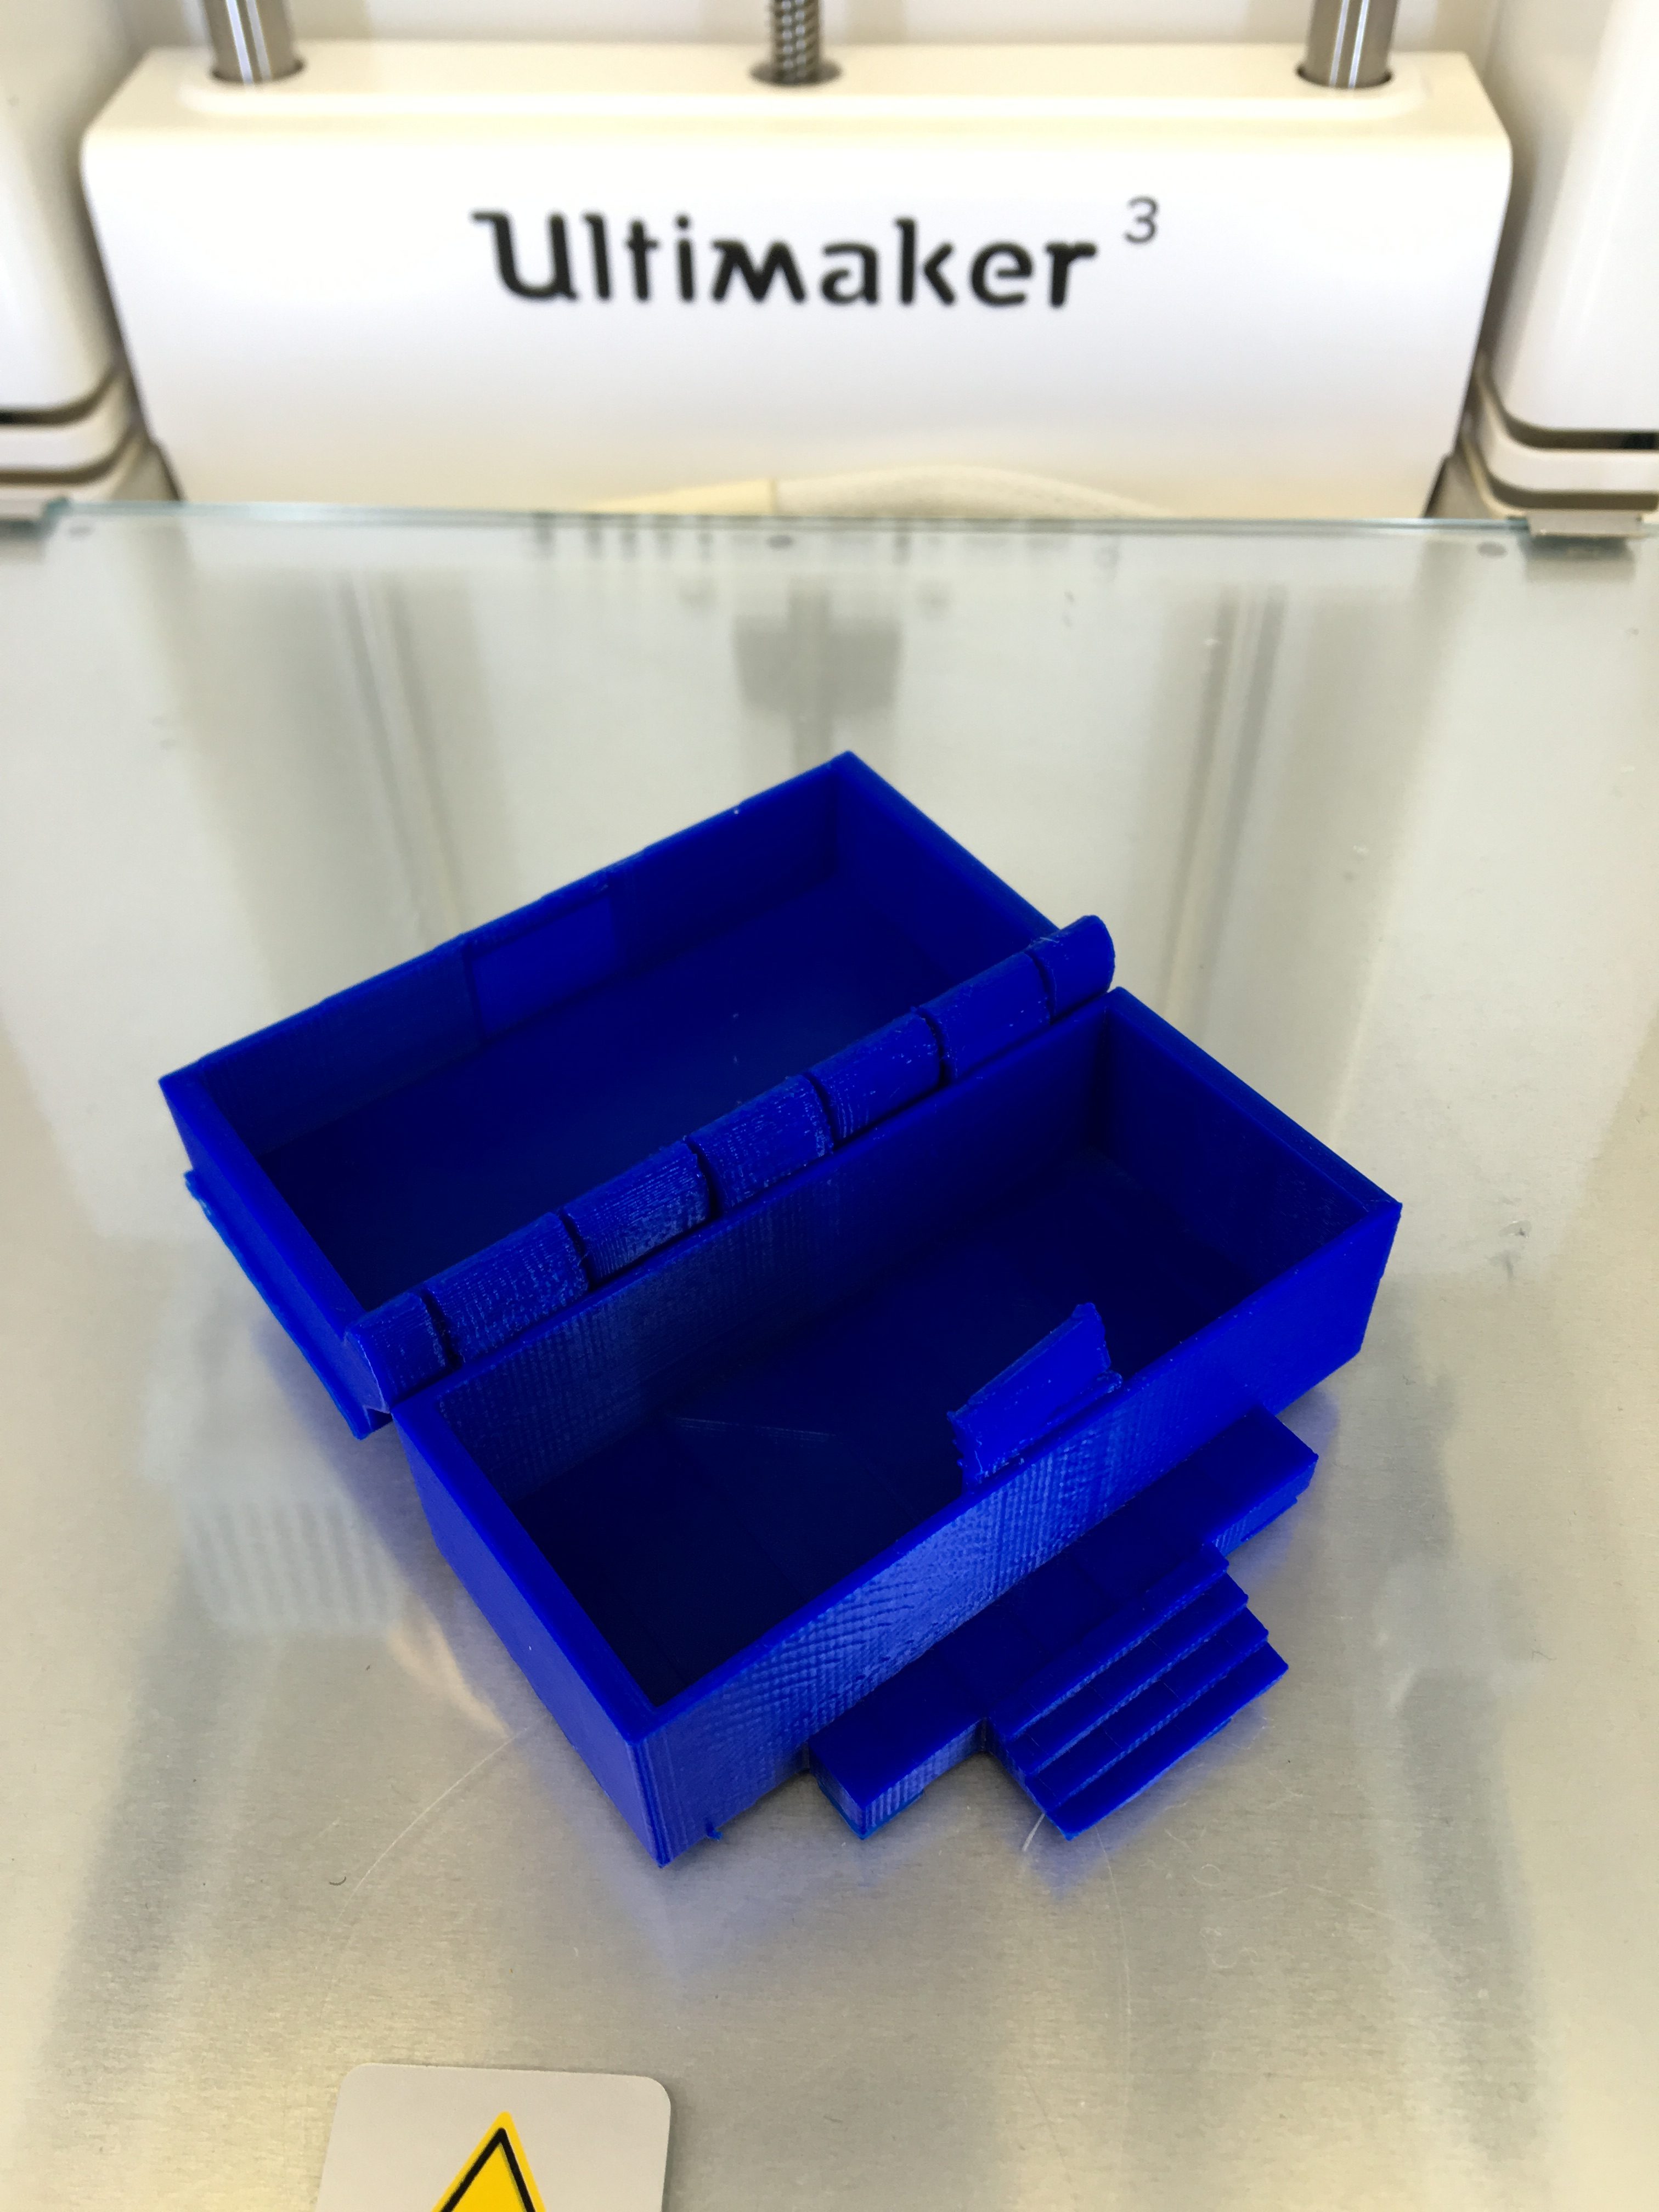
To make the box shape, we used the hole tool to make the box hollow. Then we lined up the lid and the edge of the box. We then used a long cylinder shape to create the matching pieces that connect in the hinge. We duplicated the cylinder as a hole to make the opposite end of the hinge, so theoretically, they will fit together and the box will be able to open and close without coming apart.
Once we finalize the hinge design, we will turn roof of the model wilson into an opening top. These two designs fused together will make out final 3D working box!
First Draft Print
Our first step was to print the snap hinge in order to test if our hinged box would work. We were excited to see if the hinge would snap together and be functional. The print finished and out first obstacle was supports on the protruding teeth of our hinge. They were sticking out too much so the printer added supports. These supports (pictured) however got in the way of the hinge snapping into place. We were able to get them off using one of the cutting tools in the tool kit. We proceeded to snap the top into the bottom box.
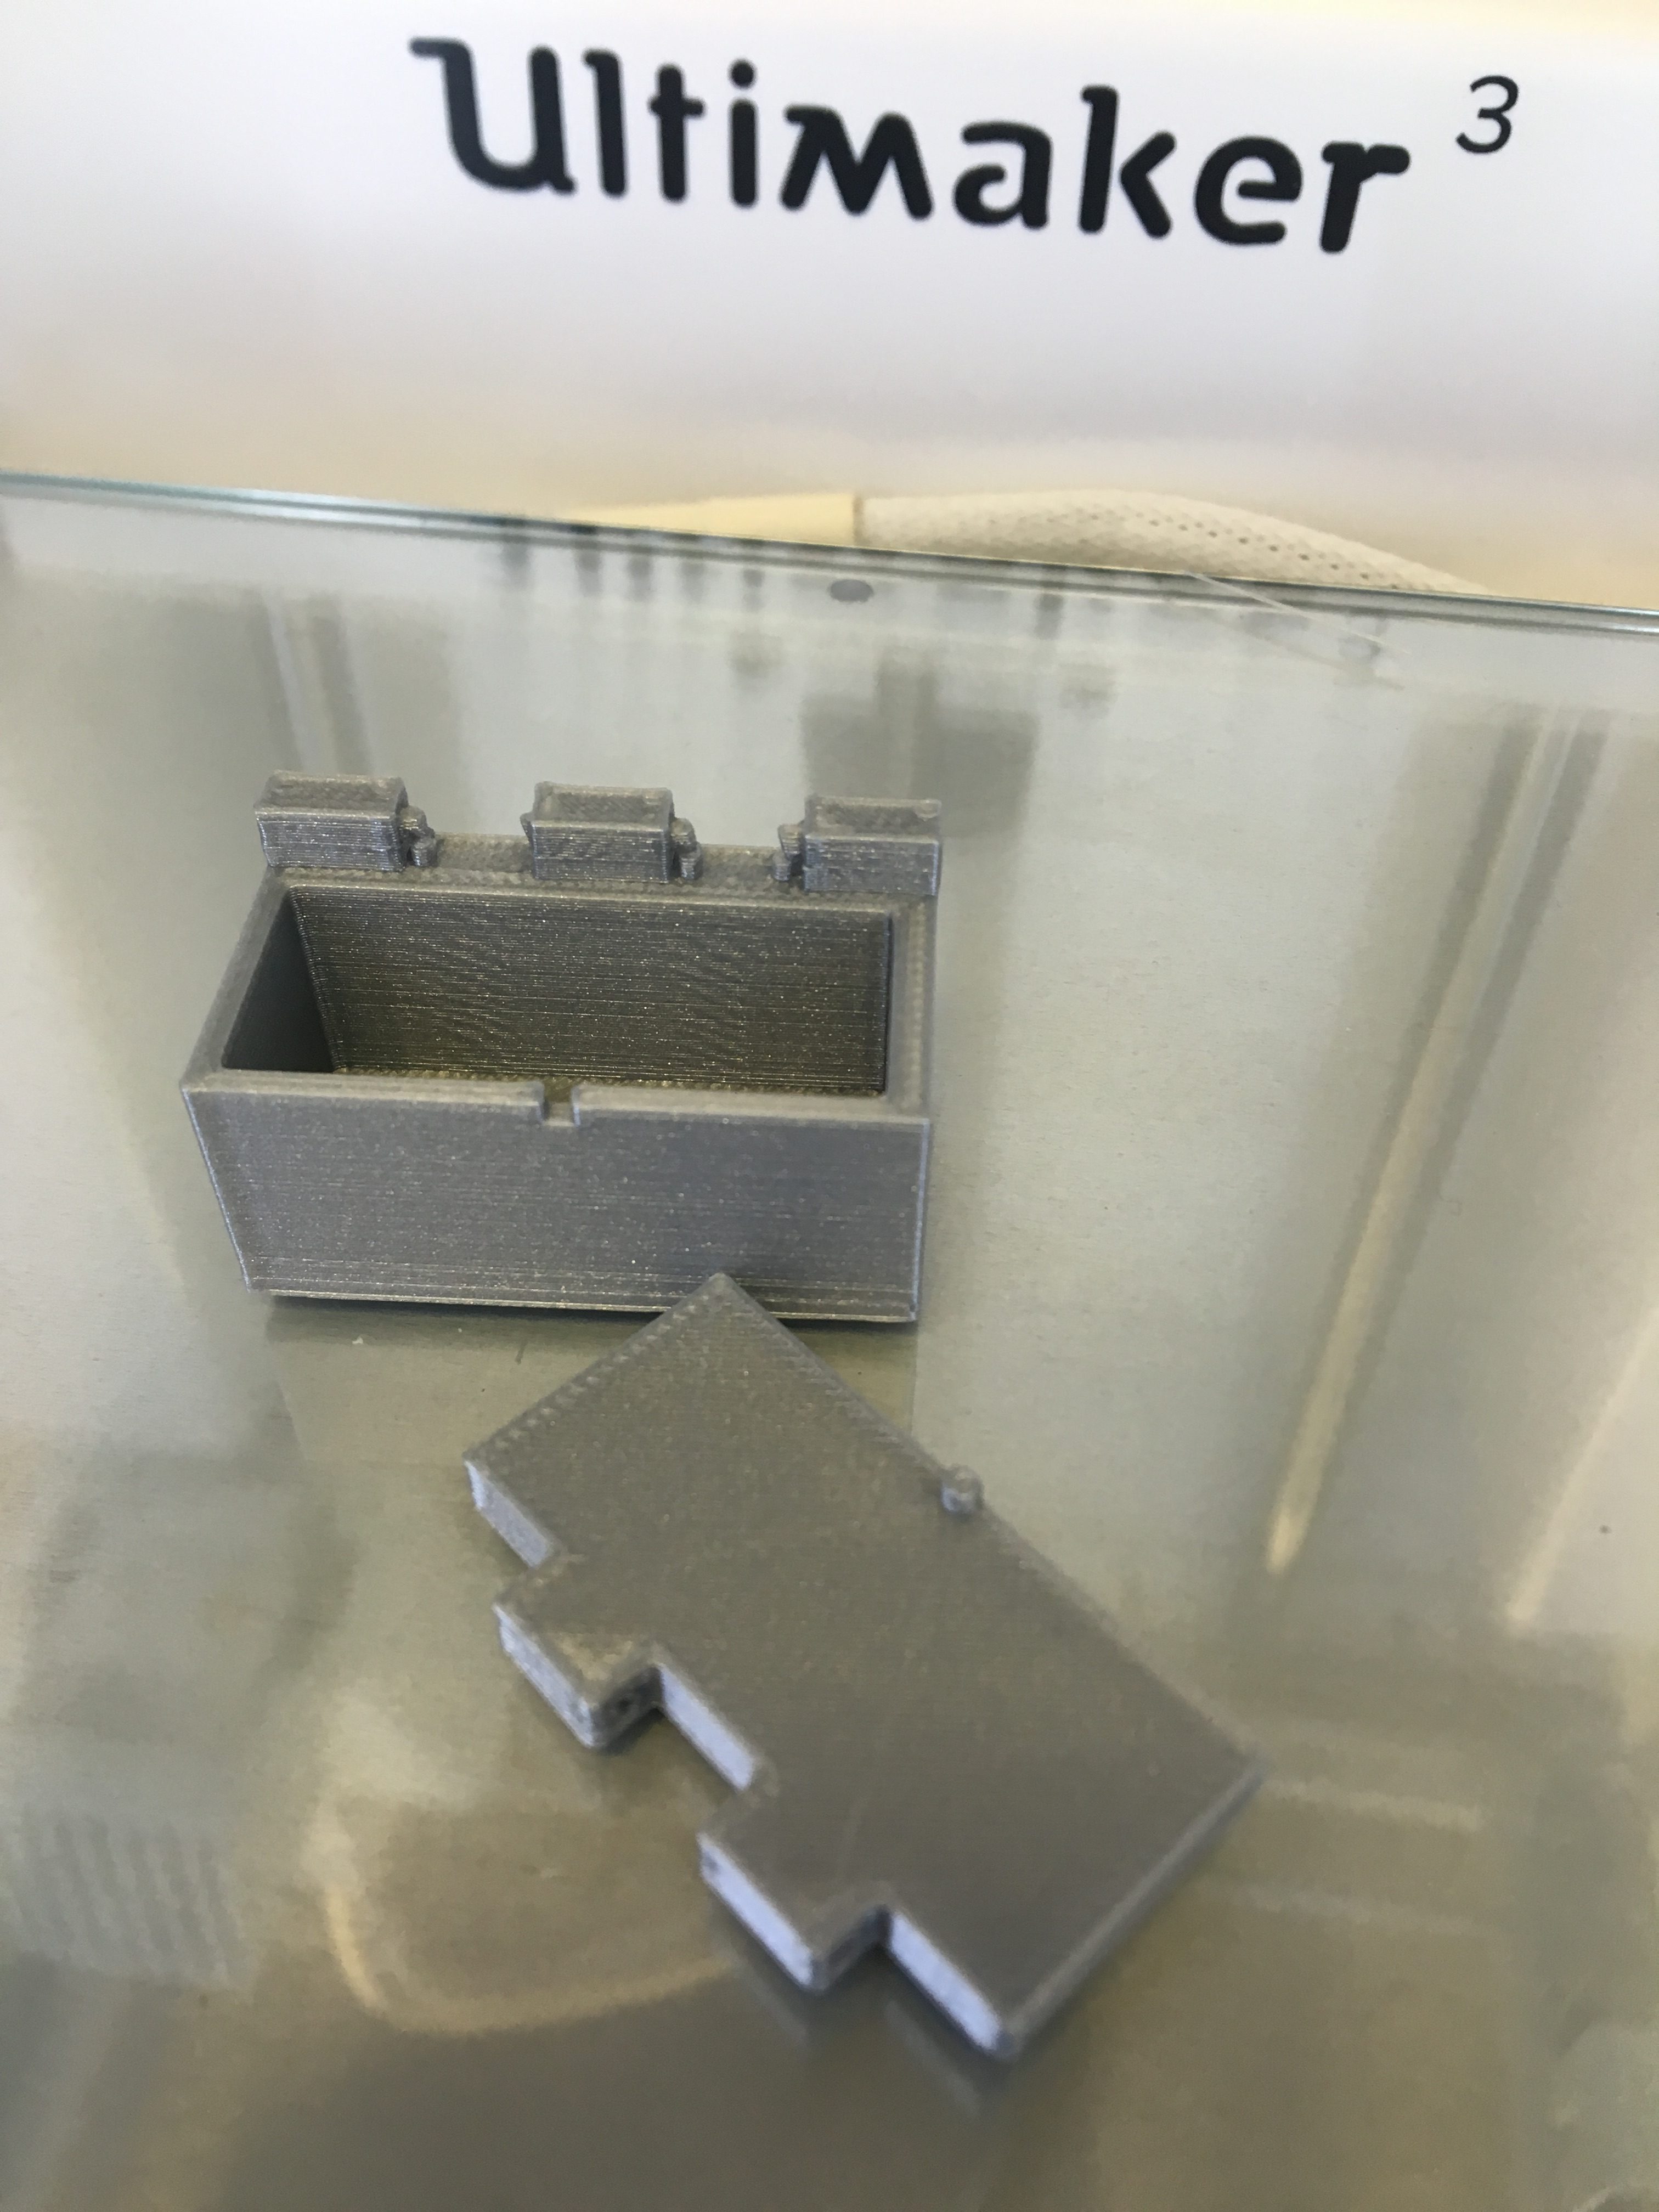
This is a picture of our design right off the printer. The supports were in the way of the hinge snapping into the bottom piece of the box.
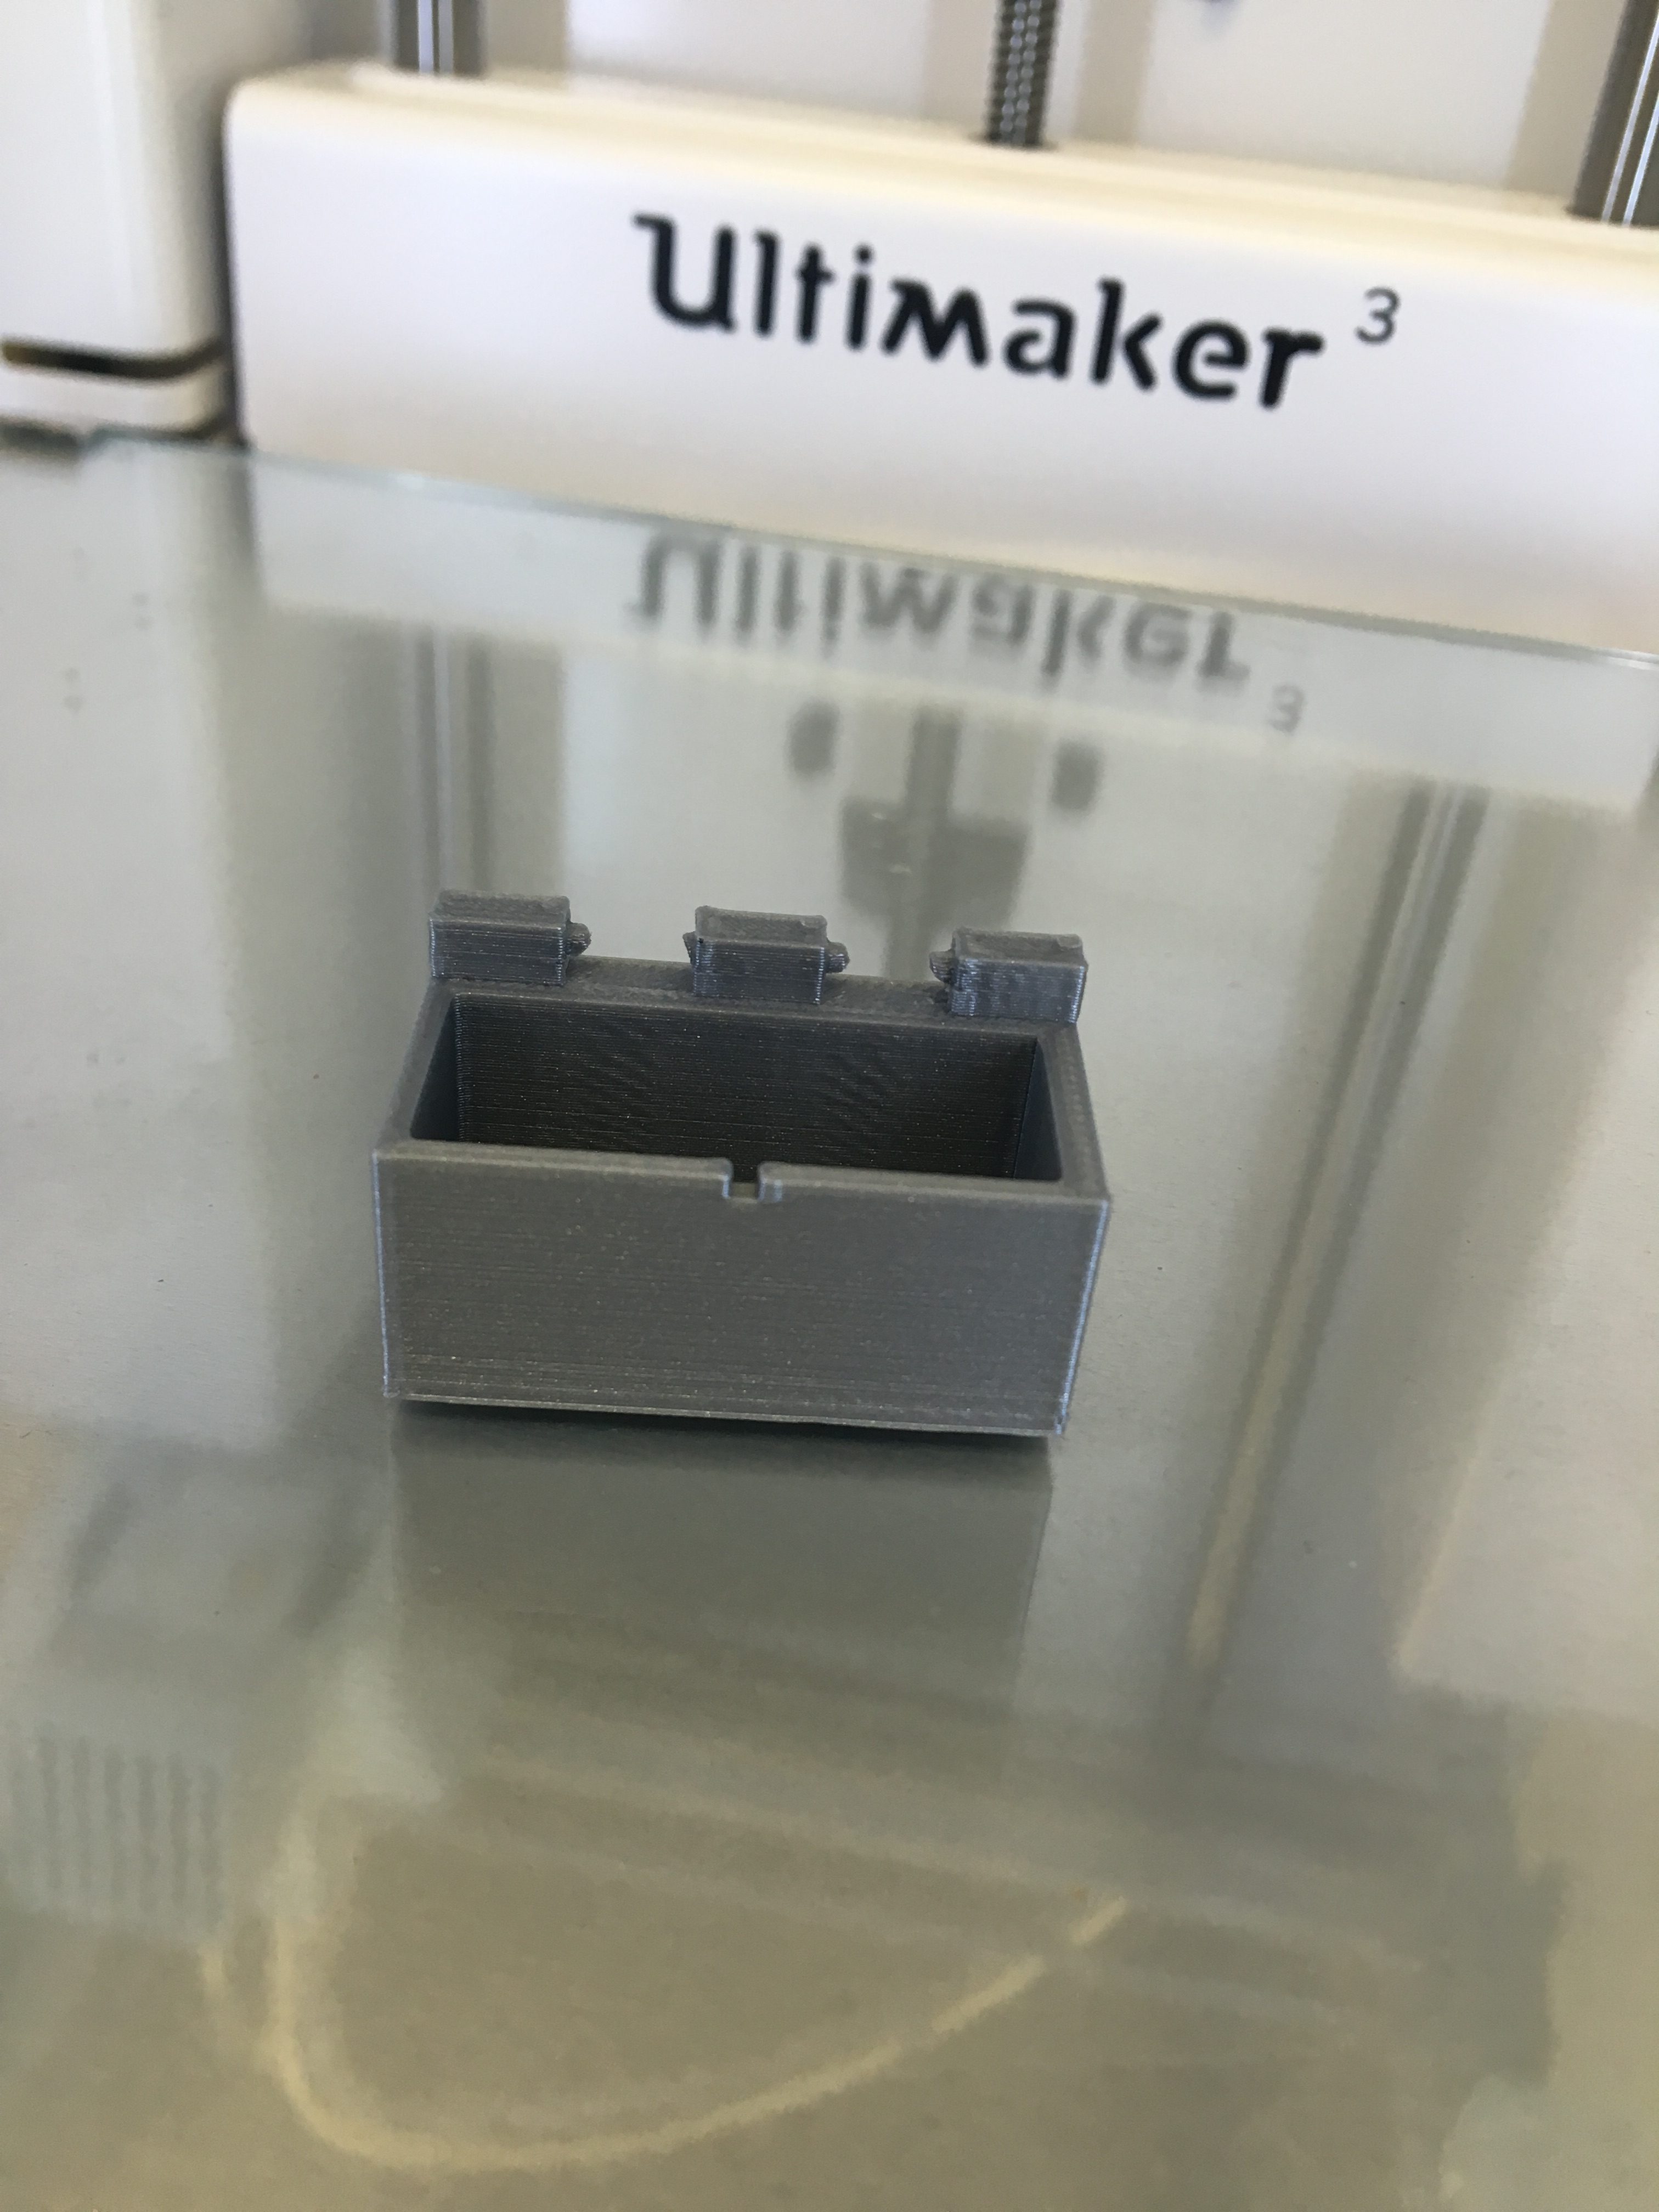
We were able to remove the supports in hopes this would make enough room to allow the hinge to snap together. Unfortunately the hinge did not snap together, and it was not close to fitting together.
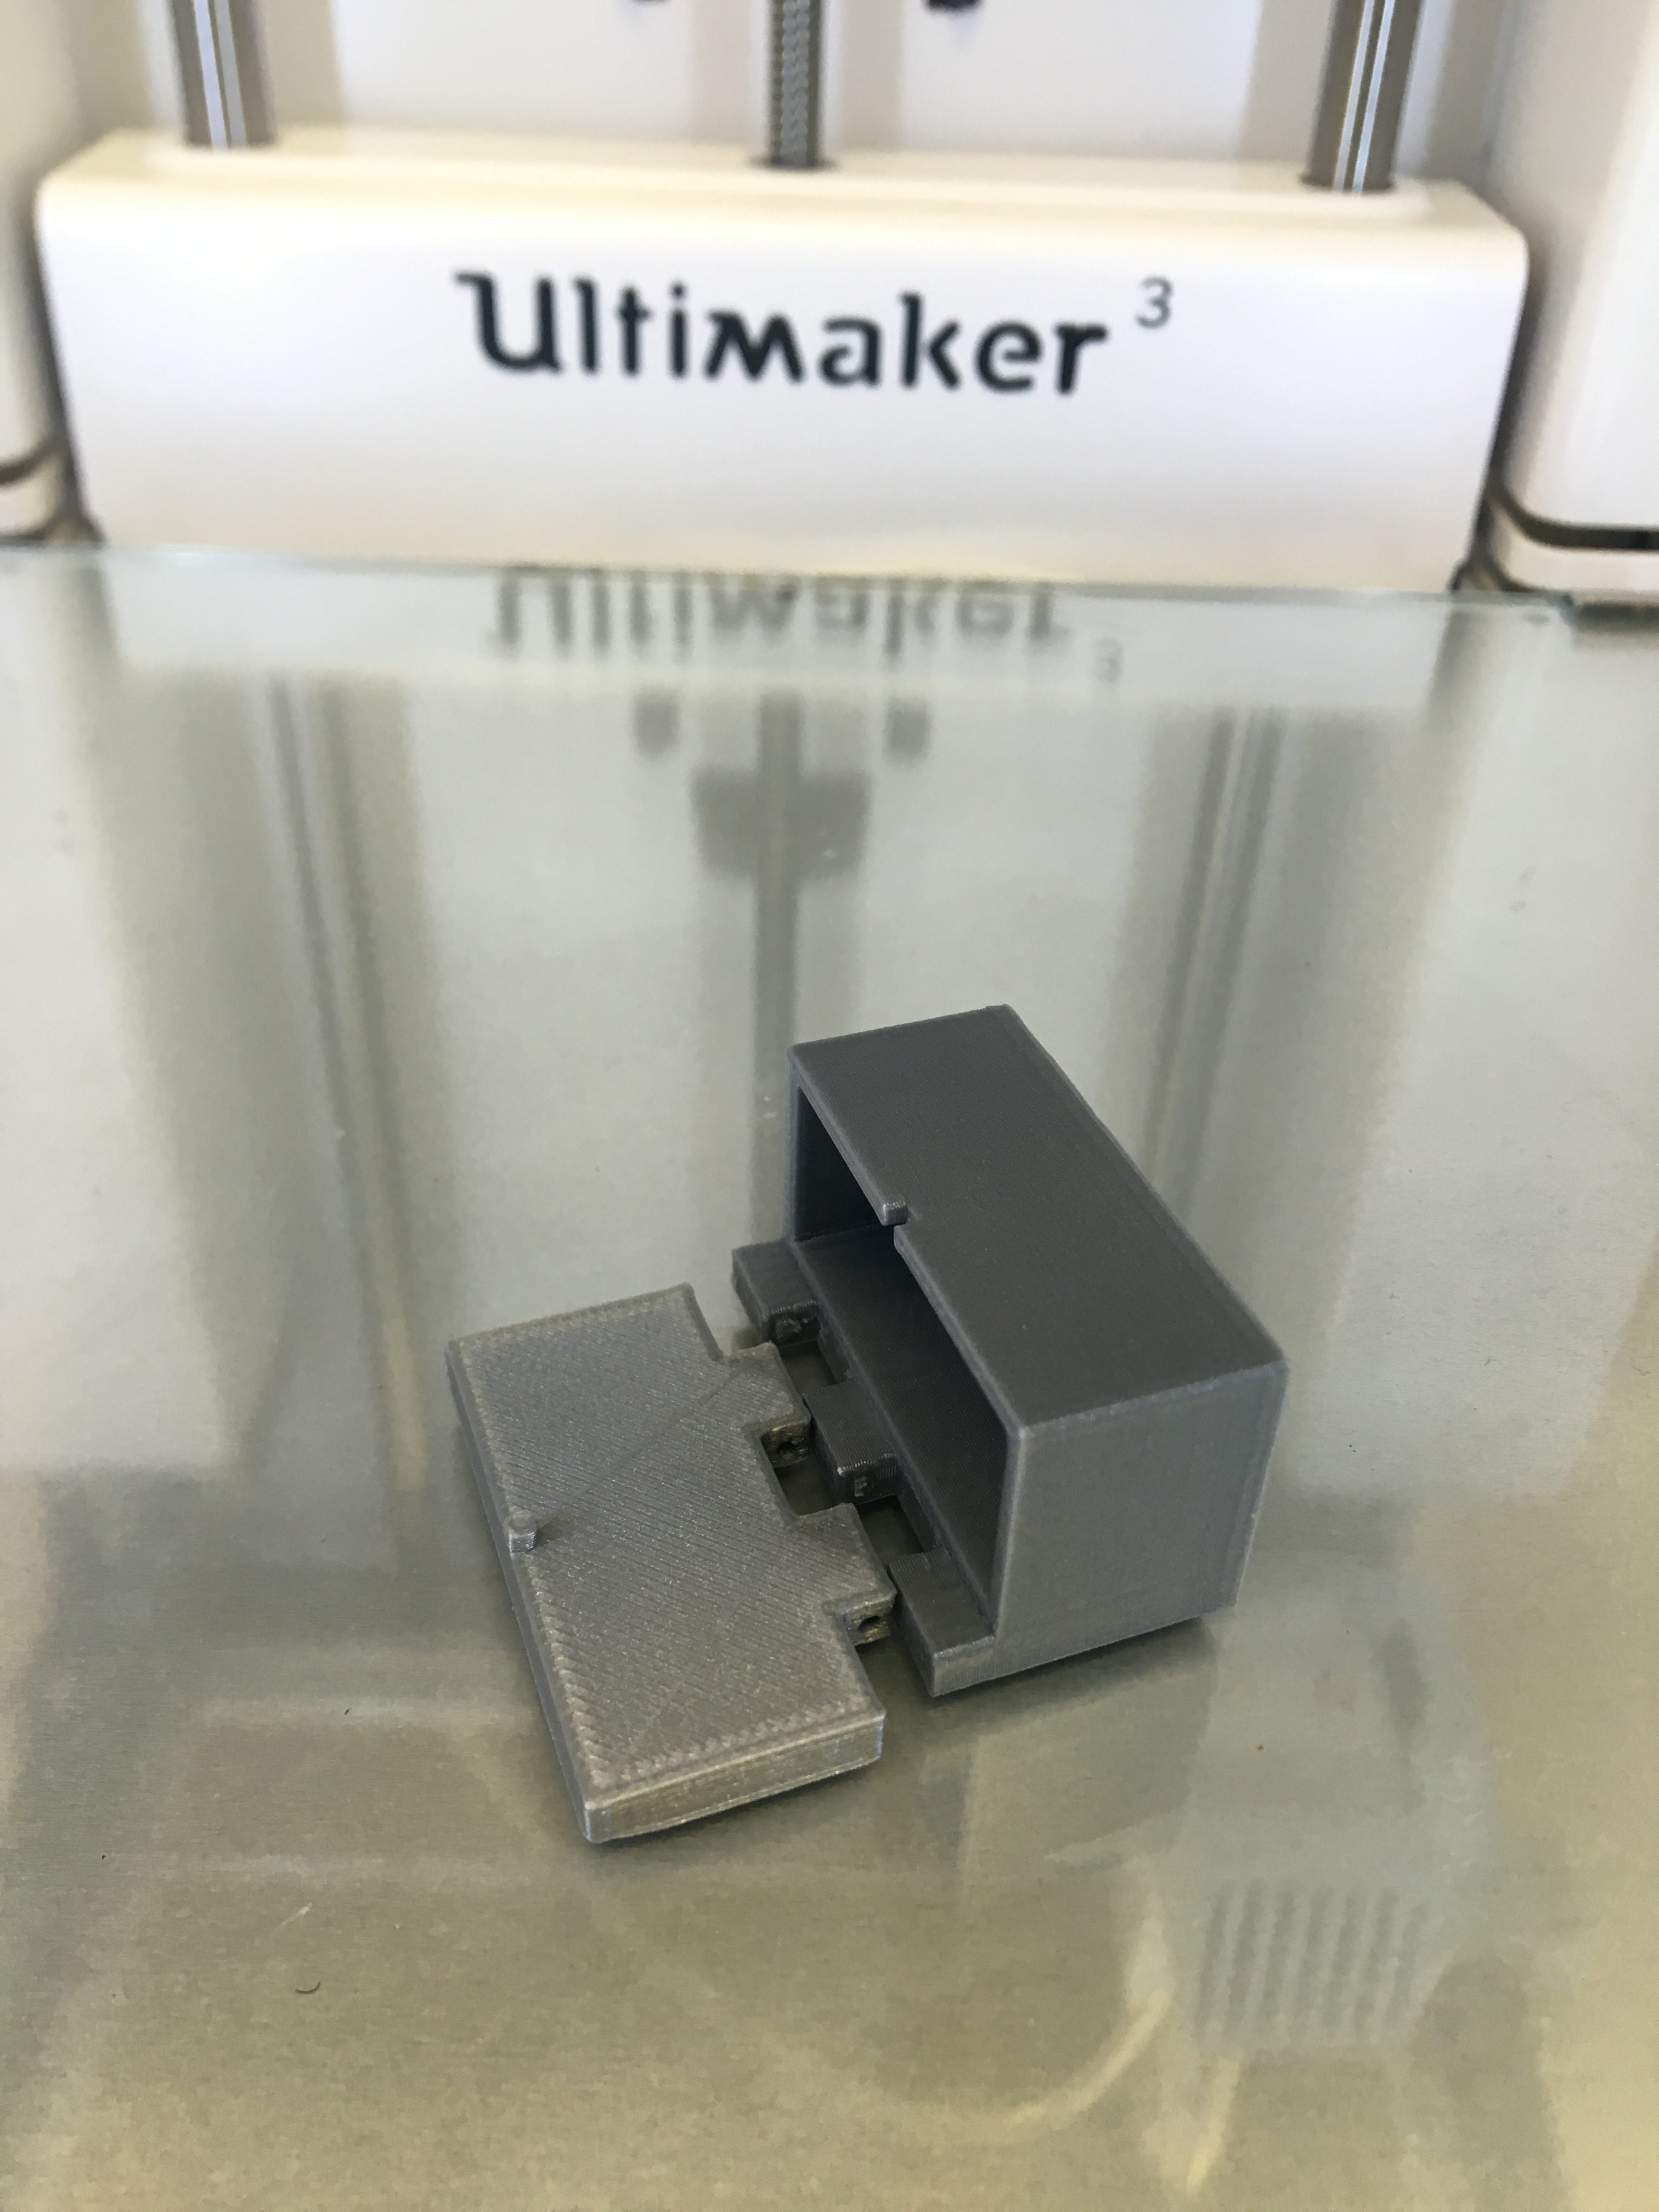
We tried to removed the supports and teeth, the two pieces did not fir together. When designing the model the measurements did not leave enough room for the two pieces to snap together. The margins were too small and made two pieces that were not able to fir together.
Iterating the design
Our first design ultimately failed. The snap hinge seemed to be much more difficult than we anticipated. We revisited the idea of an interlocking hinge that could print as one piece. The measurements have to be precise, but this is the best solution to our problem. Our first design came mostly from what we assumed a hinge would look like, without doing too much research. After our first hinge failed, we browsed Thingiverse for inspiration for a new hinge. We saw a multitude of unique hinges that other 3D designers had success with. We used those as inspiration to create our new hinge. Also, with advice from Dr. Taalman, we printed our new hinge connected as one. We also made sure there enough room to have the pieces print separately, to create an appropriate box. We struggled with the supports that the Cura added to our design. **So we selected Enable Support Interface on the support option on the Cura.

The final print of the interlocking design did not go as we planned. Because the roof had no supports, Cura added them for us, but they filled the whole inside of the box. The supports also made the box completely close shut. Not to mention, the hinge did not print properly, because it was too small or the placement between the two opening pieces was off. This picture displays the supports Cura automatically put into our design without us realizing! 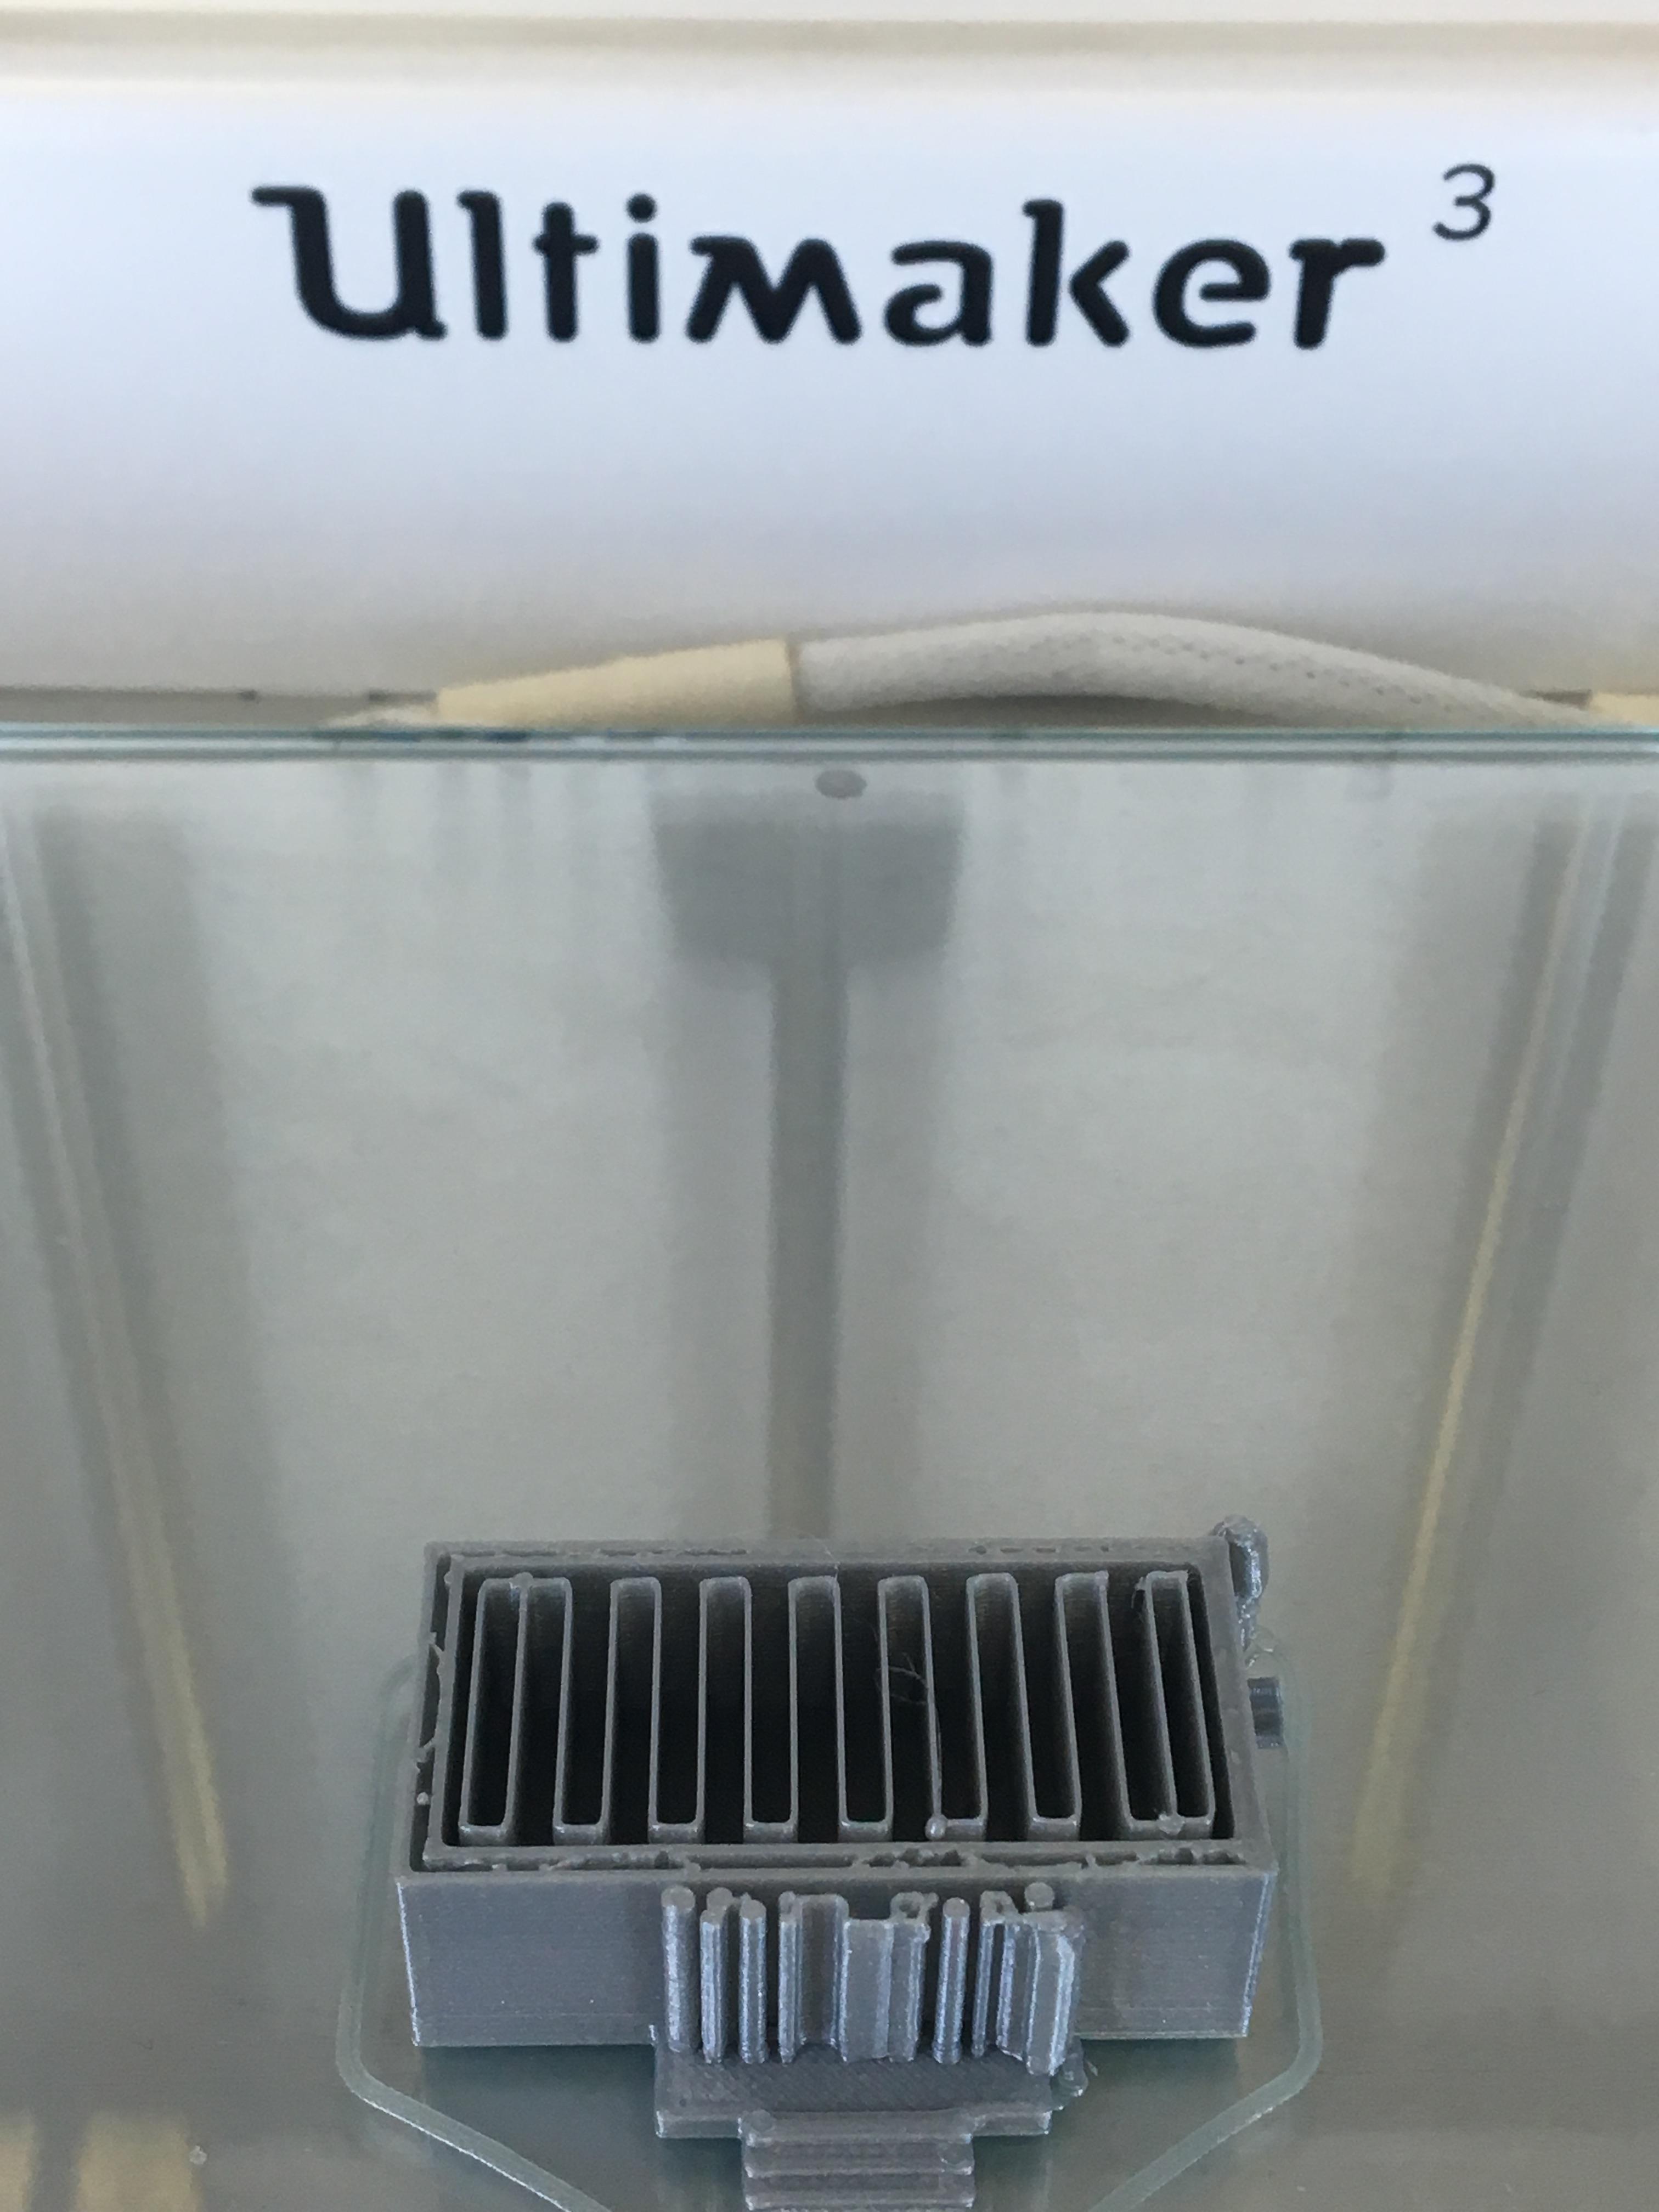
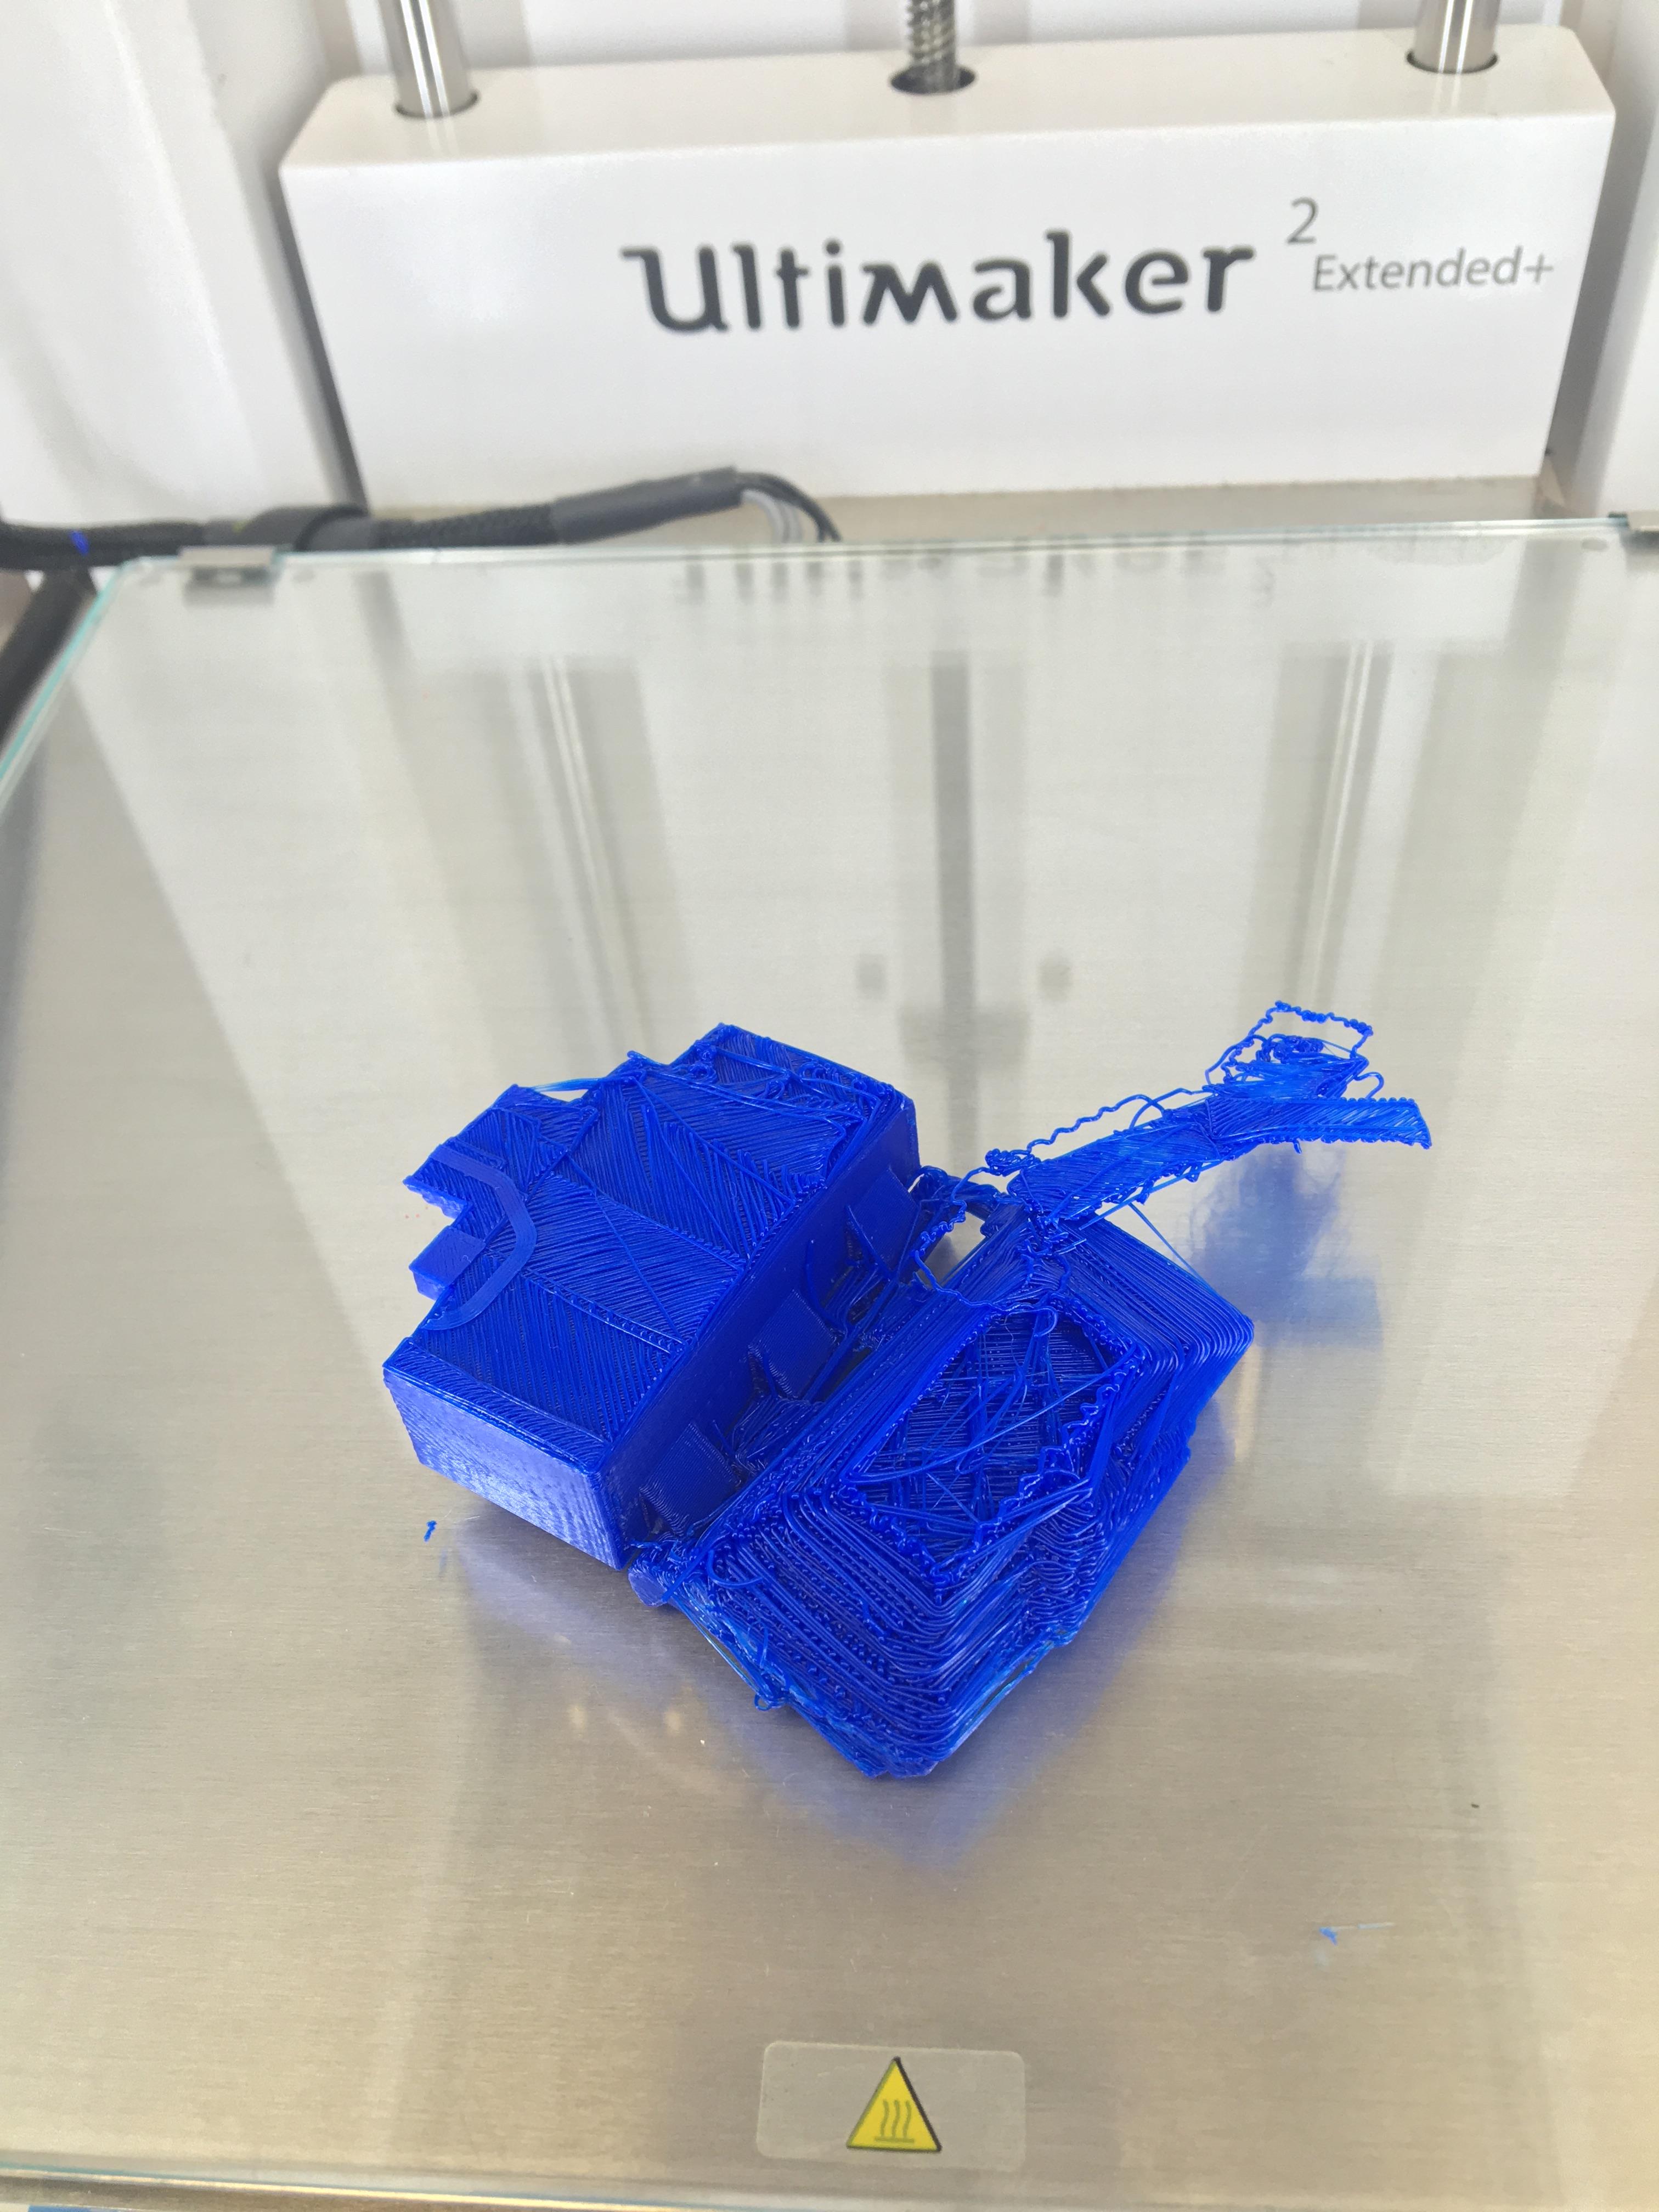
We stopped the print due to time constraints. This picture displays the print being printed fully shut. We left what seemed like enough room for the print to open and close, but between the supports and small gap we printed a box.

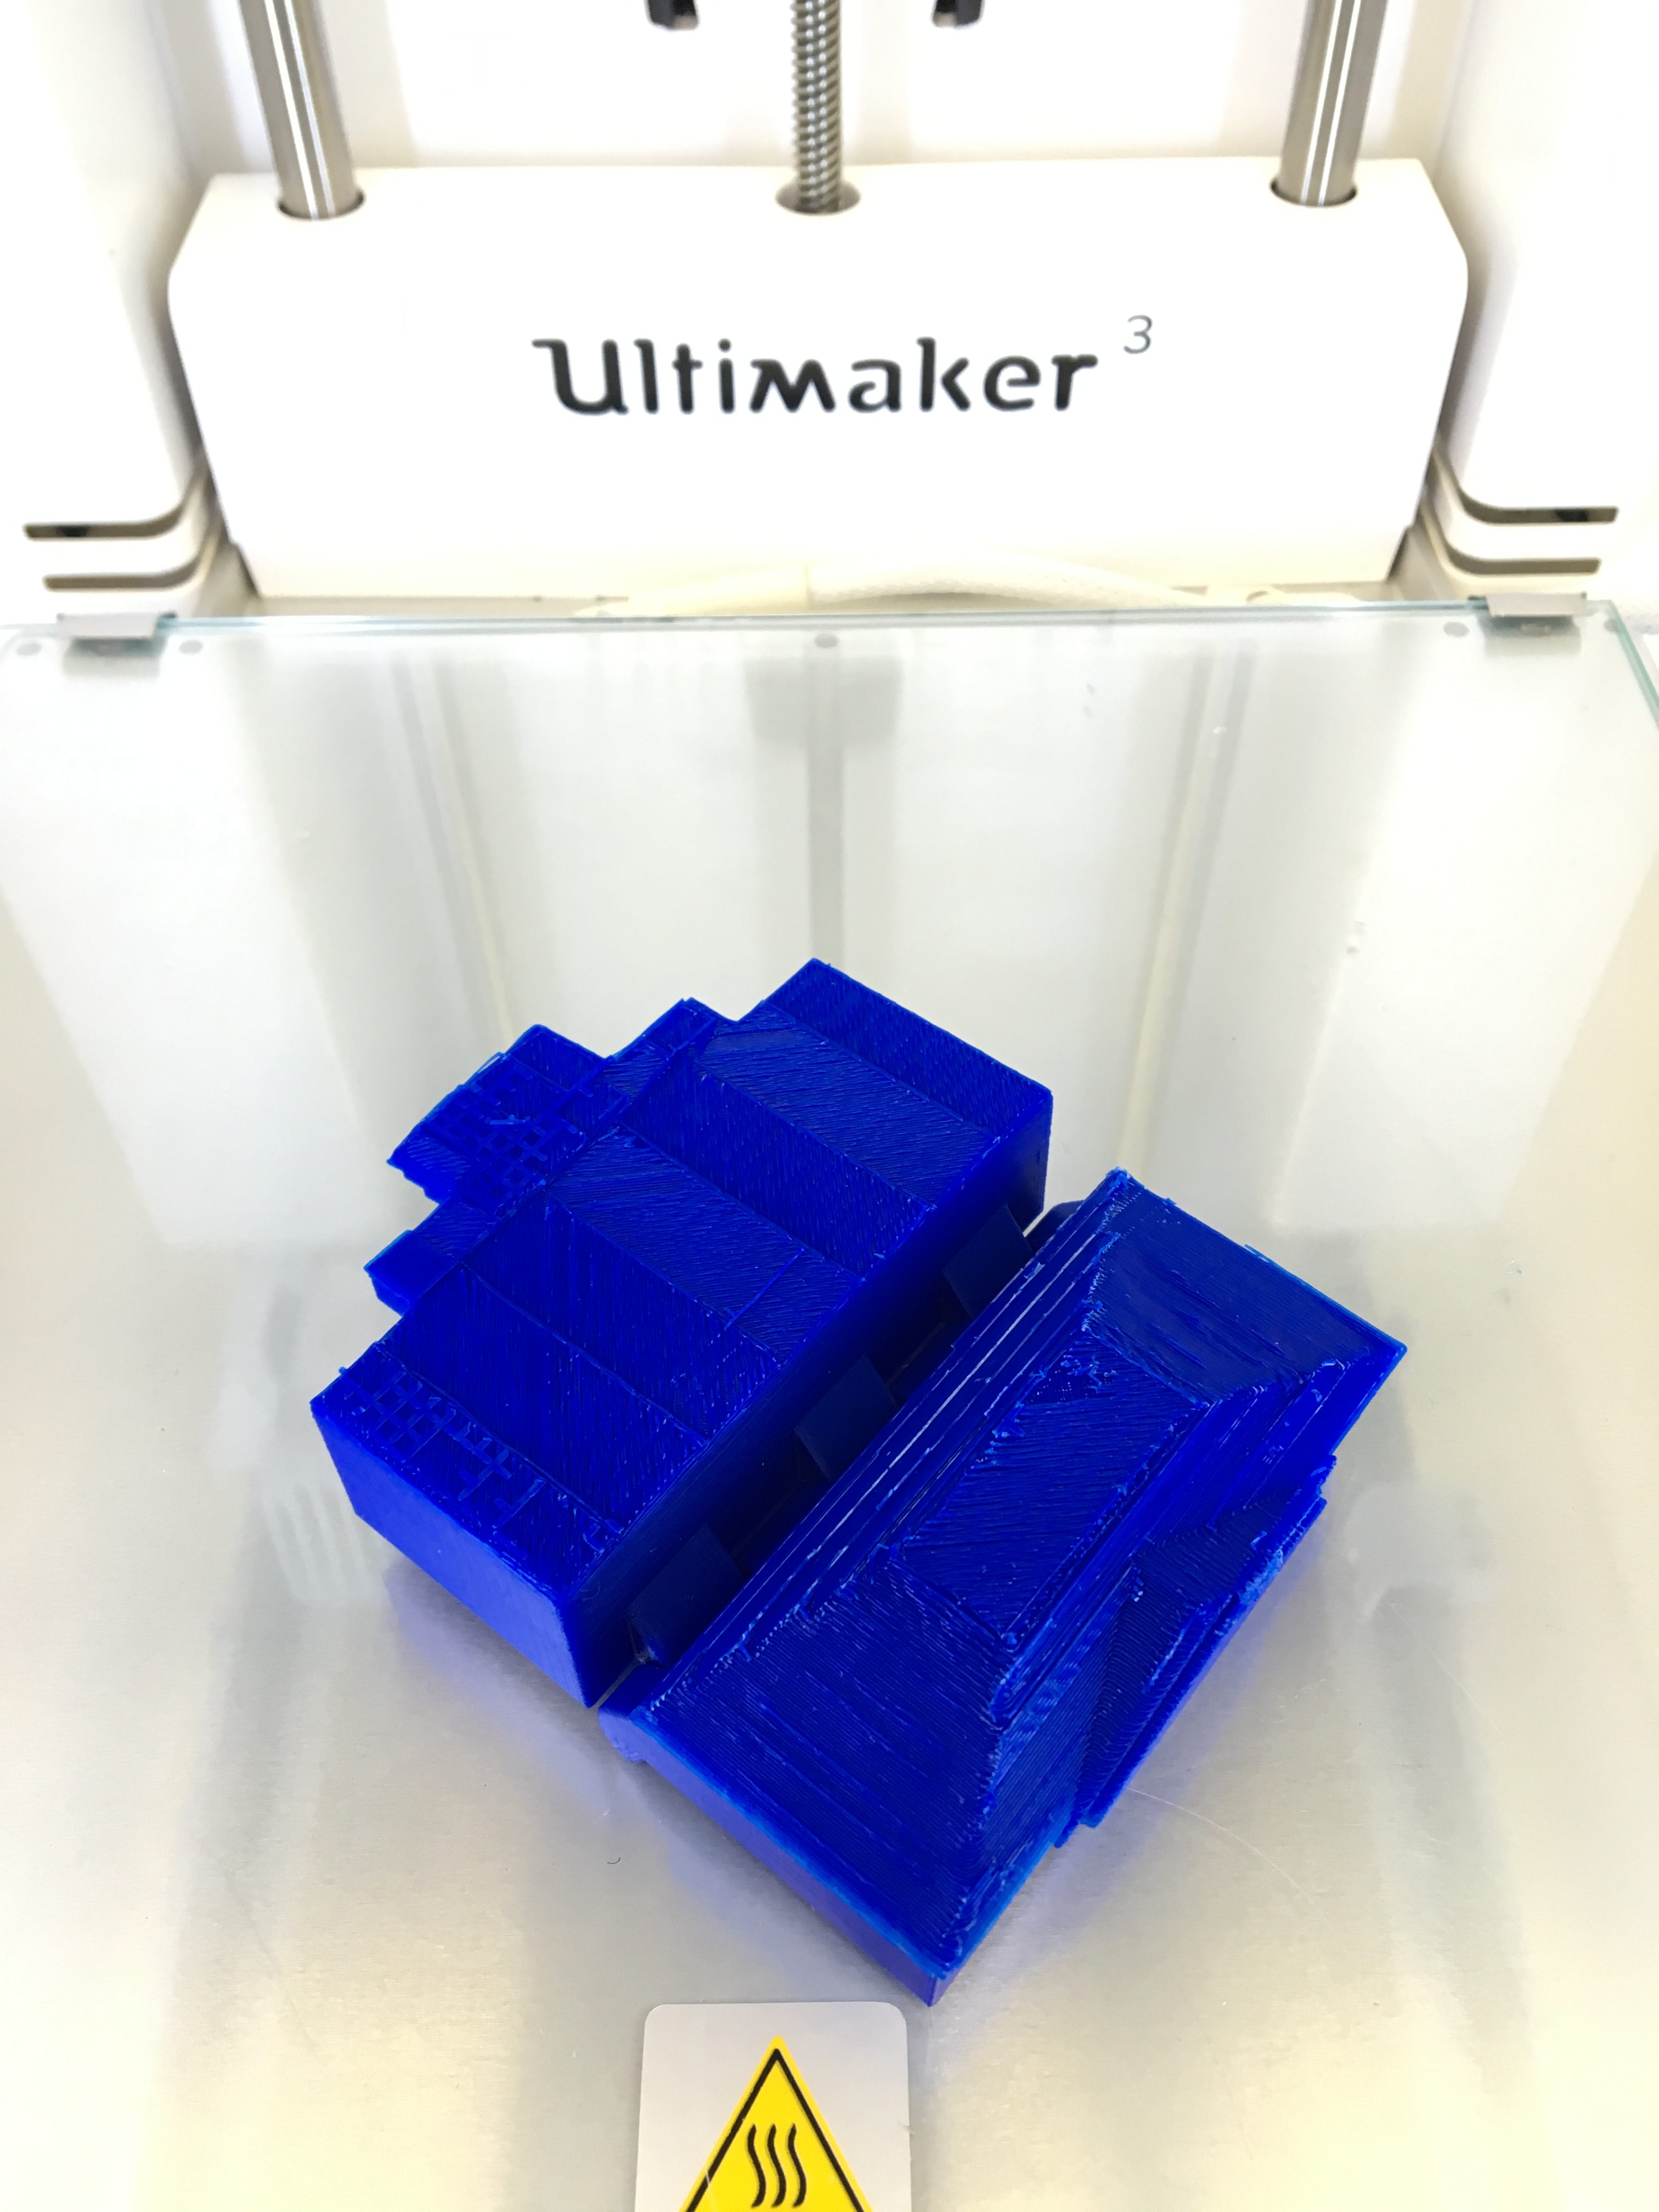
Printing the box with the top on top was too much of a challenge. After talking to Professor Taalman she mentioned that we should print the box upside down and open. This would solve the support issue, and the box not being sealed shut when being printed. We went back to tinkered to look for design inspiration and tried a different interlocking design. Using pieces from Thingiverse, like the shapes from the hinge, and shapes from Tinkercad to help with other details on the hinge and Wilson features we came up with out final design. 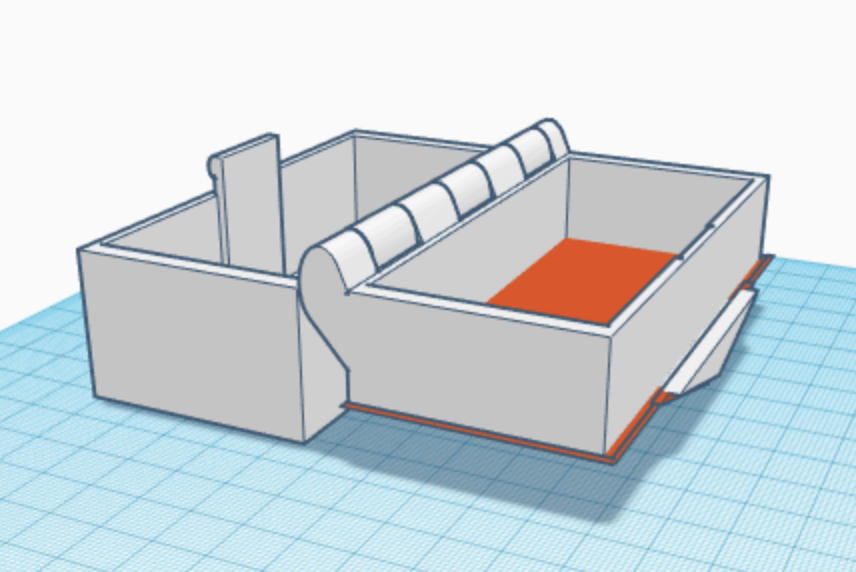
We yet again ran into issues when trying to print this model. Where the roof is not flat on the printing surface, the printer went crazy. We also printed it small as a test which messed with the hinge because it needed more room. 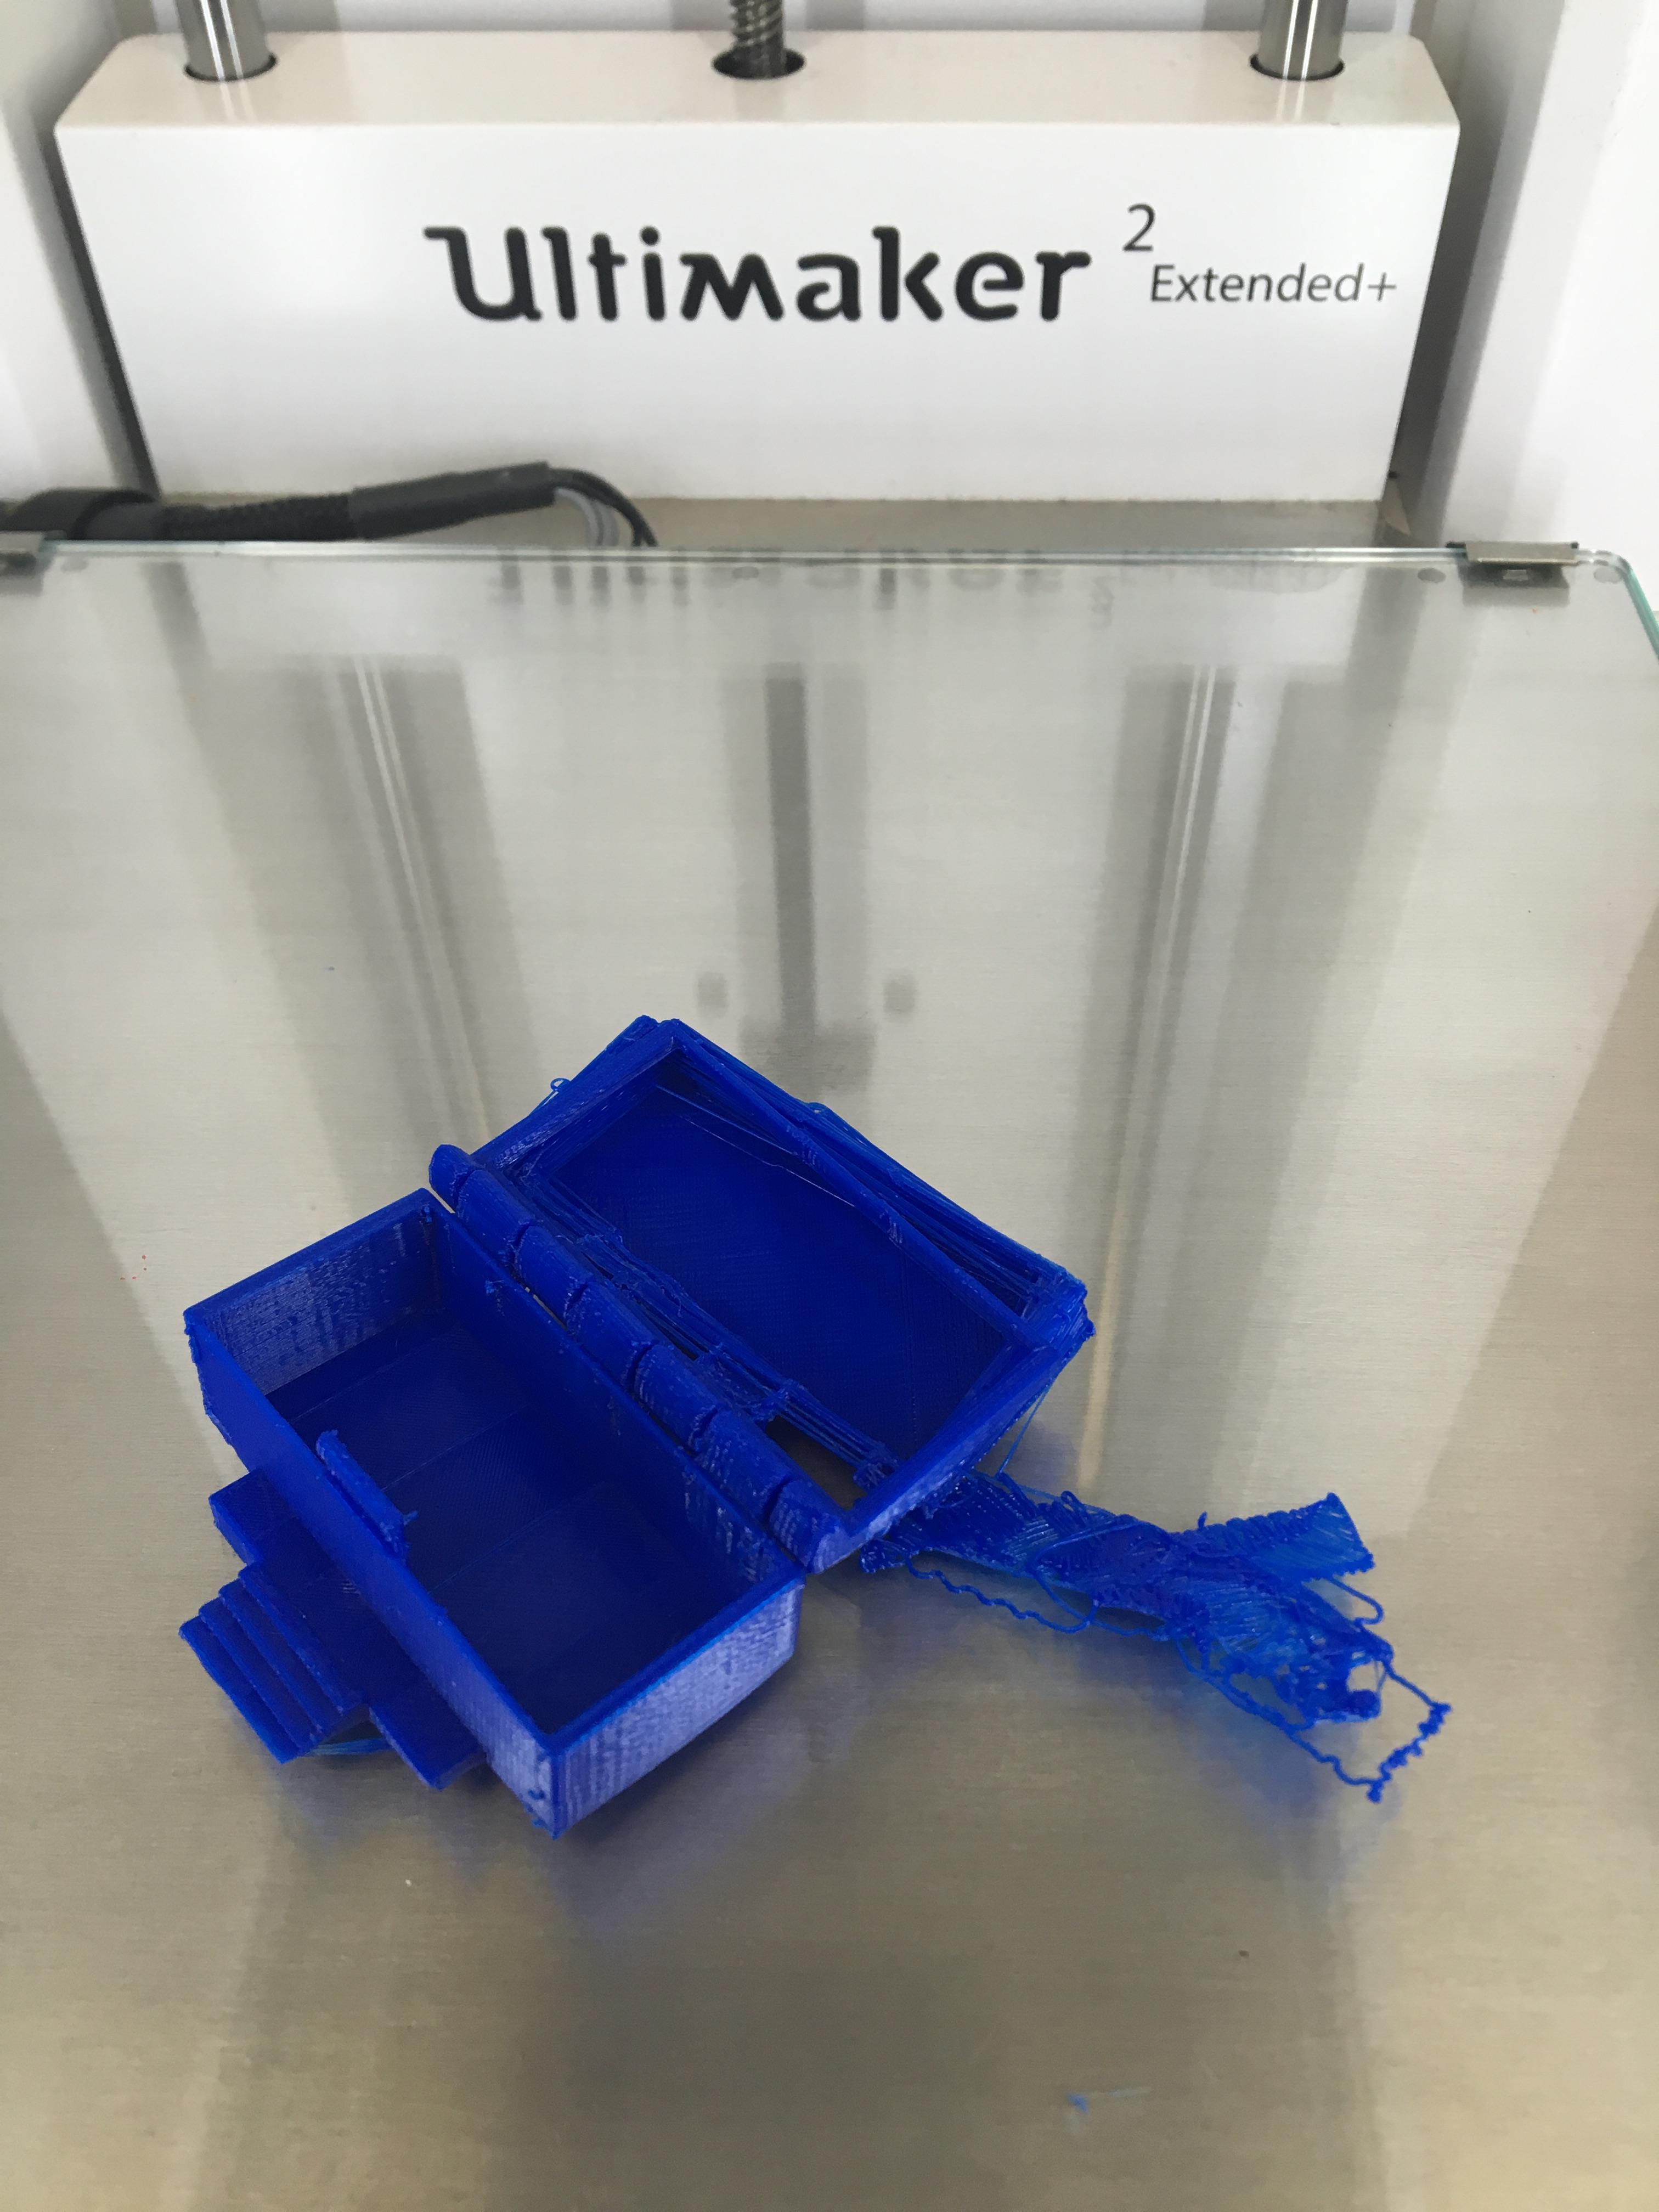
We added supports, printed it bigger, and hoped for the best for our final print.
Through many iterations, and prints our final design unfortunately did not work. We tried many designs from the snap hinge, to inner locking hinges, and cone/rod hinge. We believe that it was due to the small size, and potentially the type of designer that the project failed. We looked at other 3D hinged boxes and saw that other people faced similar challenges. One day we hope to print a working hinged box to use in our lives!
The link to our design on Thingiverse: https://www.thingiverse.com/thing:2577145