Introduction & Thoughts
When I first started with OpenScad, I struggled to understand the language. I downloaded the software to my laptop and tried to see what I could do with the limited knowledge I had accrued during class. It was a challenge, but it was one i was looking forward to as I had always been interested in exploring the world of coding and in the near future will be taking coding classes for my major. I’m in the process of declaring either a CIS major or minor so coding is something i’m going to have to become proficient in to be able to progress in the business school. I was struggling a bit, so i turned to YouTube for some tutorials and inspiration. There are a lot of good videos on YouTube that talk you through the code and explain the text as the type it.
First OpenScad Print
Far my first print, I used a template from YouTube. It was a cool shape with holes running through two separate shapes. The shape I had originally intended to make also had a hole in it but I was struggling to create the hole inside the object, rather than the hole appearing on the screen it would make the whole object disappear. After a while, I gave up and moved on to what became my first print, this one had a different way of creating the holes and worked for me instantly.
The code for my object is as follows:
// union()
difference() {
 union(){
 translate([0,0,10]) cube([20,40,10]); cube([10,20,10]);
 }
 translate ([5,5,0]) cylinder(h=20,r=2,$fn=50);
 translate([5,10,0]) cylinder (h=20,r=2,$fn=50);
}

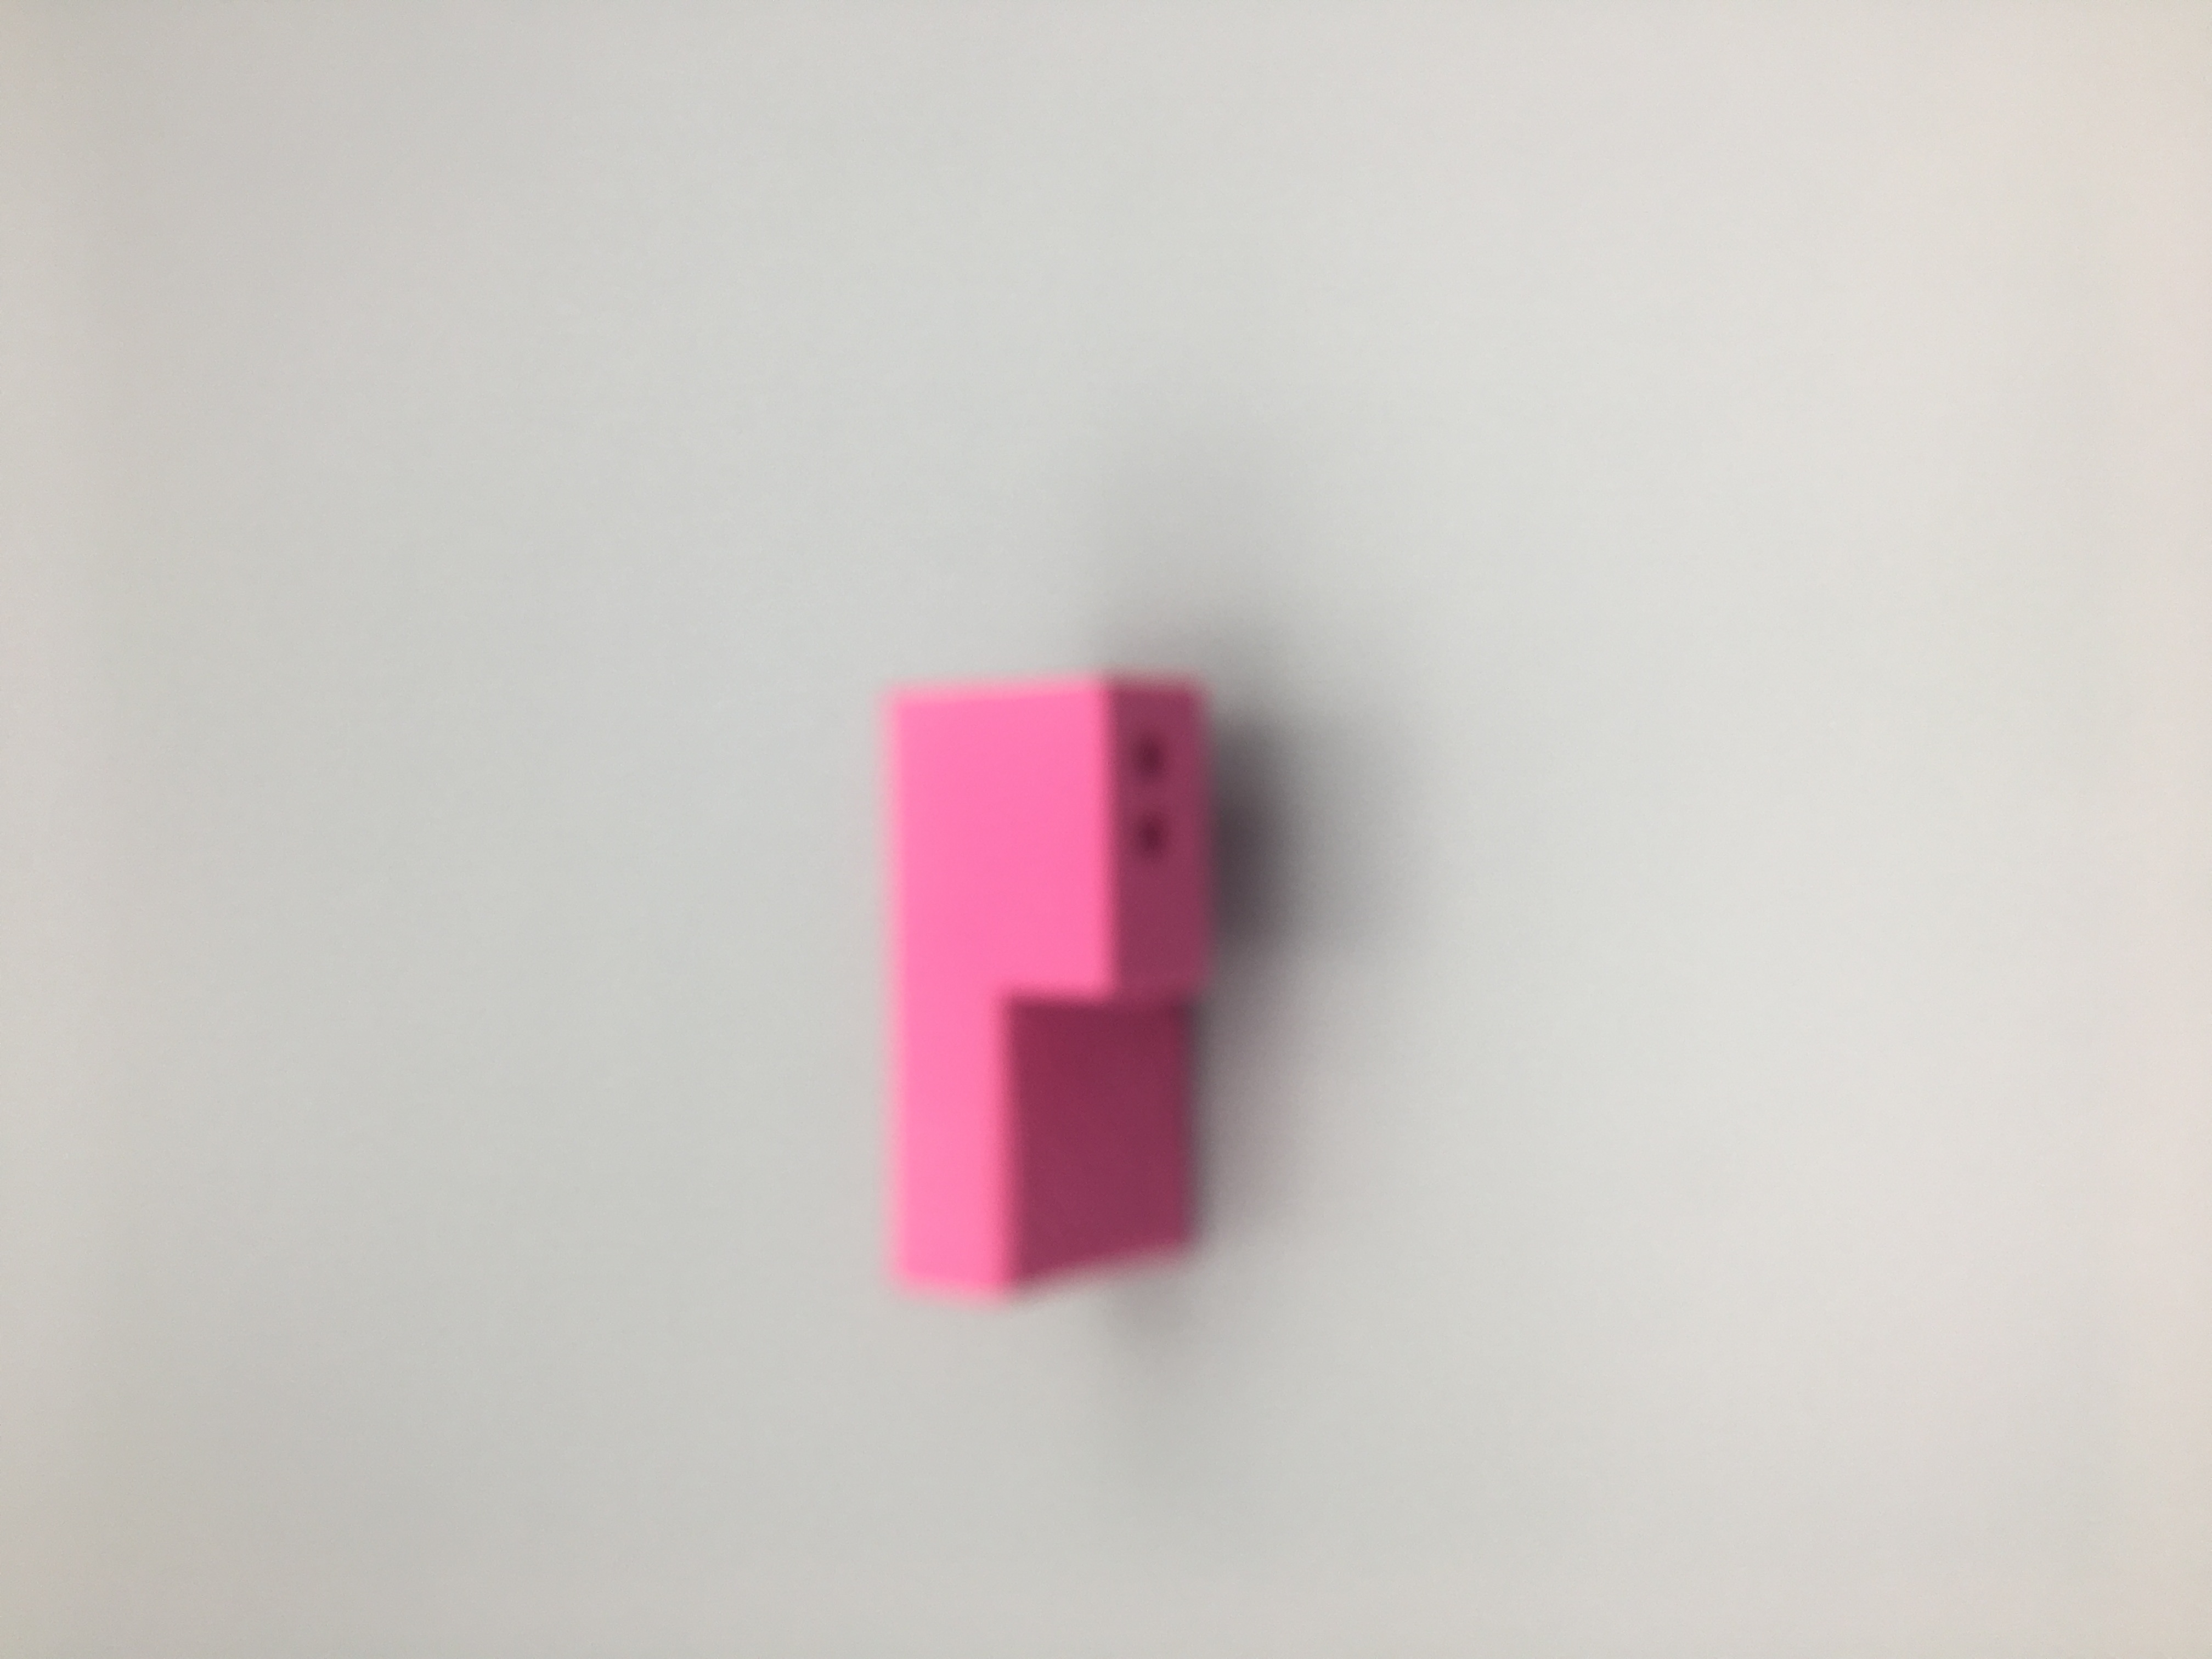 The object printed perfectly and looks exactly like it did digitally in the OpenScad software. The only thing is the two different shapes are supposed to be more distinct from each other. If I could’ve printed the shape protruding in a different color then it would’ve been more noticeable. The ‘difference’ function creates the cylindrical hole by making a hole in the object with the dimensions of the cylinder I designed. My first design was a good way to ease me into the processes of OpenScad.
‘Leveled-Up’ OpenScad Print
For my leveled up design, i veered away from original one. I didn’t feel there was anywhere I could in terms of bettering the design or adding to it. The design didn’t really have any purpose, I chose it because I thought it was cool that the two holes ran through two different objects. Instead I was searching for inspiration and I came across the ‘Turner Cube’. I thought this design looked intricate and interesting so I gave it a go!
The code for the design is as follows:
$fn=50;

difference() {
 cube( 10,center = true);

cylinder(r=4.5,h=12, center =true);
 rotate([90,0,0]) cylinder(r=4.5,h=12, center =true);
 rotate([0,90,0])cylinder(r=4.5,h=12, center =true);
}

difference() {
 cube( 8,center = true);

cylinder(r=3.5,h=12, center =true);
 rotate([90,0,0]) cylinder(r=3.5,h=12, center =true);
 rotate([0,90,0])cylinder(r=3.5,h=12, center =true);
}

difference() {
 cube( 6,center = true);

cylinder(r=2.5,h=12, center =true);
 rotate([90,0,0]) cylinder(r=2.5,h=12, center =true);
 rotate([0,90,0])cylinder(r=2.5,h=12, center =true);
}

difference() {
 cube( 4,center = true);

cylinder(r=1.5,h=12, center =true);
 rotate([90,0,0]) cylinder(r=1.5,h=12, center =true);
 rotate([0,90,0])cylinder(r=1.5,h=12, center =true);
}
There are four separate cubes, each one slightly smaller than the other. With the difference command I was able to cut out smaller cylindrical shapes from the cubes, leaving a layering effect inside what is the largest cube.
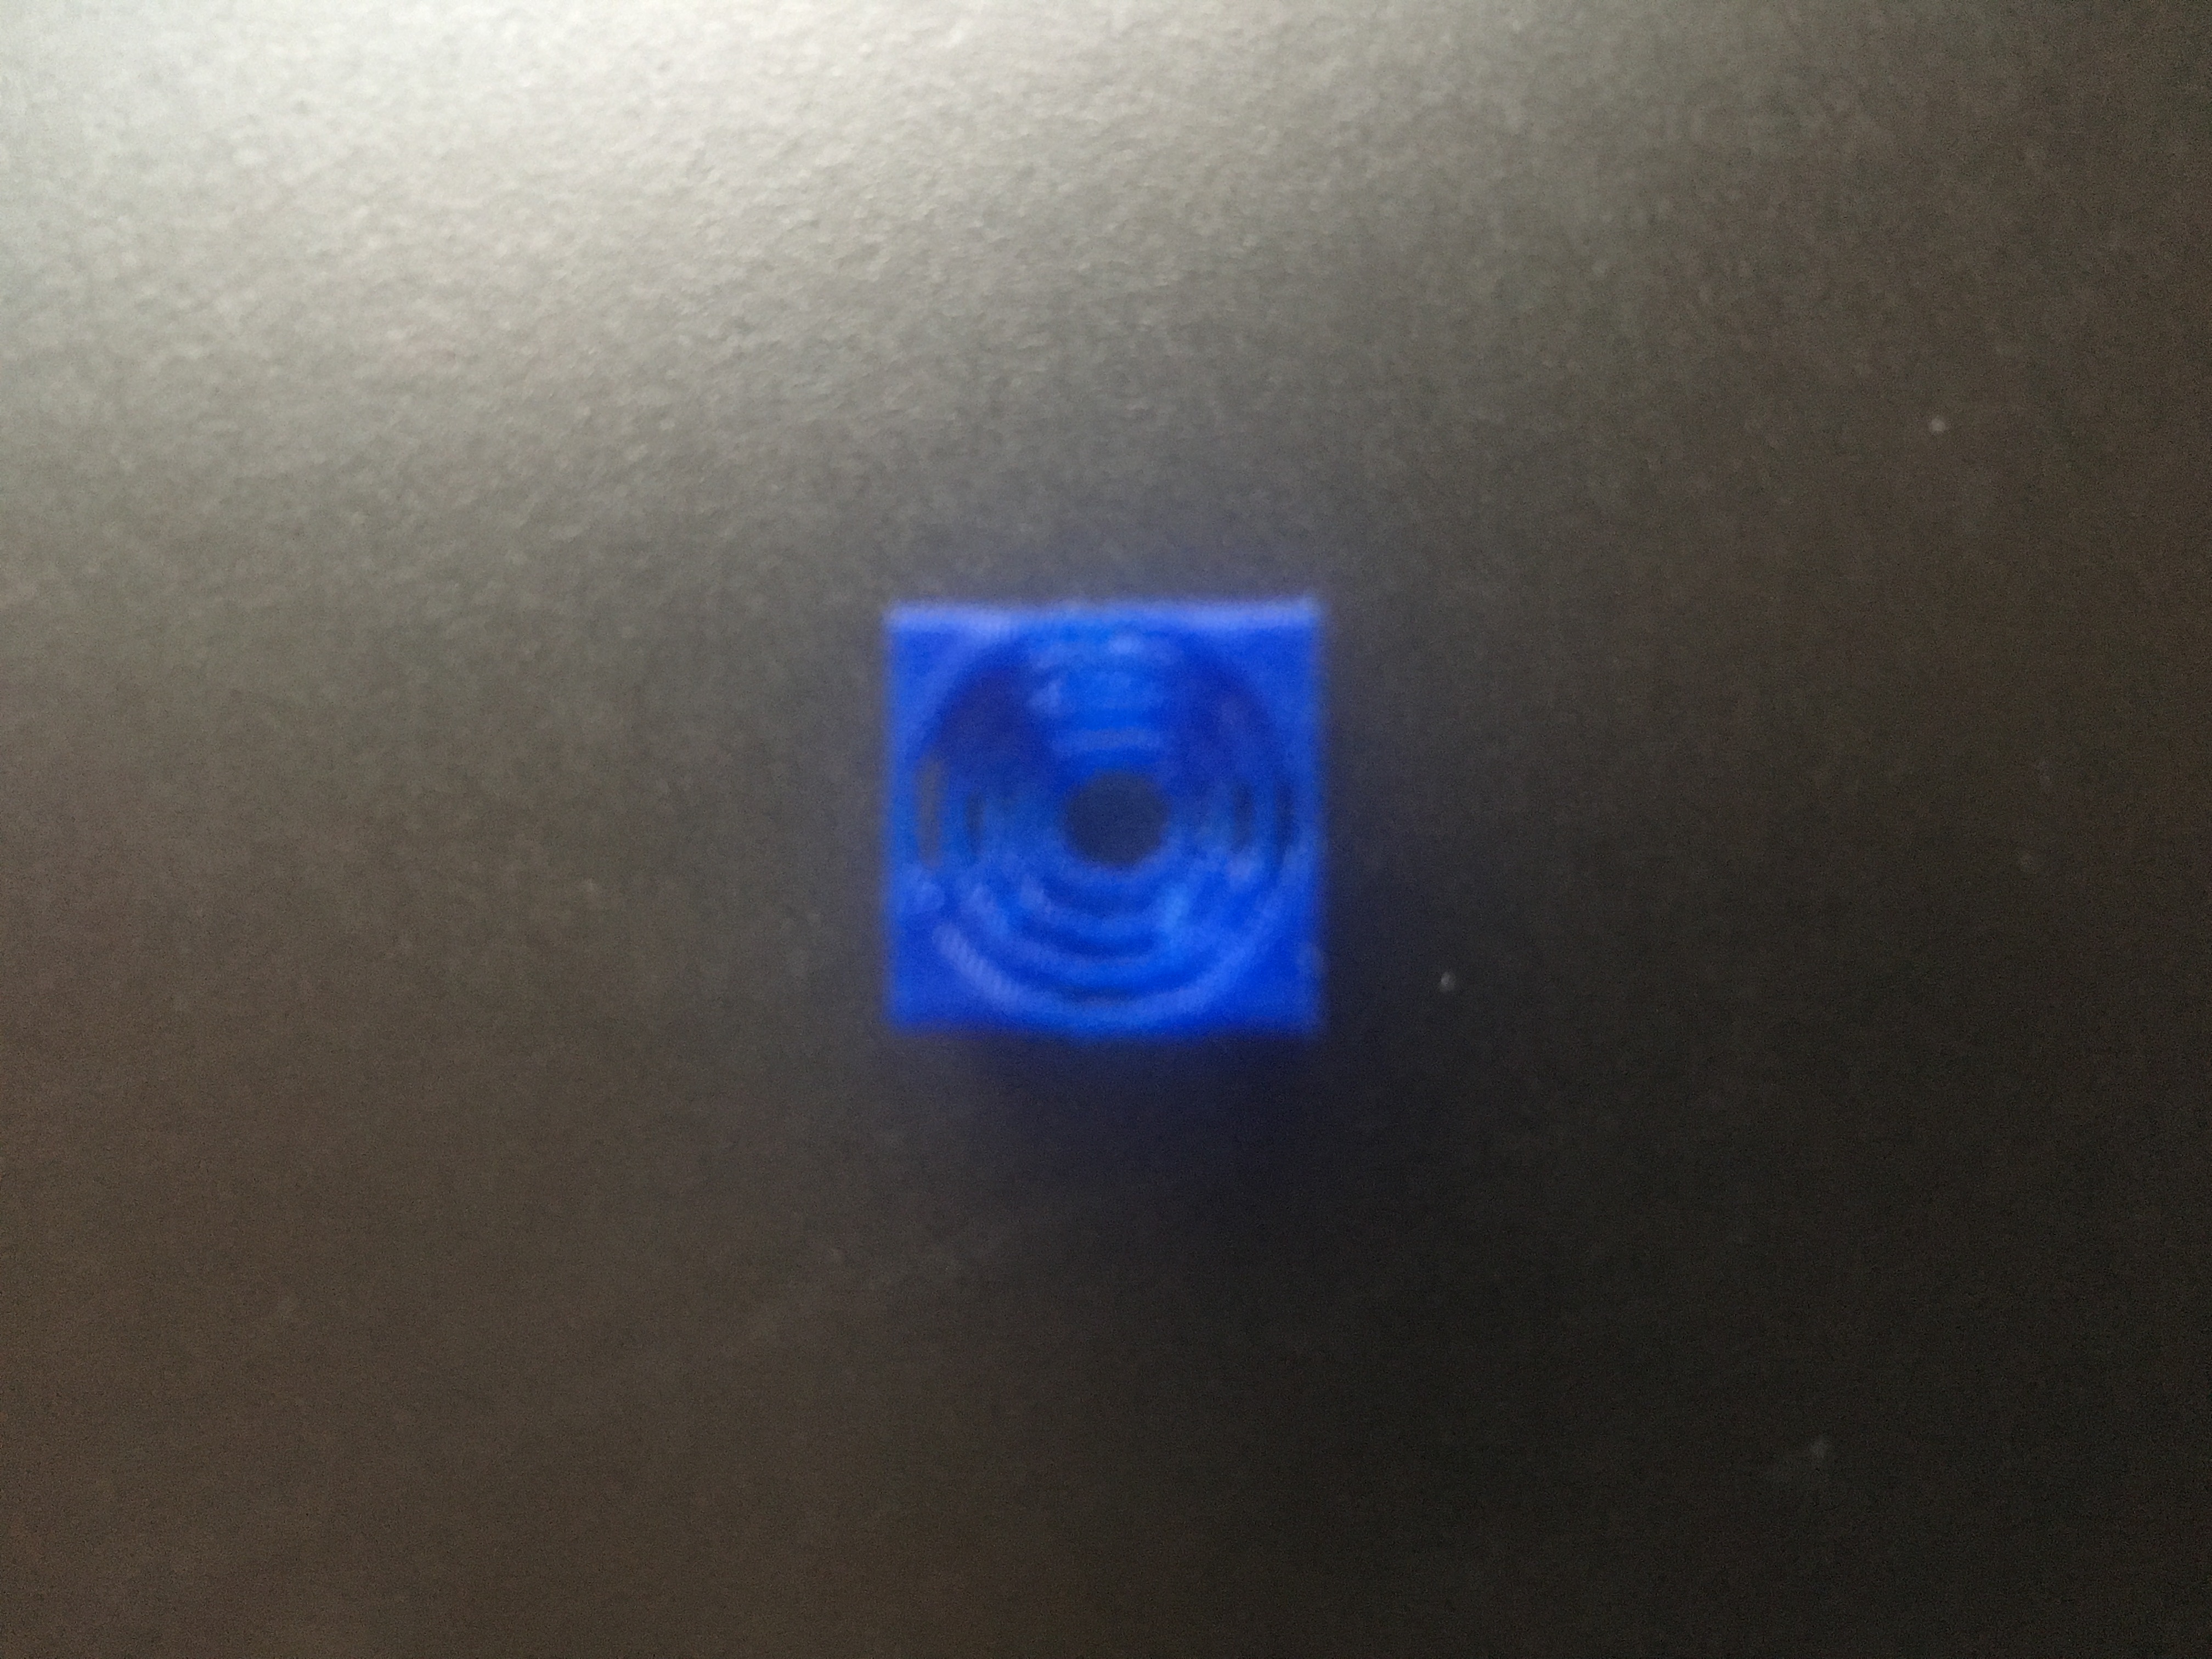
Here is the final print. It printed very well and turned out just as expected, apart from it was a lot smaller than I had anticipated. Having said that, I think that it being so small makes it easier to see the smaller details and proves just how good OpenScad and the printers are to be able to print something so small in such fine detail.
This final design was a level-up from the last one not necessarily a direct add on to the last design, but it’s far more technical and the code is a lot more thorough and detailed. Even my understanding of the code was leveled up from the last design. If I was to created the design again, I would make it a bit bigger to see if the detail would be as noticeable in a large object. It’s a cool little design, with little practical use other than looking cool and being proud that you were able to create such a thing.
All in all, this class was a very good experience for me. Learning the different ways and techniques to use the 3-D printers. I thoroughly enjoyed my time in this class, I feel like it has given me some understanding in coding that otherwise I would not have had , so it has given me a slight leg up in my major. I would definitely recommend this class to anyone who needs to take a lab!