At the beginning of this project I spent a lot of time thinking about the shape that I should made, that was because I wanted to end up the course in a positive way and making a great model would be the perfect way to do it. First of all, I watched some videos on different types of website to collect some information about how to work on this app, called OpenSCAD. Honestly, it took me a few hours to completly know how to work on it. My first shape wasnt my final one.
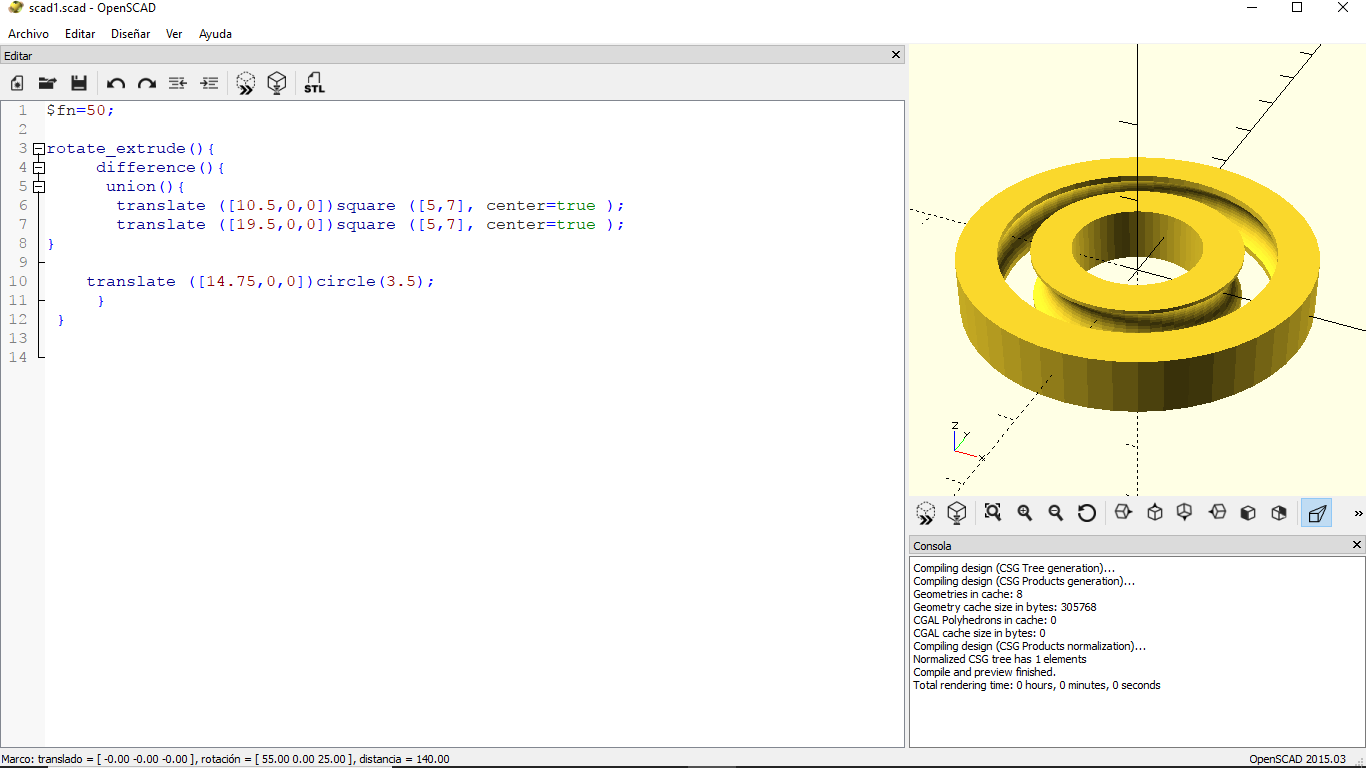
In this first model, I took advantage of one video that I saw on YouTube and I created a similar shape of the one that was in the video. This the code that I used for the first model.
$fn=50;

rotate_extrude(){
 difference(){
 union(){
 translate ([10.5,0,0])square ([5,7], center=true );
 translate ([19.5,0,0])square ([5,7], center=true );
 }

translate ([14.75,0,0])circle(3.5);
 }
 }
This model is built around a single circle. Basically, what I did is to built two circles and put the smallest one inside of the big one. I used “difference” to unified both circles. However, I didnt print this model because I saw a classmate that was doing a similar form, so I just changed it.
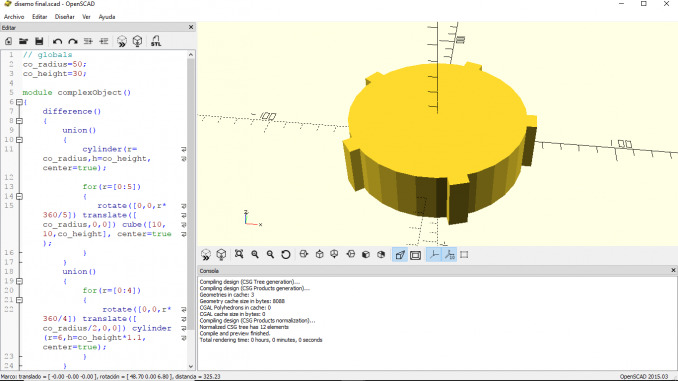
On the other hand, my final form is an engine. I also tried to do a bit of research about how other people do their engines because I found interesting this type of model. This is the code of this model
// globals
 co_radius=50;
 co_height=30;

module complexObject()
 {
 difference()
 {
 union()
 {
 cylinder(r=co_radius,h=co_height, center=true);

for(r=[0:5])
 {
 rotate([0,0,r*360/5]) translate([co_radius,0,0]) cube([10,10,co_height], center=true);
 }
 }
 union()
 {
 for(r=[0:4])
 {
 rotate([0,0,r*360/4]) translate([co_radius/2,0,0]) cylinder(r=6,h=co_height*1.1,center=true);
 }
 }
 }
 }
 complexObject();
As we can see, this a most complex object that it took more time to do it. First of all, I gave names to the variables. I named “co_radius” to the radius of the cylinders and “co_height” to the height of the same. This shape is formed by a circle and five cylinders around it. Also at the end of this code it is shown how I included four small circles in the midles of the big circles. These four circles have the same measures.
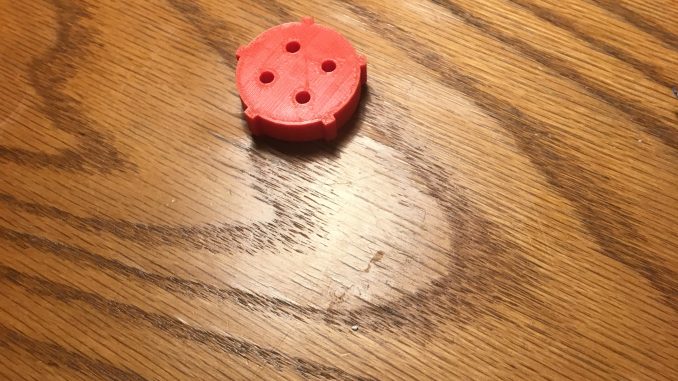
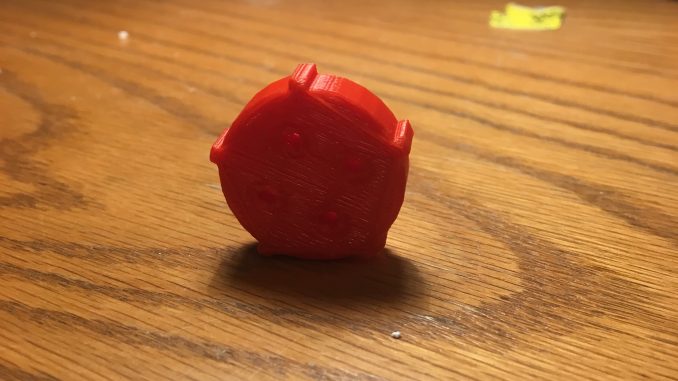
This was a challenging model but I finished successfully. Now I attached the how the model it is shown in OpenSCAD and how it look like when I printed it.
As we can see here, the circles in the middle werent shown on my laptop but however, they got printed in the final shape. Lucky right?
To sum up, I have faced some challenges in this class. I learnt how to work by myself i all of the projects and I think I did a decent job overall. Im looking forward to learn more things about 3D printing and I have really enjoyed this class!