I was most excited to start working with OpenSCAD since I’m a senior Computer Science major. However the biggest part of this class I’ve struggled with is a lack of creativity. I wanted to attempt to make something useful this time though.
First OpenSCAD Design
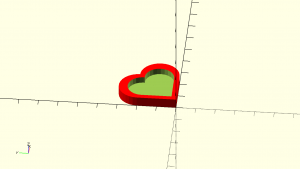
My initial design was a heart-shaped dish for my keys. I made the heart using a triangle via the polygon tool and two circles.
union() {
 // base
 linear_extrude(height)
 polygon(opoints, paths=[[0,1,2]],convexity=10);

 // left circle
 translate([ox, oy, 0])
 linear_extrude(height)
 circle(oy);

 // right circle
 translate([oy, ox, 0])
 linear_extrude(height)
 circle(oy);
}
To create the hold inside the dish, I used the same union code but smaller in the difference() function to create the hole inside the heart.
View the code for this via pastebin.
Second OpenSCAD Design
In my quest to design something practical, I looked through some ideas for what other people have 3D printed in place of office products. I found an image of a 3D-printed cable organizer that I thought would be easy to implement in OpenSCAD.
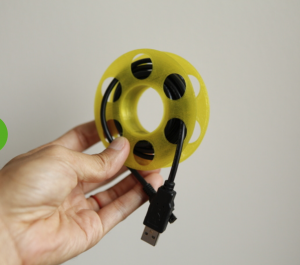
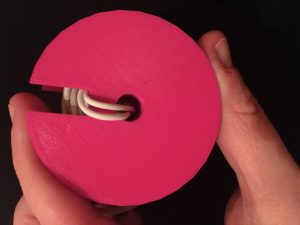
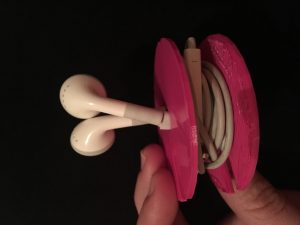
I kept looking for inspiration though, as I thought the large circles wouldn’t work well in a smaller version of the same print. I found a wooden version of a circular earbud organizer that I found would fit my needs best.

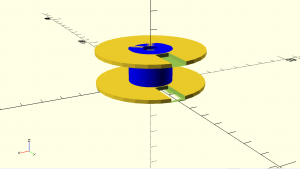
I set out to create this design in OpenSCAD. I aimed for a diameter around 2 inches for the circle, and experimented with the height of the inner cylinder.
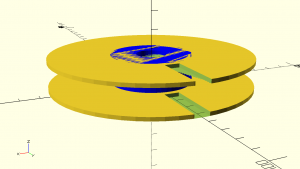
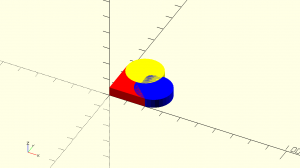
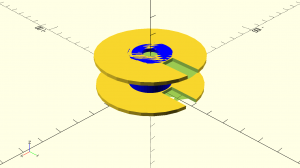
The two circles call the same module, which creates the circle, the hole inside, and the rectangle off to the edge.
module outer_circle () {
 difference() {
  // circle
  linear_extrude(2)
  circle(outer_radius, $fn=outer_radius);

  // hole in center
  linear_extrude(5)
  circle(20, $fn=outer_radius);

  // square to end
  linear_extrude(3)
  translate([0,outer_radius-5,0])
  square([8,outer_radius-5],true);
 }
}
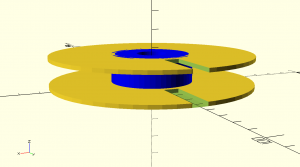
The inner cylinder is also a difference of two cylinders.
module inner_circle () {
 difference() {
 linear_extrude(inner_height+14.5)
 circle(outer_radius*0.4, $fn=50);
 translate([0, 0, -1])
 linear_extrude(inner_height+18)
 circle(outer_radius*0.15, $fn=50);
 }
}
I tested a small print of this design first because of time constraints, scaled down to about 40% of the actual size.

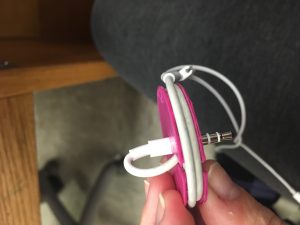
Obviously the male auxillary end did not fit in the hole in the center, nor did the wire fully wrap around due to the scaling. However I felt that even scaled up, the height of the cylinder for wrapping the cord might be too small. So I went back to increase and adjust the height of the cylinder, something easily done by changing the variables and a few scaling operations in the code.
View the code for this via pastebin.
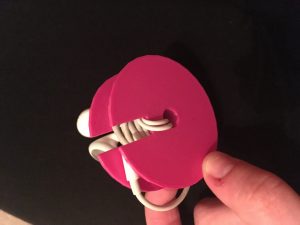
The end result was a great size!