Hello
I am a senior undergrad JMU student majoring in Studio Art. While I am a photography concentration, I enjoy all types of art or “craft” creations – generally, I just enjoy making things. The pleasure I find in small details and intricate work leaves me interested in 3D puzzles. I also just really like all types of puzzles and intricate puzzle games (despite not being great at them).
I have worked in 3D modeling programs before, but barely enough to scratch the surface. I find the whole process of 3D design and printing fascinating and look forward to learning how to use the technology and finding a way to mesh puzzle making with my art.
For your enjoyment, have a photo of some snow up close.

I can also be found here:
Initial Puzzle Research
Mechanical puzzles, mainly disassembly and mechanism puzzles, are incredibly interesting to me. One main example of these puzzle types is the puzzle box – a popular hidden compartment puzzle dating back to 19th century Japan. Puzzle boxes are just what they seem – boxes that are opened through puzzles. The puzzle can be easy or difficult, and are the only way to open the one or many different compartments within the box. Puzzle boxes can be so intricate, so ornate, and also act as miniature little self-contained machines. They can also be relatively simple in overall mechanical design, and be more of an art piece – and that’s what makes them so fun. They work as both puzzles and as stand-alone art.
![]() Assembly puzzles are also very interesting in the same way of a puzzle acting as art. They cover a large range of formation categories – interlocking, packing, tangrams, etc. – and are made from various materials. These types of puzzles have been around for hundreds of years. More simple than puzzle boxes in their mechanics, their interlocking nature still make them a fun time and a little piece of art. These puzzles too vary in intricacy, ranging from simplistic end results like the soma cube to something closer to a figurine or model.
Assembly puzzles are also very interesting in the same way of a puzzle acting as art. They cover a large range of formation categories – interlocking, packing, tangrams, etc. – and are made from various materials. These types of puzzles have been around for hundreds of years. More simple than puzzle boxes in their mechanics, their interlocking nature still make them a fun time and a little piece of art. These puzzles too vary in intricacy, ranging from simplistic end results like the soma cube to something closer to a figurine or model.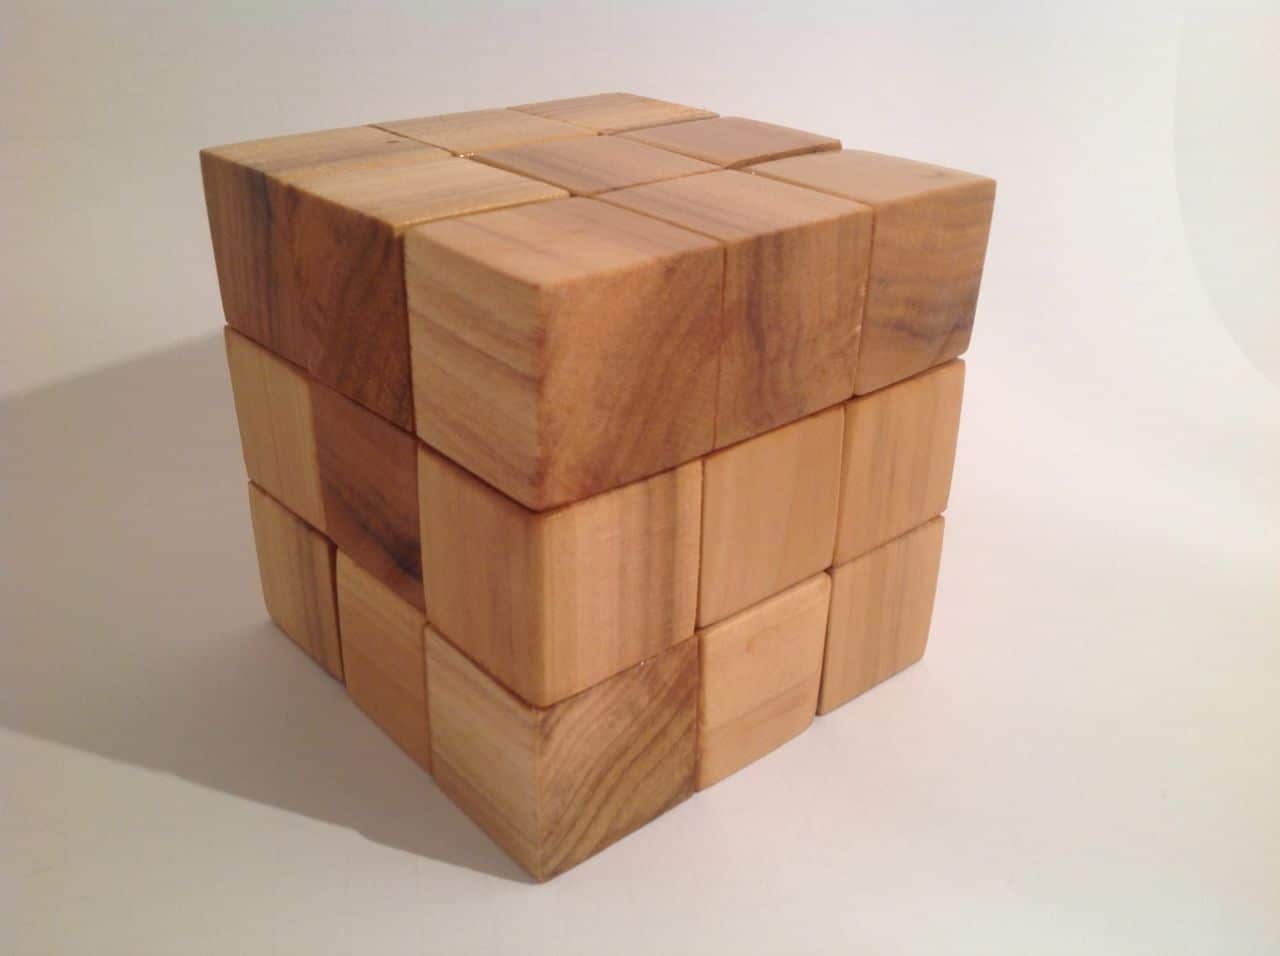 The assembly puzzles I find most interesting often rely mostly on interlocking to fit together and stand up. I find the simple and constructive nature of these puzzles to be an appealing staring point to finding a work of art within a puzzle.
I think assembly puzzles would be the most fun to work with. Mechanical puzzles would be a challenge to adapt, but it still is something to think about trying to involve – at least simple mechanisms like latches of sorts could be used alongside assembly used to make design work.
References:
Siam Mandalay – Chronological History of Puzzles: A Timeline
Siam Mandalay – The History of: Assembly Puzzle & Put Together Brain Teasers
Rob’s Puzzle Page – Disassembly
Thingiverse Puzzle Print
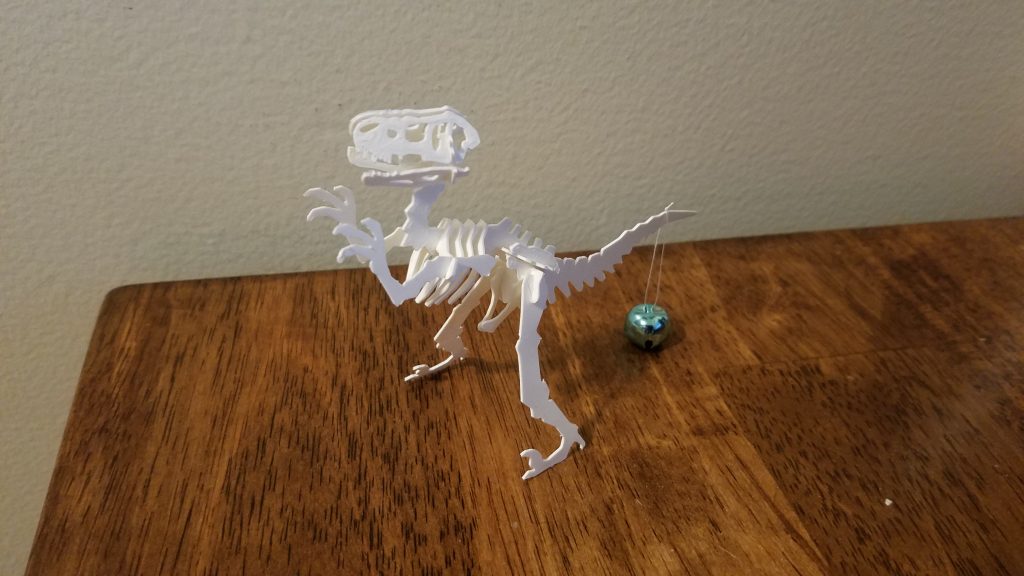
I found this velociraptor business card puzzle by user Cleven. At first I was looking at more cube interlocking puzzles, but with a combination of time constraints and printing size issues, I started to look for different puzzles. I found this one and immediately found it more interesting and fun than a cube puzzle (because who doesn’t like dinosaurs?).
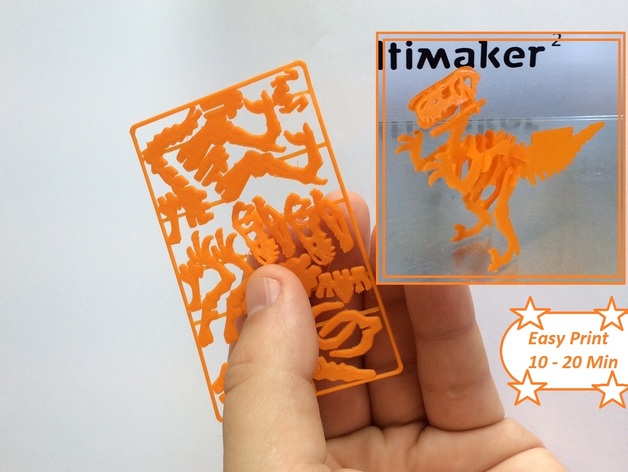
There were some problems printing it due to its small size. I printed the puzzle at Cleven’s original file dimensions but I find it a bit thin – but that could just be me. I had to print the piece with a brim because the printer just kept pulling up the first layer every time. The puzzle also easily warped when removing it from the building plate – I think it would have warped less had I printed it a bit thicker. I also lost a piece. Not sure where I lost it, it was one of the hip pieces so that is a bit of a bummer but I made it work.
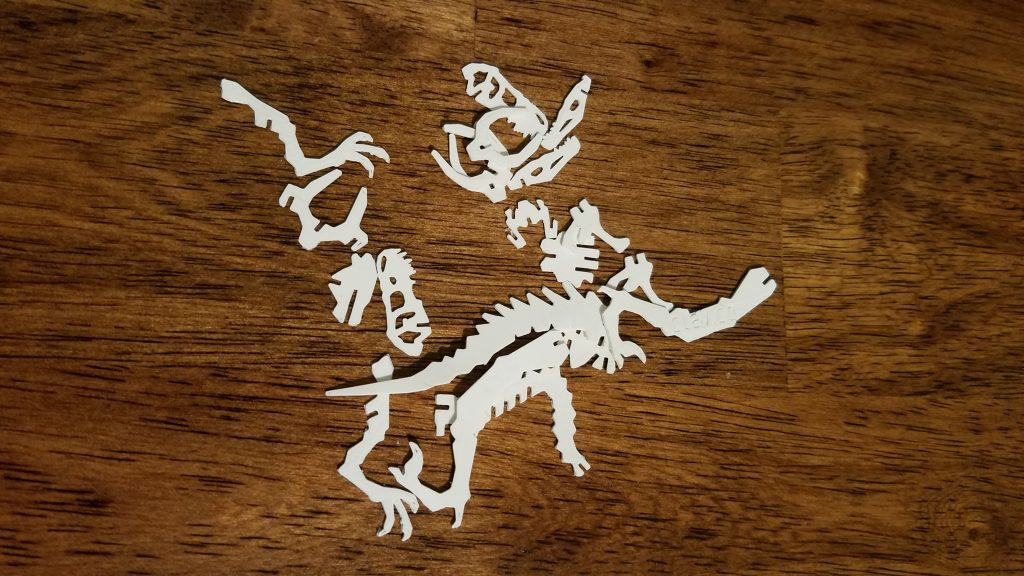
When putting the puzzle together, all the joints were quite loose so to make it stay together I had to glue it. However, as this is meant to be a business card and you would probably plan to glue it together to it couldn’t come apart later, I think that it’s fine. The puzzle is also a little front-heavy. Through shifting the pieces around I was able to make the puzzle stand by itself but with the warping of the pieces and my missing piece being factors, he can’t stand and has to have a little bell hold him down. Apart from those issues, I think it was fun and cute! It makes you think a to figure out how each piece when together to really form the velociraptor but it wasn’t super challenging, you can easily put the tail upside-down if you maybe aren’t paying attention, and it makes a cute little decoration by the end of it. All in all, while it could be printed thicker, it’s up to the one printing it and it still was fun!
Tinkercad Cube Puzzle
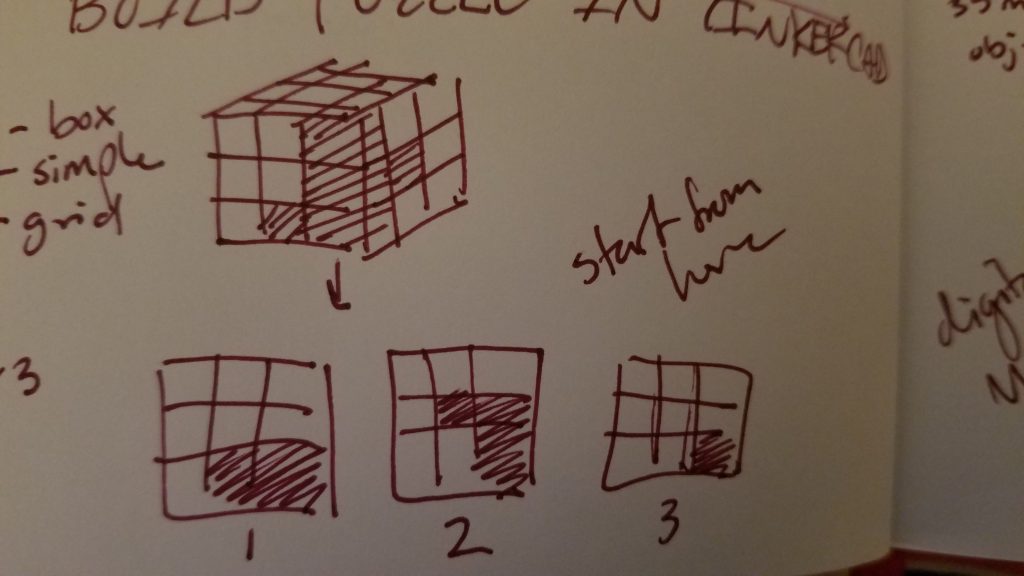
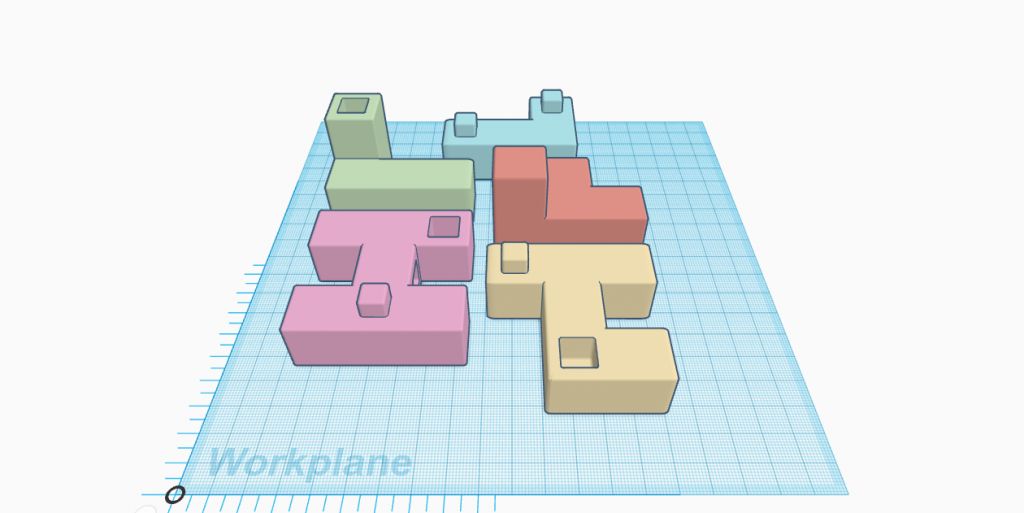
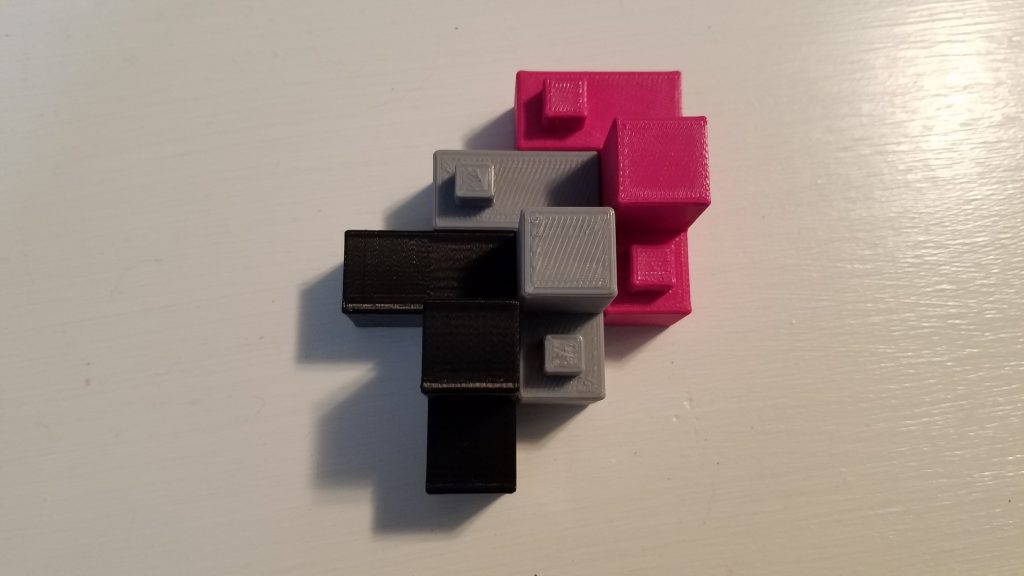
I wanted to start and be relatively simple since this is my first time making a puzzle. The easiest way I found for me to visualize it was to break the end cube into smaller cubes, and for simplicity sake I stuck with a 3x3x3 cube. I came up with one piece and the built the rest of the puzzle to fit around that one.
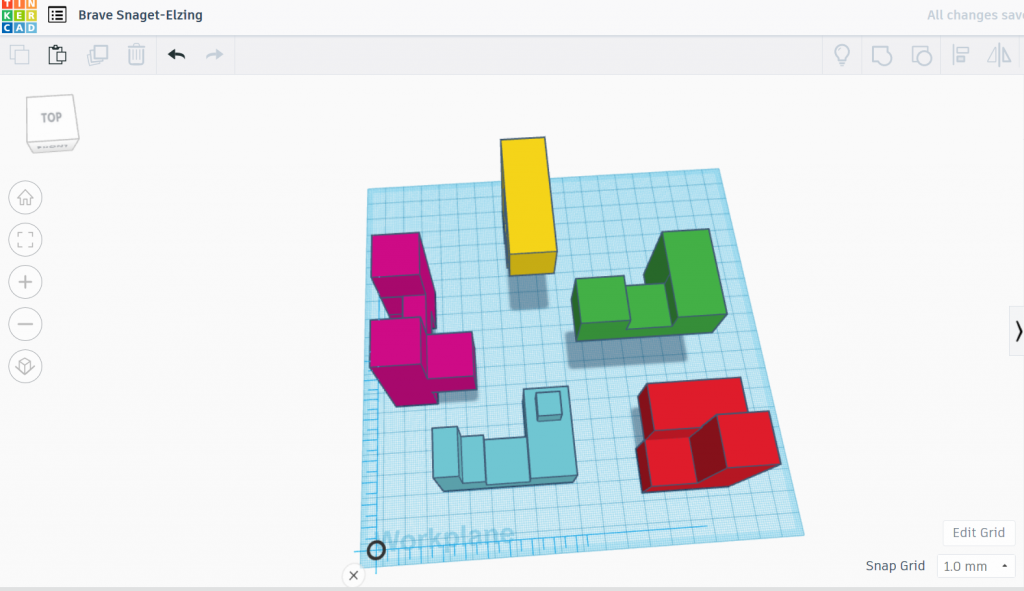
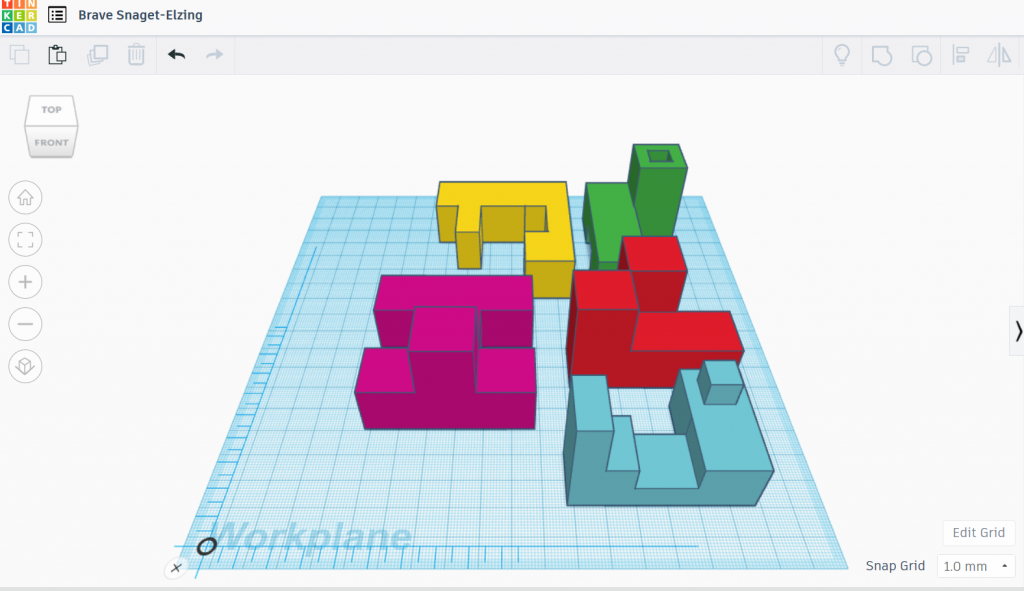
But I wanted it to be more than just even cubes put together. I tried one with a few extra interlocking bits before realizing that there was no way to put the puzzle together. I realized I focused too much on design without accounting for the actual function of a puzzle – so I went back to the simplified shapes. Still wanting to make it a bit more intricate, I started taking half-cube sizes from here or there, added a plug, and continuously “assembled” and “disassembled” the puzzle in Tinkercad to make sure everything was possible.
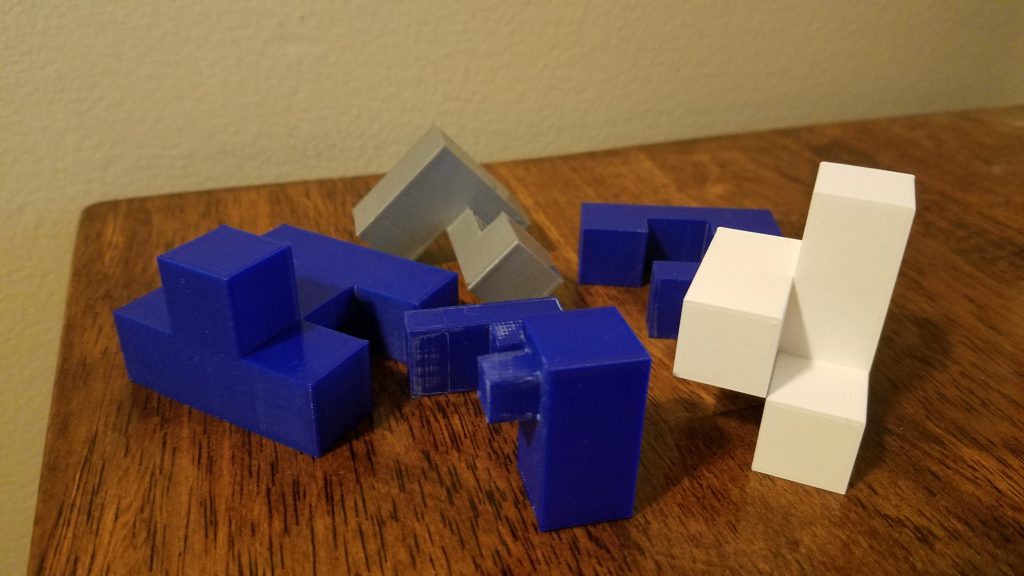
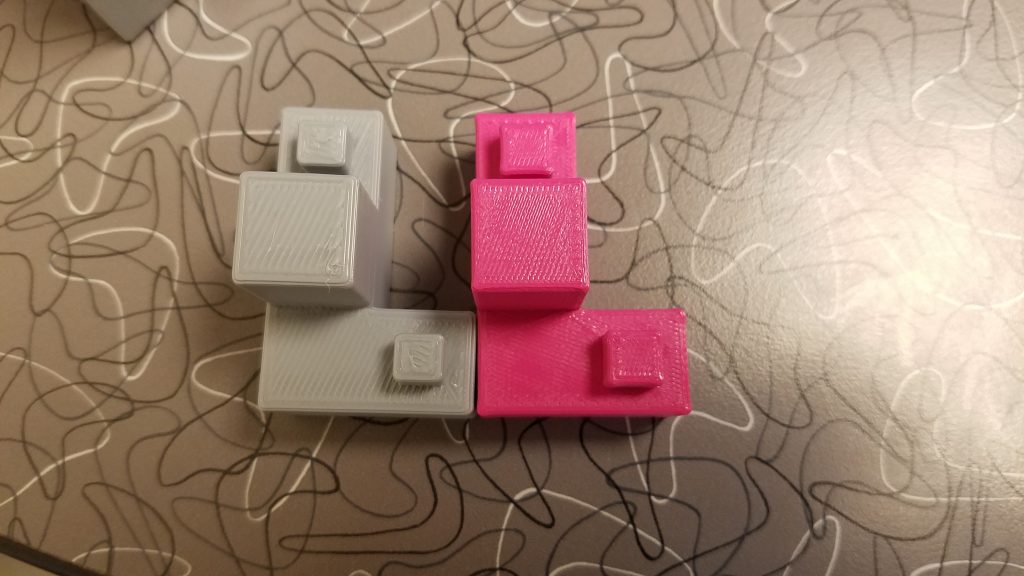
I printed each puzzle piece and they all came out no problem! Each piece seemed to look okay out of the printer and were even in size. They came out as I expected them, at least design wise. What I didn’t realize would be a problem is their actual fit. I’m not sure if some size or fit compensation needs to be made in the program, but the pieces are sometimes too tight to fit. One problem, I think, is that the majority of the pieces came out with sort of rounded edges. Instead of a straight flush edge to the piece, the side suddenly curves out at the corner, making it unable to slot into any other piece unless it’s been cut down and sanded. This happened on every piece except for one (which is also the simplest piece).

After doing some sanding I was able to get the majority of the pieces to fit together, but the notch/peg I made would need extra work and consideration to be able to fit. I think rather than sanding each piece I would like to find some way to account for this problem in design and print each piece with this result in mind. I’m just not sure what I should be planning for. I also think making two versions, one with simple blocks and one with the more complex interlocking ones, would be an interesting future for this puzzle. So while the design of the pieces printed as I expected and they theoretically fit together, there are more technical issues I didn’t realize would be a problem making my puzzle less than what I had hoped for. It’s a bit of a bummer, but this is my first puzzle and I’m hoping to find out solutions (hopefully a bit easier than sanding) for future projects.

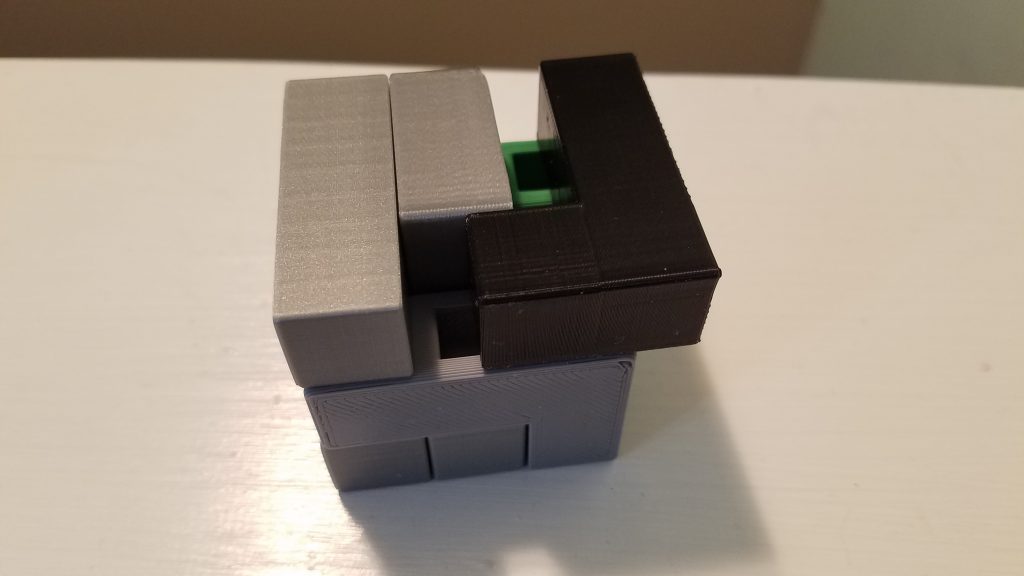
Cube Puzzle Iteration
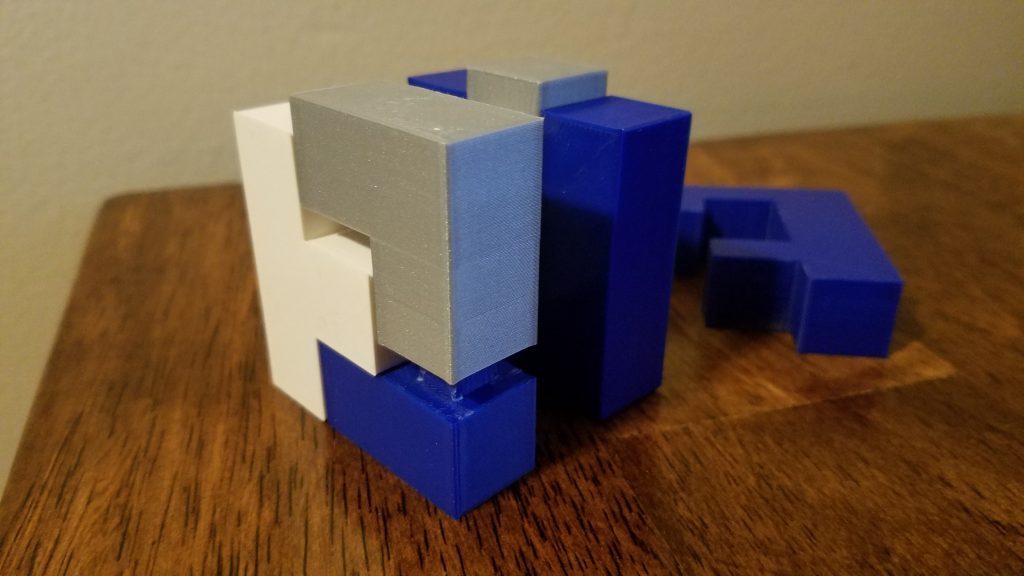
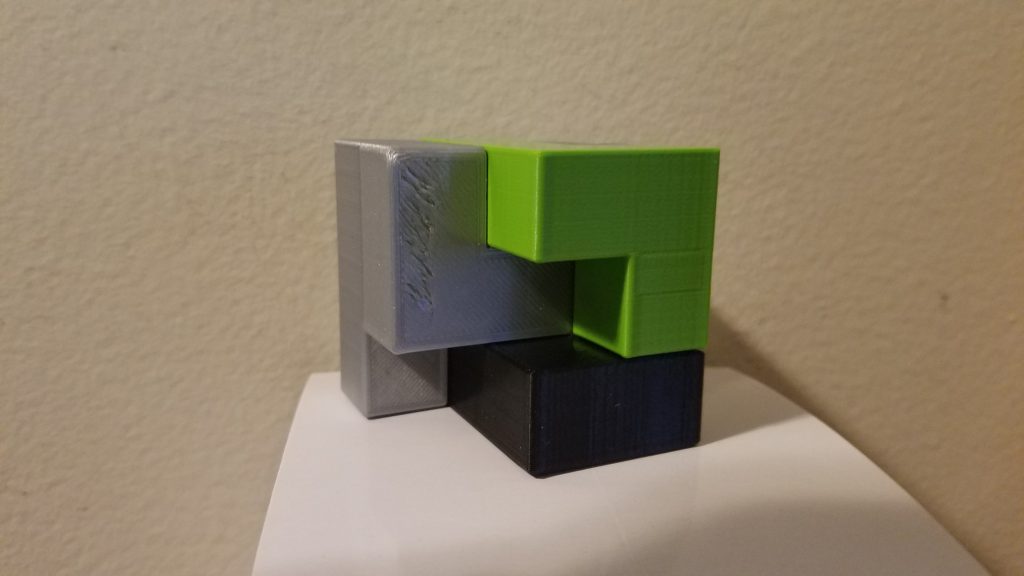
Compared to the first iteration of this puzzle, two things to improve were: the fit of the puzzle (having the pieces actually be able to fit together) and puzzle design cohesion. I didn’t exactly nail the fit on the peg connections (they wobble a bit) but when the whole puzzle is put together it holds together as I originally wished without any sanding. I feel I got cohesion by choosing one of the two elements I had in the first iteration – either half-block connections or peg connections. The puzzle is still simple in design, but that’s also what I wanted. It is simple to solve but maybe not completely obvious.
Firstly, I dealt with the issue of the pieces not fitting together. This was easily solved by rounding the edges in Tinkercad. I tried different programs to attempt to bevel the edges, but they weren’t working as I had hoped and weren’t as easy to understand as quickly as Tinkercad. I found that just a simple rounding of 1mm with max steps worked perfectly, if not making some pieces too lose.
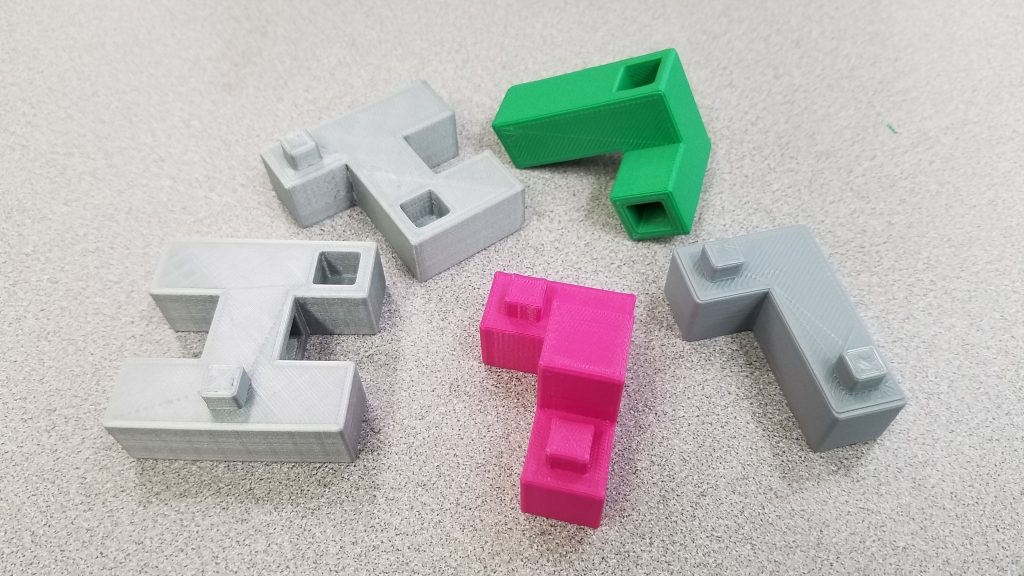
Next I looked at the cohesion of the puzzle. My first iteration had both half-block and peg connections and on review I began to think that only one type was necessary. Having only one type gives the puzzle a better chance of fitting together as well as make it feel like one solid puzzle. Too many elements put into this puzzle meant to be simple started to make the puzzle feel disjointed in its design. I made two different versions, one with ‘slabs’ and another with pegs.
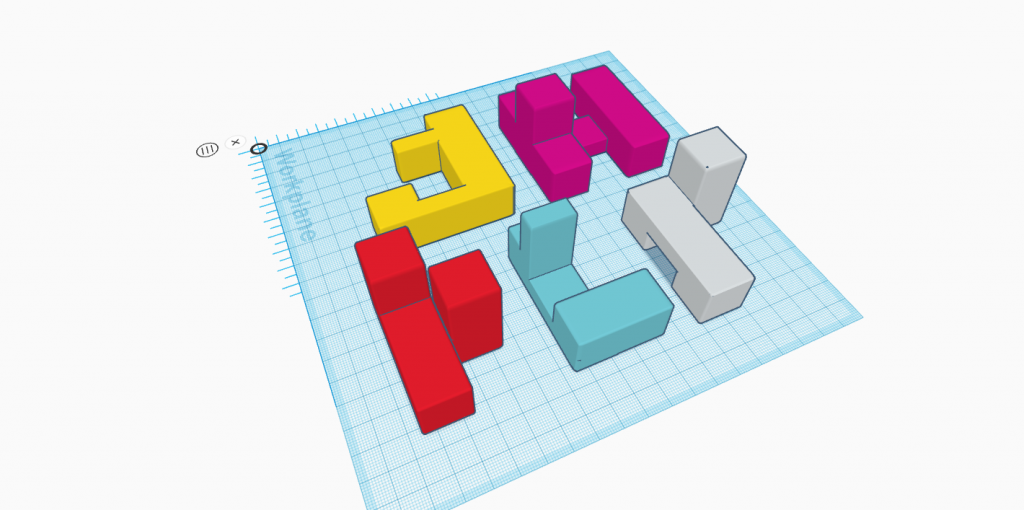
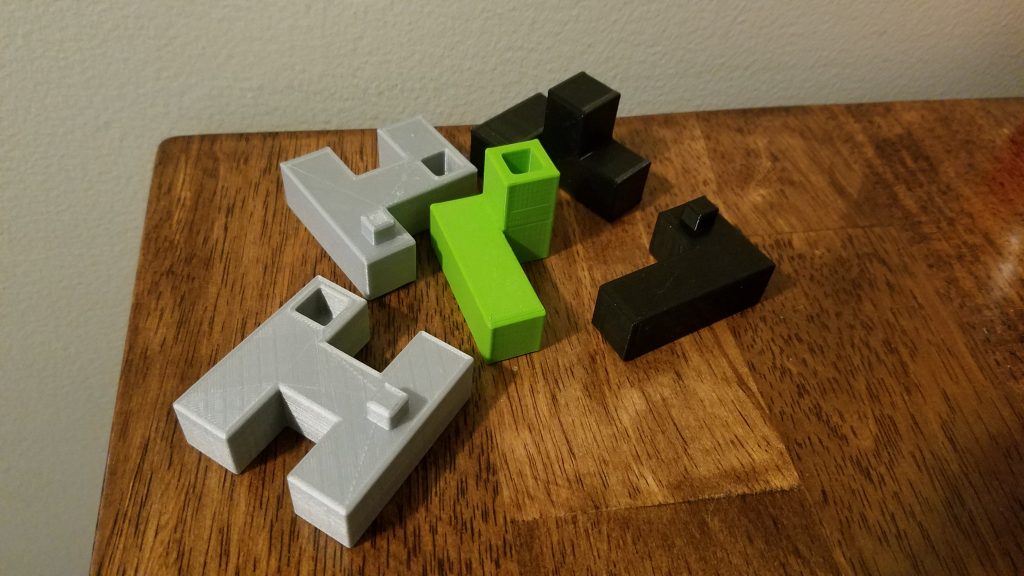
I printed pieces of both puzzle types. I had also compensated in the designs for fitting the pegs and slabs. I overcompensated for both. The holes for the pegs are too large, but I also noticed that they didn’t necessarily print the same on different printers so I think I chose the safer route in making the holes larger than necessary. The slab puzzle on the other hand, didn’t work as well. The compensation was too much so the puzzle is either full of gaps or won’t fit together squarely. While two pieces of the slab puzzle don’t wobble like two pieces of the peg puzzle once put together, there’s too much of a gap between the pieces and they don’t fit flush.

I only printed three of five pieces of that puzzle but I’m glad I only did that many because I would not call that a well-designed puzzle at all. And while the peg puzzle works, the printing process was not 100% great. Mostly because it was only when I had all the pieces printed did I realize I had designed two pieces incorrectly. One piece was supposed to only have a hole while another was supposed to have two pegs, but I accidentally gave one only one peg and the other a hole and peg.

I only had time to quickly fix and reprint one piece to make the puzzle fit together but while distressing at the time, it was also quite funny. Getting through printing all pieces only to realize you had a 10 second fix mistake in the design that throws the whole thing off is hilariously upsetting. All pieces have been corrected in the design file posted.


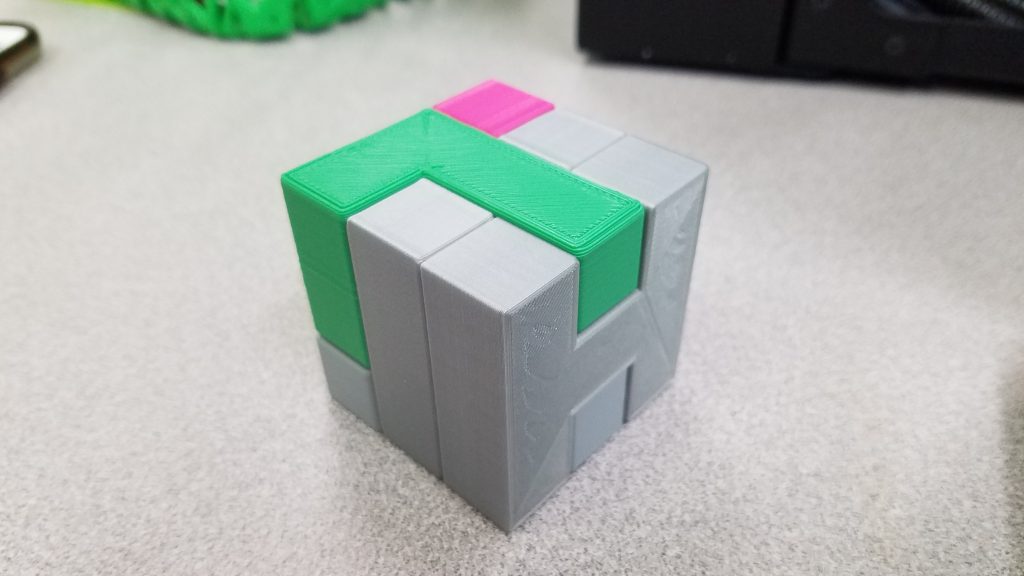
The puzzle works well now. Improvements were definitely made in getting the puzzle to fit together at all as well as in design and feel of the puzzle with the slightly beveled edges. Finding a way to make the pieces fit together without sanding makes this version better than the last, I would say.
Final Cube Iteration, Cube Puzzle Wrap-Up
To better my puzzle, I resolved both some of my own concerns and those brought up through suggestions of others. Luckily, the suggestions I received to both better and increase the difficulty of my puzzle coincided with my own thoughts of pushing the puzzle.

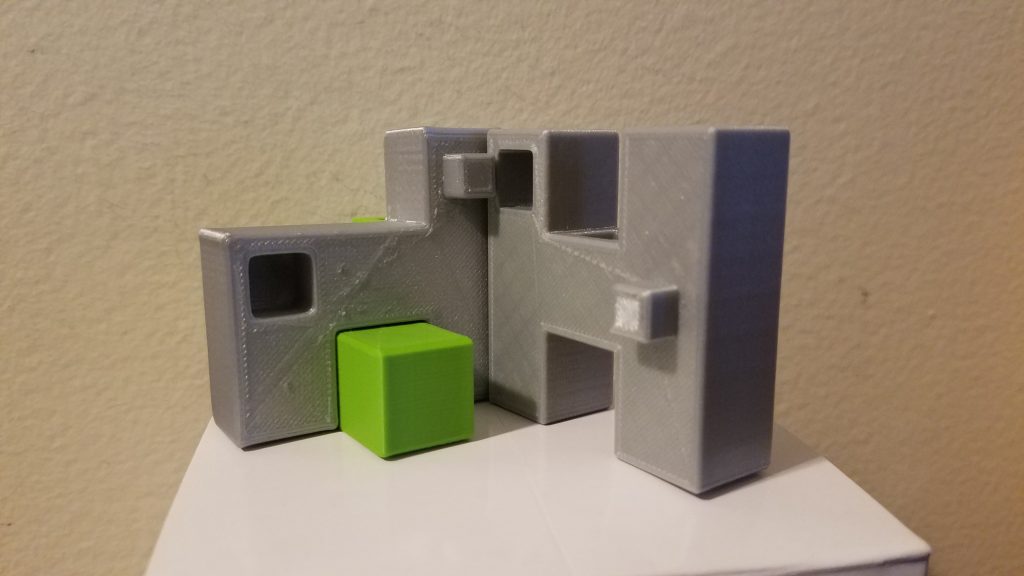
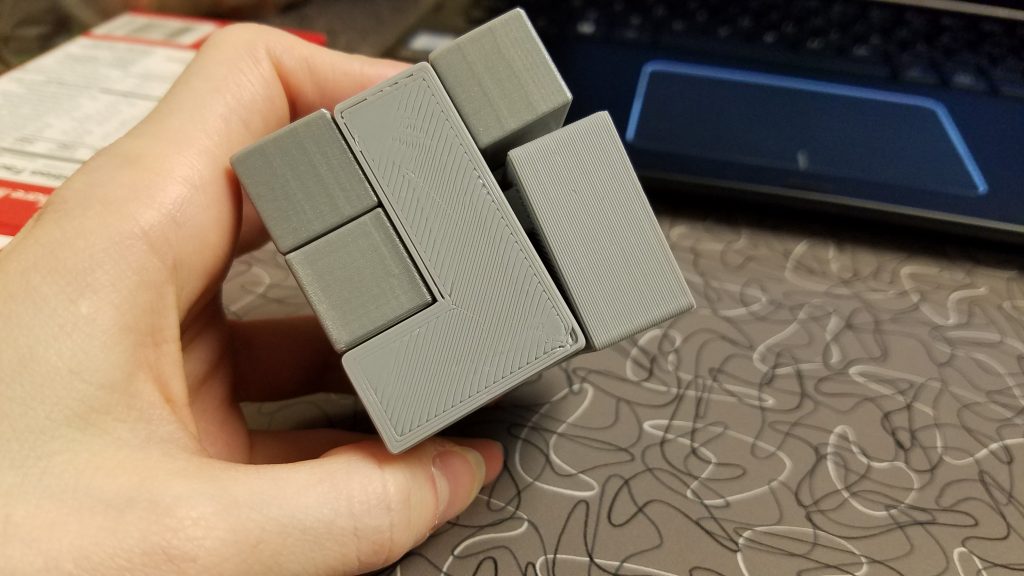
The first major decision was to add more connection points. I had initially left one piece, the ‘key’ piece, blank to help lead someone in the right direction for solving. Once printed, however, I was still having fitting issues so the piece would fall out if not held properly. It became really obvious that this was that ‘key’ piece and while I wanted it to act as the first and final piece, I didn’t want it falling out. Adding in a couple pegs to the piece solved that issue.
The next problem I dealt with occurred after I had printed a new key. While the piece did not immediately fall out, if you held the puzzle with that piece on the bottom, it would fall out – the problem of the fit between peg and hole came back to bite me. I went back to tinkercad and made the pegs 1mm bigger and that seems to have solved it. It could possibly be a tighter fit, but I’m not entirely sure because the pieces I printed were all printed on different printers, so not all the holes and pegs are actually the same. I think I have improved it better as the piece won’t fall out, but I imagine I could have pushed it even farther than I have already. But only by either .5mm or 1mm more.
I have updated the files on the Thingiverse post to reflect the peg size changes. There are also updated pictures.
I think the biggest thing I learned was having to learn both printers and programs enough to account for the disconnect of digital to printed objects. I learned that the digital design will not exactly be physical print and visa versa. Knowing how to figure out what compensation needs to be made and how to make it will be very useful continuing on to other puzzles.

I might not have made it vastly different, but it doesn’t not fit or fall apart anymore so I think that’s a pretty big improvement.
Personal Project Pitch
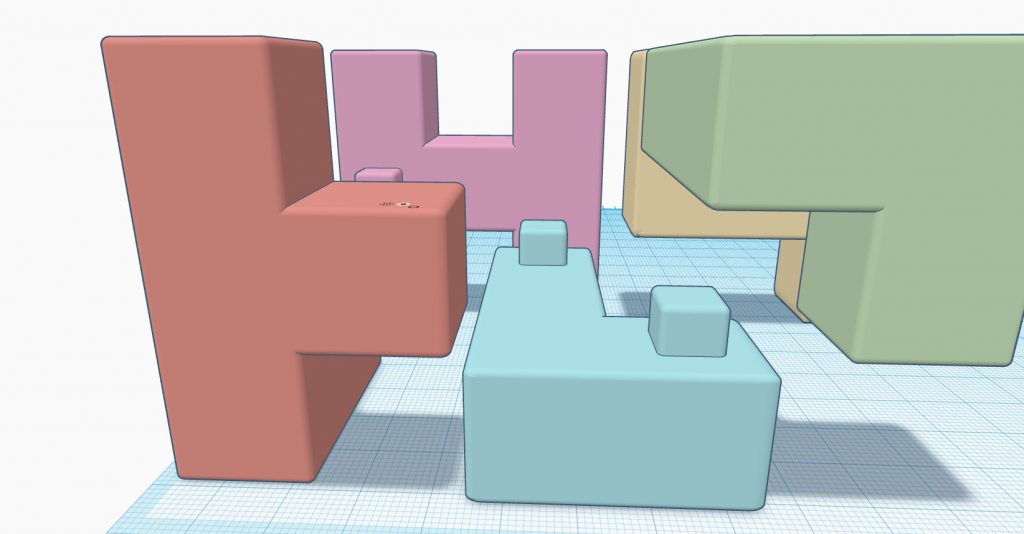
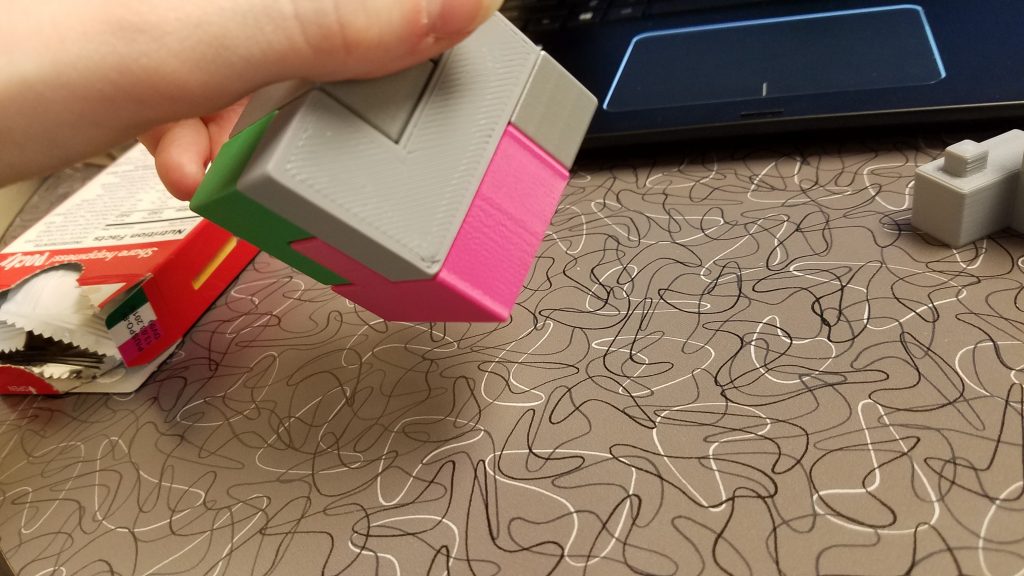
Making a puzzle that is both art and interactive is my end goal. It would be fun for the puzzle to be two puzzles in one – a more decorative façade puzzle (made of something like wood or nice acrylic, so it would look very nice) as well as an inner, more complicated puzzle (printed from the 3D printers in the plastic filament). The puzzles would be cube shaped, but could be taken apart and put back together into a different formation creating a platform and pedestal situation. Inside the puzzle would be a prize, which the reformed puzzle would hold. The prize would also not be constant, as the solver could take that object and replace it with something of similar size, so the puzzle really never ends. It’s hard to describe in words.
I really want to bring decorative designs to this project rather than extreme puzzle difficulty. Interactive art is important to me, and making a puzzle with an ever-changing ending seems really fun. I generally work in patterns and intricate work, and I think that will be very beneficial to this idea.
The cube, while simple, is very appealing. Using what we’ve already encountered in class with creating cube puzzles, making test with fitting and the feel of the puzzle when you hold it, will be very important to the final puzzle.
I’m not entirely sure how I will achieve this idea of a puzzle that is both a flat “tapestry” platform sort as well as a hollow cube, but I’m very interested in trying. Since I also want to use more materials than just plastic, I’m going to need to learn how to use the other machines like the laser cutter for the façade of the piece. And since I don’t know the best way to go about making a patterned 3D shape become a different patterned 2D shape, I’m going to have to look up existing references to help me get started. I will also need to look into the materials themselves, how thick I make everything, the fittings, and balance so when the puzzle is deconstructed from a cube and reconstructed into a platform and pedestal, it will stand up alone and be structurally sound. But it still sounds exciting!
Fusion 360 – 20 Forms
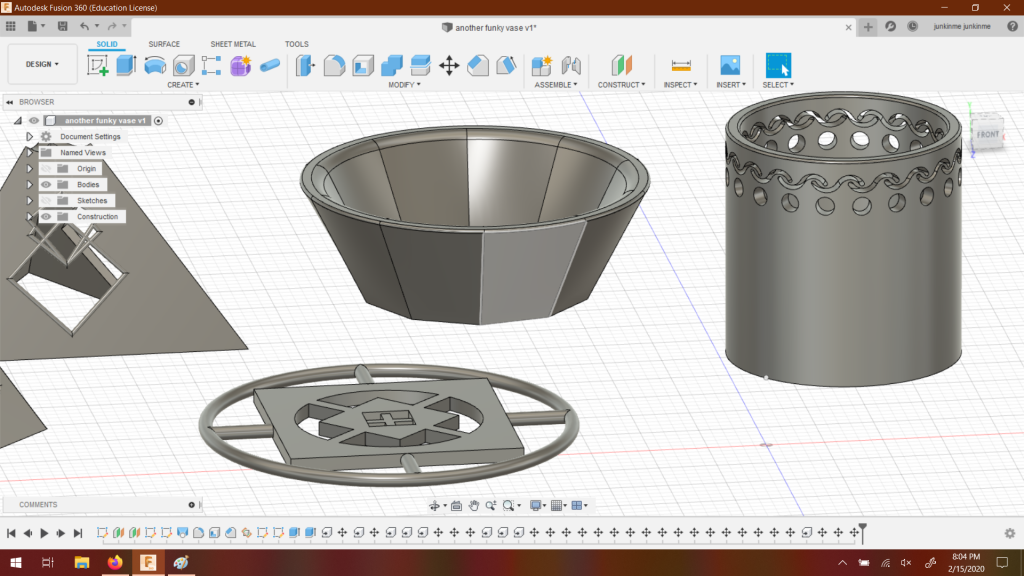
Forms 1-10 are all things I actually had ideas to make – things I had inspiration for and thought would be fun to try challenging.
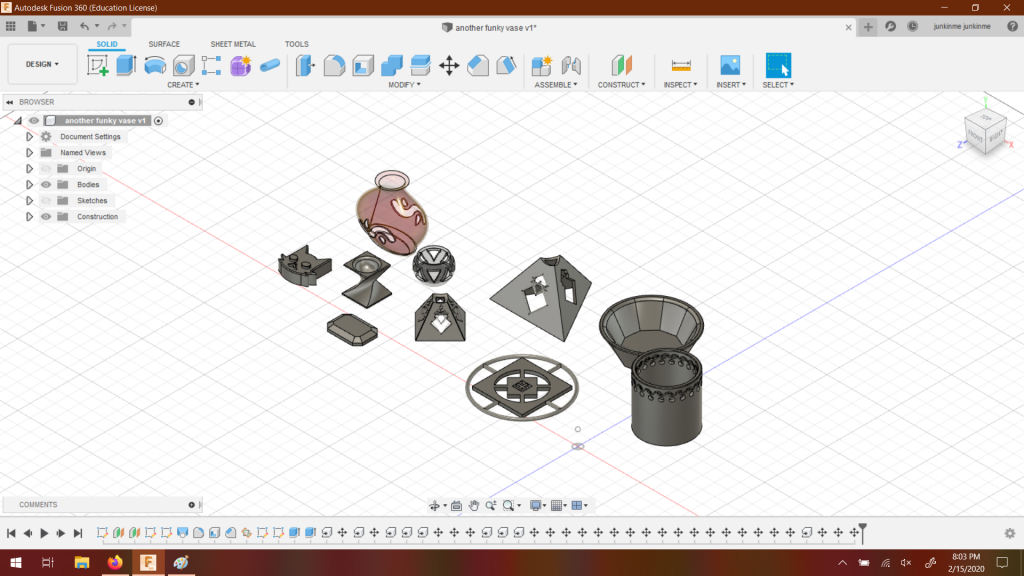
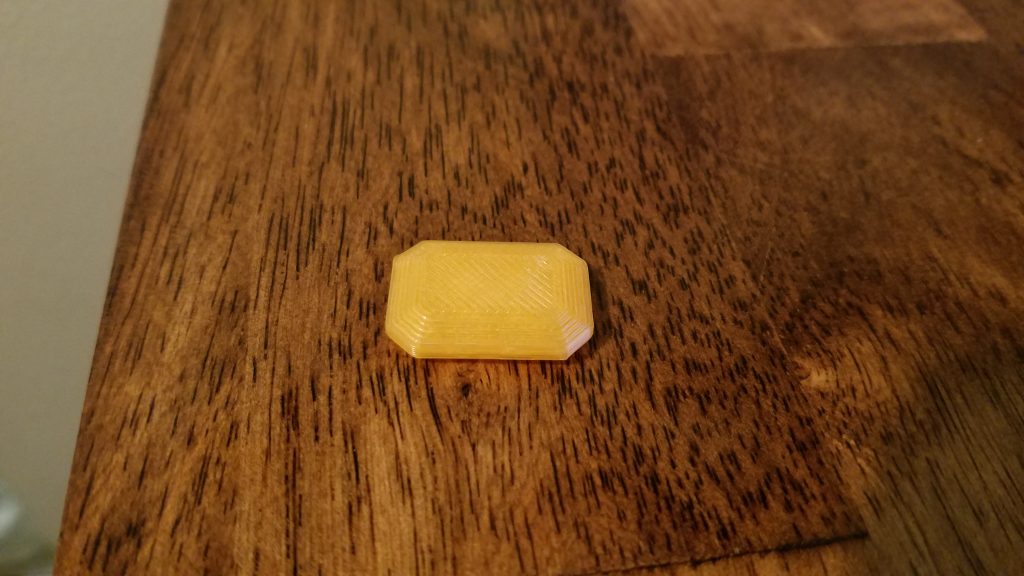
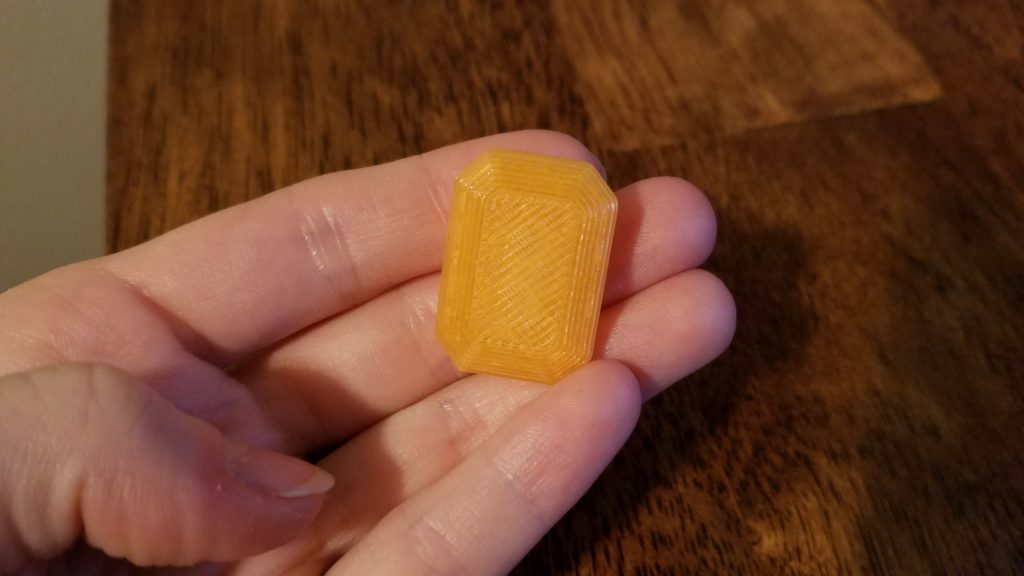
They are better thought out compared to 11-20, but aren’t necessarily great. They are the more fun things. There’s a cat face, a couple funky cups, some useless vase designs, a failure and a not so failure pyramid, a bowl, a gem (which I printed), and a weird wheel-ish thing.

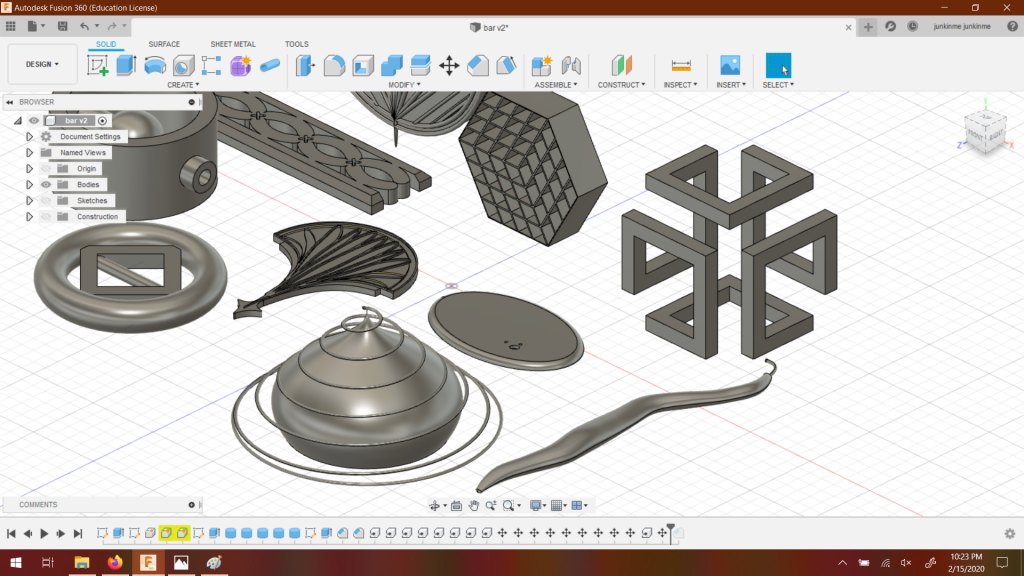
Forms 11-20 are more so the testers.

I was just seeing what the tools were. Some are also more mistake than planned (the green bean that was supposed to be a snake…) and some others are illusions I found online that I was able to successfully make. In general these are the weird 10. These forms include 3 complete tester shapes, a sad green bean, 3 tests for surface designs (which might be best done out of this program), a platform with a face, and two optical illusion forms (infinity cube and a take on the Rubika B601 bookshelf originally designed by George Bosnas that has too many squares because getting the shape into fourths was easier than thirds).

Honestly, I forgot tutorials were a thing and made a lot of unsaved testers. I just wanted to see what I could do. There are still I lot of tools and I didn’t even touch that I’d like to see what they do. I really like working in Fusion! I found that it definitely has its strong points and weak points (I’m thinking small detail designs aren’t really a go for this program) and there are limitations, but it was a fun experience and starting point for meatier 3D programs.
I printed the gem for simplicity sake.
Here is a table compiling the tools I used respective to the forms created:
|
Sketch: |
Forms 1-10 |
Forms 11-20 |
| Line | X (gem) | X |
| Rectangle | X | X |
| Circle | X | X |
| Arc | X | |
| Polygon | X | X |
| Ellipse | X | |
| Slot | X | X |
| Mirror | X | X |
| Fit point spline | X | X |
|
Under solid tab: |
— |
— |
| Extrude | X (gem) | X |
| Box | ||
| Sphere | X | X |
| Pipe | X | X |
| Fillet | X | X |
| Chamfer | X (gem) | X |
| Loft | X | X |
| Cylinder | X | |
| Torus | X | |
| Coil | X | |
| Mirror | X | X |
| Shell | X | X |
| Draft | X (gem) | |
| Split body | X | |
| Appearance | X | |
| Hole | X | |
|
Under surface tab: |
— |
— |
| Extrude | X | |
| Circular pattern | X | |
| Pattern on path | X | |
| Thicken | X | |
|
Constructs: |
— |
— |
| Offset plane | X (gem) | X |
| Tangent planes | X | |
| Plane through three points | X | |
| Axis through cylinder | X | |
| Point at center of circle/sphere/torus | X | X |
Makery Fabrications
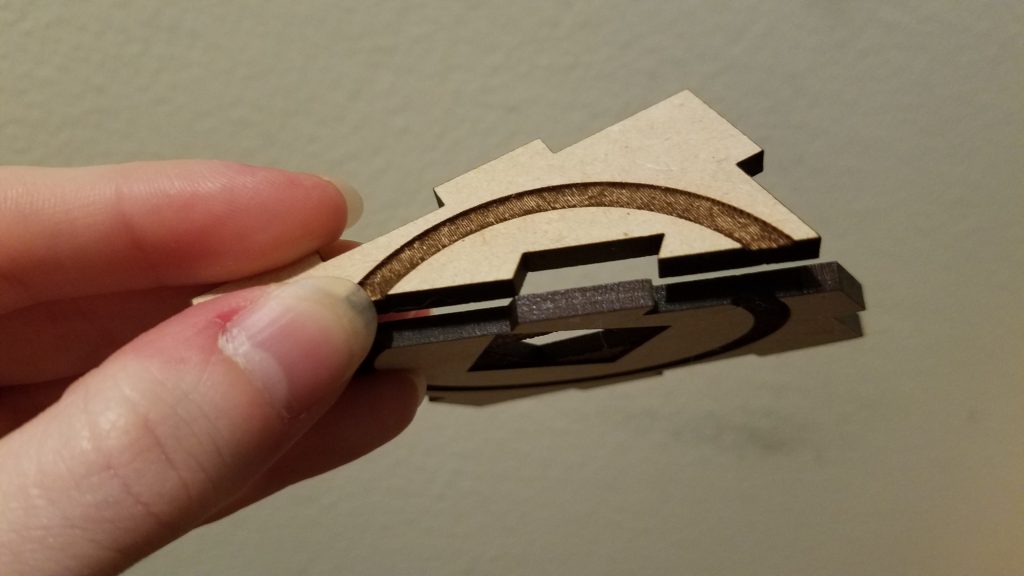
I started testing my outer puzzle in the Makery. Firstly I made a very small test “swatch” piece on the laser cutter to see some of the different settings. Since it was a tester I never saved the illustrator file.

After seeing what the basics of the machine are (as well as realizing I need to remember to indicate material thickness for the final work), I printed a miniature version of the entire puzzle. I also printed a single piece at what was supposed to be full size that had a simple test design on it to see how that would print.
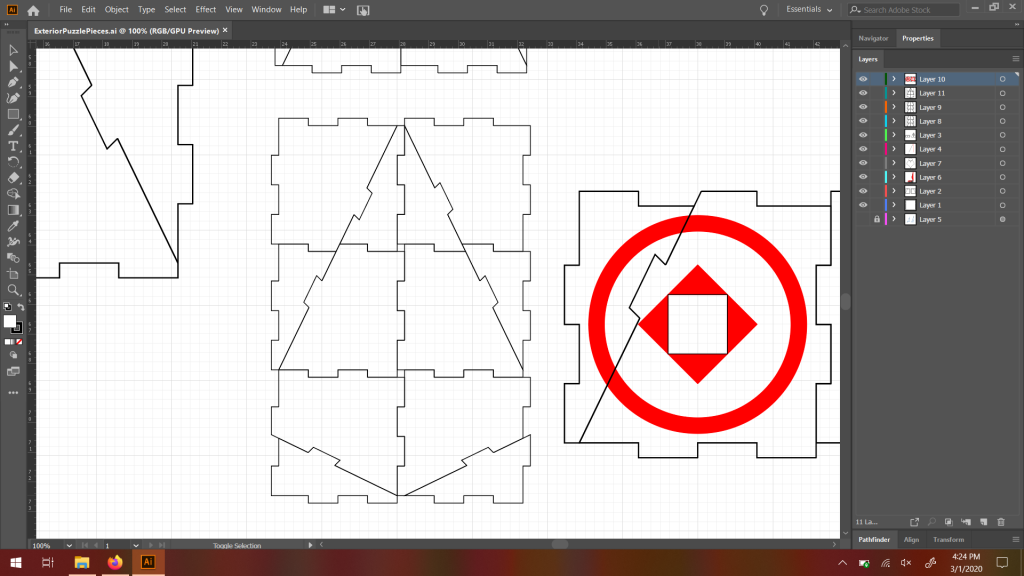

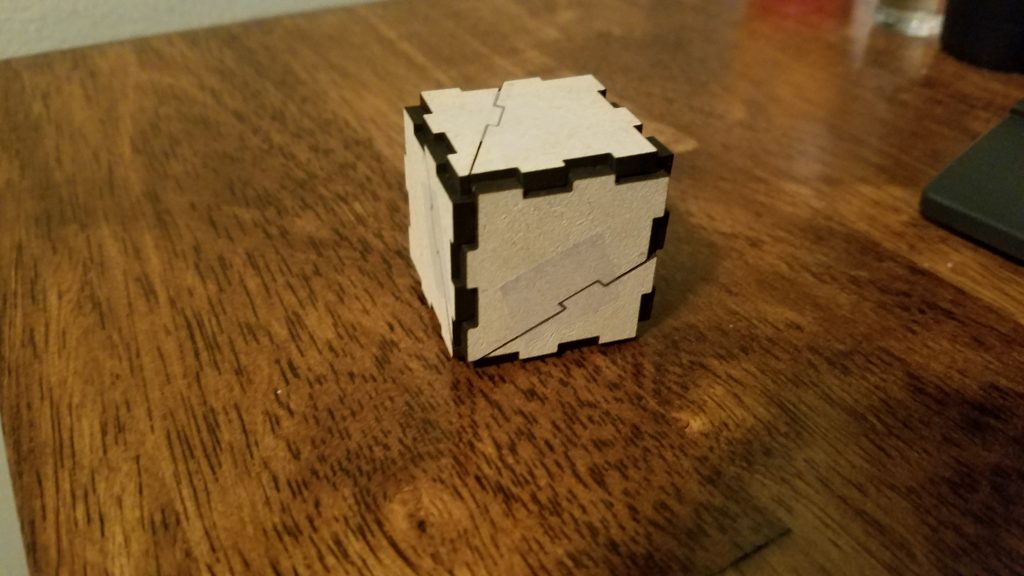
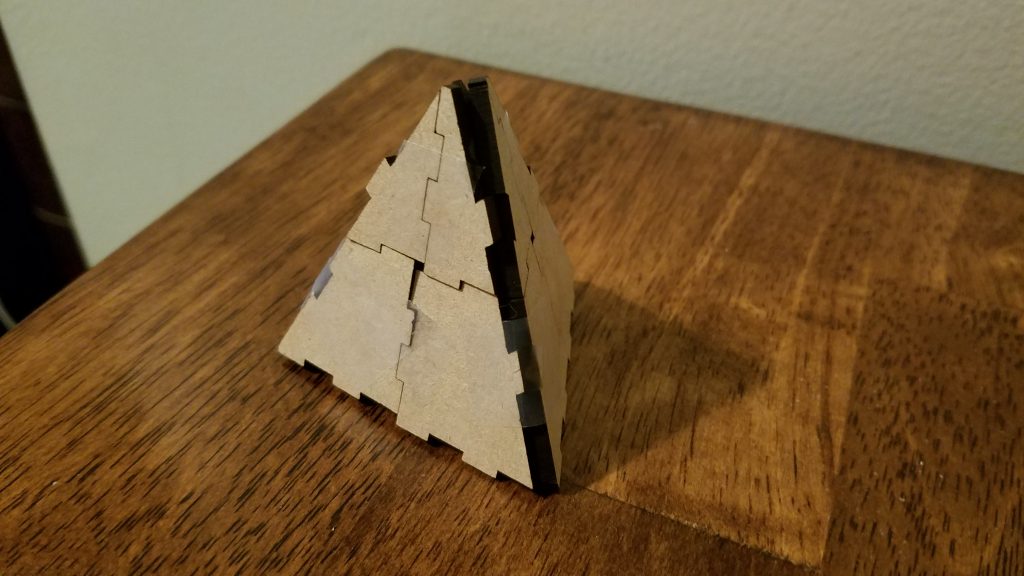

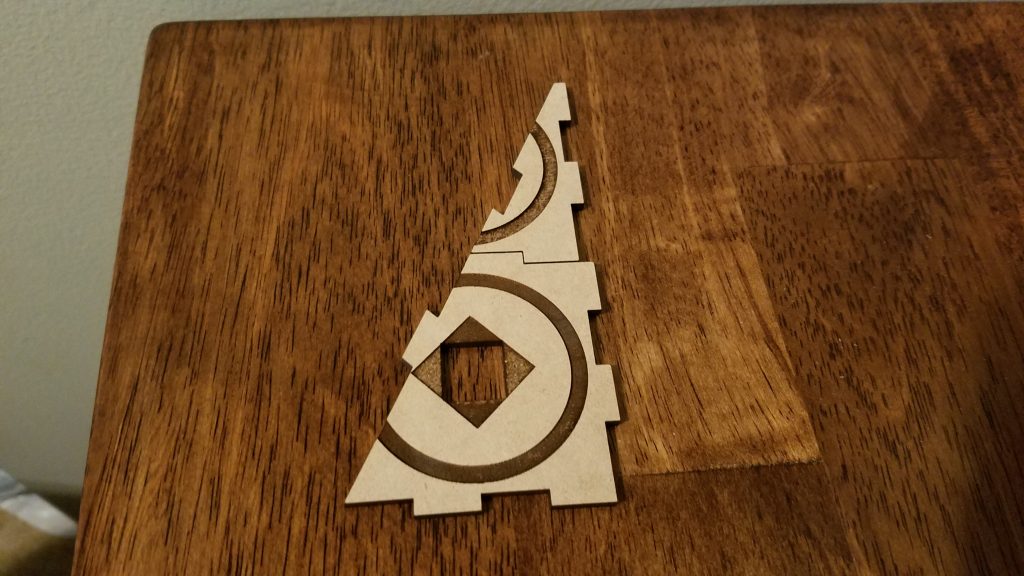
In the file I thought I had specified it at the final puzzle measurements, but printing resulted in a piece almost half the size.

I’m not too sure what happened, but it’s not really a huge deal – just something to make sure to remember to check when printing the final puzzle. It still worked for my testing process.
Both prints definitely gave me direction for the future. The pieces didn’t fit as tight as I want them to, and I was given a few tips as how to help that: one is to have thinner lines in my Illustrator file and the other is to print the pieces separately rather than together as a whole.

Not anything too difficult, and as I will need to print more testers before the final I have time to figure this out.
Another thing I realized is the current tab used to connect the two pieces into a square or triangle half can’t stay as it is. I currently have it at a 45° angle, but when moving the pieces from their cube to pyramid shape, that angle doesn’t allow the pieces to fit together.
Probably should have realized and seen that coming, but that’s why you test things. Again – a simple design fix that, while I’m not worried about, was a lot better to find out about now rather than later.
As for what’s next, it’s just working on these little fixes, keeping up the work on the piece designs, doing more cut tests, etc. all to work toward the final project outcome.
OpenSCAD Testing
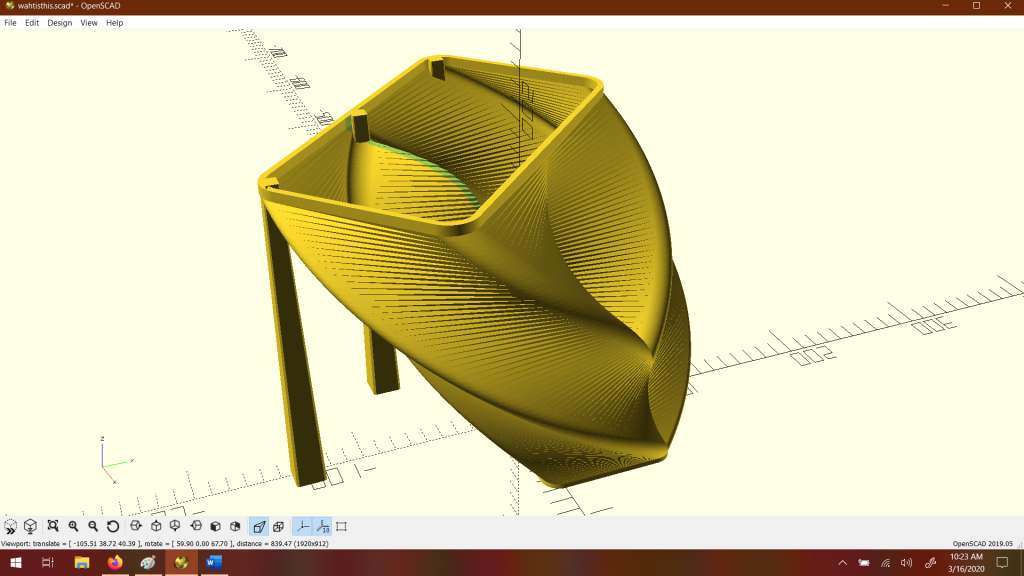
I tried to test a lot of the capabilities of OpenSCAD, but coding is difficult and I kept defaulting to what I had already tried and gotten to work. But I did try a number of things. In general, I found making impossible and weird objects to be the most fun – only a few of these could actually be printed with any good amount of success.
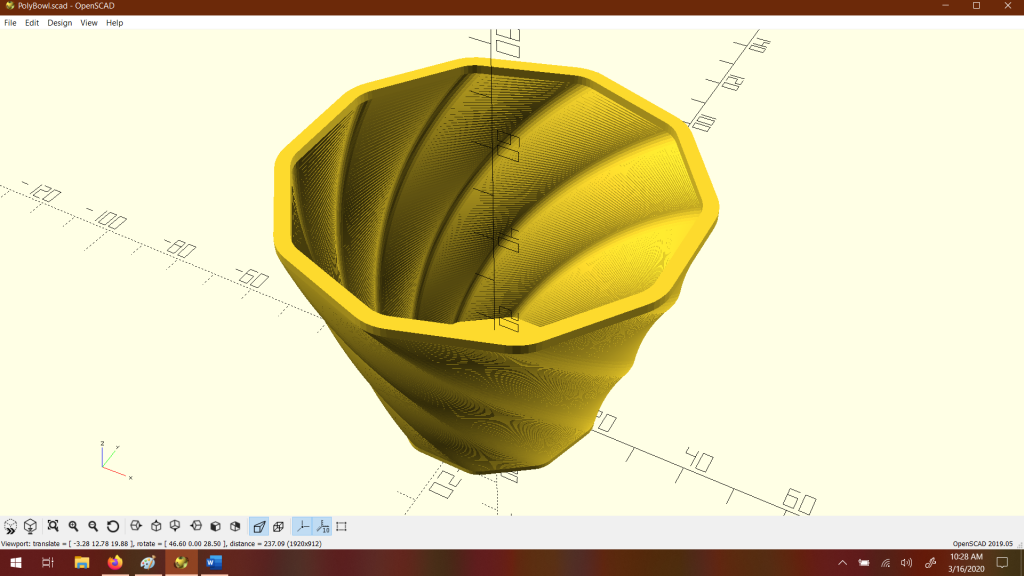
At first I was following both Patrick Conner’s videos, mainly the one on extrusions, and the polybowl video for class so the first few things look similar to those.


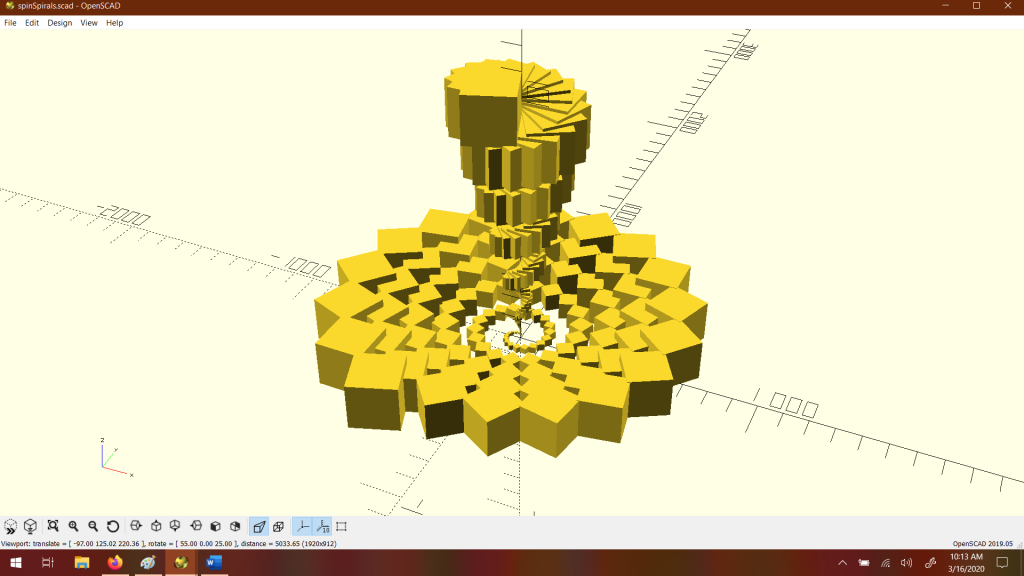
I got interested in the for control and rotate transformation, followed from here, and also wanted to try an animation:
 Then I started working on figuring out polygons and had these two using the same polygon shape base.


I made a more precise polygon and just went bonkers with it:
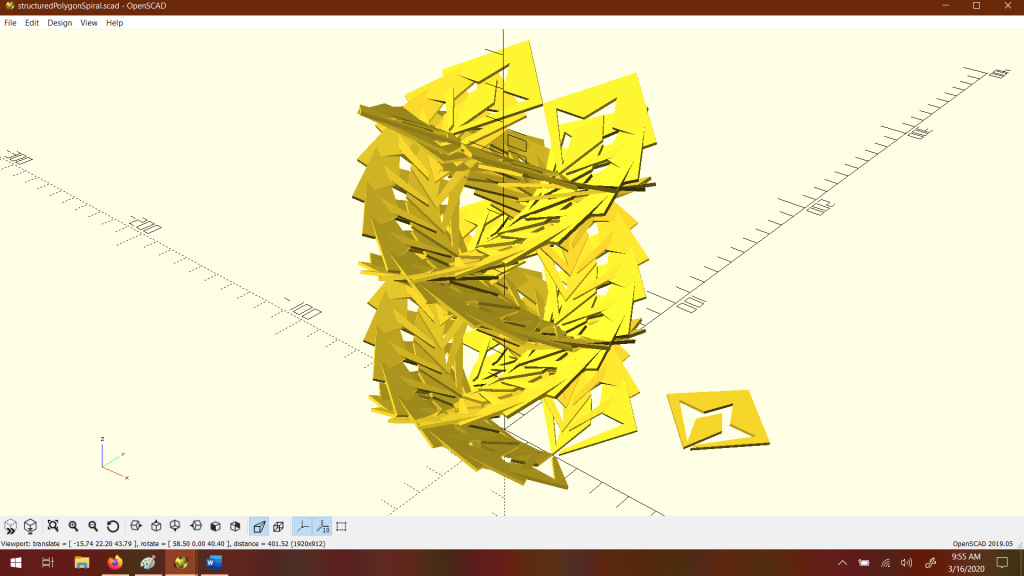

And then the final two things I made:
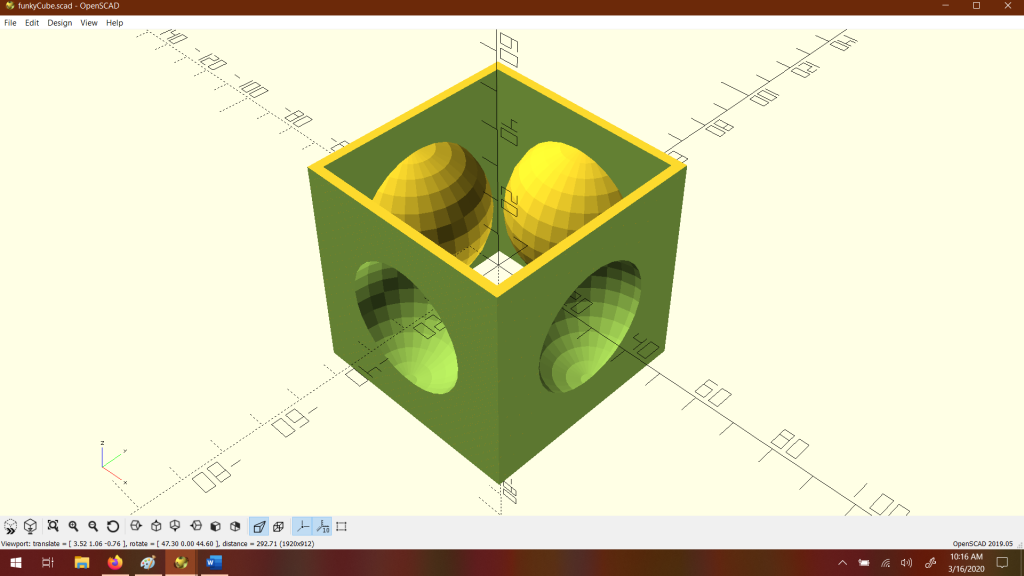

The last thing actually has two versions, the one above and then the ideal version, very smooth, but also its existence makes my computer wheeze: