Hello
Hello. I’m Patricia Wright. I’m currently a Senior at James Madison University (JMU). I transferred to JMU a few years ago from Northern Virginia Community College (NOVA). I’m a Geology Major.
I have past experience in 3D Modeling and Art in traditional art and digital media. I’ve used 3D Studio Max software back in high school for 3D Animation and 3D Printing, and also the Adobe Suite at NOVA. This is both a new and familiar experience to me as I learn these other software. A goal of mine would be to apply this knowledge to the field of Geology and see if I can make models people can use in teaching aids in Geology.
In my free time I like to work on puzzles of different sorts from number puzzles, word puzzles, to puzzles in video games, and tactile puzzles. I also like to craft things with polymer clay, crochet, and draw.
The picture below is from my Ireland Field Camp from summer 2019. I like exploring outside and tend to take a lot of photos of nature and architecture.

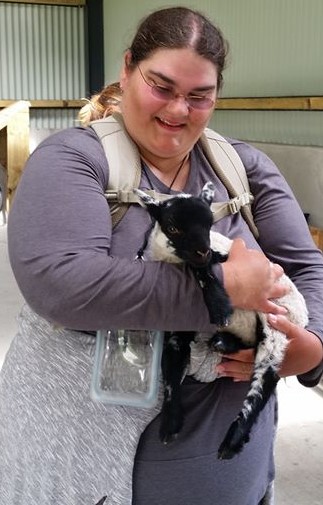
And one of me holding a baby lamb.
You can find me online at the following links:
Initial Puzzle Research
The first puzzle I picked is the Jigsaw puzzle. How I want to make this puzzle is not like an ordinary Jigsaw with defined borders and connected pieces. I want to make custom shapes for the puzzle with the goal of getting all the shapes within the tray. Some of these puzzles can be very challenging as it can require a few combinations or one specific combination to solve. I have linked a playlist in this post with videos from Chris Ramsay and Mr. Puzzle on Youtube. Their channels are both linked at the bottom of the post. Another idea for the Jigsaw idea would be making a fractal design to lay on the cut out tray.
The second idea I have for a puzzle is the Hedgehog in a Cage puzzle. The original puzzle was a wooden cage and a ball with wooden spikes on the inside. The goal is to remove the Hedgehog from the cage. There is usually some type of variation in the cage itself that allows you to remove what’s inside the cage and the piece inside the cage can have movable parts or areas of the figure where you have to angle the figure on the inside to remove from the specific location of the cage. I want to make a different design for this puzzle than the original Hedgehog and cage. Below is a video from Mr. Puzzle with a bird in the cage.
References
Wikipedia Hedgehog in a Cage
Thingiverse Puzzle Print
1/21/2020
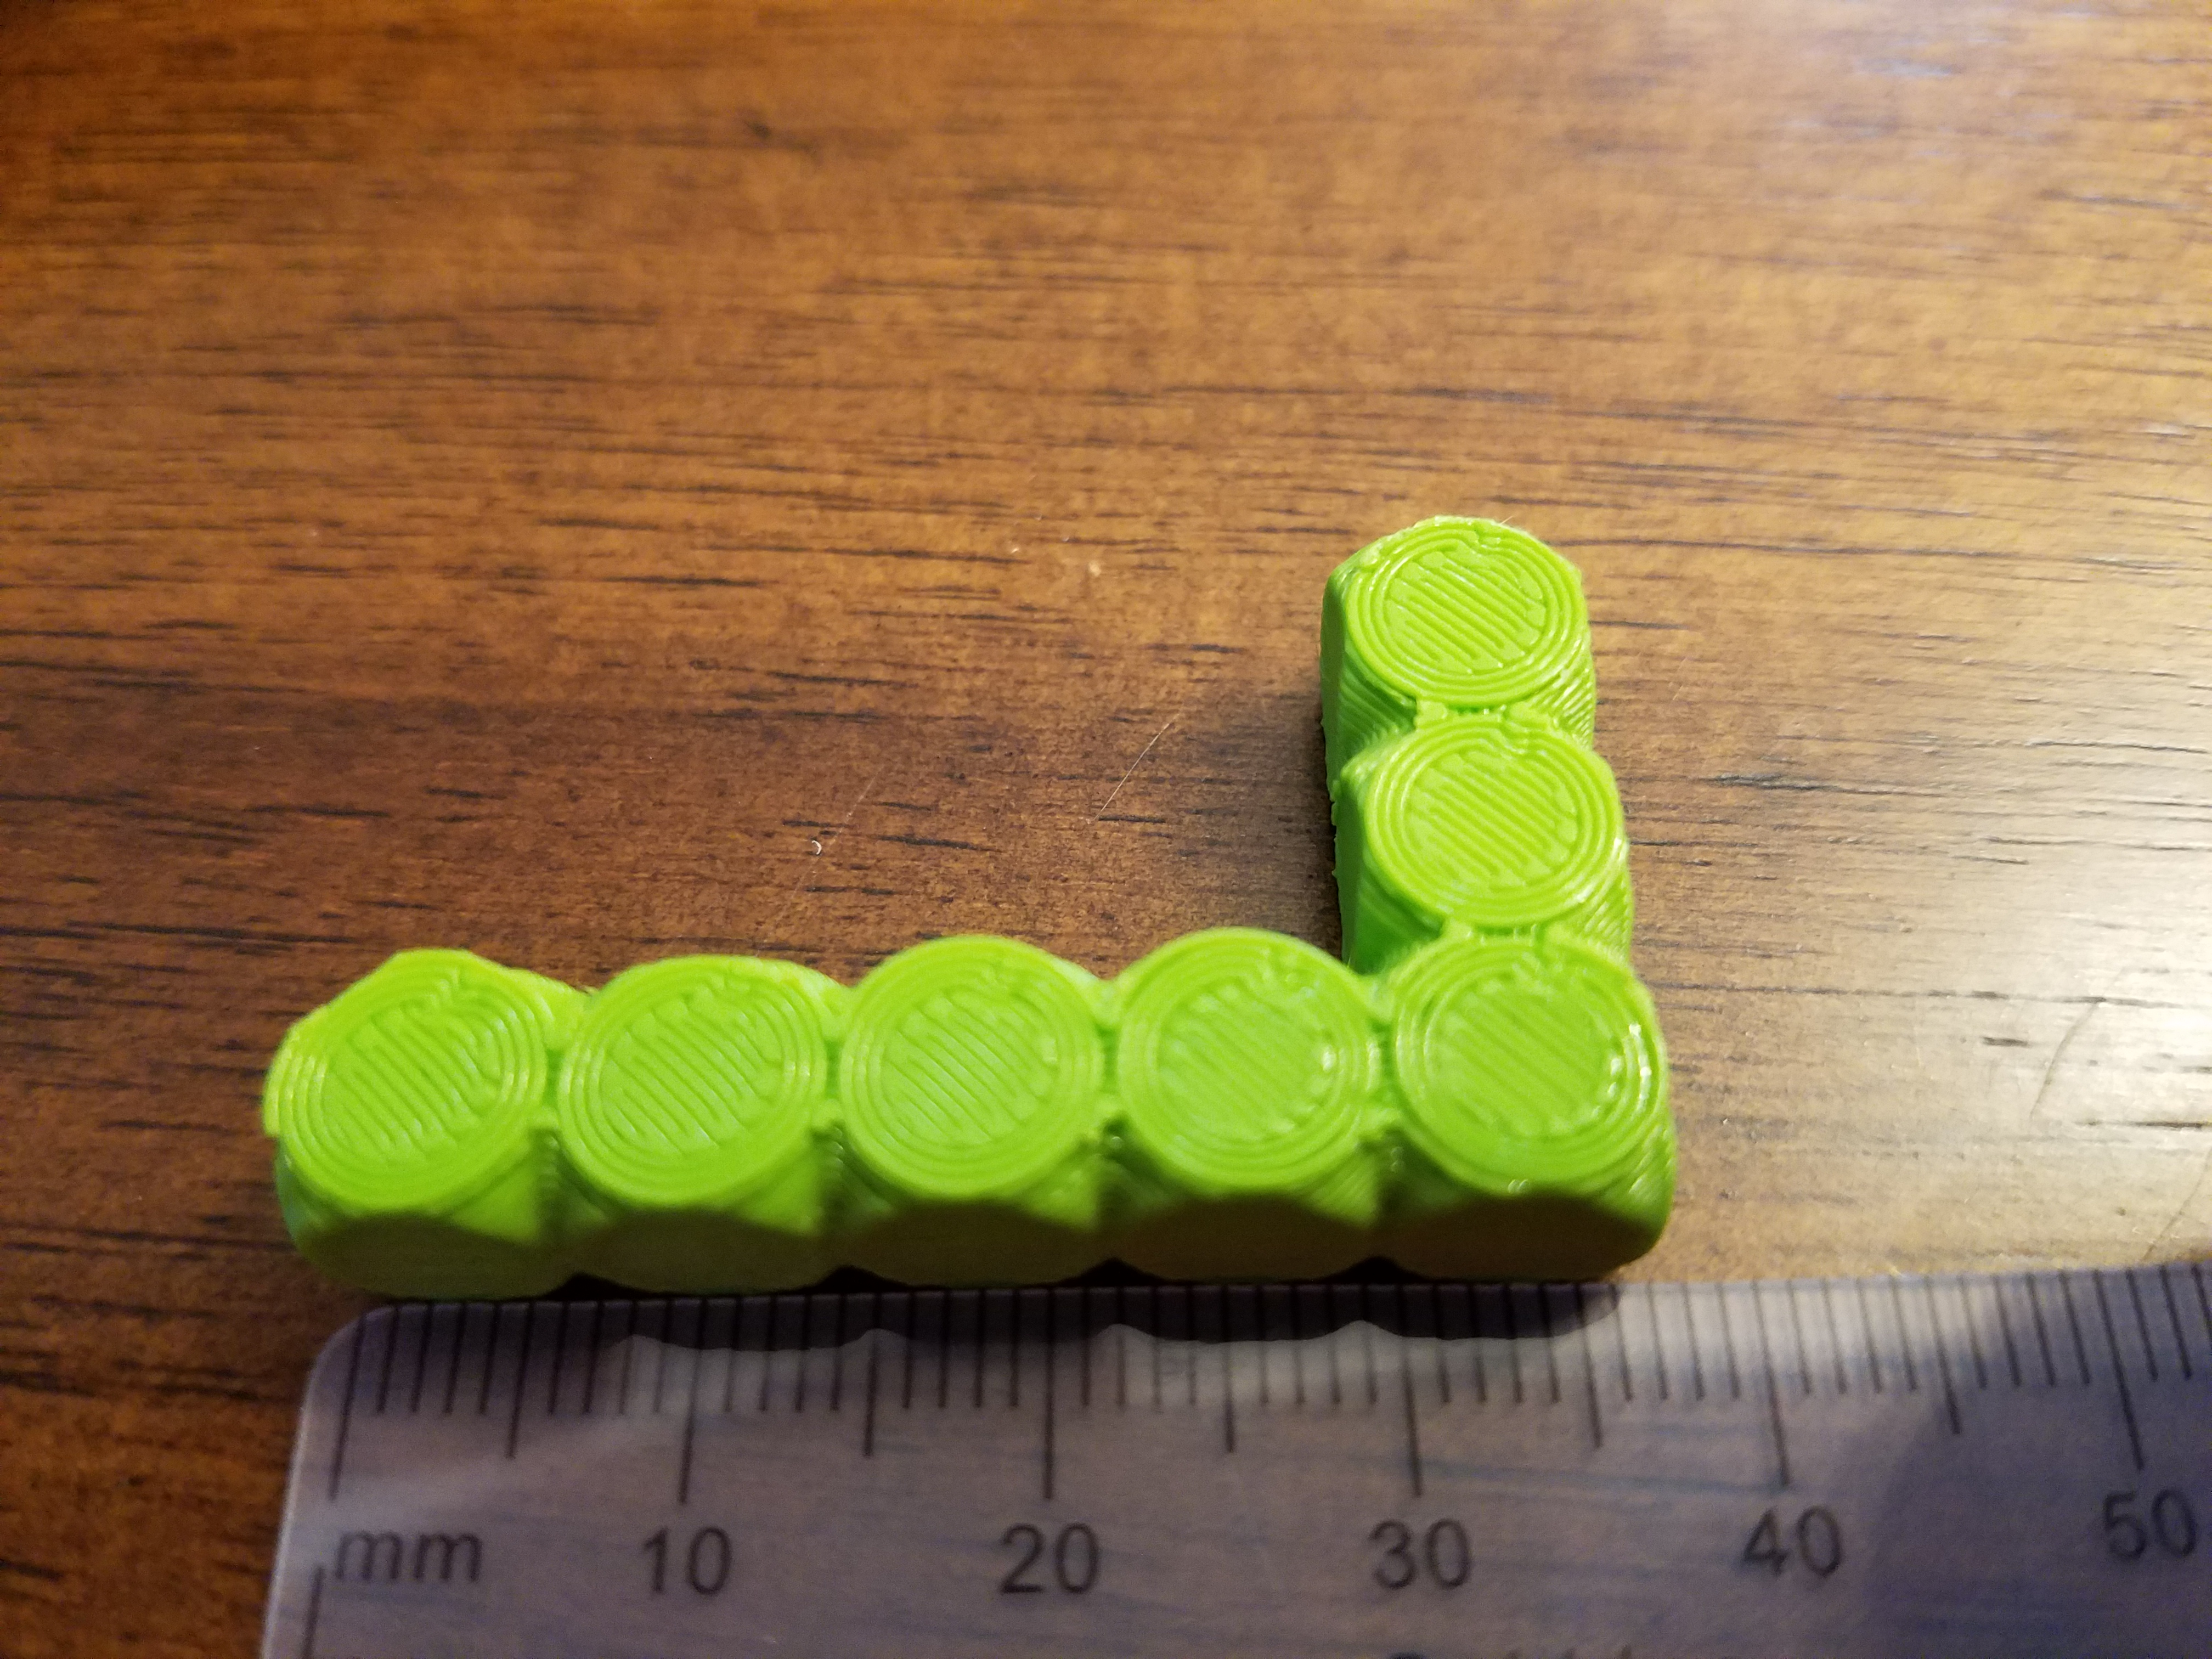
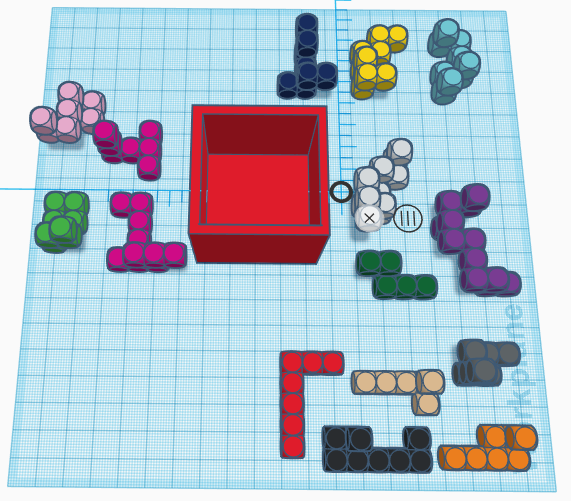
Out of the four Soma Cube puzzles in the Cube Puzzle Quartet from mathgrrl on Thingiverse I picked the Coffin Cube. It’s rated at a level 3. It doesn’t look hard at first glance but it is challenging. It took me about an hour of struggling until I finally solved it. There is only one solution with this tricky puzzle and a very good brain teaser. I came close to solving it quite a few times. I would like to print boxes and the other 3 cubes part of this collection. The puzzle is not large. It’s a perfect pocket puzzle size if one wants to put it in their bag or backpack and take it with them. Even display it on your computer desk. The cube is about 30 mm long.

Puzzle Credit: Cube Puzzle Quartet from mathgrrl on Thingiverse
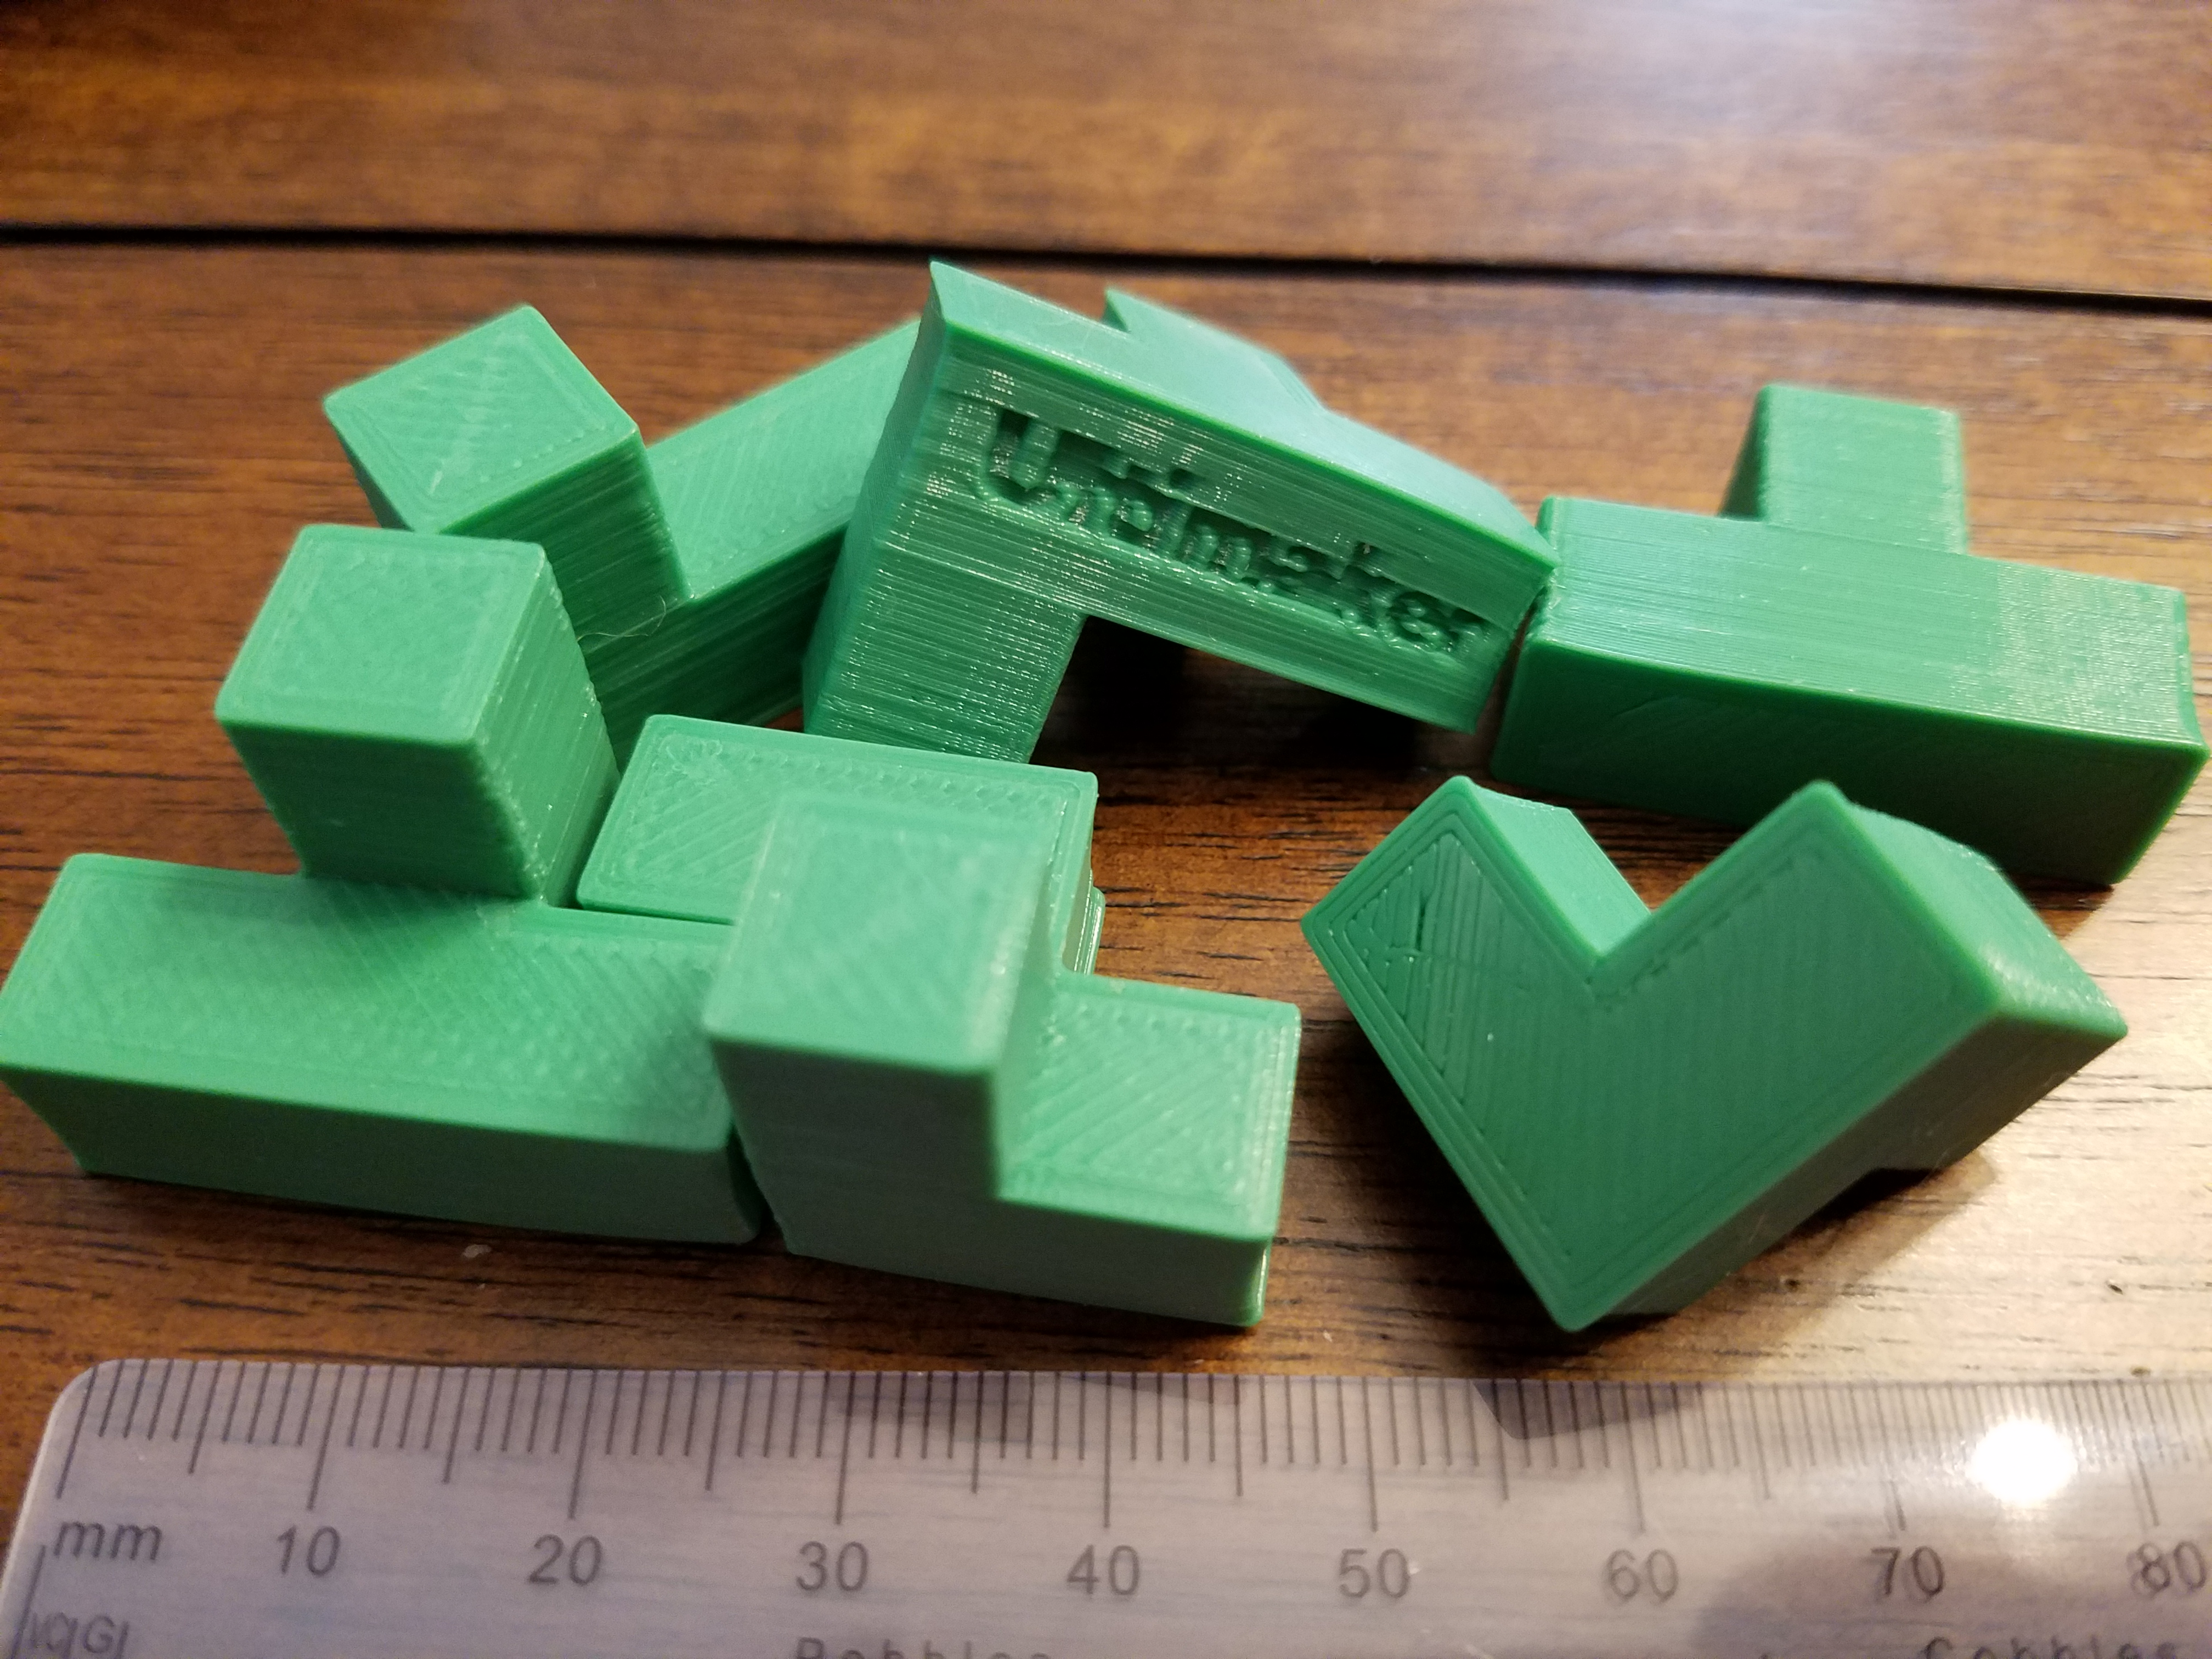
Puzzle Credit: Cube Puzzle Quartet from mathgrrl on Thingiverse

Puzzle Credit: Cube Puzzle Quartet from mathgrrl on Thingiverse
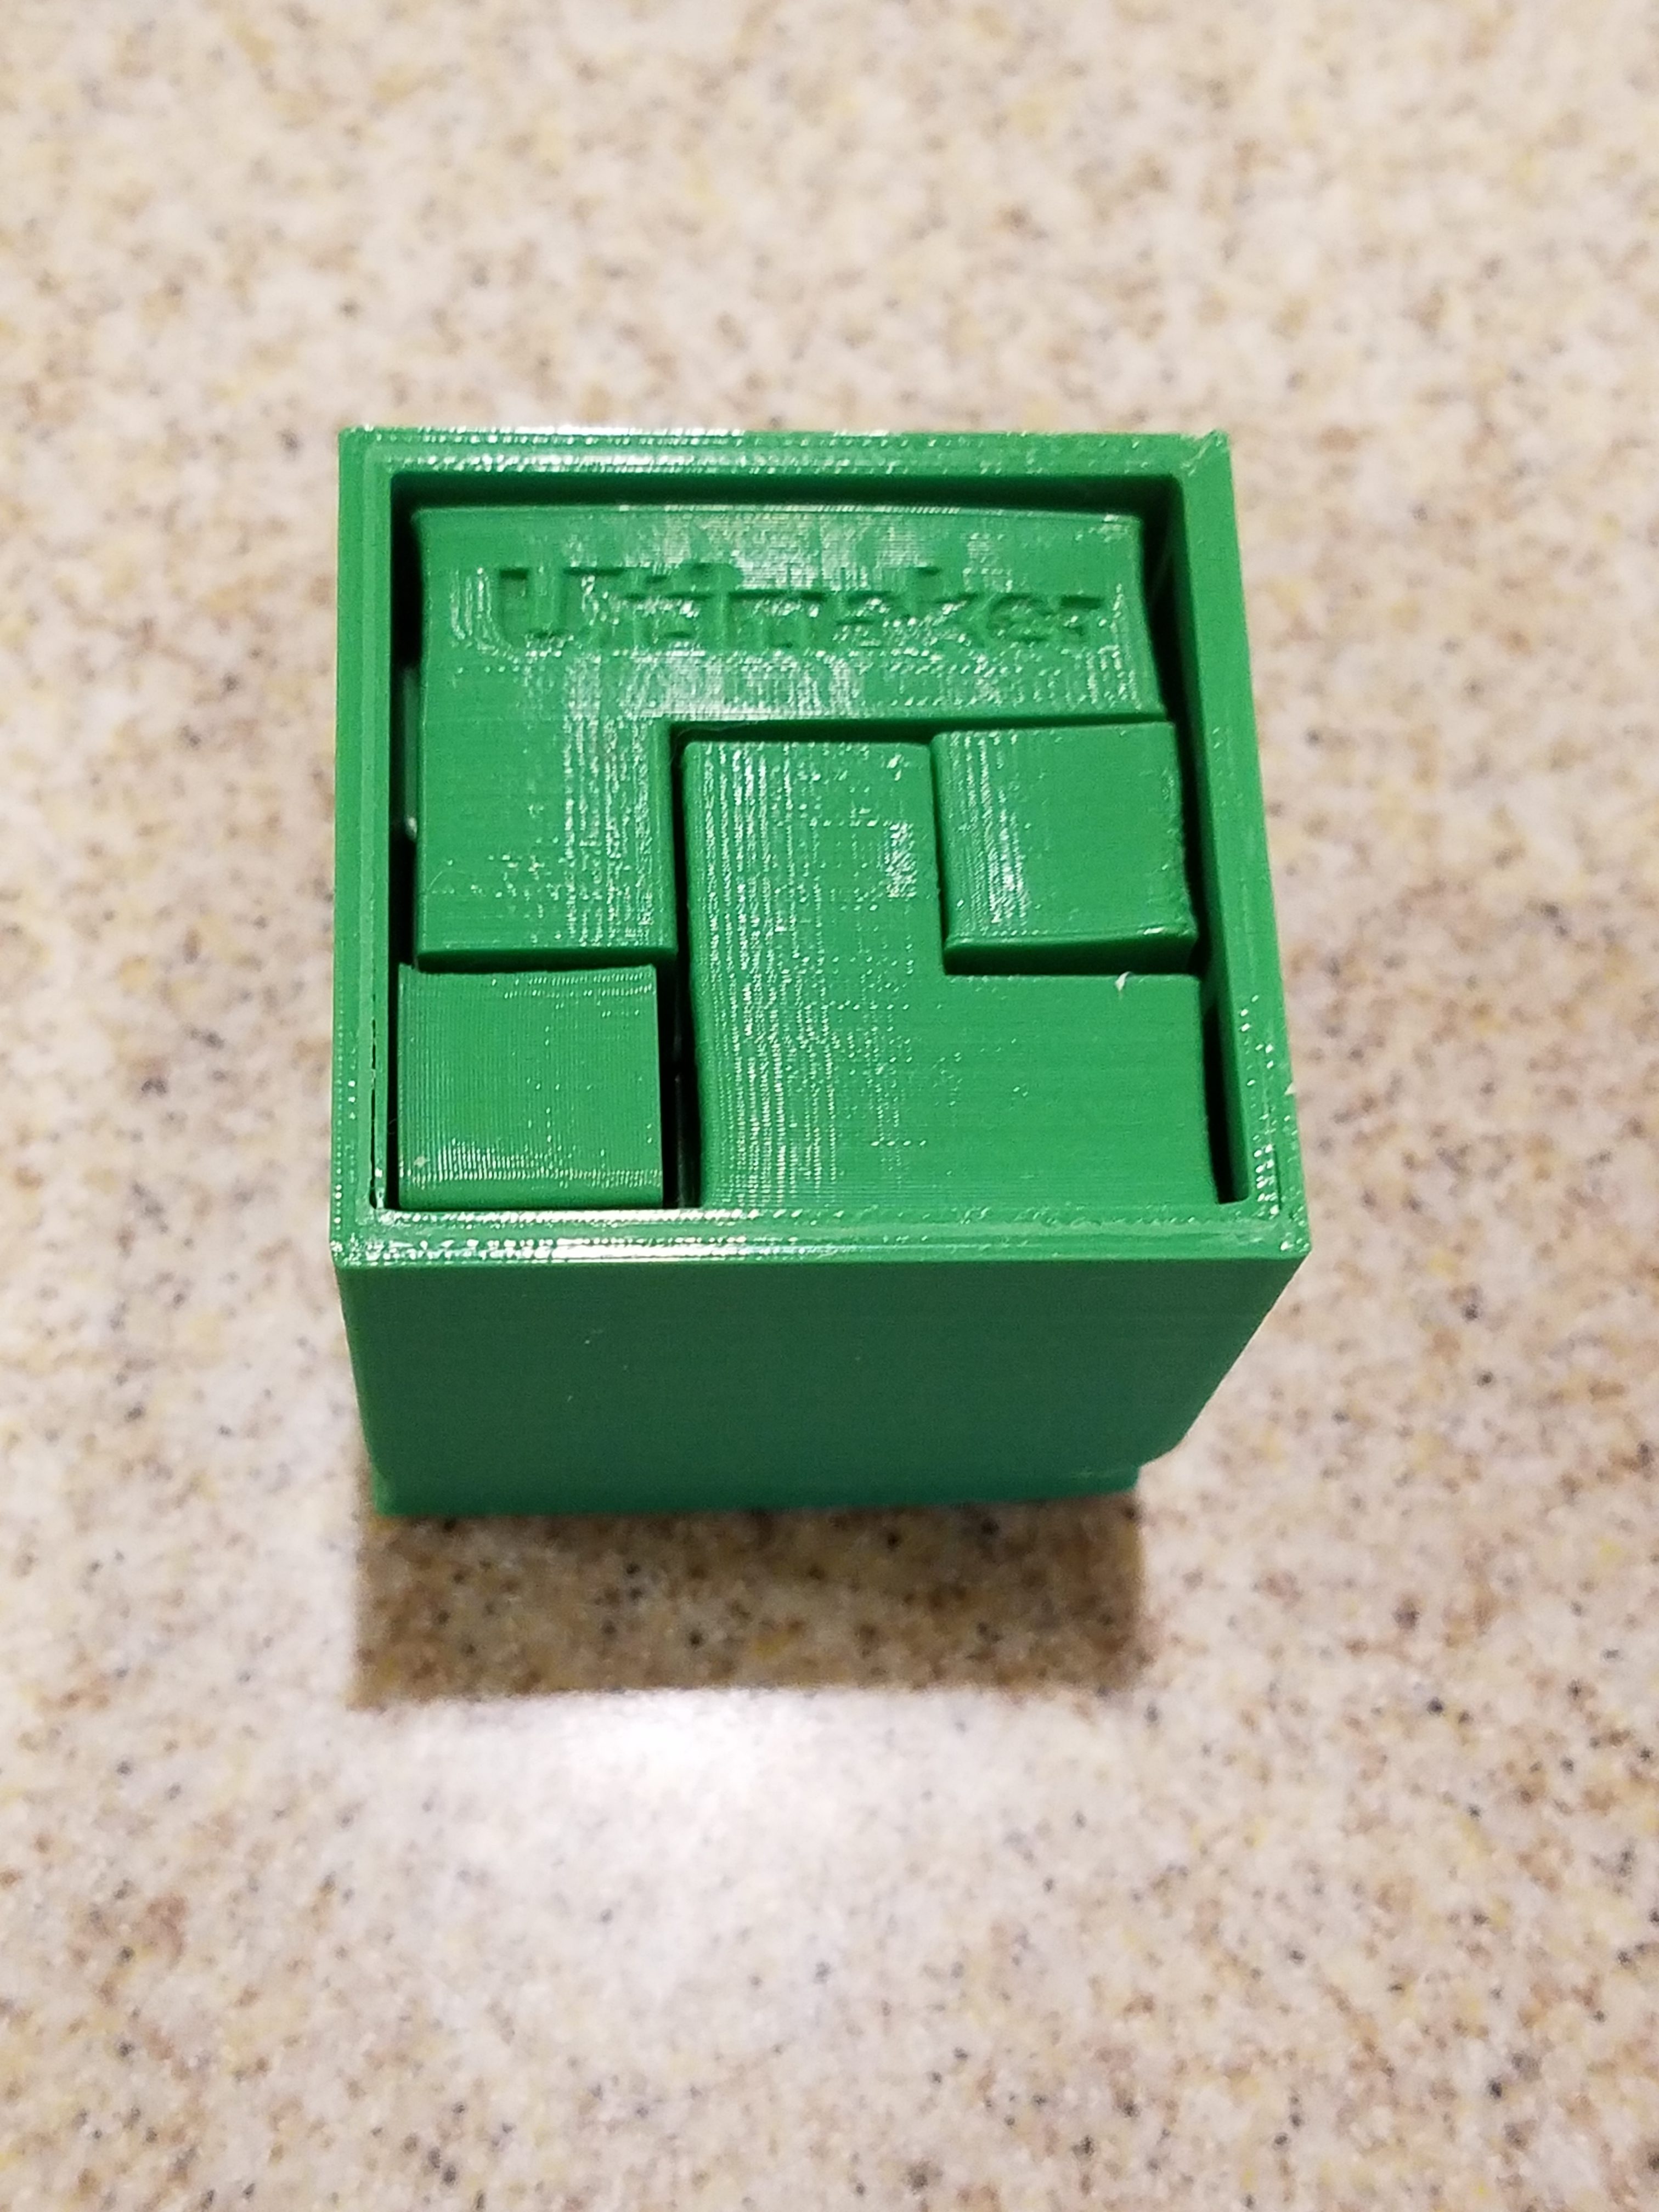
Puzzle Box Credit: Patricia Wright
Puzzle Credit: Cube Puzzle Quartet from mathgrrl on Thingiverse
About the printing:
1. Filament used is a dark green pla plastic.
2. I did not use a brim for the puzzle pieces in the print, though I could have to prevent the base of some of the pieces from curling.
3. I did use a brim for the custom box I made for it. I still had some slight corner warping with the printer I was using for this print. The print settings could be adjusted next time. I have watched a few youtube videos and some suggested to change the printer settings and lower the temperature of the print slab or to turn off the temperature of the print slab.
4. What I would like to do next is prepare the Soma Cube for finishing. Lightly sand paper the box and pieces then spray a coat of semigloss on it.
Here’s my Make.
Reference
Cube Puzzle Quartet from mathgrrl on Thingiverse.
13 Things I Wish I Knew When I Got Started from The 3D Printing Zone
Soma Cube Wikipedia Article
Tinkercad Cube Puzzle
1/21/2020
My puzzle comes in 3 different designs, but lots of failures as a learning experience. I love the design of the first one the most because I like the look and feel of it. I feel this would have been made better if it was made a larger puzzle with a more solid core with pla. The first one is a Tetris style Soma Cube puzzle. It is challenging to put together and has 15 pieces all together. The pieces should slide and click together without much force, but I feel that the size of the puzzle made the structure weaker along with the edges of the cubes causing a seam weakness for snapping.
Puzzle Credit: Patricia Wright
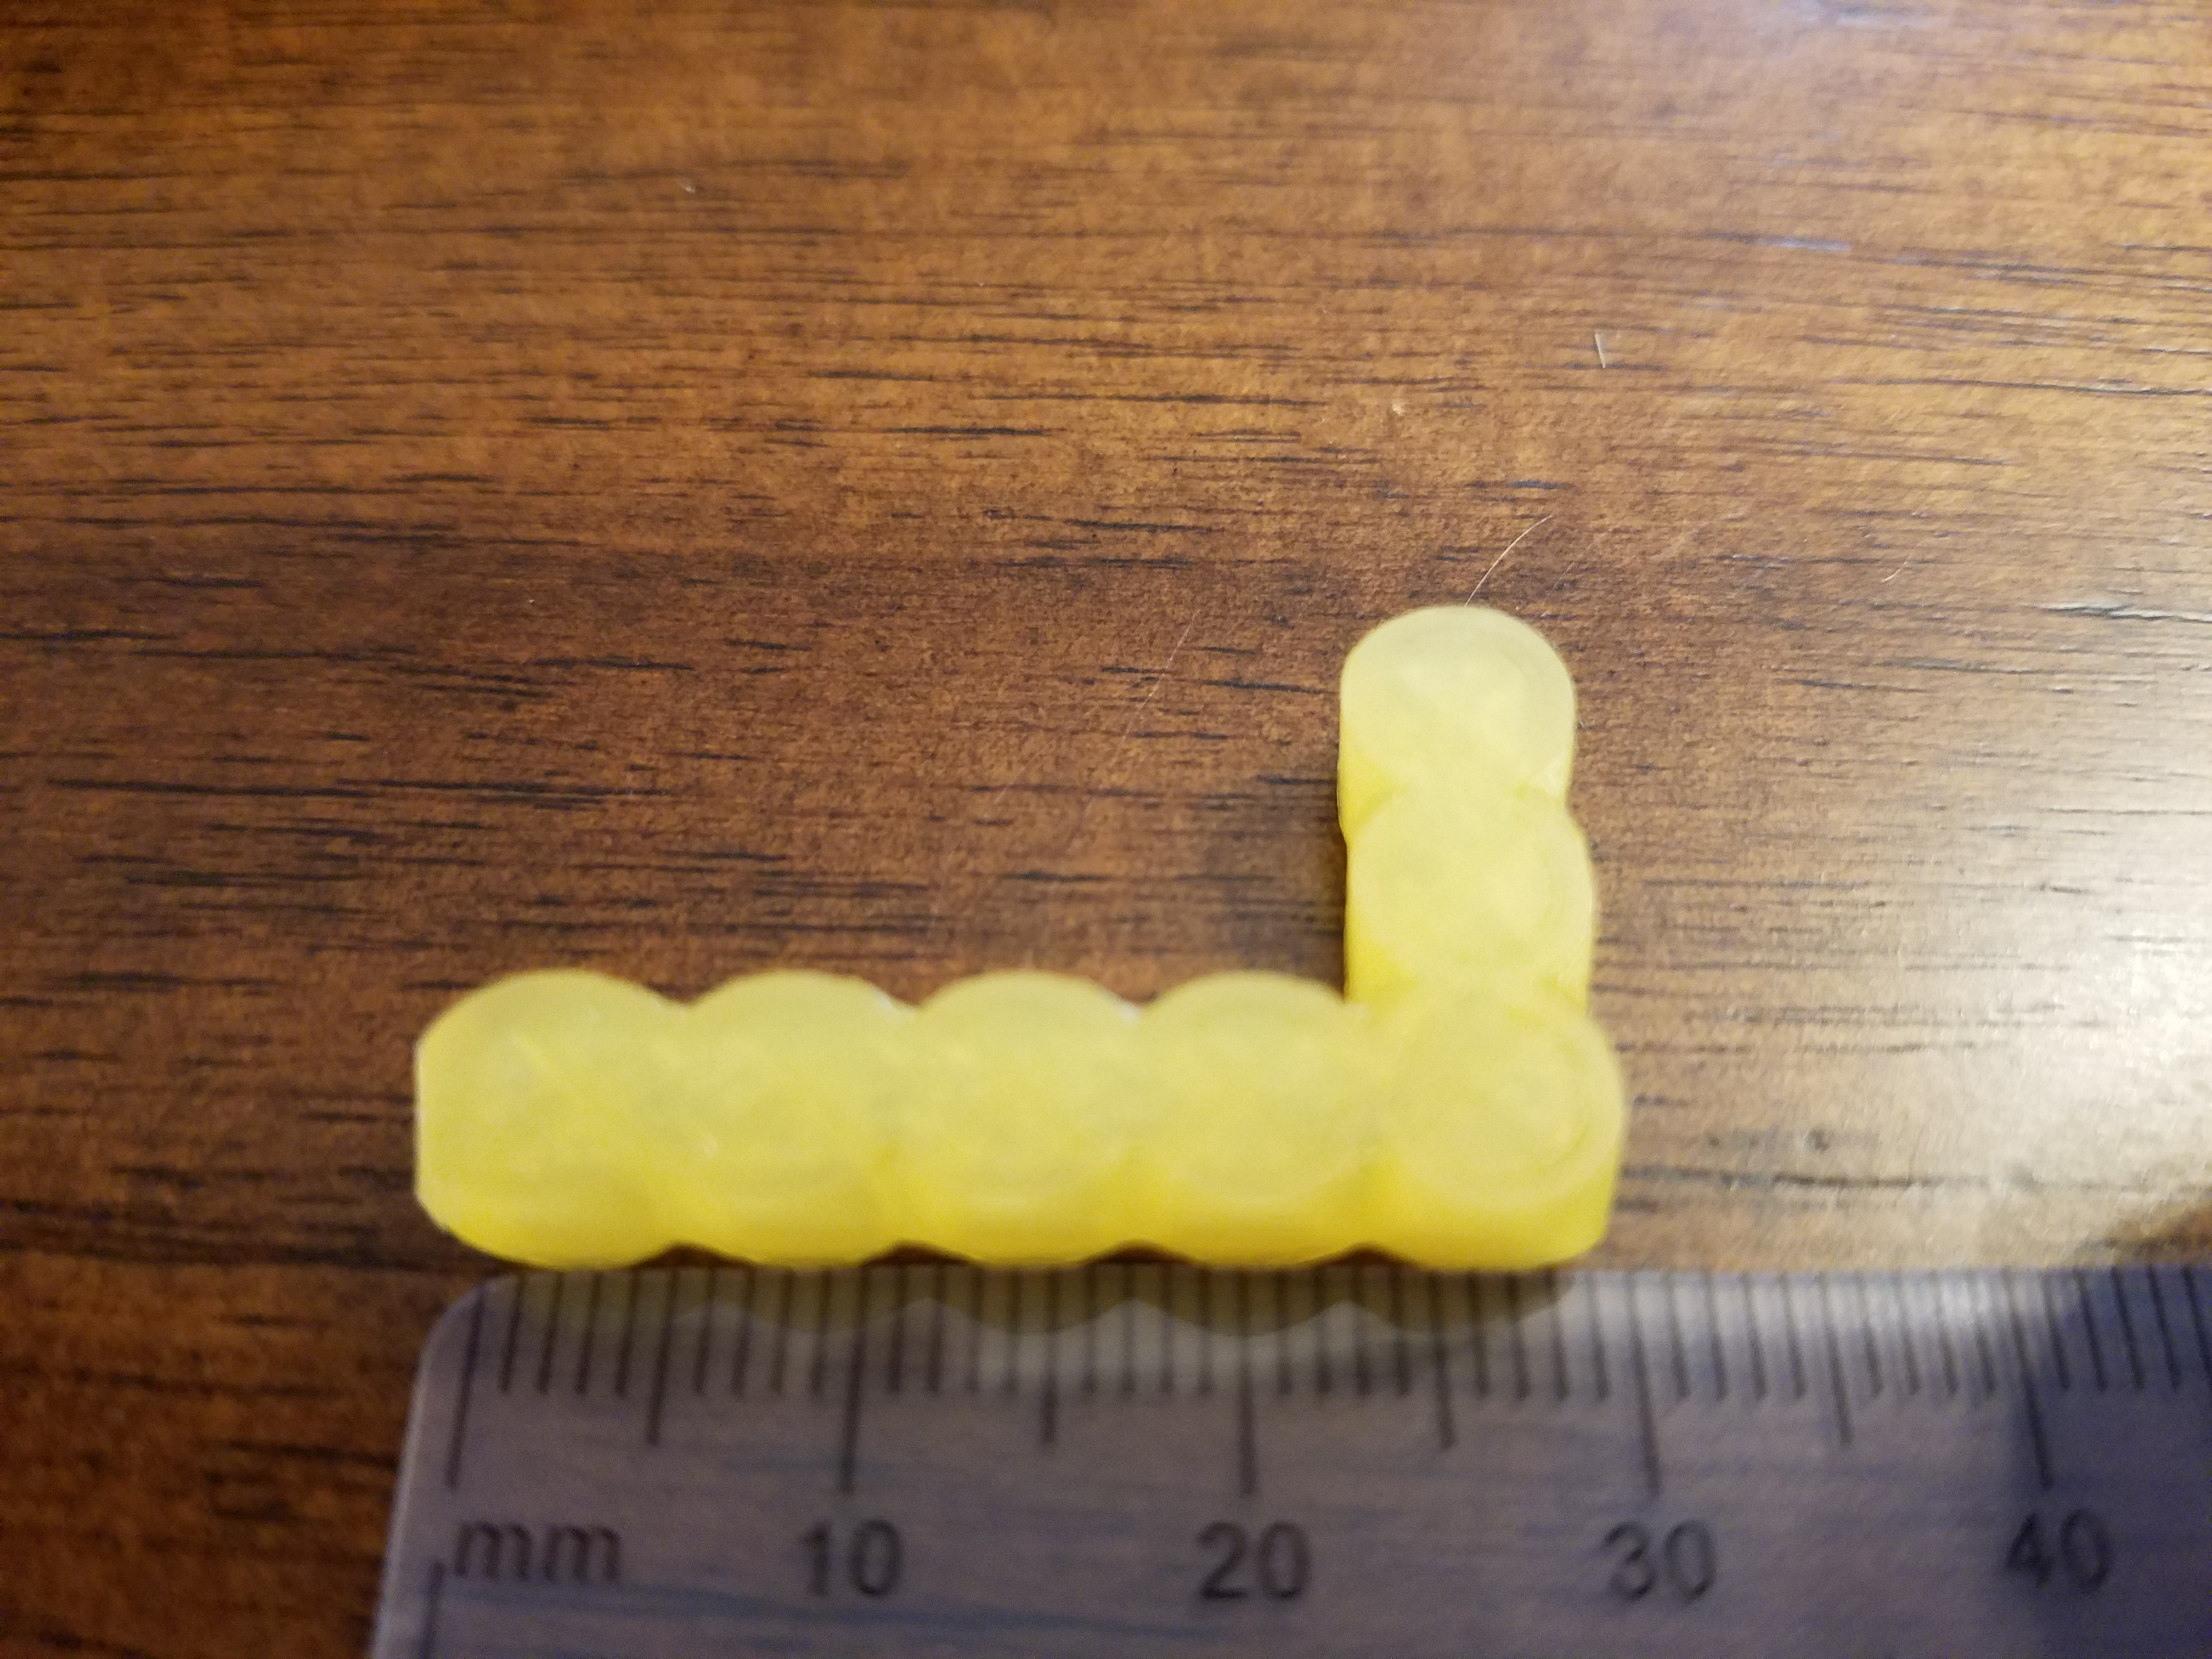
My first test run of this puzzle I printed on a Lulzbot Mini with a translucent yellow pla plastic. I wanted to test the size of it. The first run showed me that it was too small for a puzzle in this size at just under 30 mm. It could work but details were lost and I wanted the details to come out of this design like “stacking cubes”.
Puzzle Credit: Patricia Wright
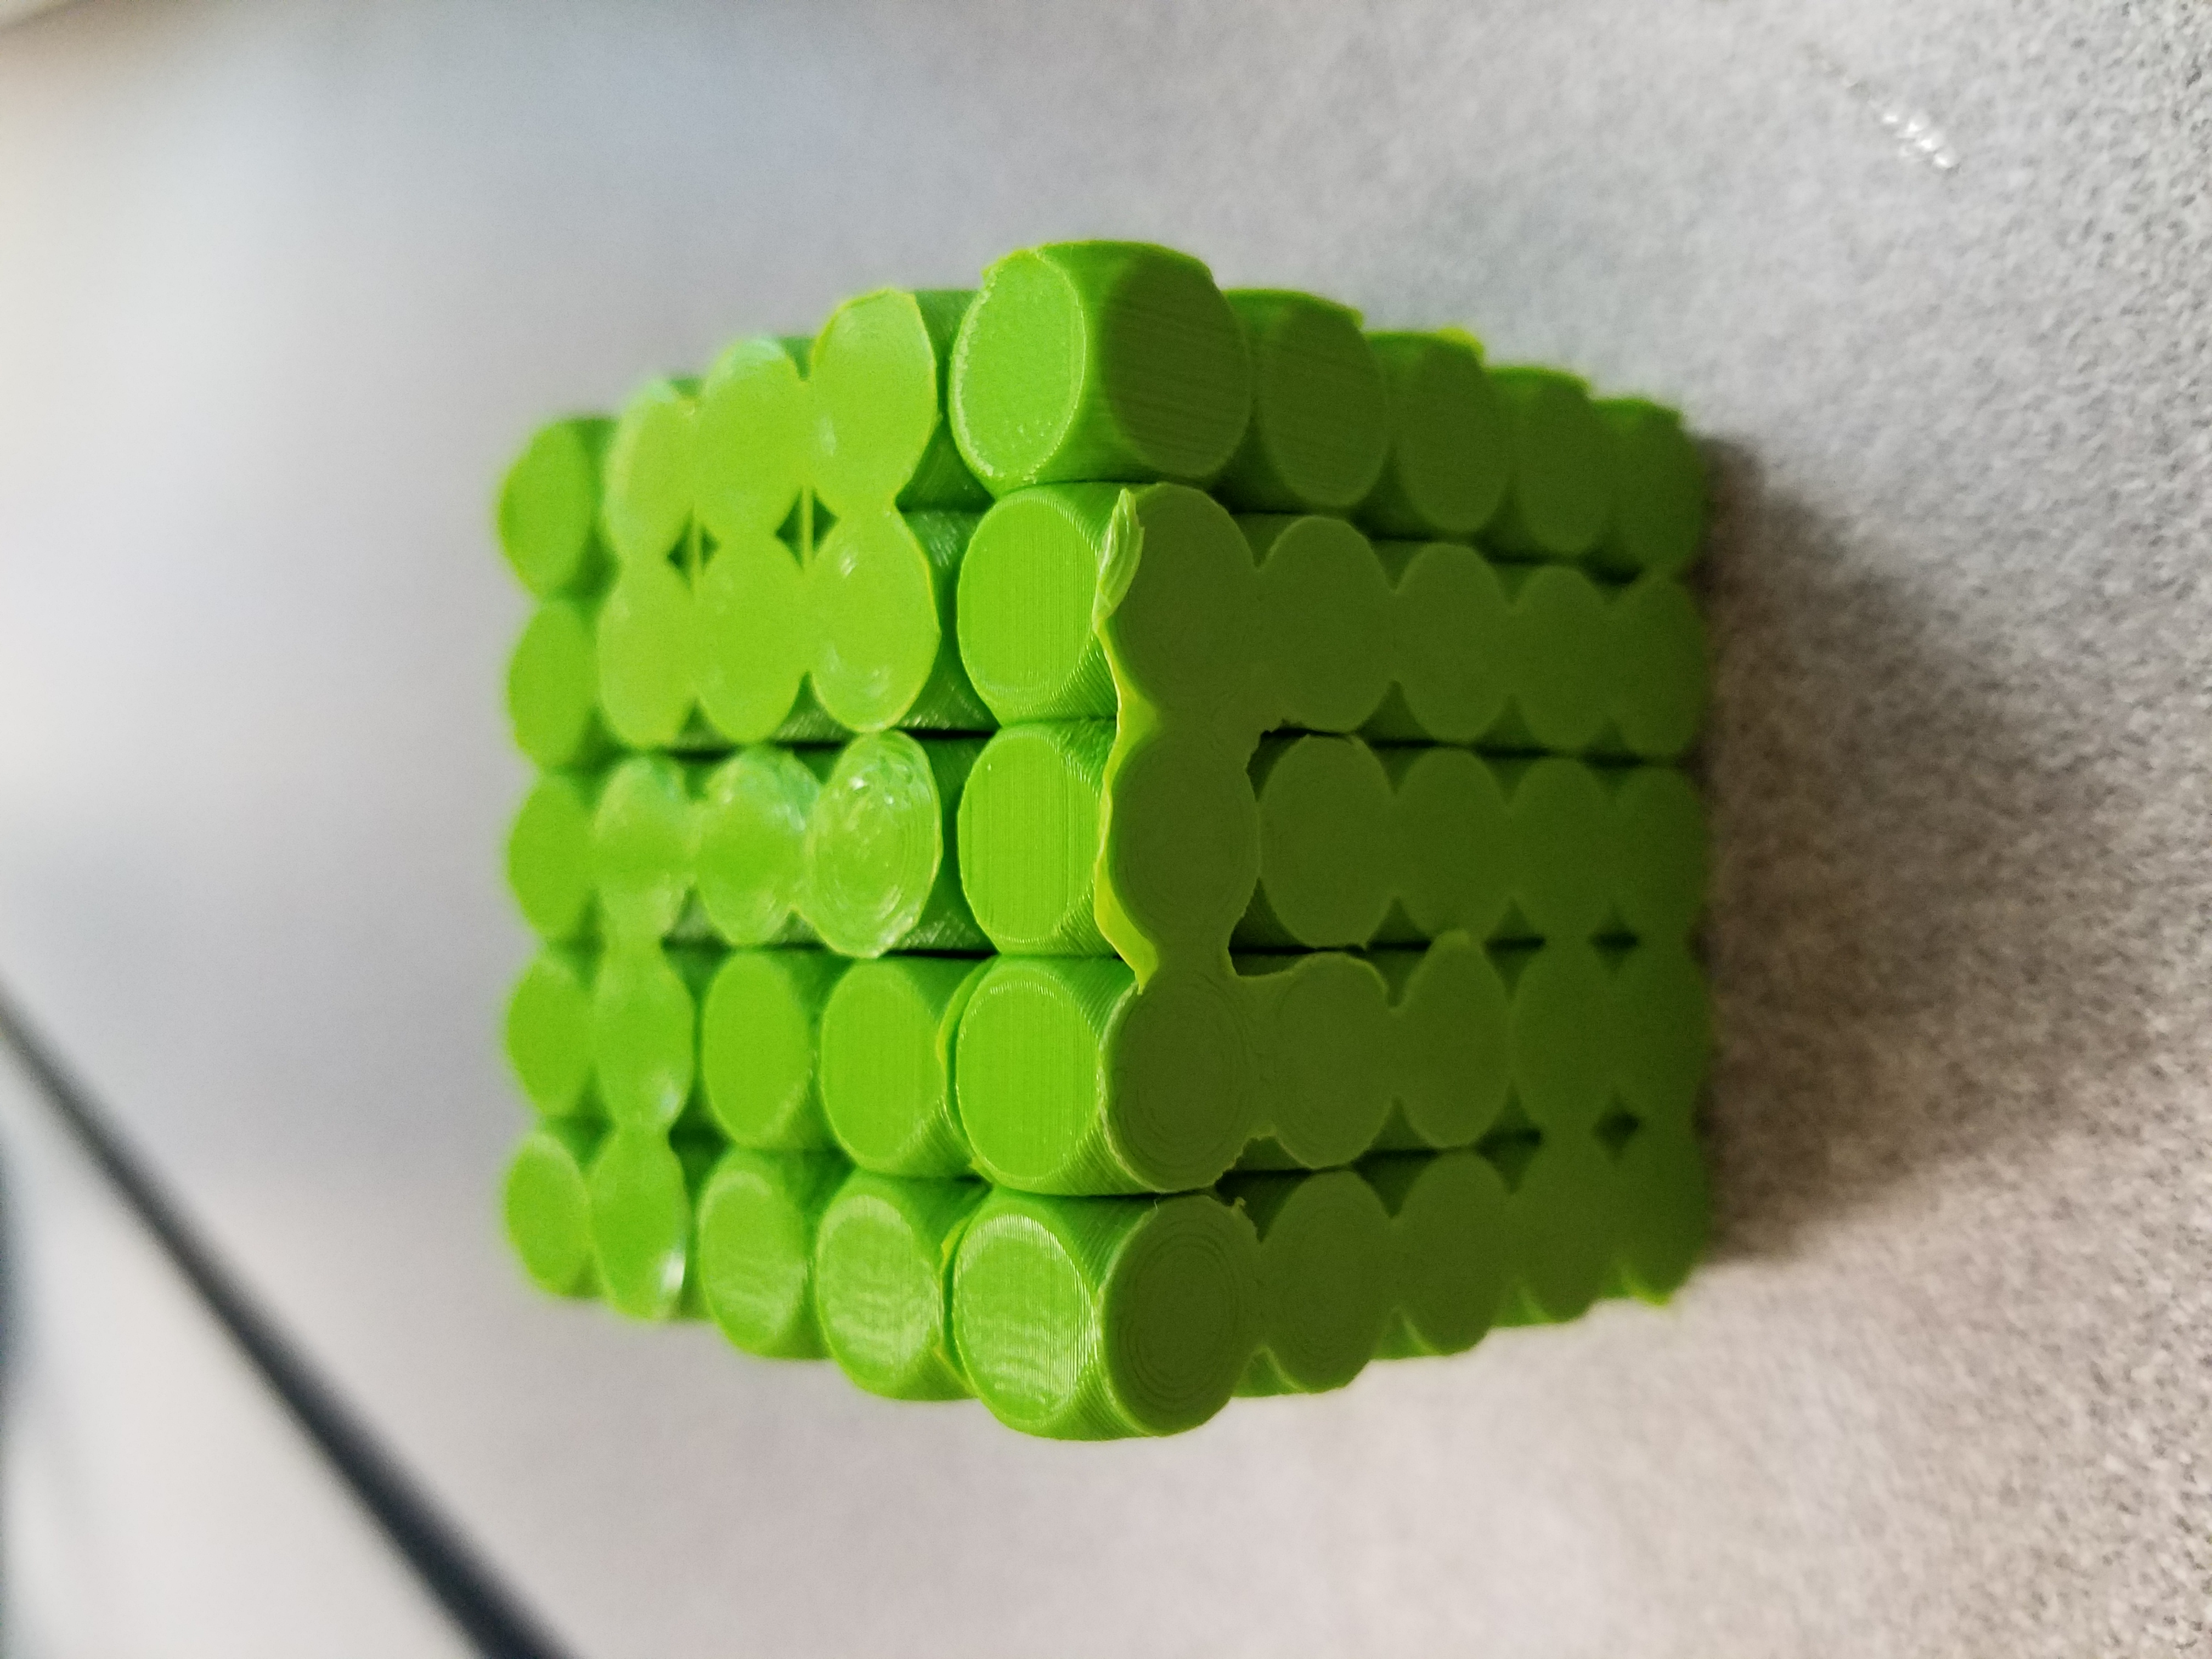
The second print I printed on a Ultimaker 3 with a lime green pla plastic. I scaled up the size of the puzzle pieces around 37 mm. The print needed to be stabilized with a brim because the print head would knock of the first rounds of the puzzle. The size itself looked like it was going to be a stable puzzle.

Puzzle Credit: Patricia Wright
Puzzle Box: Patricia Wright
With the more complex Tetris pieces they needed supports. I’m not entirely sure if I like the support method that the printer used. The bottoms of some of the cubes ended up short and a mess of noodle tangles of pla plastic. The complex ones do require support, so if I decide to reprint this I want to check out the support section of the program to see if there is a better method of printing these pieces.
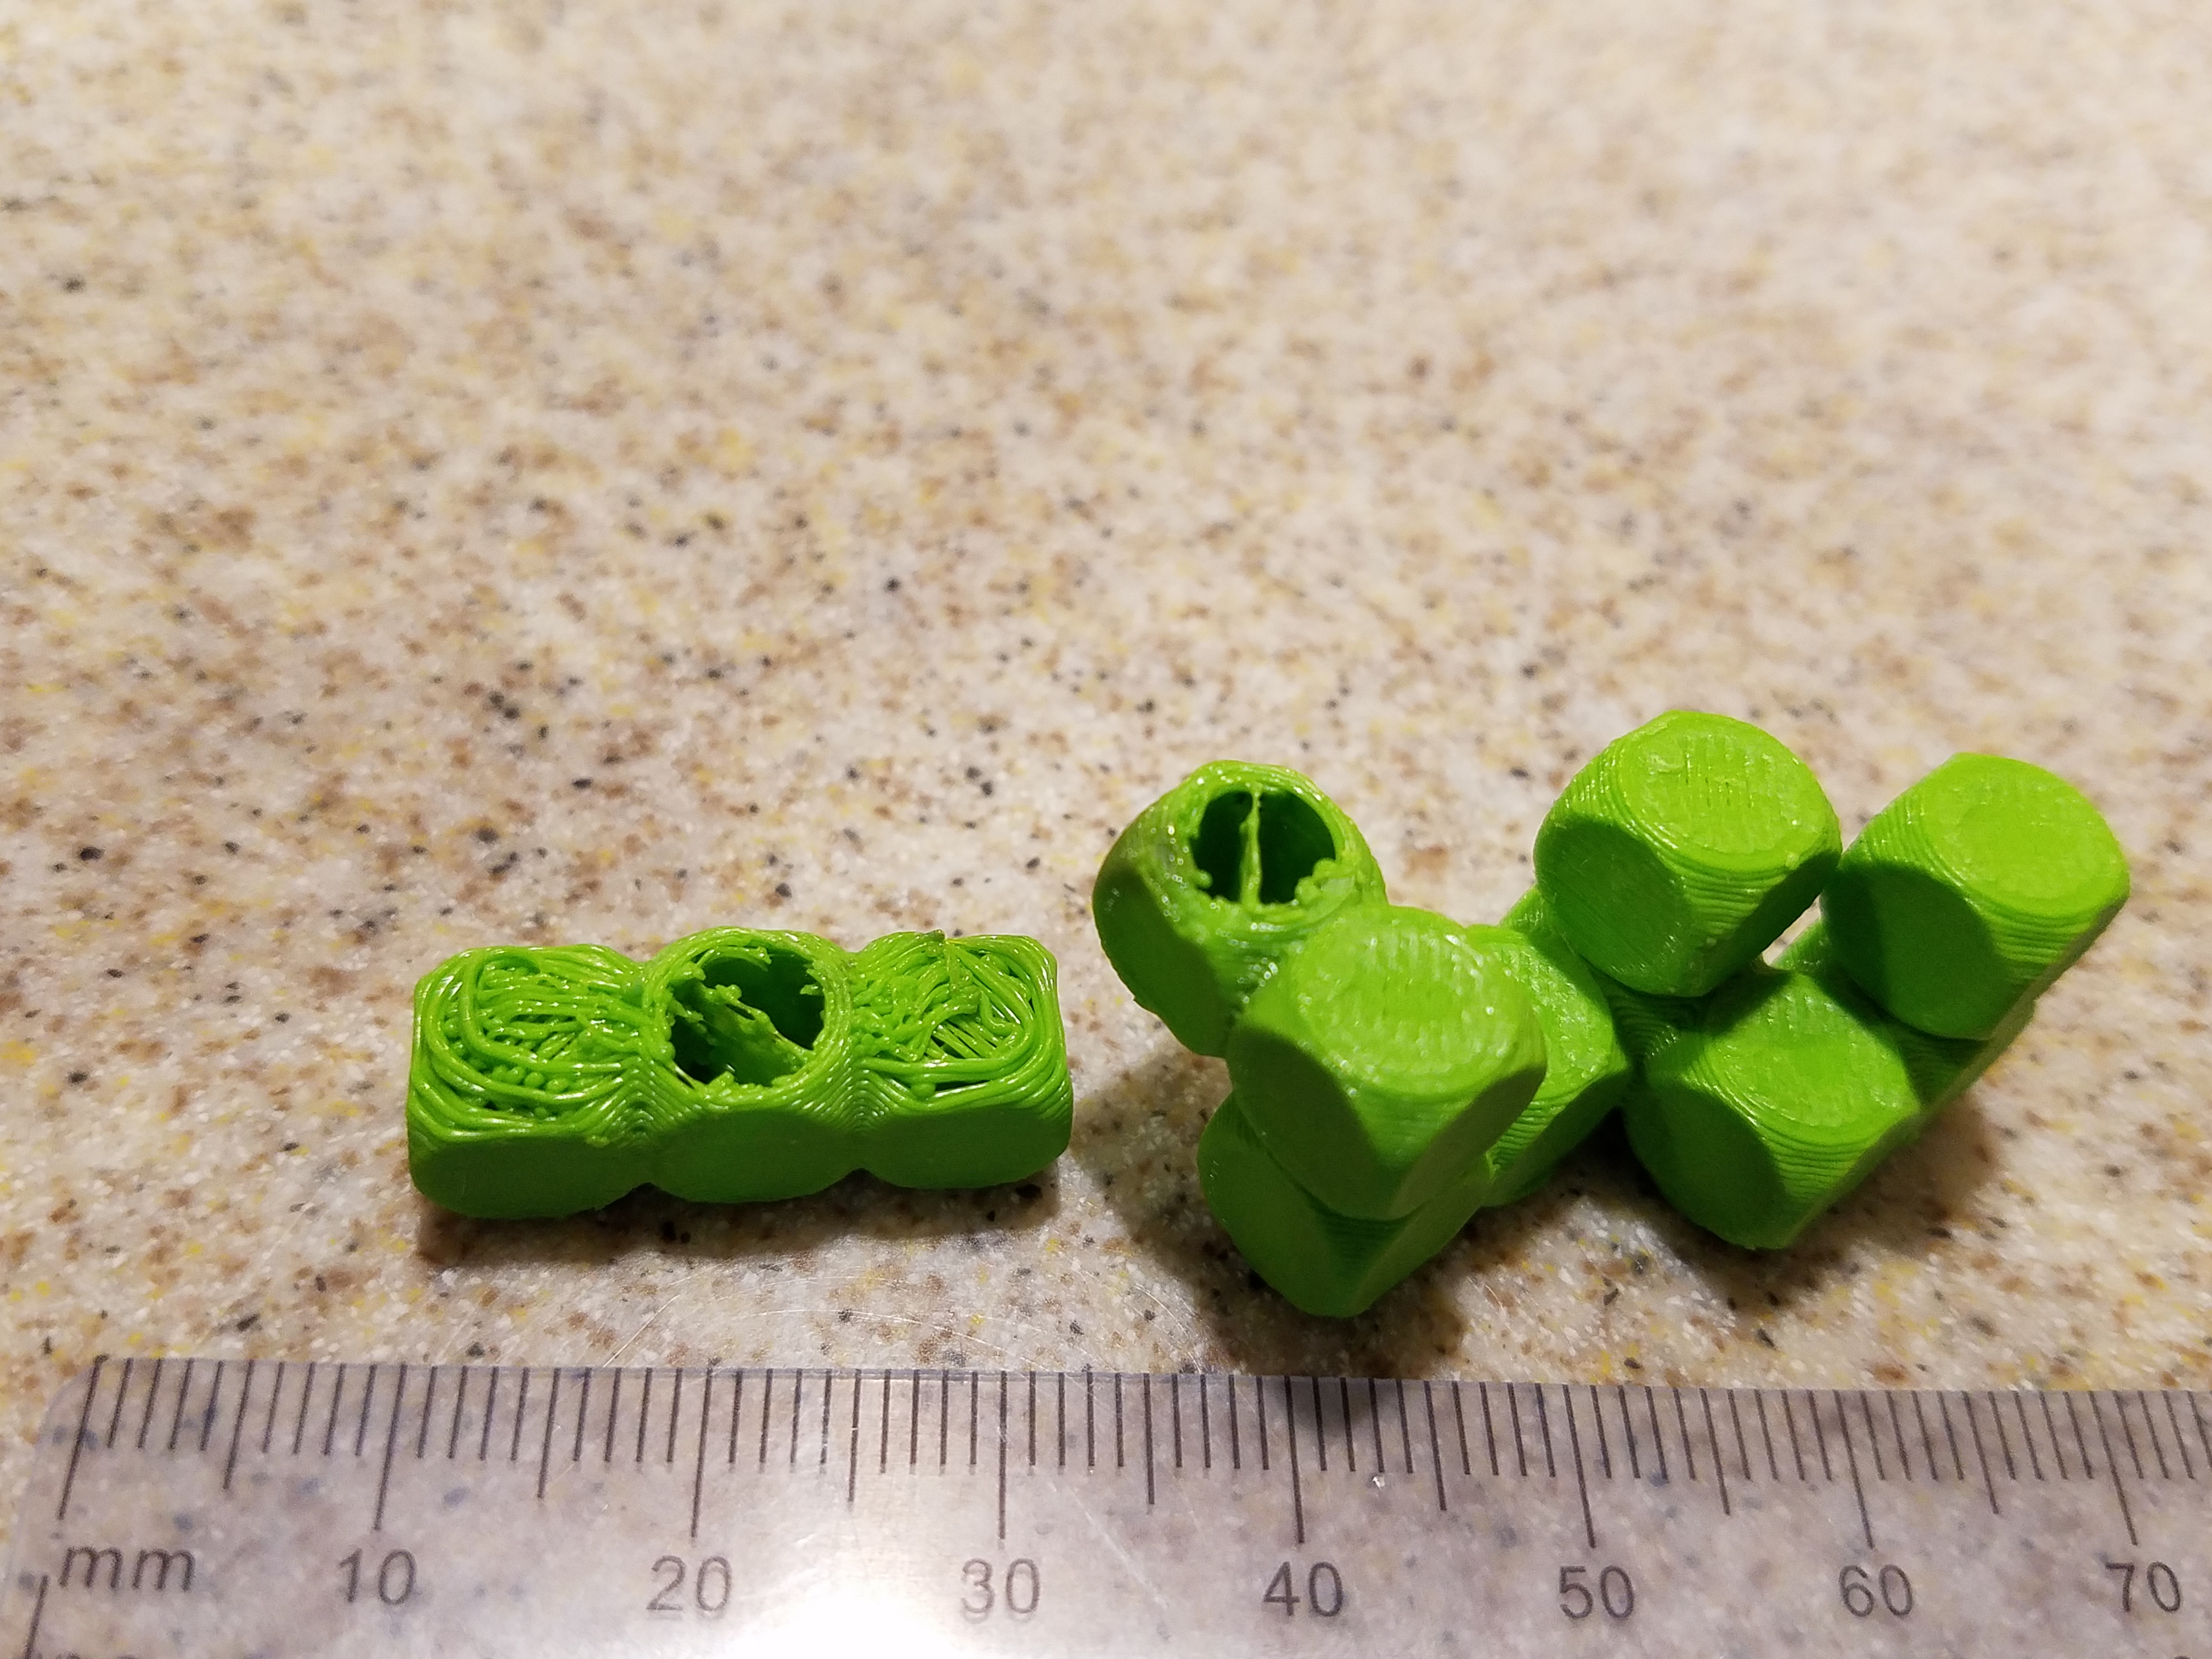
Puzzle Credit: Patricia Wright
This was the heart breaking moment when I went to go solve the puzzle one of the pieces snapped at the seam. I tried to remelt the plastic and fuse it together but I couldn’t. If I were to glue it back it would re-snap at the seam. The fill structure inside the pieces is minimal at best. I guess I could reinforce the models by adding rods in the middle to each piece. That would help strengthen each piece. But I feel like this puzzle needs to be at least the size of a Rubiks Cube to be structurally sound.
My second iteration of this Tetris style was to make the puzzle less complex and make sure that each cube overlapped to give more seam structure.

Puzzle Credit: Patricia Wright
My first print of this version was on a Lulzbot Mini with dark green pla. The print failed because it had no brim support. Half way through the print head knocked off the pieces on the heated plate. The pieces were not structurally sound and I had to go back and piece them closer to each other. My second print was on the Lulzbot Mini with gray pla.

Puzzle Credit: Patricia Wright
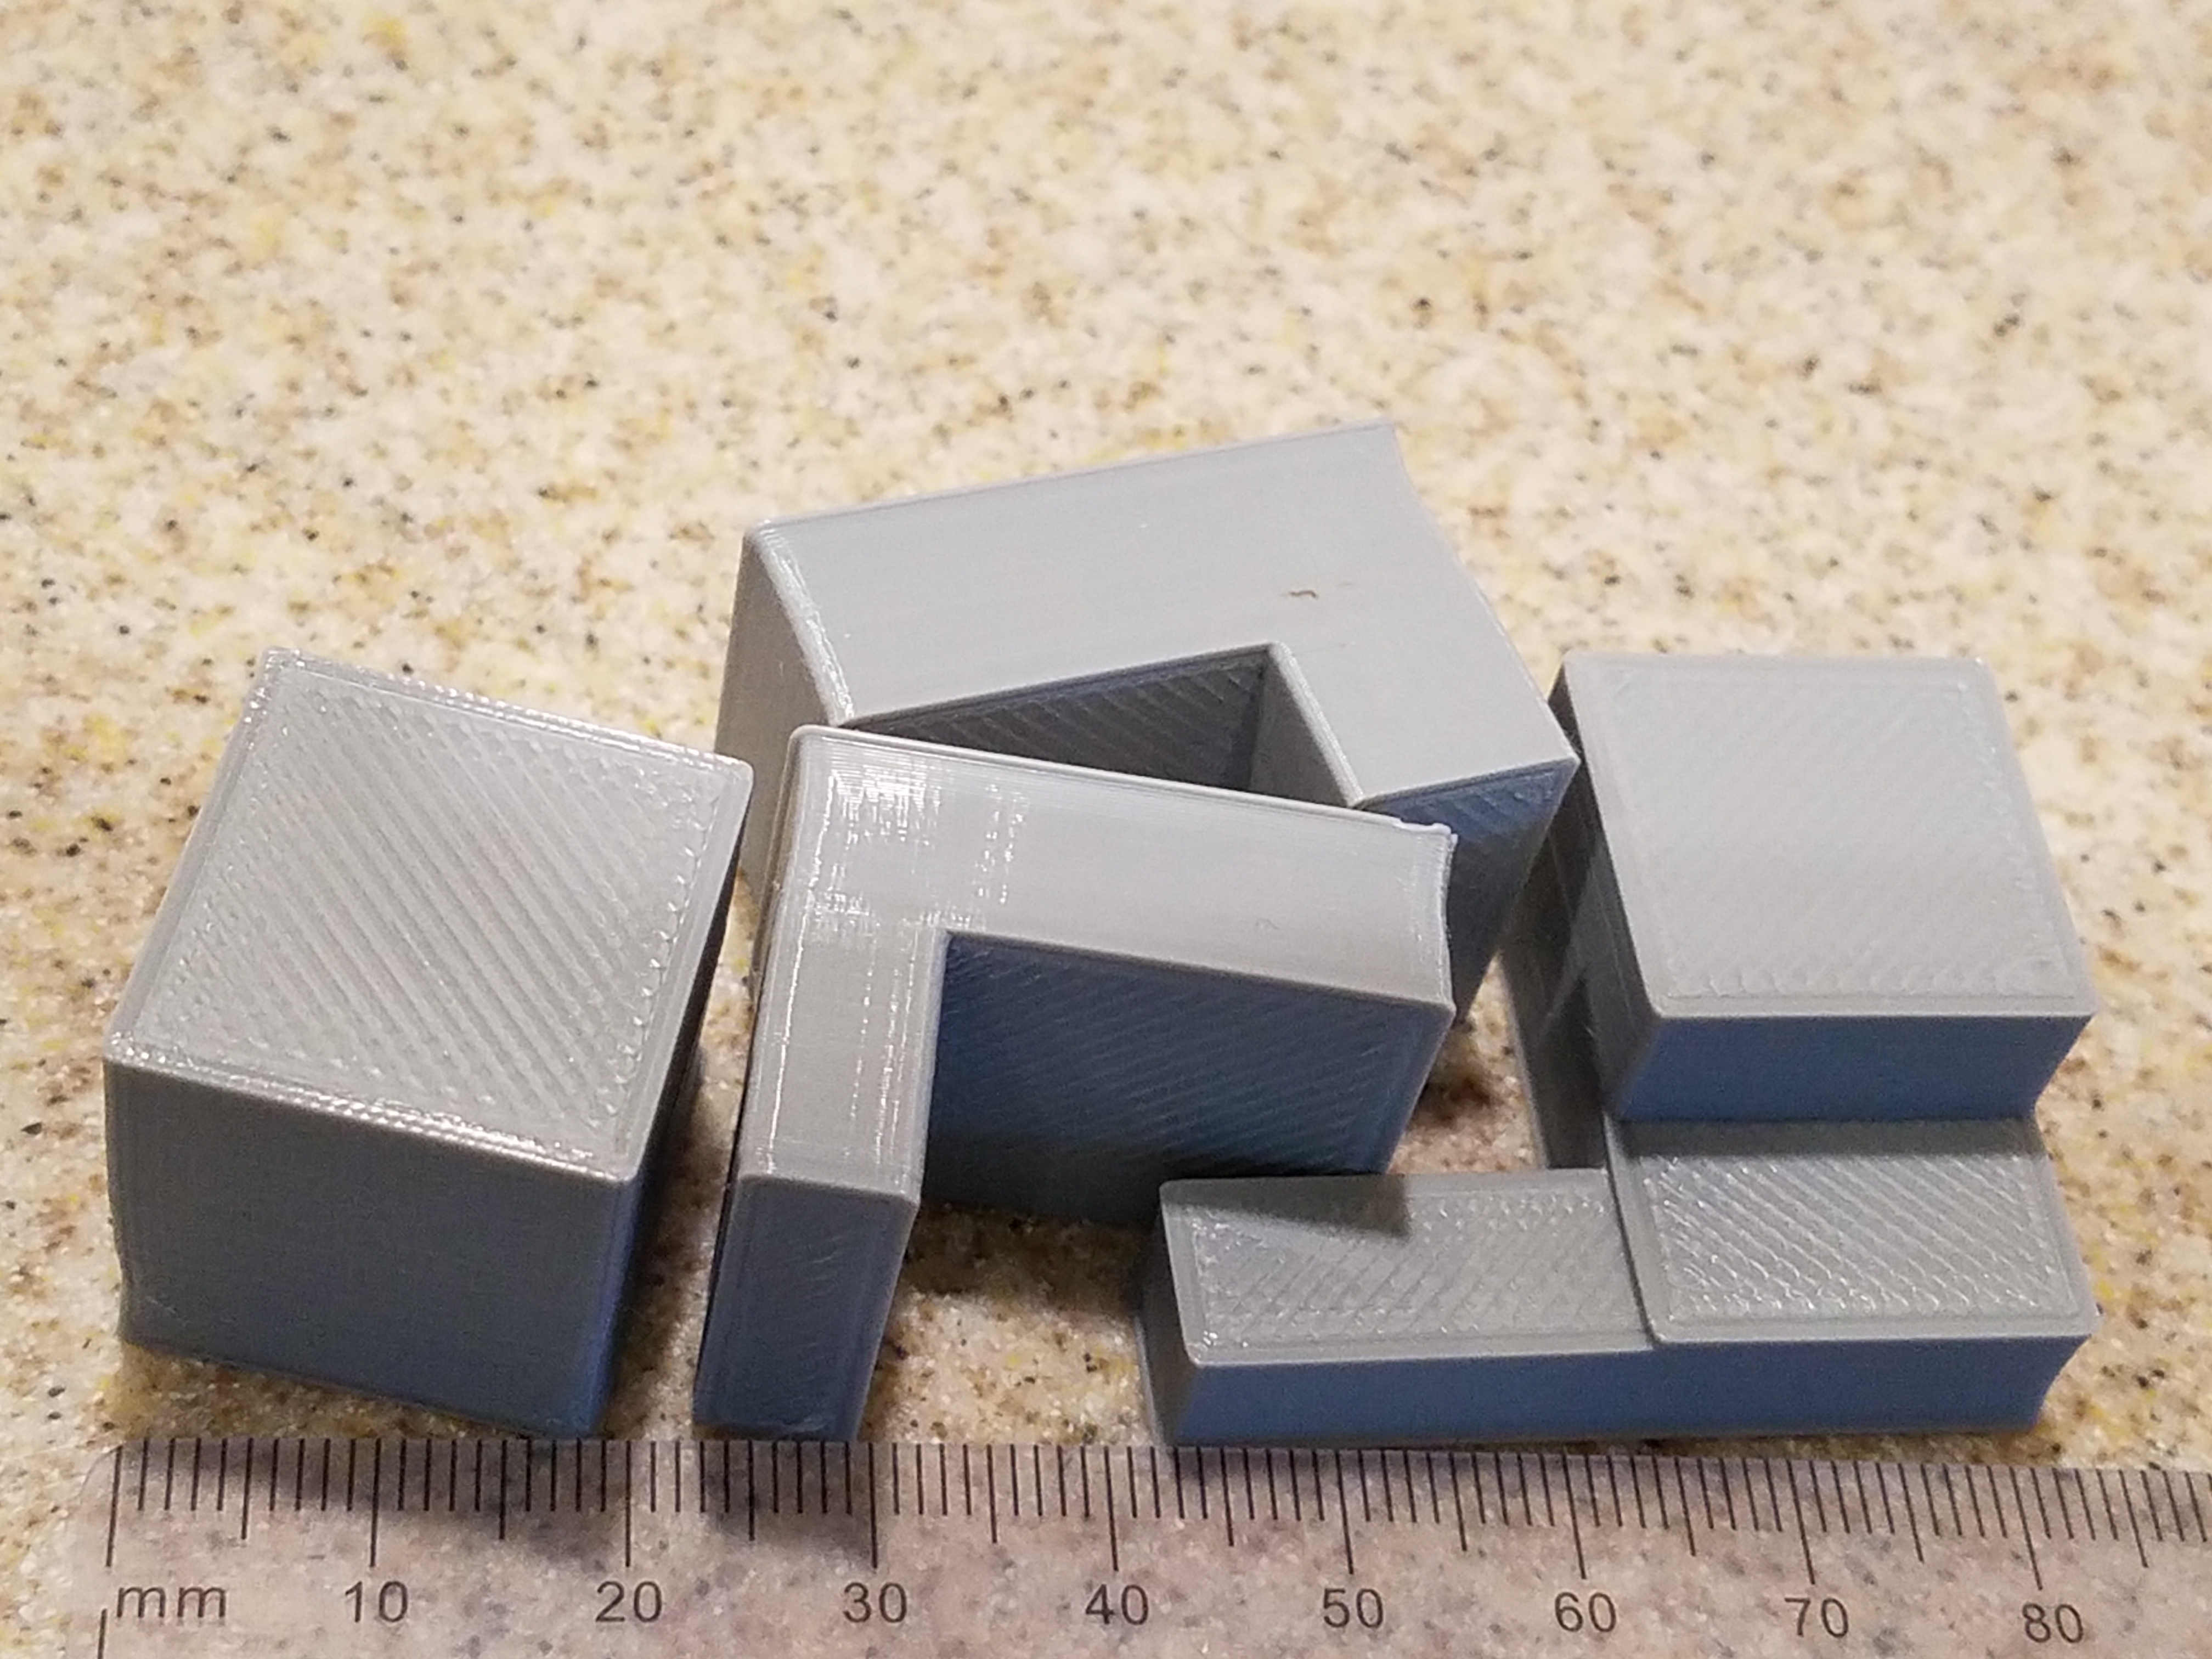
This puzzle would work but I forgot to adjust some of the pieces so they can fit together like the one on the right in the photo above. The two pieces on the left should fit together. That can be fixed with some light sanding or going back in to adjust the models to print.

Puzzle and Box Credit: Patricia Wright
There is a similar issue with support structures, though the structure was better on the Lulzbot Mini. It printed a column on the pieces that needed it. The pieces also needed the brim support to prevent the printer head from knocking them loose.
The third iteration off this puzzle I stepped away from the Tetris style and with with a more cube like step based structure. This one is more structurally sound. I printed this one on the Lulzbot Mini with gray pla.
Puzzle Credit: Patricia Wright
Puzzle Credit: Patricia Wright
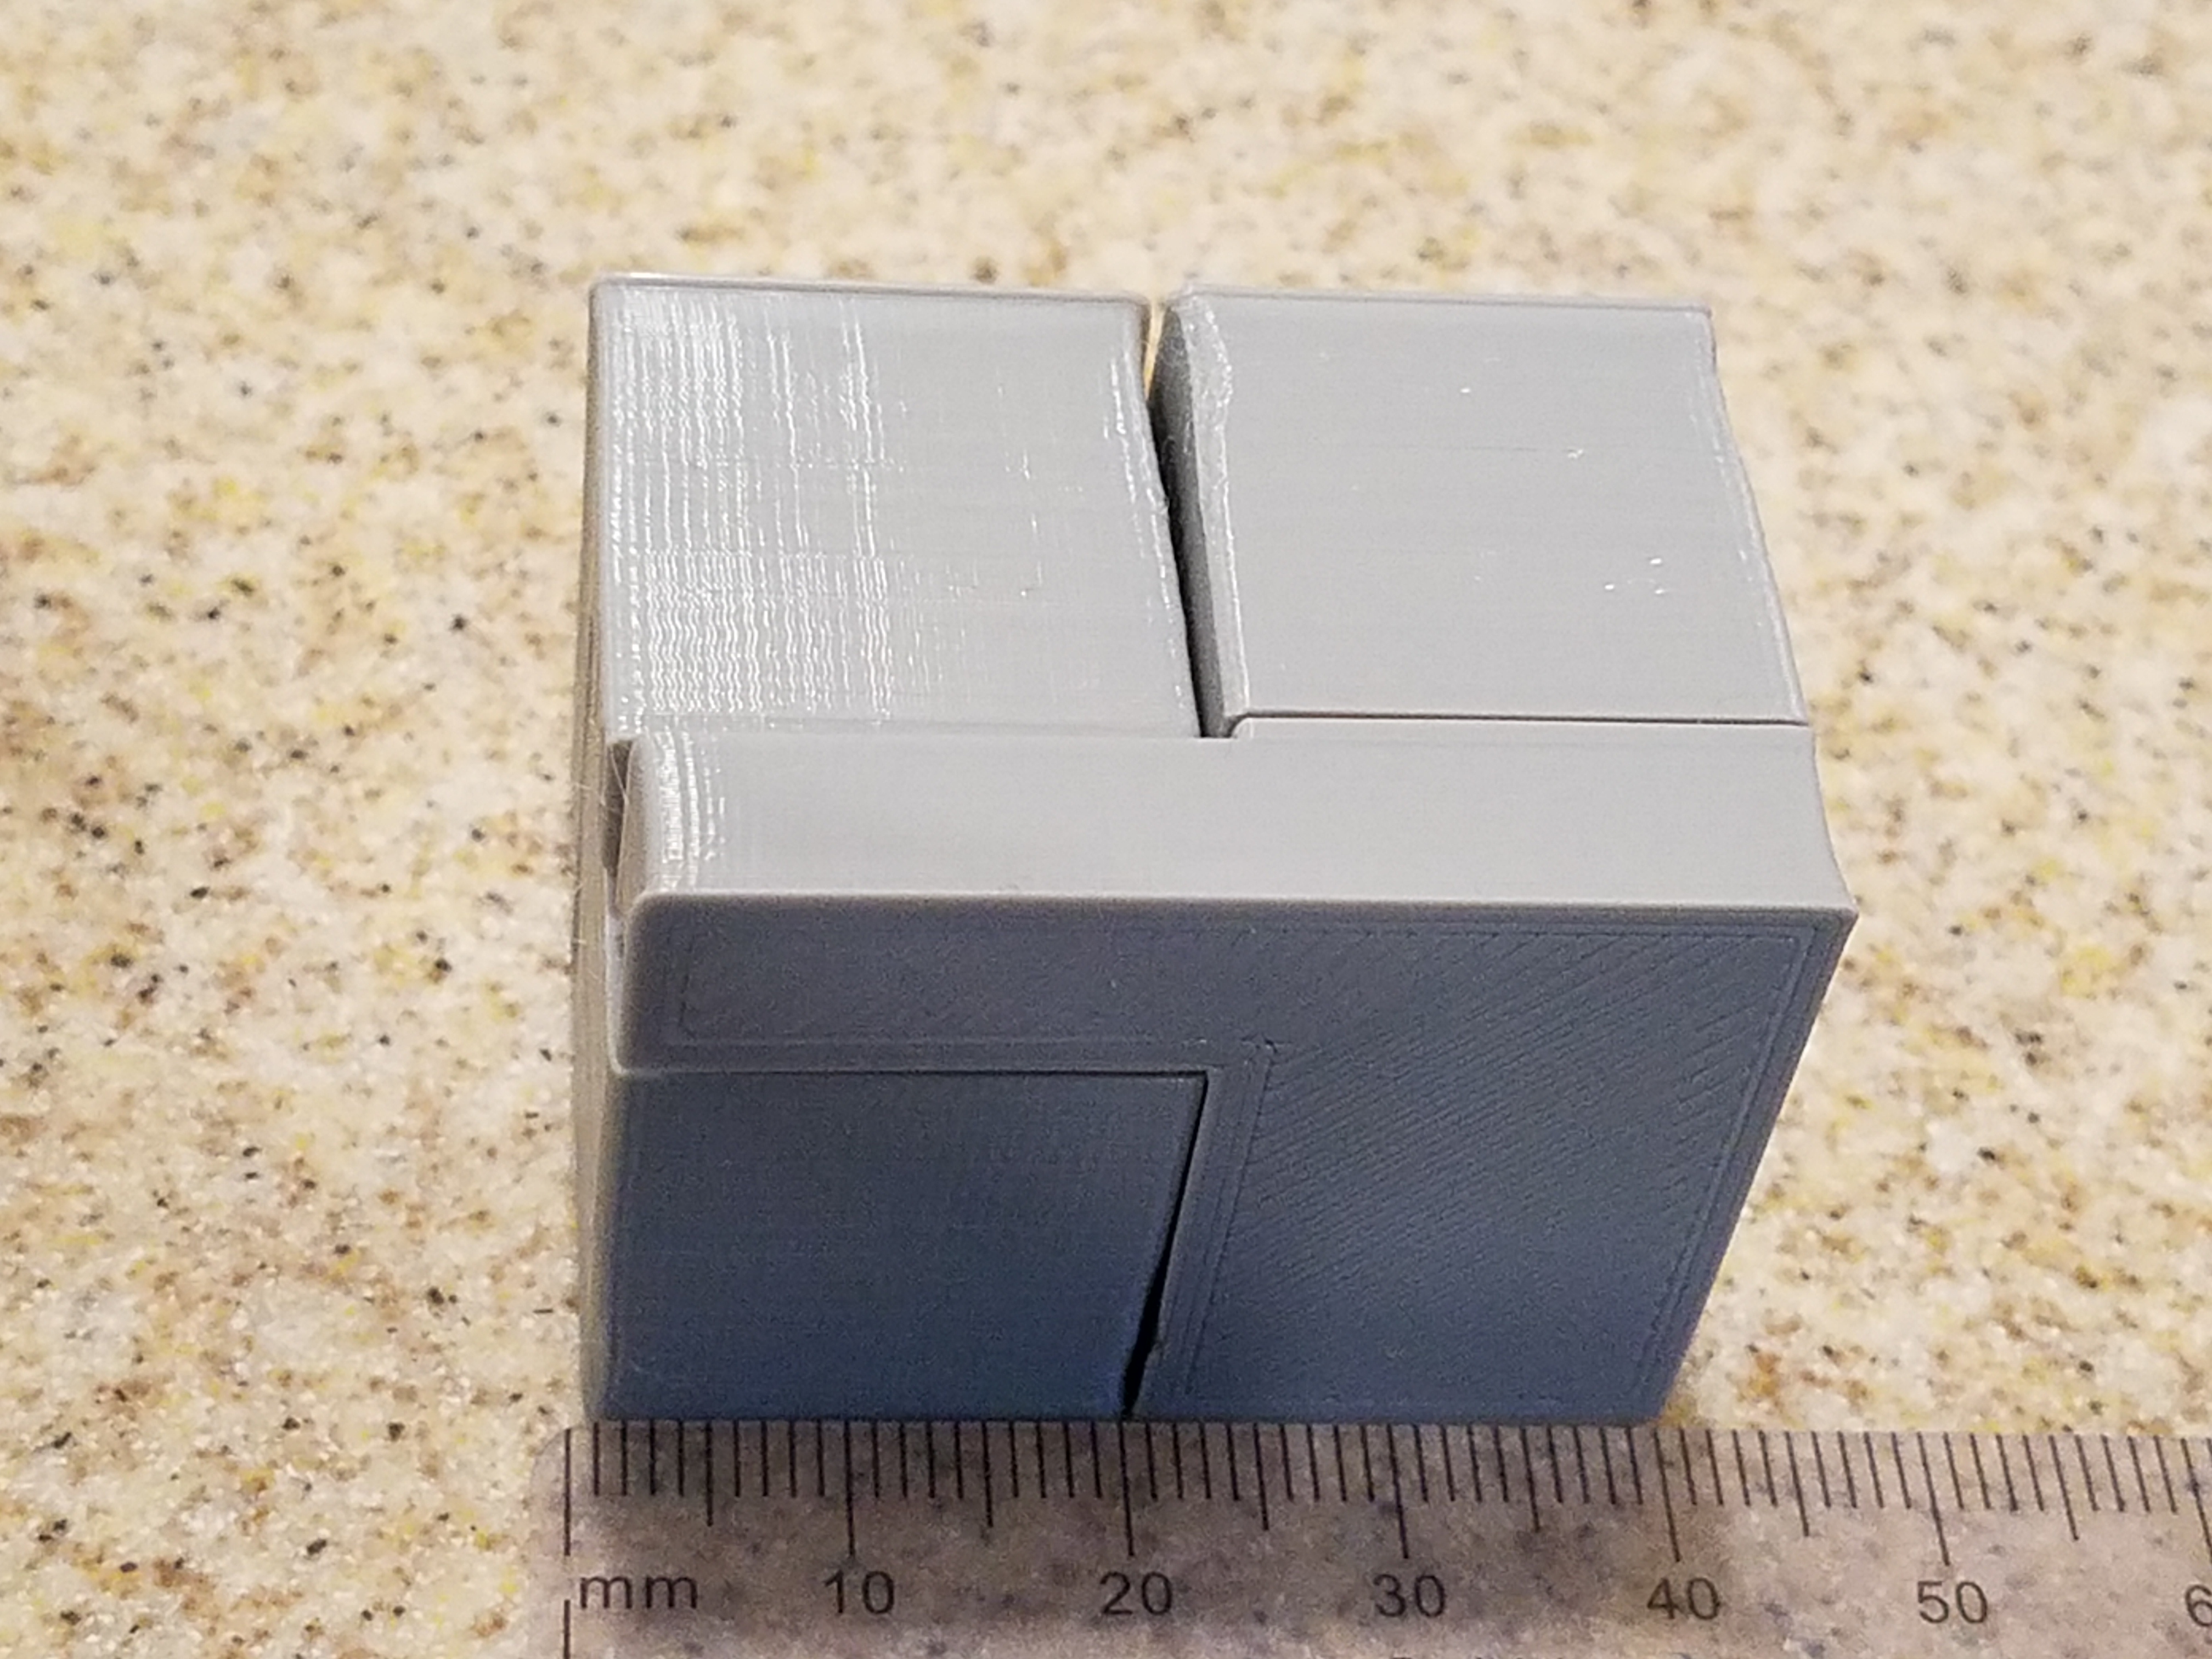
There are some issues with the model itself where seams don’t line up straight, but that is okay! It still works as a Soma Cube puzzle. I would like to sand it down some to line up the edges and maybe even paint it a different color and seal it with a semi-gloss.

Puzzle and Box Credit: Patricia Wright
The step style is one of the easier ones to make and fit together. The steps can get more complex. This one also fits nicely into the box I made too. If I were to revisit one of the ones I made it would probably be the Tetris style to see how to further the design and print structure.
Design Aspects
This is the main design for the first Tetris like Soma Cube I made. It is a Soma cube that is 5 squares by 5 squares. The height of the puzzle is also 5 squares. I wanted to keep the cube dimensions even. Each piece is made up of cubes lined up next to each other. Some pieces appear to be wrapping around others when put together. There should be no forcing of placement so the size may need adjustment on the sides or light sanding of finished product. These cubes line up on the seams and need more support structure on the inside going through each piece (adding rods). It’s designed to be a harder style of puzzle. I like the uniform color of the lime green pla, but different colors could be printed for each piece too. In total there are 15 pieces for this Soma cube.

Here are both designs for the more simpler Tetris Soma style cube and the step style Soma cube. The pieces that make up the second Tetris style also follow a 5x5x5 cube alignment mostly. I may have to go back in and realign pieces to make them fit the grid better. The dimensions of the cube may be smaller as the cubes overlap at the seams. They may require additional support on the inside too if printed on an Ultimaker printer. For the step style the dimensions are around the 5x5x5 cube but may run smaller along the width of the cube. It does fit in the puzzle box. The pieces can be adjusted so there is more width to the puzzle.
Printing
I forgot to take pictures of the print beds, but I have plenty of the puzzles themself.
Problems Encountered:
1. Brims are an important structure that may be needed in prints. It helps prevent curling, gives structure to the object being printed, prevents wacky printed loose pla, and prevents the printer head from knocking loose pieces.
2. Heated beds may cause curling on edges. Brims help this but I would like to see and experiment with the printers if there is an option when slicing to turn off heated beds.
3. Support structures are very import for hanging edges and objects. I need to look at the structure options in the software. I prefer a good structure column to help the bottom platform of the hanging edge. It helps prevent the loose pla noodles better and keeps from loosing the bottom edge of the object hanging. Lulzbot did better with the basic support than the Ultimaker, but I should be able to adjust that setting in the program.
4. The fit of the puzzle pieces. This is mainly a modeling problem. Adjustments to the models are needed. There can be wiggle room from a little sanding for better fits.
5. Internal support is needed on pieces, and don’t just rely on seams. Seams become a weakness in the support of the structure. Either better support in print settings or add rods in the pieces. Future prints need better support.
6. Size is an issue. Not everything can work on smaller scales unless designed for it. The structure of the Tetris pieces became more brittle along the seams from the size too.
Cube Puzzle Iteration
1/26/2020
Design elements that I fixed for this version of my Soma Cube.
1. Added a .25 mm distance offset between cubes except for stacking them vertically. Hoping this will help pieces sit nicely but also fit together.
2. Added cylinder rods for more support along the rows and columns of the cubes.
3. Cross infill pattern for more support.
4. Still kept the brim around each piece for additional print support so pieces will not get knocked away from print head.
5. New design to the cube. There are no longer hanging pieces to worry about support structure, as I am still researching the best methods to used support structures better. This makes the print more simple and less of a hassle later after the print. Also my cubes won’t lose their form from the print.
6. Still a 5x5x5 cube but individual cubes that make up the pieces were scaled up to an even number. The cubes are now 8x8x8. The number of pieces dropped from 15 to 12 in this Soma Cube.

I still kept the L shape from the original design. I modified the new L shape with new cube dimensions, offset distance, and adding the cylinders. From there I made the other pieces and aligning them to the right offset.
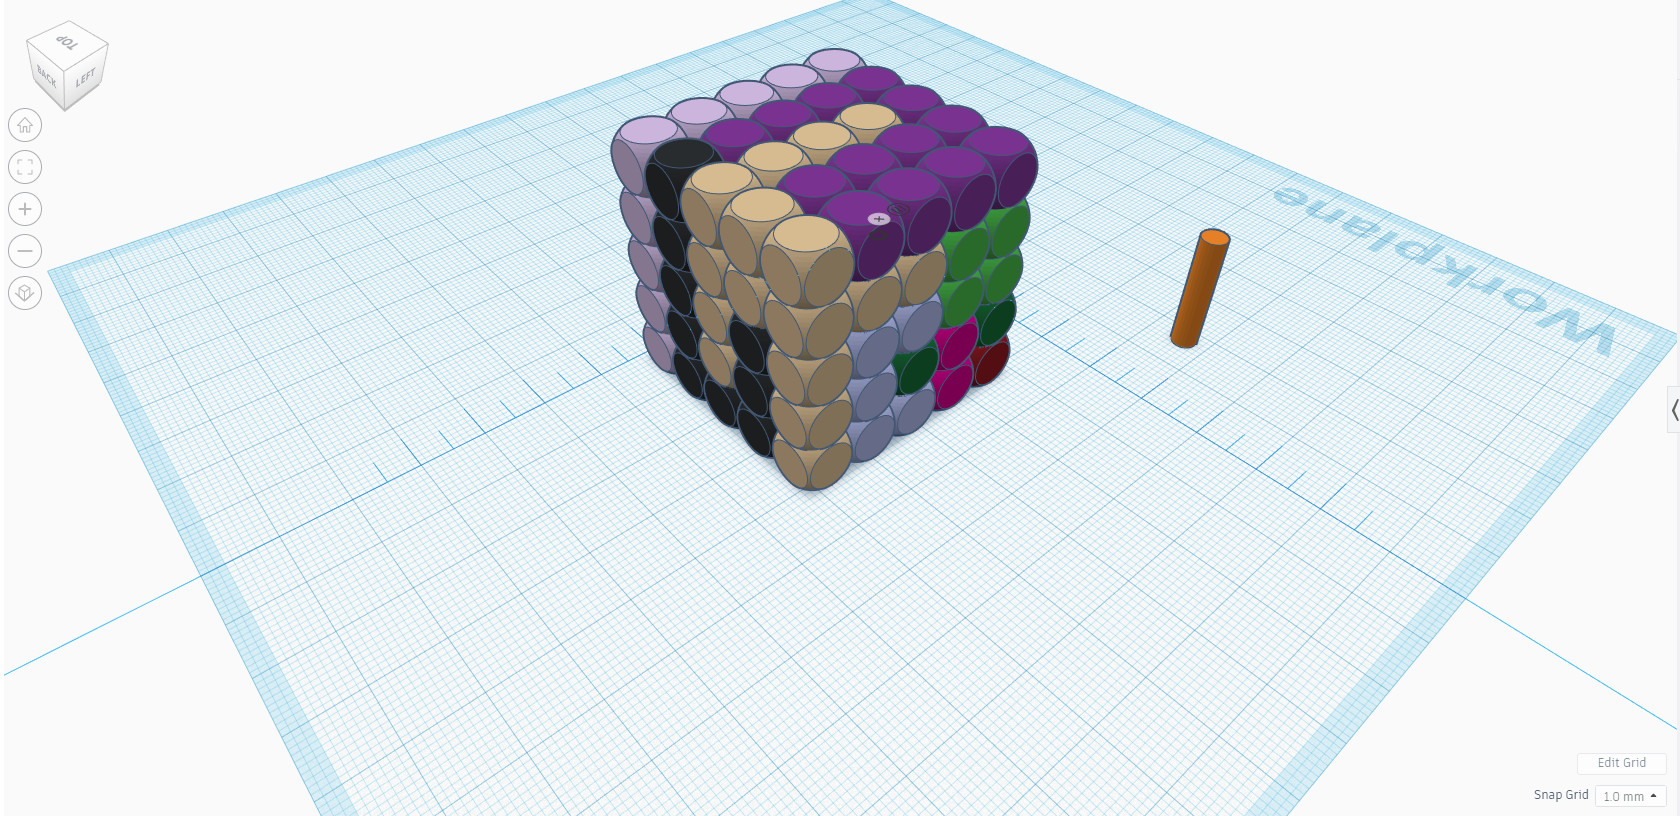
For scale above with the cube together. On the right is the cylinder I used to give each piece an additional support. It’s a cylinder with a radius of 4. Height varied with each piece.

Here you can see the internal structure being built up with the cross shape and cylinders. I mainly focused on giving an offset and structure to this design because my first version had issues with support and fit. A piece on my first print snapped and the support was not much on the inside.
It fits!!!!!! It’s a great fit too. Each piece slides in and can hold in place with the other where needed. Offset of .25 mm was perfect between the cubes. The pieces feel stronger in my hand than the first too. No snaps to report! I just need to sand the sharp edges at the bottom from the brim and it’s good to go. I like the rounded feel of the cubes on this puzzle. Round/rounded objects have been a favorite tactile thing for me. The size from the last version is bigger. I need to make a box for it to settle in as it’s slightly a few mm bigger than the inside of my other box. It’s about 41 mm x 41 mm x 41 mm with dimensions, so a box that can hold a 42 mm box should give it enough wiggle room. If I were to work on this more I would try to redesign some pieces and try to work on supports for over hanging squares like how the first version was. But I still love this new one too. The design has helped me figure out the magic number for offset in Tinkercad.
Here’s my Make!
Cube Puzzle Wrap-Up
1/29/2020
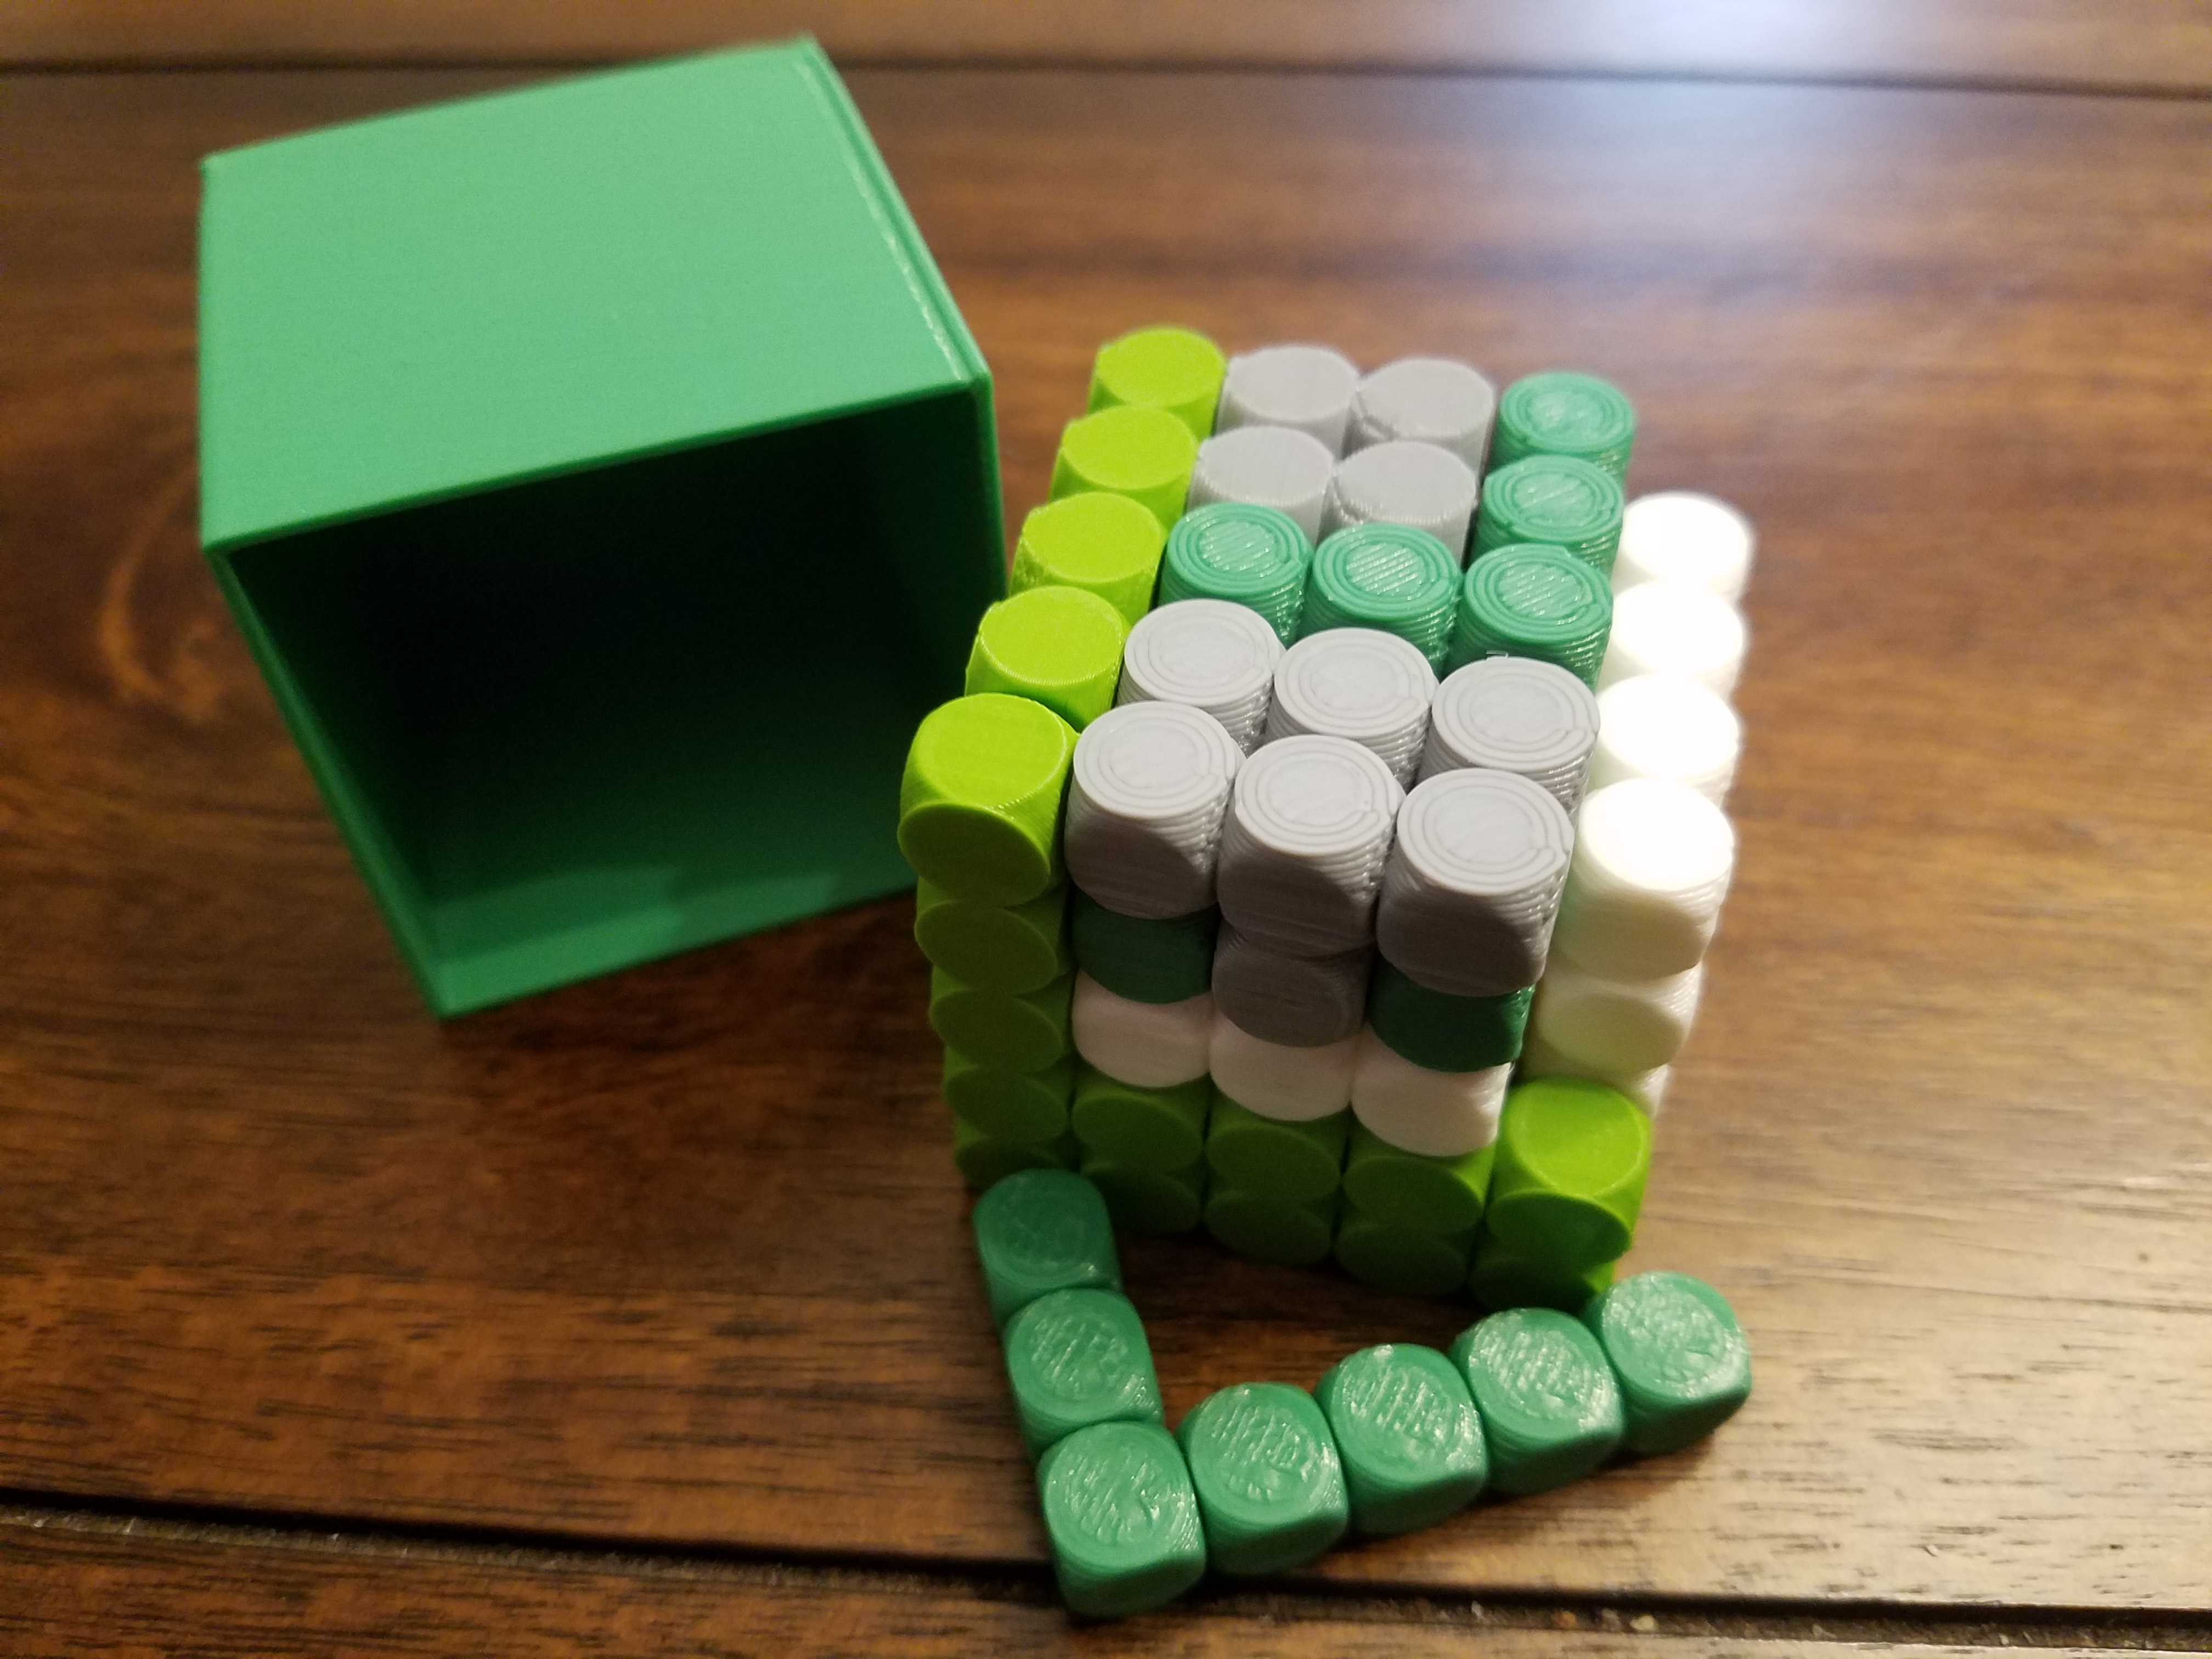
For the final version I did not change the pieces. The difficulty of this puzzle is already challenging, even more so if printed in one color. I changed the difficulty from the first version from really hard to a medium difficulty. The feed back I got from another in my class I used to print the puzzle pieces in another color. The new puzzle version is made up of 4 colors (dark green, lime green, white, and gray) and the same 12 pieces. Printing in different colors helps with the concepts that have gone into this puzzle. It’s a 5x5x5 cube with slide-fit pieces as a mechanic. As one solid color the difficulty goes up with trying to figure out the slide-fit mechanic.

The tools I learned while making this puzzle are:
1. Supports are very important when making pieces with overhangs.
2. The dimension of the puzzle pieces matter. The individual cubes themself need to have even dimensions all around for it to work right.
3. Offset space is important for puzzle fit. Just the slightest number for offset can change everything. .25 mm was enough.
4. Internal support, infill percent and pattern. I added additional support with these pieces with adding a cylinder in the middle. It helped strengthen the piece along with the infill cross pattern.
5. Brims can help if there is poor adhesion on the print plate. But if there’s good adhesion then a skirt of 3 helps.
I learned that there are challenges in making puzzles and it requires multiple versions to fine tune it. I can’t expect success on the first try. But I can expect failure to happen. I should take the failures and grow from them and go back in and redesign and improve the structures. The elements I listed above will help in my future prints and my final project. Dimension and Offset are very important when it comes to making pieces fit in a tray. The others help with better prints and structure. To make my jigsaw like puzzle later though I really need to make sure that the pieces and offset is there as those are important to the fit and solution of the puzzle itself. I do intend to go back and make additional improvements to the pieces and hopefully get a separate make of it up on Thingiverse in the the future.
Here’s my Make!
Personal Project Pitch
2/2/2020
Preliminary Idea.
I have two ideas floating around:
1. Jigsaw puzzle where there is a spin on the pieces themselves. The objective is to fit all pieces into the tray. These puzzles range in difficulty in each version type from easy to hard (only one fit). The pieces could be all corner pieces of a jigsaw, they could be misshapen bars, or other bent ways. Maybe even animal shaped or even curved lines or some other geometric piece. It could even follow a theme of some kind.
2. The other idea would be a card based puzzle like the Jigsaw puzzle above/Tangram with many arrangements of difficulty in one puzzle. The pieces can come in many shapes from Tetris style, to animals, to other inspirations. The goal of this one is to get the certain marked pieces into some type of shape like a Tangram puzzle. Tangrams are more geometric in style. There is some forms of it that takes it a step further where stacking pieces is involved too. For this one I should start easy and work up the difficulty. I need to design cards and pieces and a tray to hold everything together.
Previous Knowledge.
1. Previous 3d modeling experience (Maya and 3D studios max).
2. Previous design experience (design 1&2 class, experience with photoshop/gimp, Adobe Flash, and some other Adobe products).
3. Some 3d printing experience on a different type of printer.
Lessons Learned.
1. Supports are needed at certain angles. The program will add them in automatically, but settings in the program can be changed for the supports.
2. The dimension of the pieces matter. From each puzzle piece to the case that holds them.
3. Offset space is important for puzzle fit. A small amount in pieces can change the fit.
4. Internal support, infill percent and pattern. Makes the individual pieces stronger.
5. Brims, rafts, and skirts can help if there is poor adhesion on the print plate. But sometimes pieces stick to the raft so I usually avoid rafts.
6. Lots of patience and time.
7. Size can be an issue. Don’t go too big or too small.
The Unknown.
I know problems will arise in the future and I may miss listing stuff here.
1. Keep designs simple. I have a feeling that if I over complicate a design then the piece may not come out as intended.
2. Need more experience with Tinkercad and download Blender or some other free modeling software. I am not sure how to make bevel edges in Tinkercad. Maybe someone can show me. I really don’t like the feel of sharp edges as there is a lot of poking and sliding against skin that hurts to hold pieces.
3. Using Inkscape to turn a drawing into a 3d stl file. I still have not mastered it and I’m working on trying to understand it.
4. Make better use of embedding a design in Tinkercad. I have found that size is and issue along with number 3 above. I would really like to put a logo and name on the final make of the product like on the case. An embed would be cool as it would just be printed as the design. Unless i need to flip it to where the design lays flat on the stage while it prints. I am not entirely sure just yet and it’s a work in progress.
5. Some times I get warping when making boxes and sometimes I don’t. I don’t understand why. I think the stage of the printers are running too hot. It has been a hit and miss since the beginning.
6. One of the goals of this project, well a personal goal, is to learn better design for making puzzles. I love puzzles and there is this artistic and mathematical (with size, offset, etc) design with everything in the puzzle itself. The pieces fit together a certain way. There is a challenge to get certain pieces to fit within a customized shape. Simple artistic design with the pieces itself.
7. Audience. I want my puzzle to be for a certain audience. I am not designing for a really young audience (if I was then size would definitely be a focus so little hands can hold pieces better). I want my audience to be a general audience of some where between 6 to 100 years (or more as some people live older). I may have to bump the age range higher by a year, 7 to 100. I want the person to be old enough to not chew on pieces and can enjoy the puzzle.
8. Difficulty. The puzzle should come with ranges in difficulty and I need to work on it. One person may start on the easiest mode while another starts on a more difficult mode. The choice should be fluid. I feel like there should be a certain range.
9. The idea of travel size. How can my puzzle entertain a person on the go? At work on a break? Down time between studying? Or just having fun in general. I should focus on travel size, so the puzzle can be placed in a bag and played on the go. I should not be going over or under a certain sized case. I’m thinking a rectangle case with rounded edges. The depth of the case could vary on the amount of challenge cards.
10. A set number of pieces. It should not be overwhelming/underwhelming with piece count. This is one thing I need to research. It should not be too much like 20 pieces and it should not be as few as 5 in total for the entire puzzle game.
11. I know other problems may arise so I’m living more open to this post to come back to and look at and add on if needed in the future.
20 Items made in Autodesk Fusion 360

I made two rings and linked them. I’ve heard that 3d chains can be printed which is an interesting design. Oval shapes would probably print better than rings. Then I used the coil tool to make a coil. I liked messing with all the shapes. The sphere I combined with a ring to make the grove in it. It’s an interesting design which could be made into some type of tactile toy with little marbles in it. The rounded rectangle and the other sphere were made with the create form tool which can generate easy to manipulate models. That’s good for sculpting specific objects and models. There is a dent in the rectangle as my ring touched it when it generated. It’s interesting how objects can interact. The ring shape is perfect for making round holes for threading string in pendent beads too if a straight hole is not preferred in the jewelry piece. I made a cube and used the shell tool to make a box.

There is so many sketch tools. The curve too is really responsive and generates nice curves. It’s easy to free form sketch with the tools too. If I had a sketch to import (there is an option to do that with the image tool), I could make more accurate lines but for just free form sketching it was relaxing. I also used the hole tool to make the eyes and holes to add in string or a jump ring.
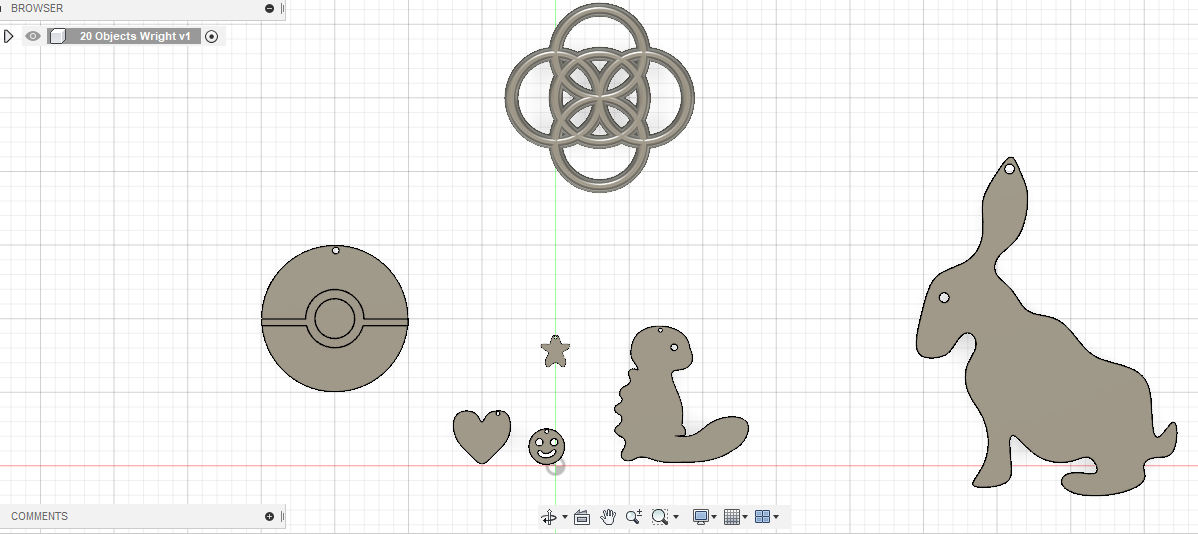
The pokeball on the left is made with cylinders and a rectangle. I used the extrude tool to level extrude the piece for detail. I also placed a hole on the top. For the heart, smiley face, star, and rabbit I used the sketch curves tool and extrude. They also have holes in them too. The little monster figure is a quagsire, a pokemon, that I may end up painting details. I couldn’t figure out at the time how to make raised detail for his arm, but I learned how to later. The rings up above I made into a chain mail design. I think this pattern would look nice as the cover of a box or maybe even an emblem design on the cover.
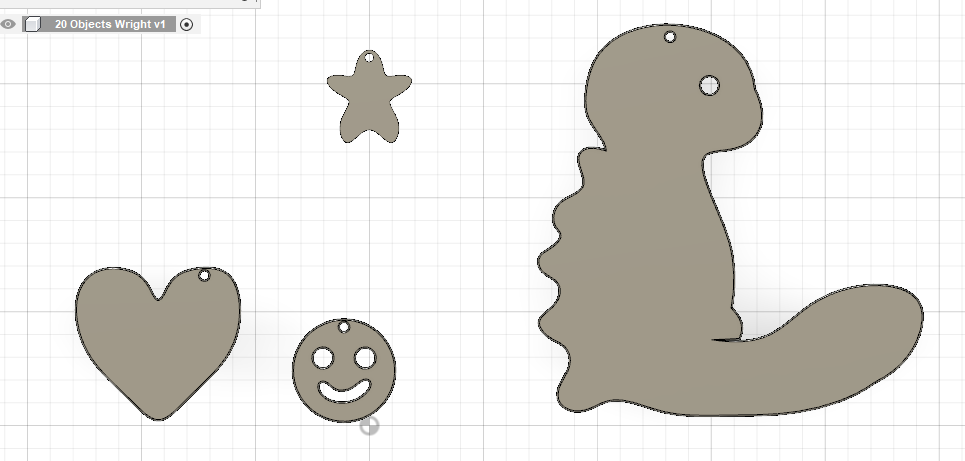
Each of these figures I made I also used the fillet tool to round the edges. I know printing can have sharp edges but this tool makes editing these designs a whole lot easier on the edges. I couldn’t go too high of a number for the edges. Roughly 0.40 to 1 for the edges. I also applied the rounding to the edges of the holes so that way if these pieces do get printed they won’t cut into the string when made into a necklace.
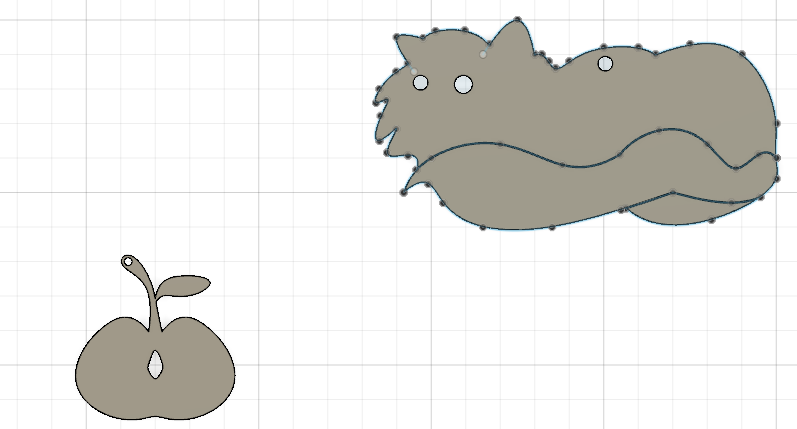
The apple and cat was challenging for me. I used the curve tool to draw them but when it came to extrude them into a piece I had to work around with the software. Extruding the apple was easy but getting the apple seed cut out of the middle I had to use another too. The hole tool is good if you want a straight circle hole. It doesn’t do custom shapes. I had to extrude the seed design from my sketch which was a little more challenging to do then use the shell tool on that custom item. I pulled it down all the way through to make the hole in the middle. With the cat I finally figured out how to do stacked layers in a single design. I used the curve tool to sketch. I then extruded the top and part of the bottom to the same height. I had to go back into the sketch and get the tail to select to extrude it. The software does not want to do everything at once and I couldn’t get it to let me manipulate it if I did extrude all at once. But the sketch method does work. If I want to add custom detail to something then this sketch method could help me. I just have to remember that shapes work better than lines. Unless there is a way to pull out a line for detail. I haven’t figured that out yet. And the only snag I’ve run into with the sketch tool is to make sure all my dots line up when connecting. It becomes a problem if the dots are not connected.
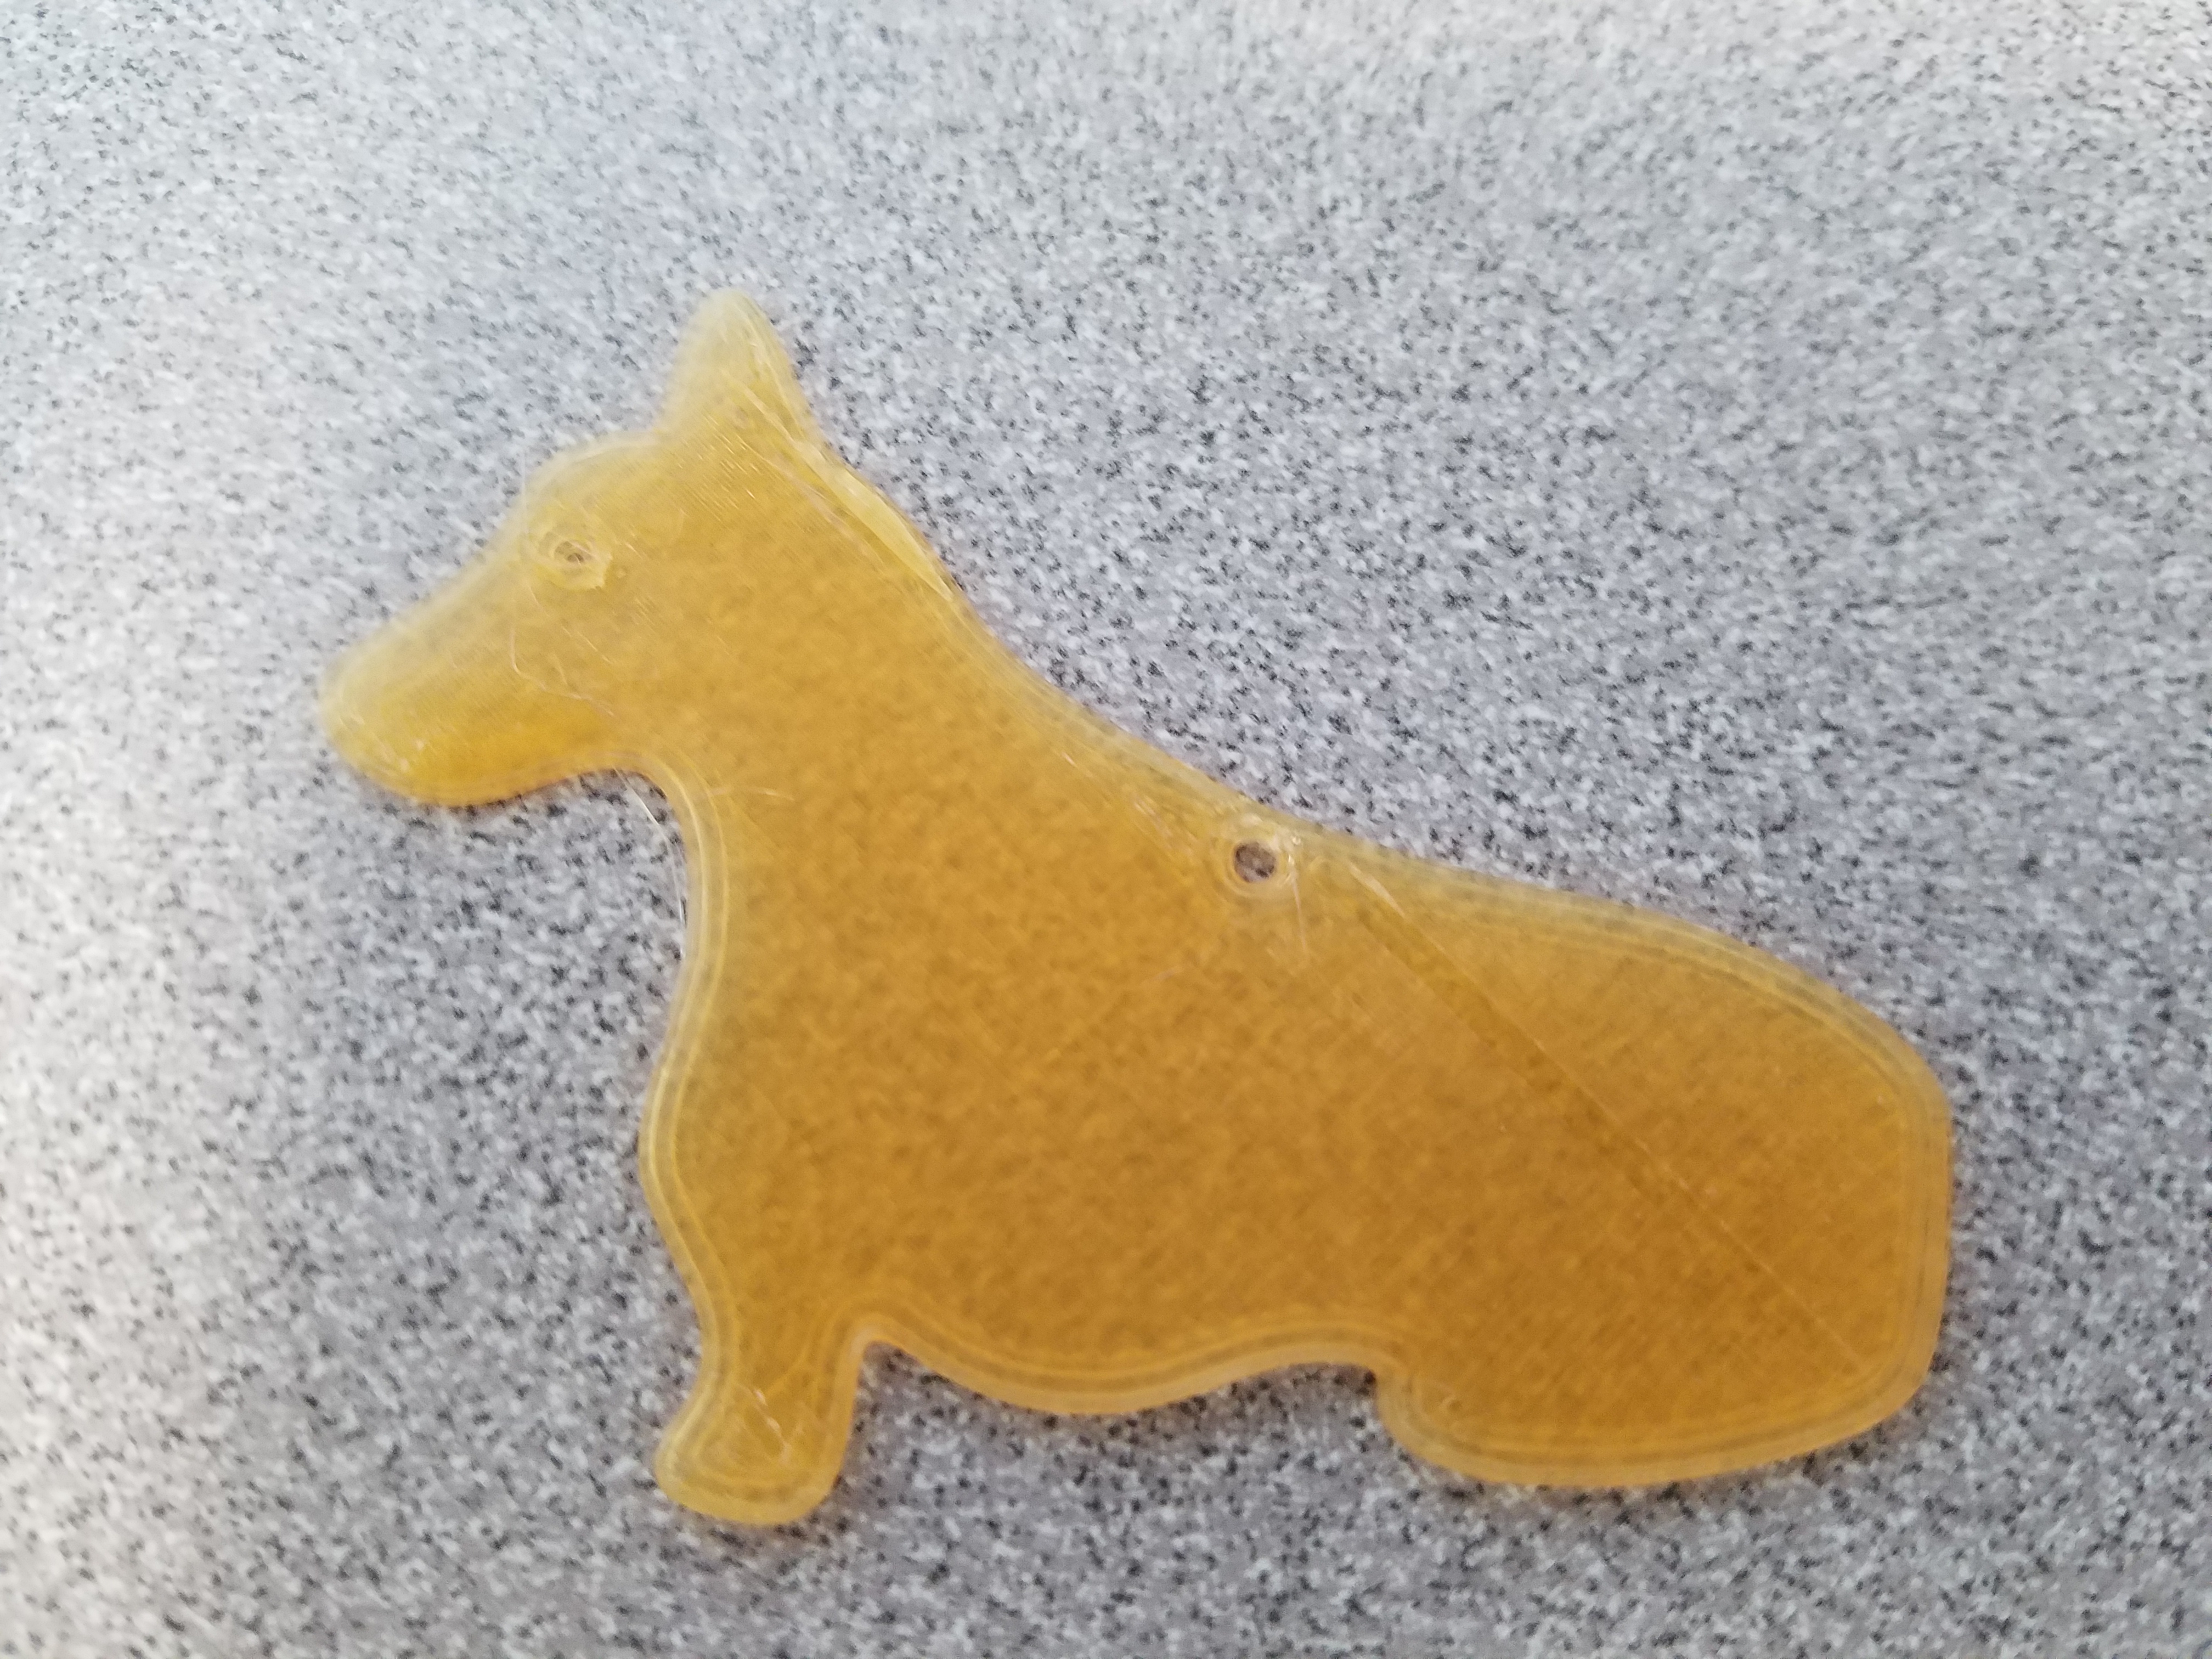
Corgi is a little on the thin side. The second one I’m making is a tad bit thicker. Overall it’s adorable.
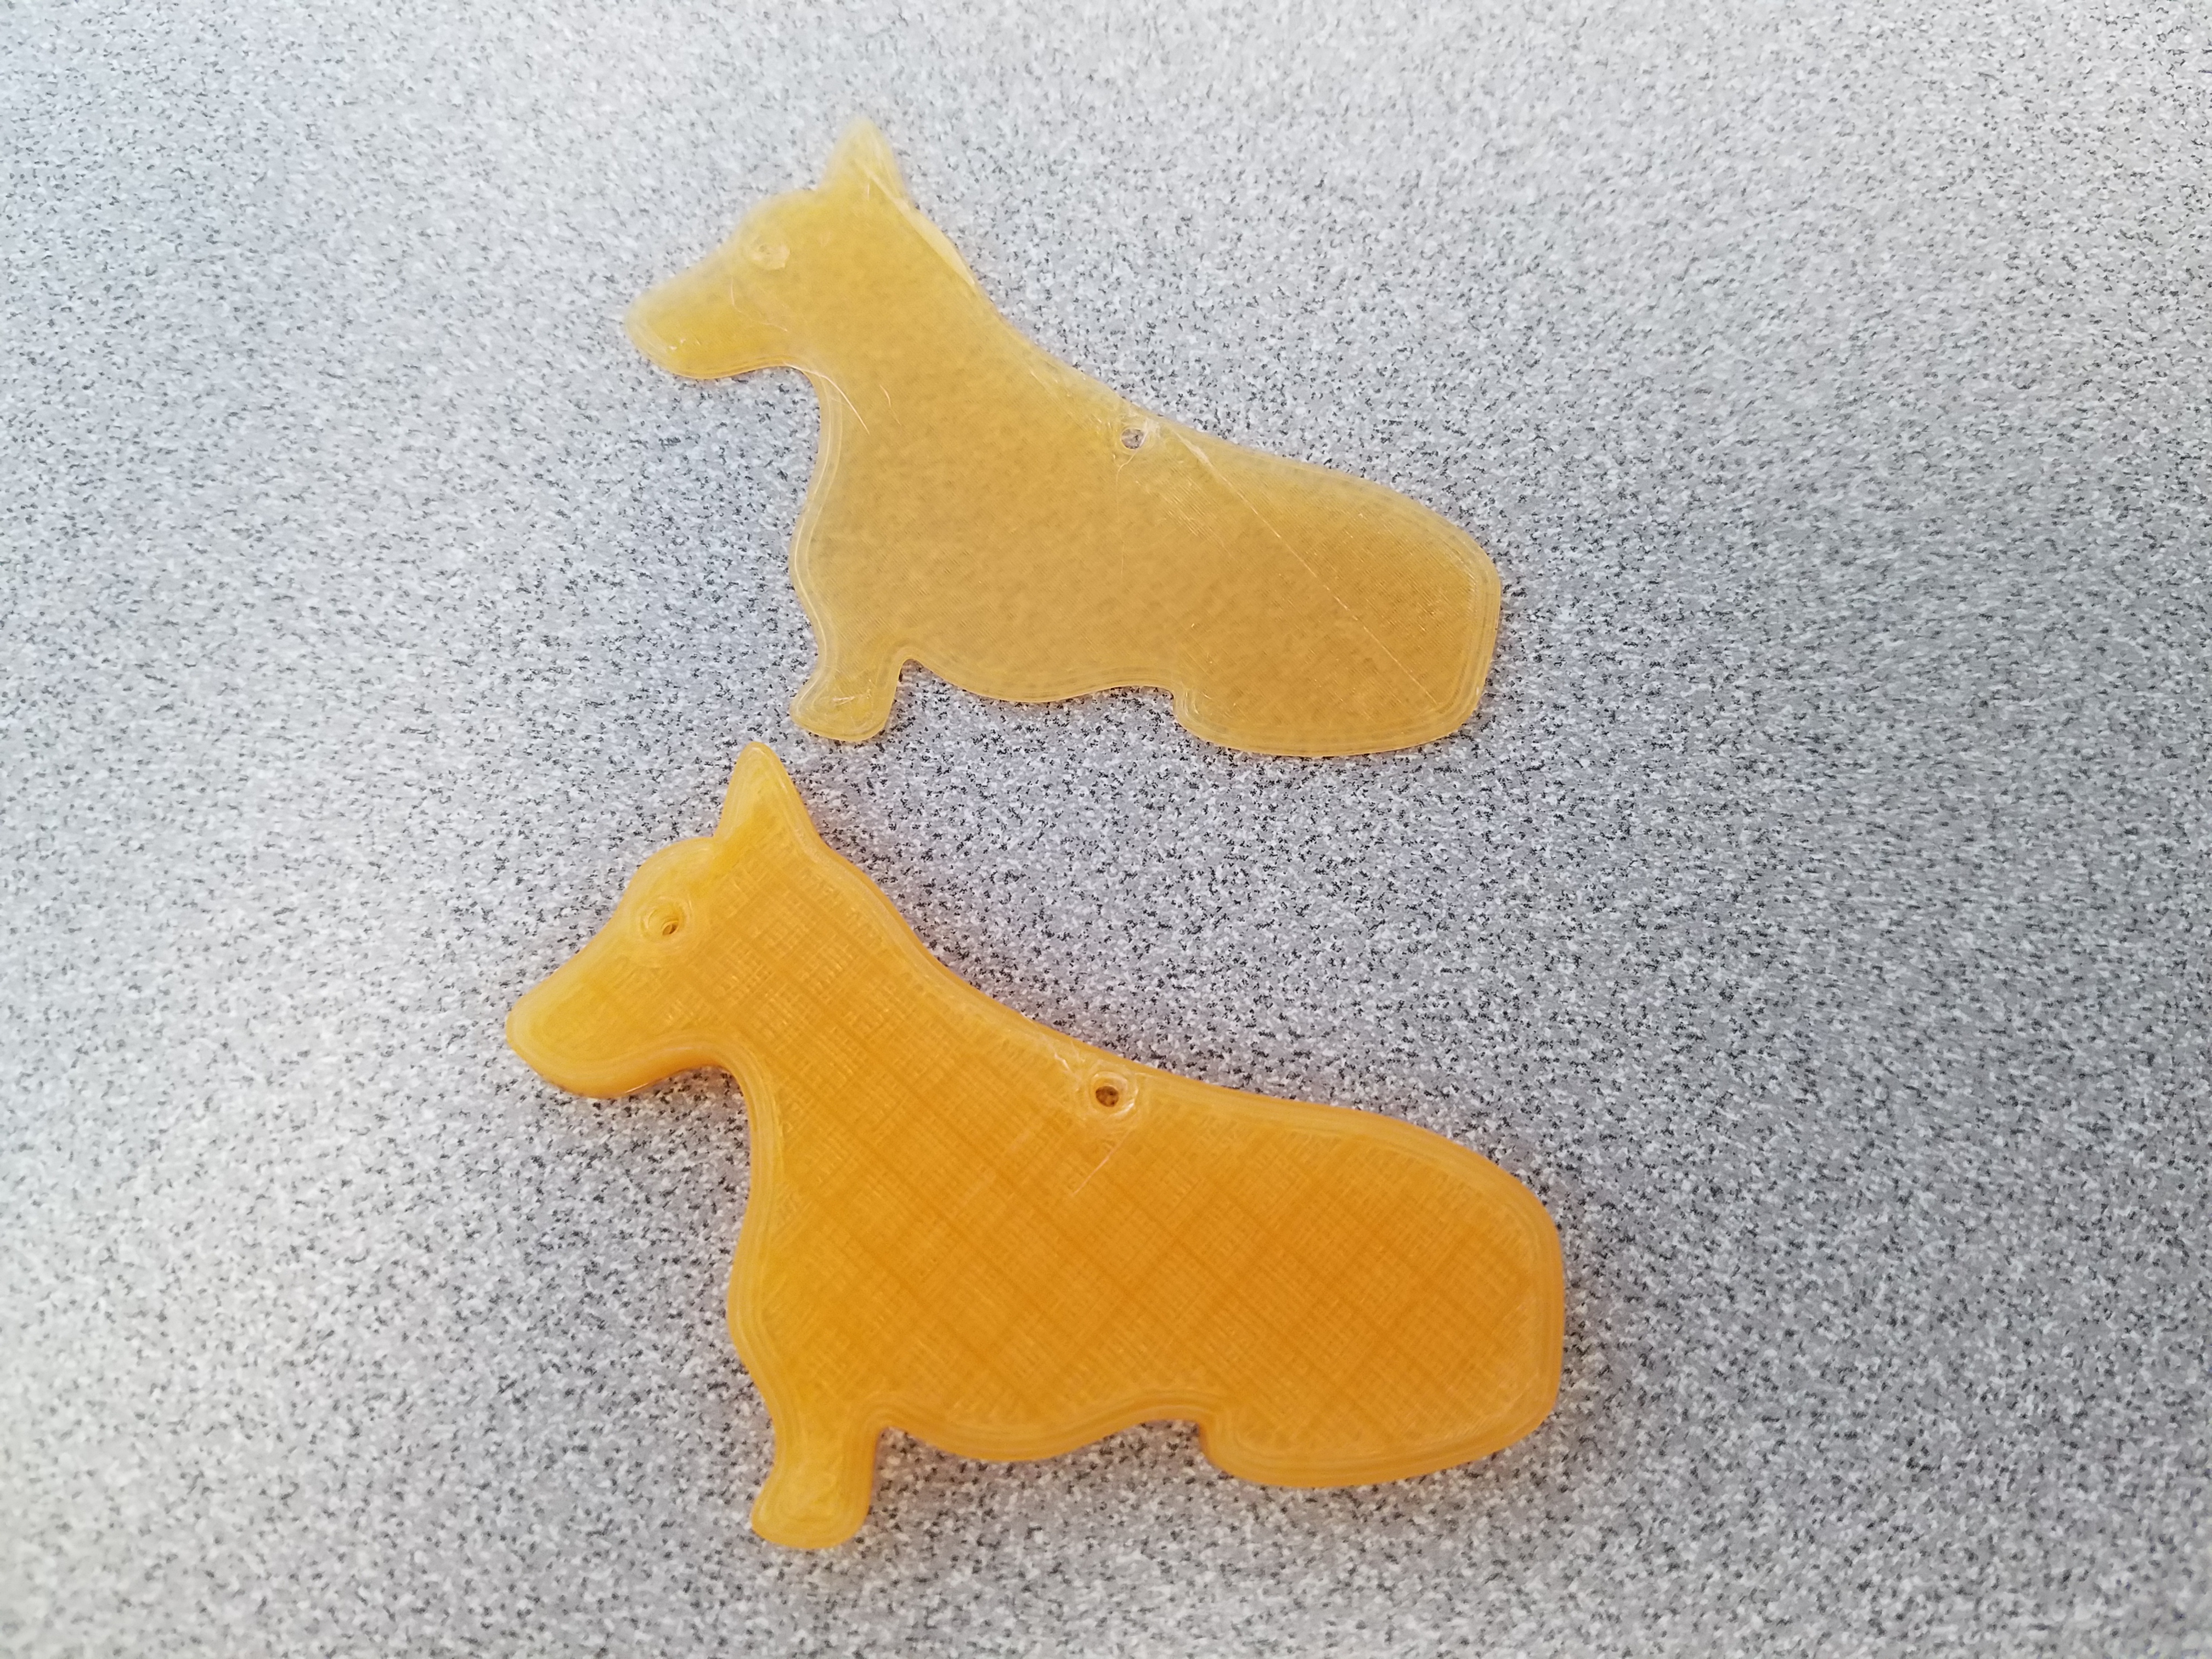
Much better. Scaling up the model height helped.
Digital Fabrication in the Makery
I decided to use the Glowforge in the library Makery. I have never used a laser cutter before and have only done wood working in the past. For me to apply this tool to my project I need to know how to use it and what its capabilities are. For new media and software I like to go in and experiment with the tools or make swatches. I’ve done this with traditional media, crafting, and digital media. My goal for this was to see how well it can do curves, images, and etchings.

My first step before printing on the Glowforge was to go into Inkscape and make a swatch. For the image I had to go into Gimp and convert it to gray scale (or black and white would have worked). I made an array of circles and ovals to see the shapes. Same for the curved lines. Line art can carry organic line work, and when I do some final digital inking for my puzzle pieces they may end up carrying organic line artifacts into the design. I also wanted to see how it would handle different lines for details and spiral for curves. The star was fixed to be a gradient later in the Makery. The only thing that did not translate to Adobe Illustrator was my name and the numbers on the image in the file. That’s okay and probably resulted in something when importing the file to Adobe Illustrator. But I’ve learned a lot from this.

This is my swatch image I made in Inkscape. I’ve learned that Glowforge will etch lines right away. Color doesn’t factor in as much because it gets translated to the machine. This could all have been a black and white image. But going forward for my puzzle pieces I’ve learned how to go about preparing the image better. It will require 3 to 4 pdf image files for me (maybe another image format also, but pdfs preserve the image information). 1. The border to cut away from the wood for separation (black border box line). 2. The outline of the puzzle pieces for cut away separation. 3. The detail etch line work of the puzzle pieces (the line work in the swatch, and any carved out areas). 4. Image detailing if I want to go about shading the puzzle pieces (like the star and the picture in my swatch). I took this Inscape swatch to the Makery and had some help with fixing it up to be printed. We had to save the border of the box as a separate pdf image file so we could change it to cut through the wood for this image. For the rest of the image we changed the line work around the objects to be connected with the image itself so it wouldn’t treat those lines to cut through the wood. Though for my puzzle pieces we would need those lines to cut through the wood for the pieces. Instead there was some further engraving which is fine. If the object is one solid color it will engrave that area like with the pink circles. The circle at the top next to the swirl we changed to be not filled in. Once the file was finished and uploaded we set it to print and in about an hour this piece was finished, the image below shows the detail better.
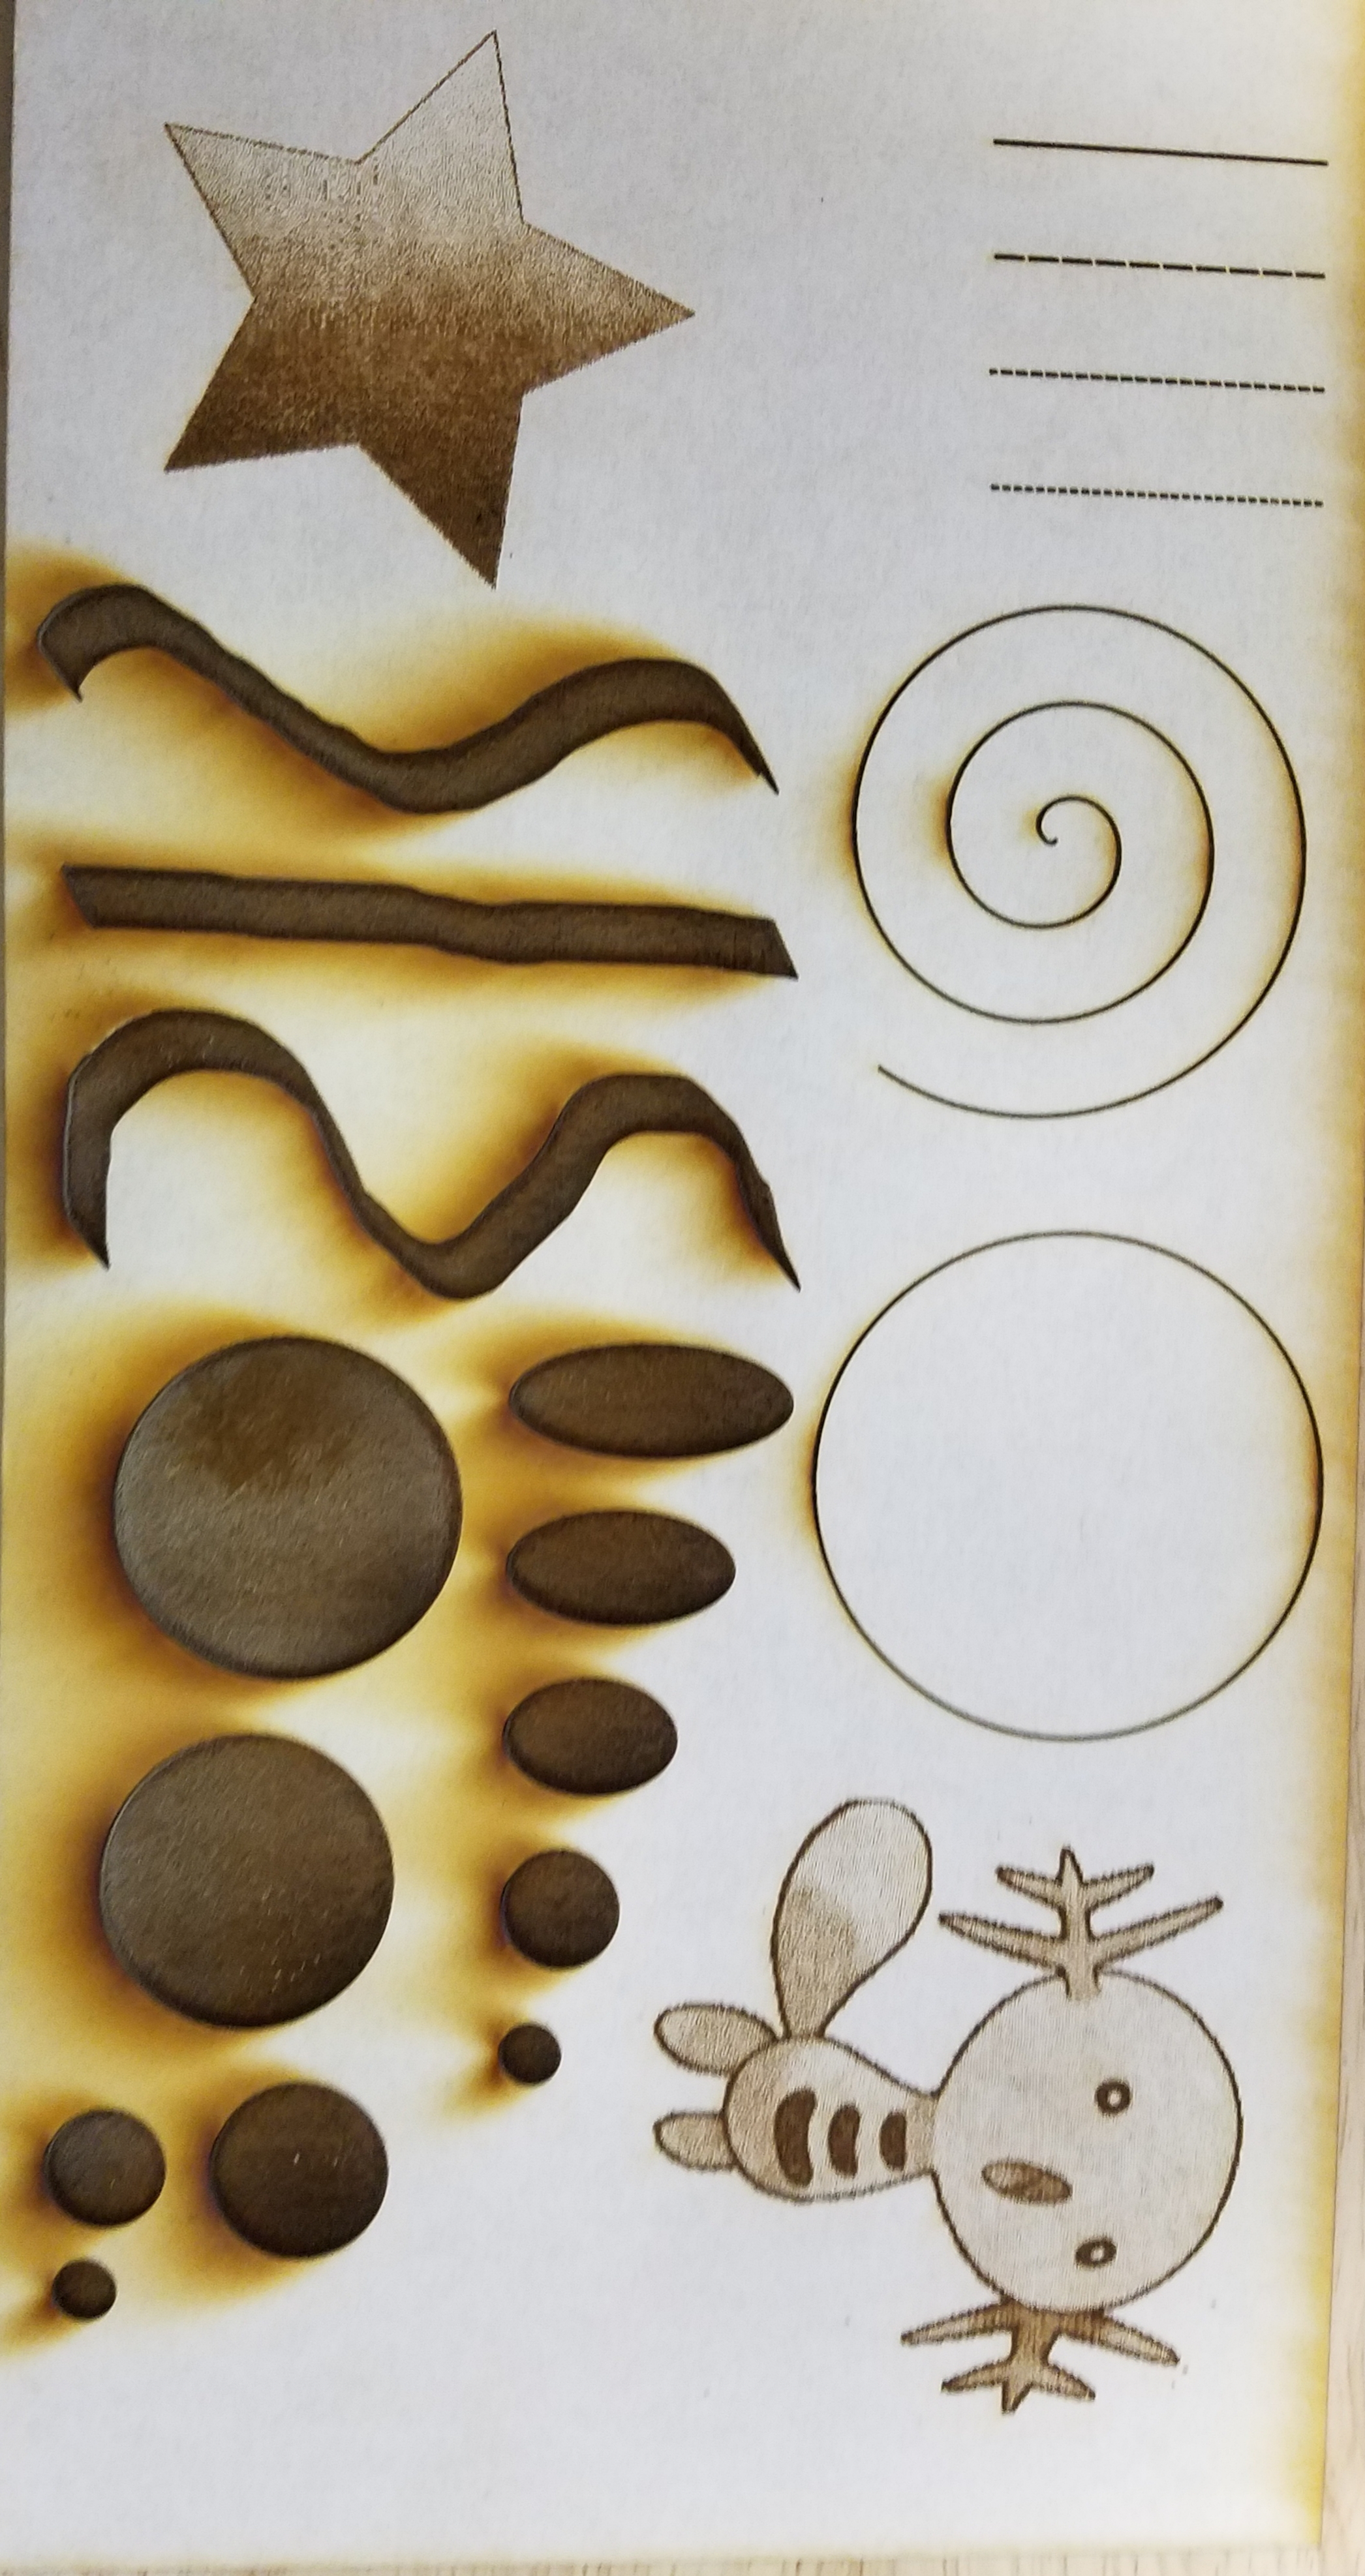
It came out great. I can use this swatch to help me if I want to add etching, engraving, and imaging to my puzzle pieces going forward. I have not tried an acrylic sheet yet, but I think it would be cool to have different colored acrylic pieces for the second puzzle set with detailing. I do like how it handles gradients and shading on the images and I’m happy with the curve line work. Going forward with this knowledge will help me digitally design for this puzzle and the Glowforge. I just need to scan and process the image for the Glowforge. I’m still trying to stick with my 5×7 box dimensions for the puzzle box play area.
10 Things in OpenSCAD
OpenSCAD is more challenging for me to use. I don’t know a lot about coding and a lot of it is confusing to me, but I’m trying to grasp at the basics right now. In class we looked at manipulating the code to make a bowl. The bowl below is what I made in class.
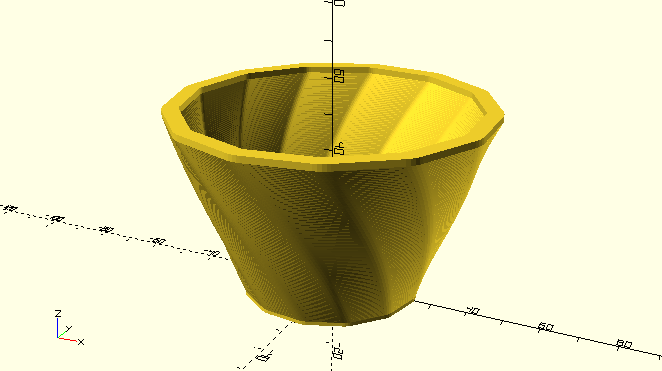
I made the sides thicker and put more of an angle twist with the bowl. The number of sides are 13. It printed okay. There were some spots where it was uneven. I’m not sure how to fix that. It might just be something with the model itself that I needed to do. Like an extra step.
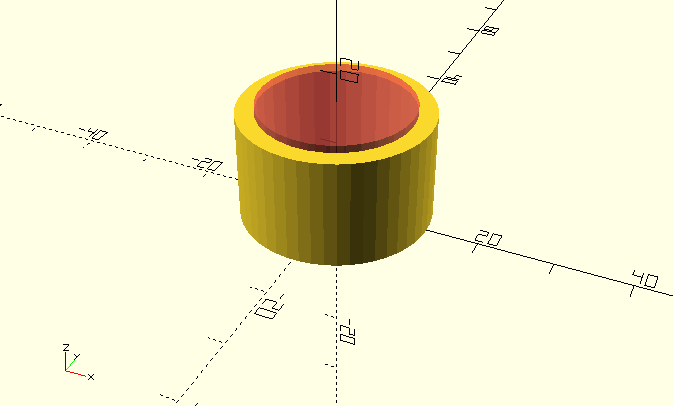
I took 2 cylinders and made a ring. I increased the number of sides to make it a bit smoother. I used the difference and translate tag for the inner cylinder to make the hole in the center. The outer cylinder could use further smoothing. 100 sides may give me a better smooth finish. This ring is customized to my ring size. I measured my finger in class.
Code edit by Patricia Wright.
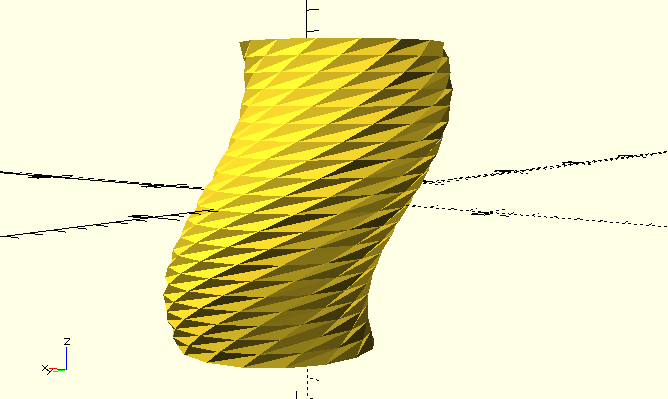
On the OpenSCAD User Manual there was code for extrusion. I wanted to play around with the settings to see what would happen. I changed the height, twist, and radius. I like the pattern on the object. It probably won’t print well at its current size. But I could see it would make an interesting vase object. It may even work with the printers that can print 2 colors. The inside would need to be hollowed ought right. Maybe straightening out the object before re-twisting it again.

Code edit by Patricia Wright.
I edited the code for the sphere inside the cube from the OpenSCAD User Manual. I increased the size of both the sphere and the cube. I wanted to get this printed with a marble inside like a penny trap. Penny wouldn’t work for this one though as it would fall through. I could have added a sphere inside too for the marble but I don’t know how well that would have printed. Spheres are a challenge to print.
Code edit by Patricia Wright.
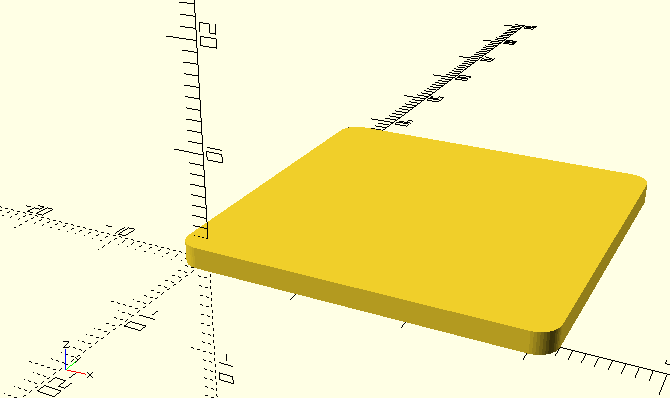
I wanted to learn how to round corners on a box. I looked at the code from the OpenSCAD User Manual and edited the box to make it bigger. The minkowski tag takes a cylinder that is touching an object and combines the two to round the edges at the corners. This makes it easier to export rounded objects into other programs. This base can be used to make something like a badge at the right thickness and engrave texts and images.

Code edit by Patricia Wright.
This program can do text to, but only available text on the machine being worked on. I looked at the code in the User Manual and extruded to size 2. The text is Hello World which was the first program I learned how to write years ago (a little string program). The font style is Comic Sans. I want to see if I can combine this text with the rounded rectangle from earlier. This program is still really challenging.
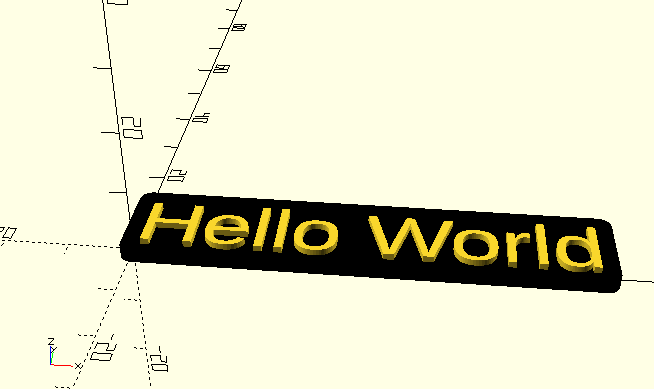
Code edit by Patricia Wright.
Now I have a badge with text. I took the minkowski box from earlier and combined it with my text. I changed the box dimensions to (70,20,1). I had to translate the box down by [0,0,-1] and I changed the color to black so the text could be seen better. I tried the translate tag with the text and couldn’t get it to move up. It may be I’m not typing it in right for text. I also tried the color tag with text and couldn’t get it to work. I found that the hex numbers work with color so I used the hex code for the box.
Code edit by Patricia Wright.
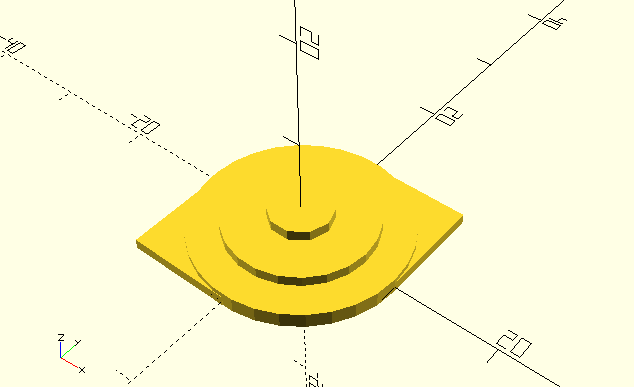
Made an eye like shape. I couldn’t get the middle cylinder to become a hole. That’s alright. I don’t like the lack of movement tools in OpenSCAD. It’s harder to move objects without code. I modified one of the code from the User Manual. Added another square to the side and started shaping it like an eye. I wanted to color the cylinders but couldn’t get the code to work. I’m fine with the way they’re stacked. It gives the object definition for when printing.
Code edit by Patricia Wright.
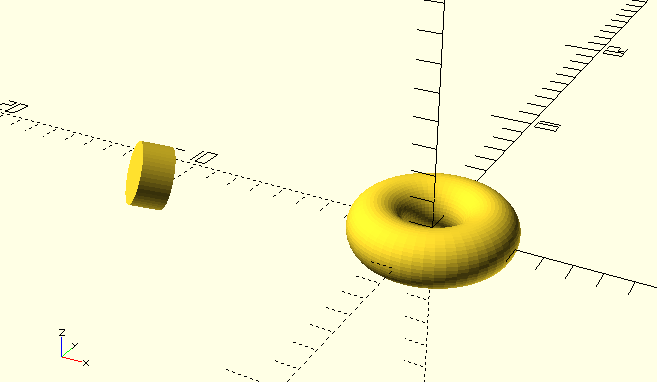
I tried experimenting with the mirror tool. It mirrored the original cylinder object but not the doughnut object. I tried adding the tag to make the mirror be a doughnut but it kept giving me errors. I edited the original and mirror to have a quality of 50 instead of the rough polygon object it was. I wanted to mirror to the side of the object which it did do.

Code edit by Patricia Wright.
The last object I used the polygon tool. It took some time to make because of all the points. It’s like filling in graph paper to make a shape. This one is a little cartoon head with little ears. Out of the programs we’ve used this semester, this tool took the most time to use as I had to type in the points for the xyz grid. For any free form sketching I would use another program, but for not as complex polygon shapes this would be enough.
Credit for the code:
OpenSCAD bowl code by mathgrrl.
OpenSCAD User Manual credit to the author(s).