Project Summary
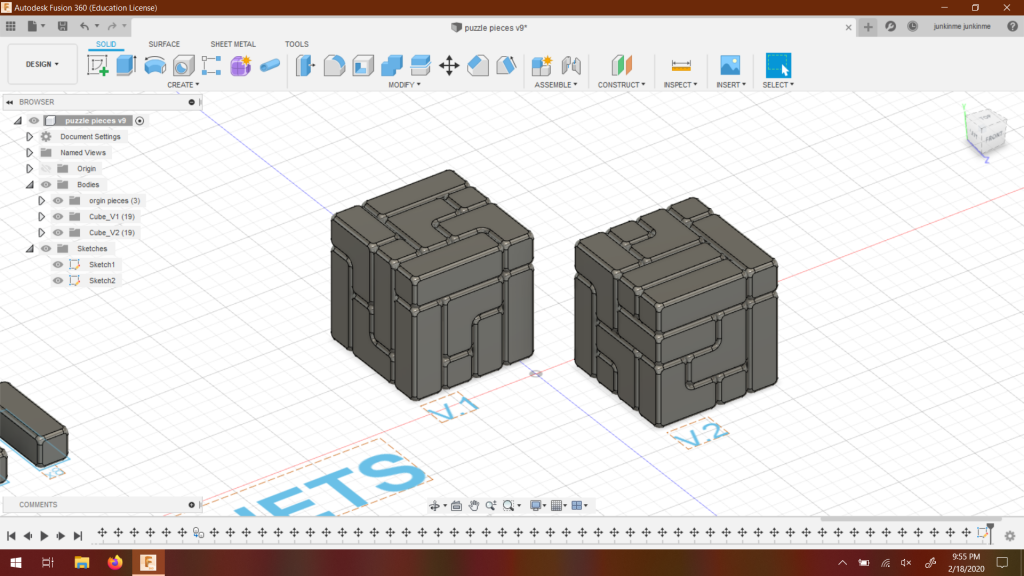
A two-part cube puzzle consisting of a blocky hollow inner puzzle and a decorative panel outer façade puzzle. Each puzzle can be disassembled and reassembled into a platform and pedestal. The object inside the inner cube (if anything) can be displayed on top of the pedestal.
2/18 Edit
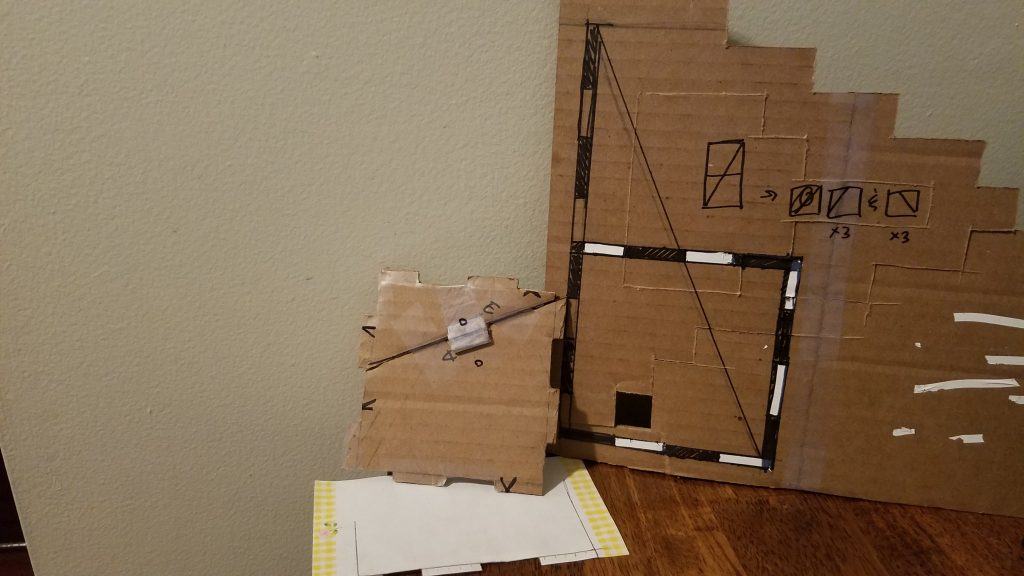
I realized I never included the initial write-up plans for the puzzle. Here are my very first plans for the puzzle:
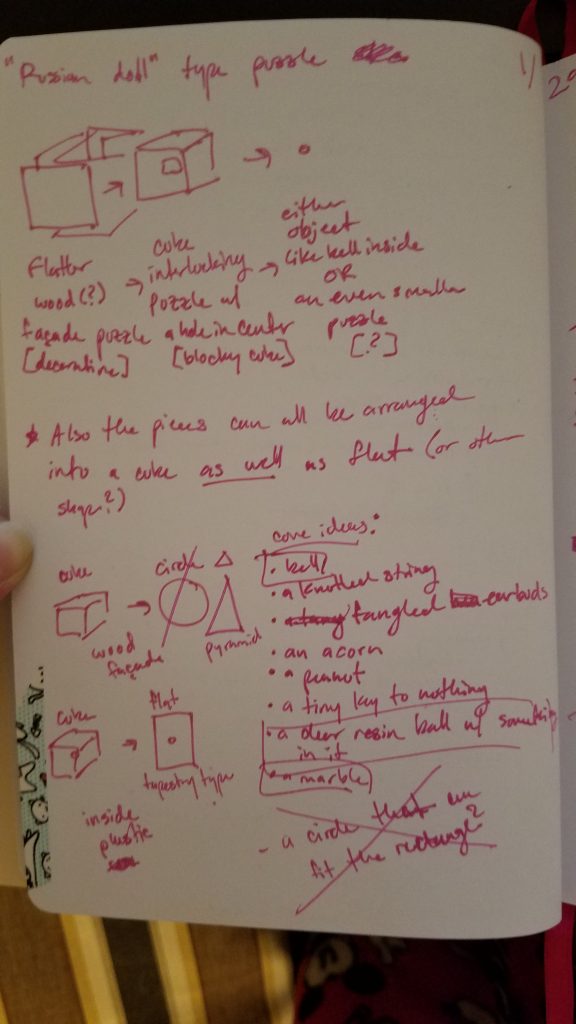
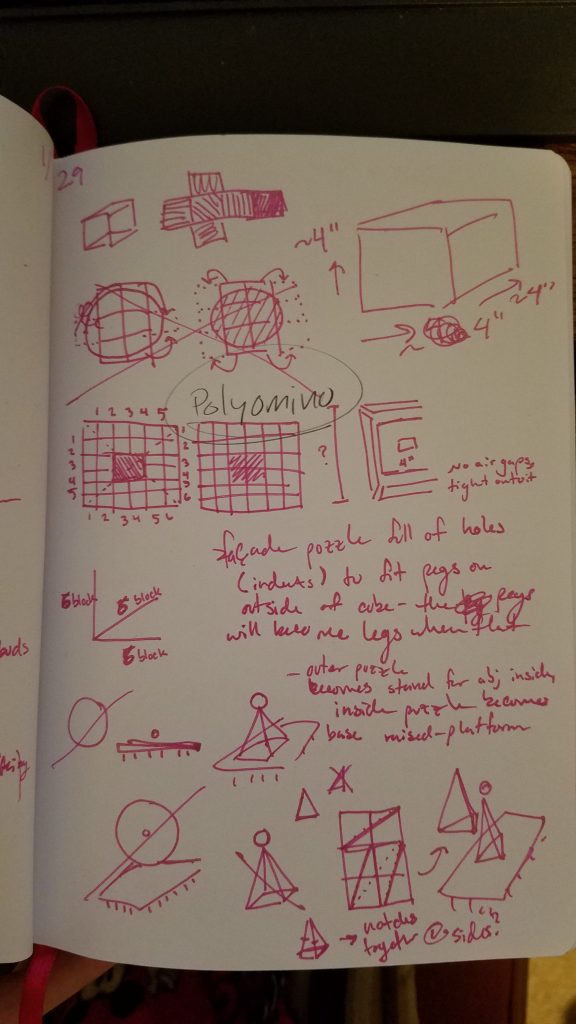

Some things stayed as they were, and others have progressed and changed form since then.
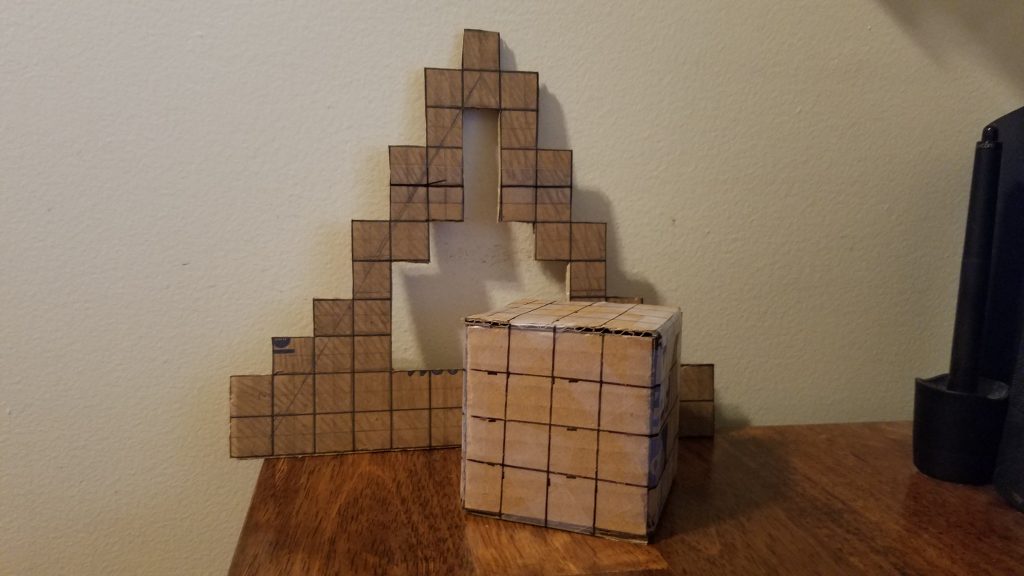
Prototype
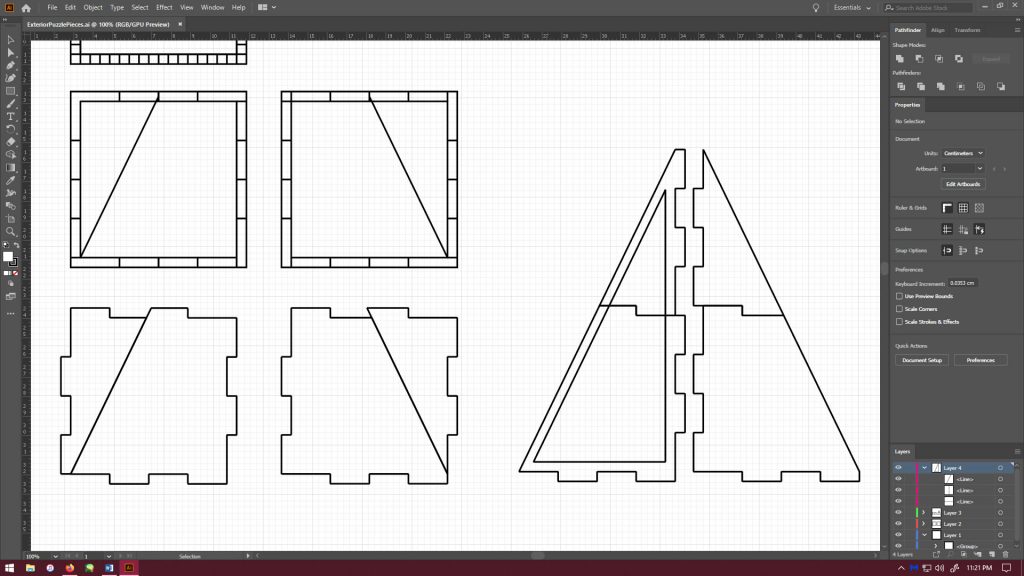
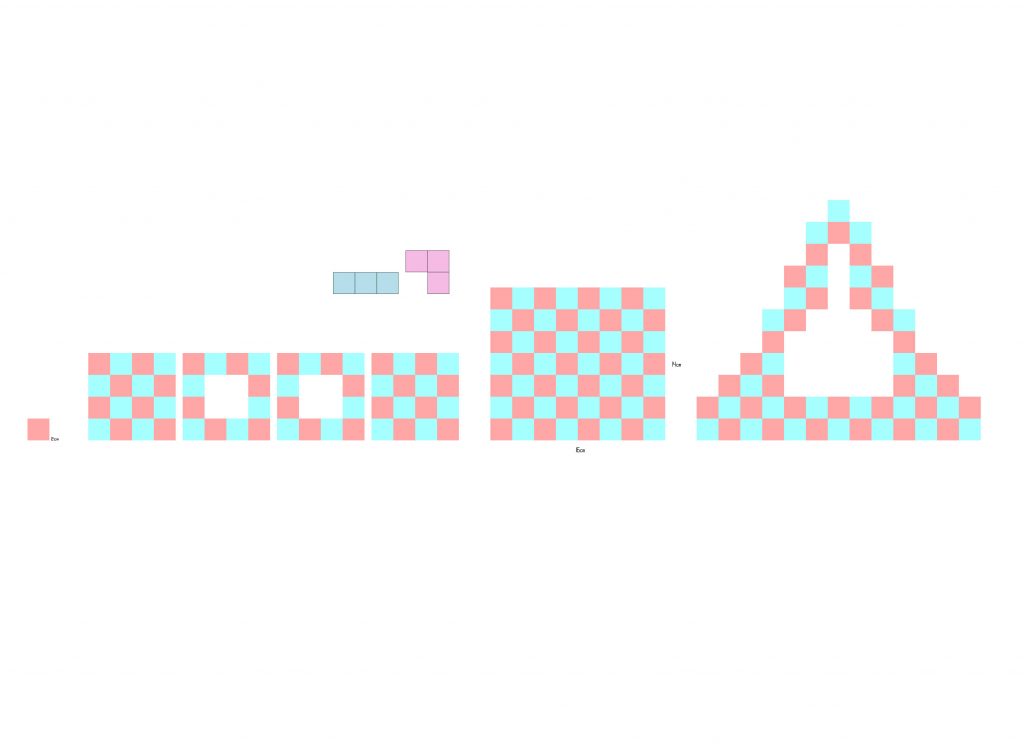
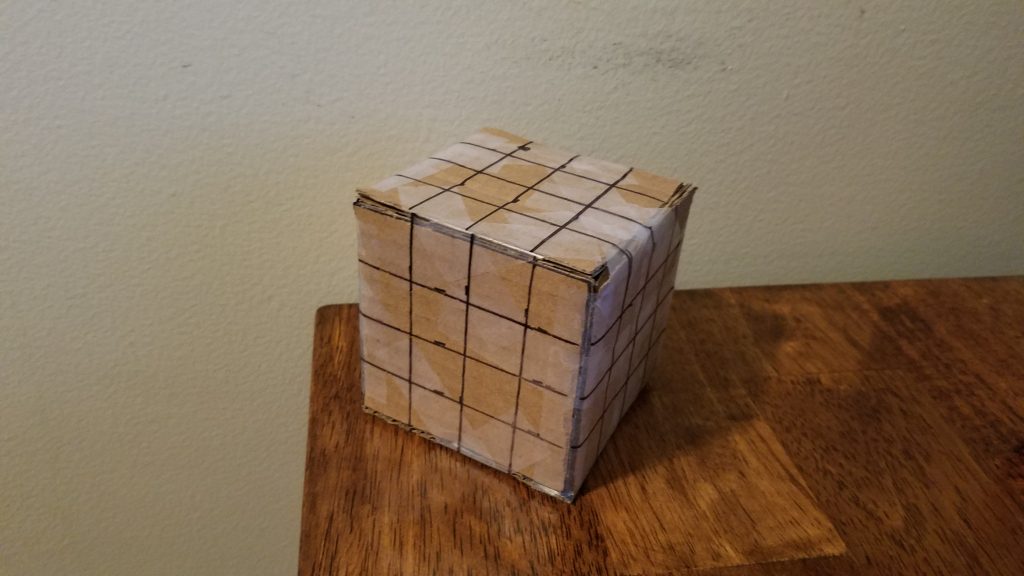
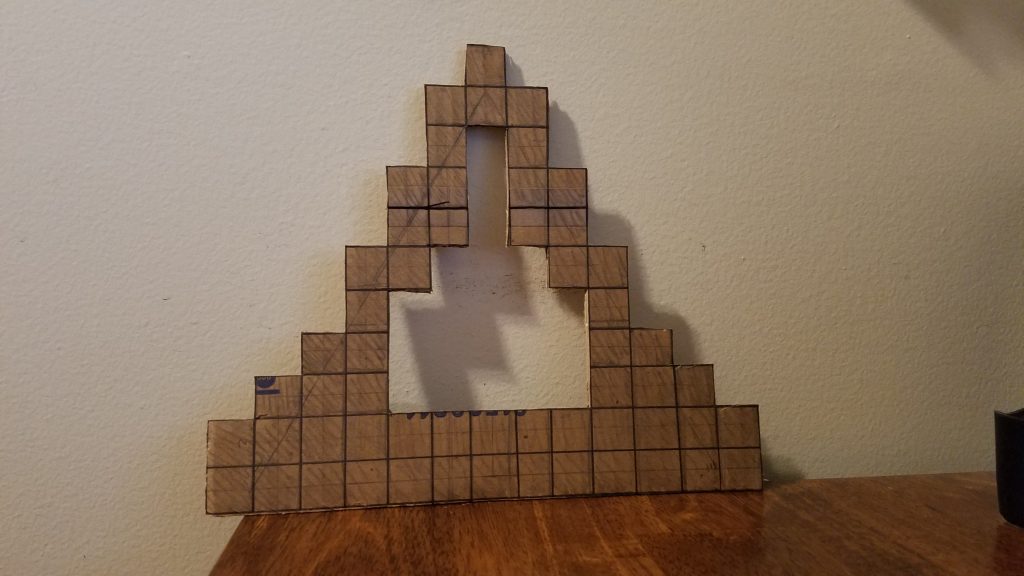
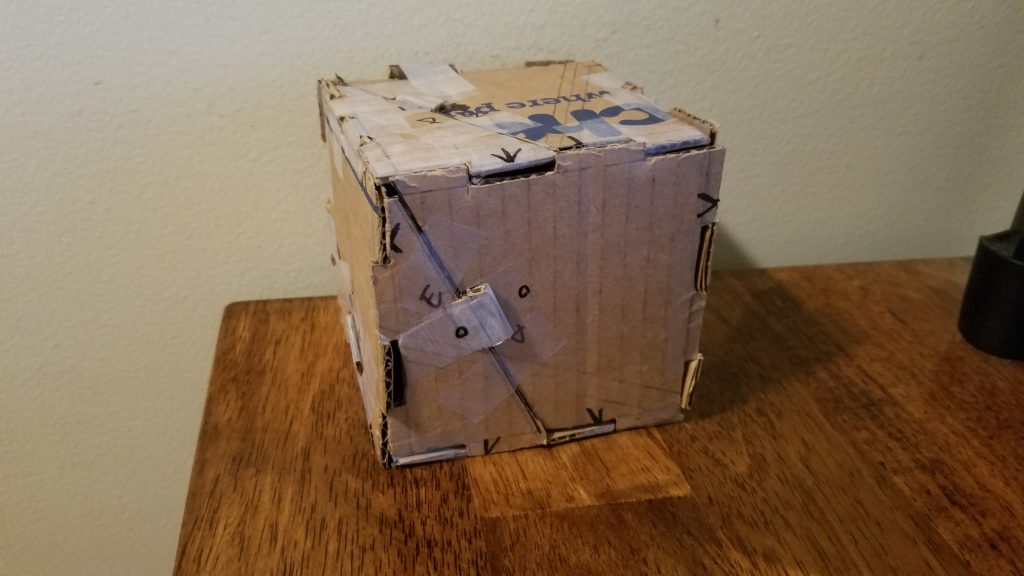
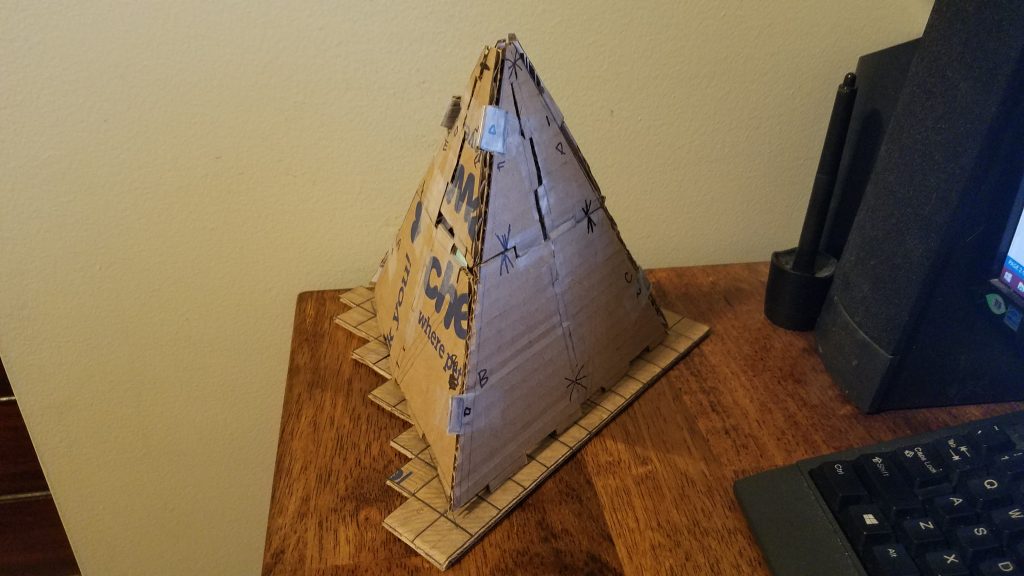
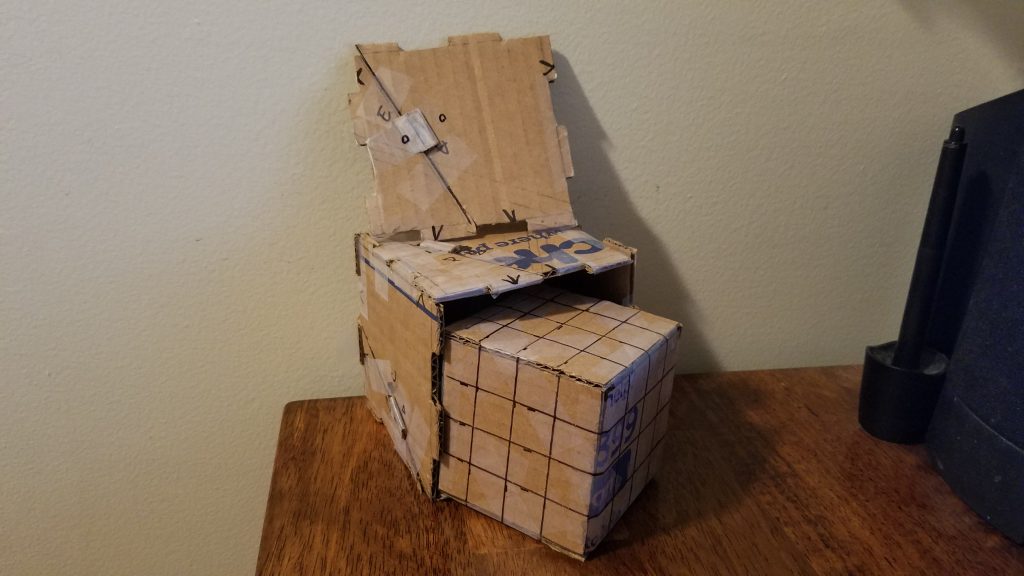
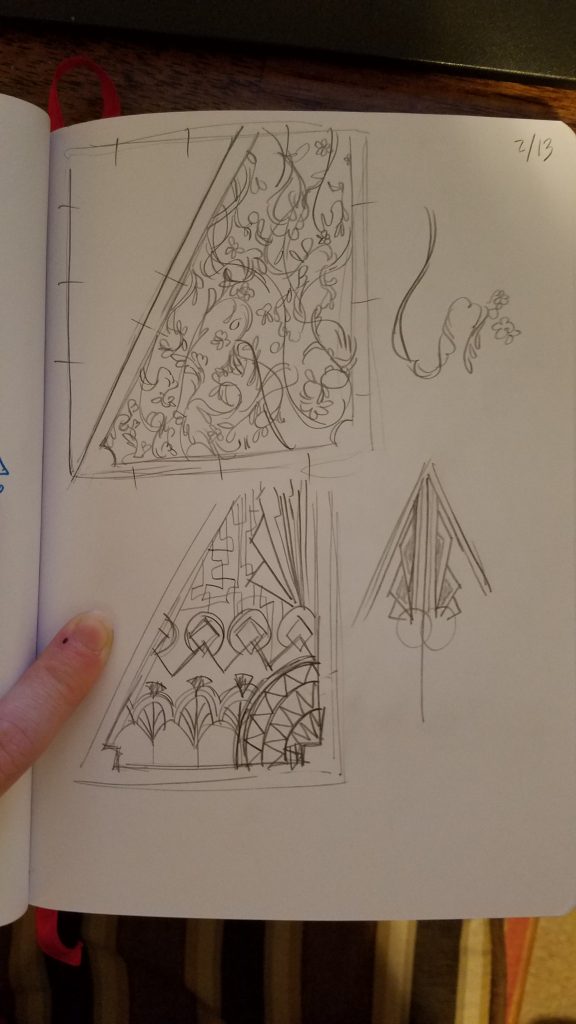
Firstly, I thought about the size I wanted to make it. I wanted it to be a bit larger since it would be decorative, so I started with outlining the inside cube’s size. I then took into account how I would break down the cube, similar to the previous cube project made – settling on a base unit for a single block of the puzzle, how many blocks is the puzzle’s grid, etc. At first I planned for a more complicated small piece puzzle, but I quickly found that wasn’t going to work like I thought it would. Then I simplified into larger pieces and made up for fewer pieces for fewer piece shapes. After figuring that out, I tackled the platform layout. At first, I just planned for a rectangle, but having finished the exterior puzzle prototype by this time I realized that the platform (as a rectangle) would be too small and wouldn’t even fit under the pyramid. So I stared playing around to make it into a triangle itself. That worked out better than I had hoped and I’m feeling happier with the platform design now. How exactly the pieces will completely arrange into the cube and platform is still in the thought process, but the platform shape has already got me thinking on what/how many pieces will be included.. But, to be honest, I underestimated the time needed and didn’t give myself enough time to fully figure out the pieces for this puzzle, so all I have prototyped is the 3D shape/size of the inside cube (cube and platform) along with 2D plans and no functioning pieces.
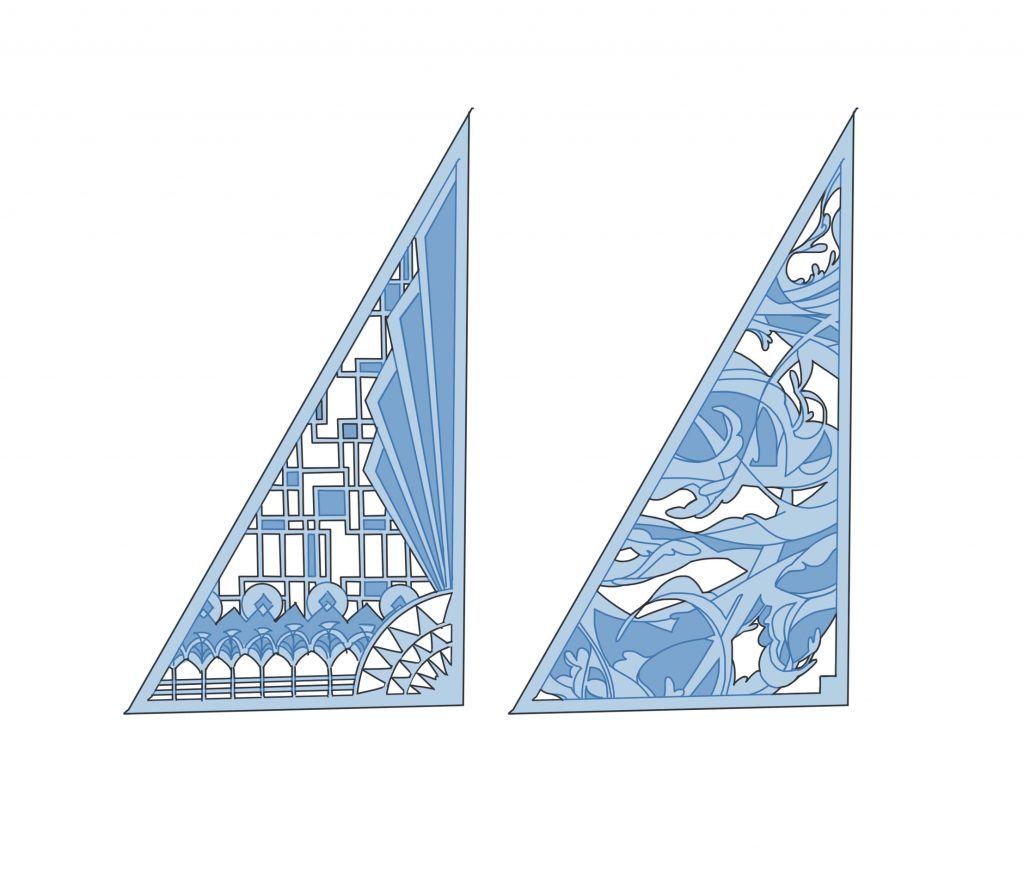
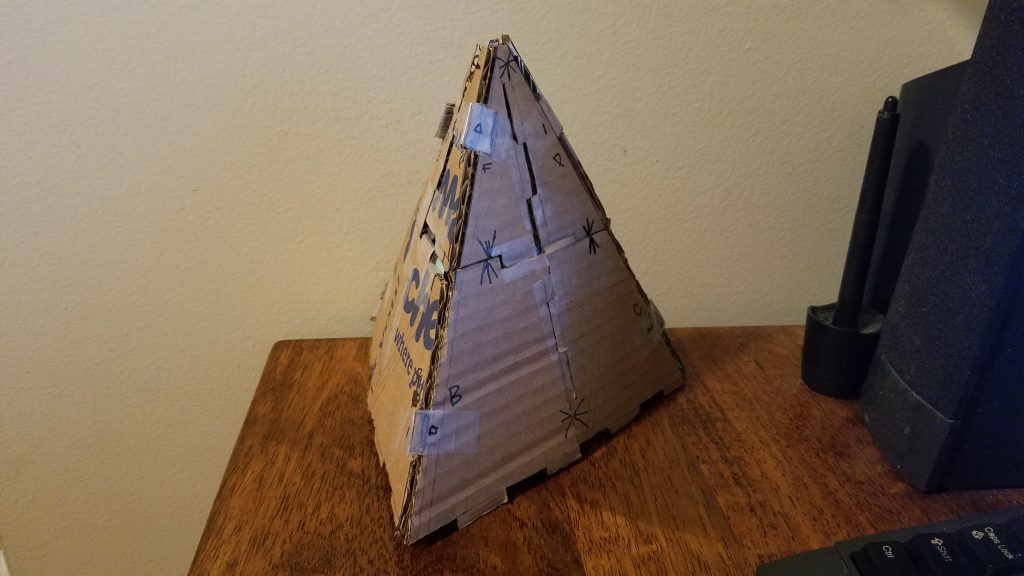
At the same time, using the inside cube as the size guide, I made the roughs of the outside puzzle. For these pieces, I already had a more solid idea of what I was actually going to do. I knew how I would make all six sides turn into the three-sided pyramid. I quickly made the sides and then worked out how to make them fit together. The hardest part was how they would slot together. That took a bit of flipping pieces around and at one point just not looking at it a while before figuring it out. Now I have a functional exterior puzzle, albeit the pieces don’t completely fit together properly with all the tape and constant moving of tabs. These pieces, once made uniform in shape, are the expected final outcomes of the exterior puzzle (only shapes, not material and look). I’ve yet to design the pattern for the pieces but I’m not too concerned with it right now, as I’m thinking it’ll most likely edge on a more organic/flora design.
I’m actually pretty excited about how it will look completed. I definitely like the overall size of each puzzle as both cube and pedestal and the plan for the exterior puzzle. I’m also finally feeling a bit better about the inside puzzle after getting some more thought in so that’s nice.
Initial Design Test
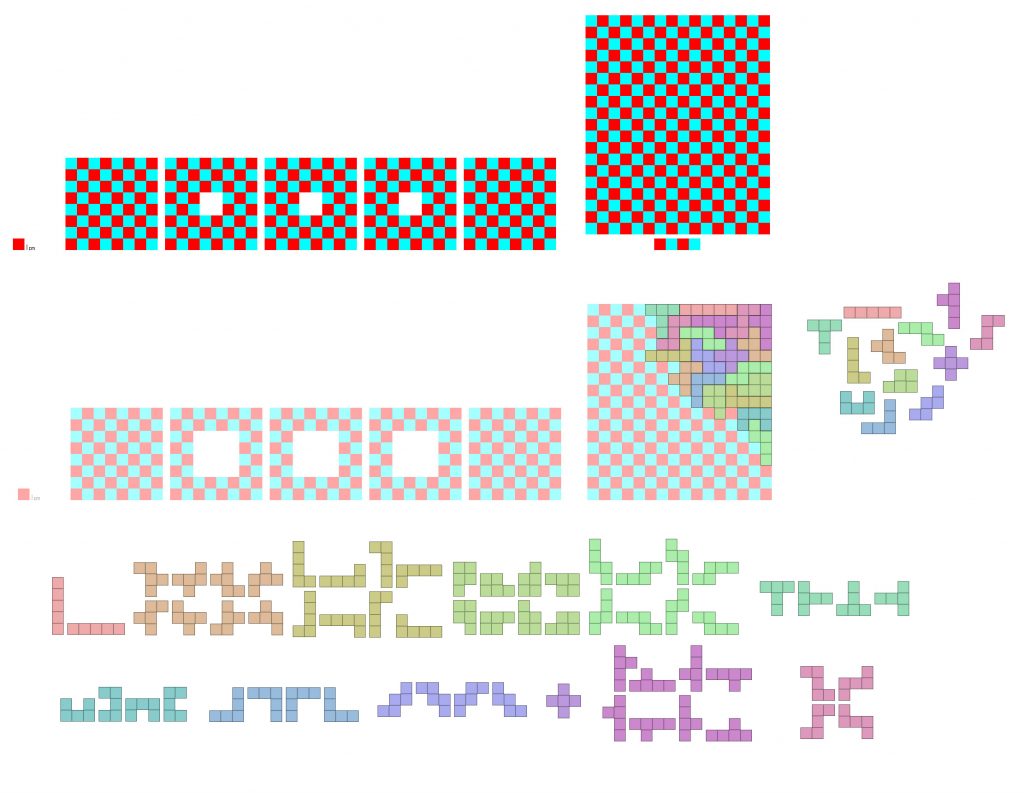
The area I thought to test first was the entirety of the inside puzzle. It was the only area I was mostly unsure about the outcome of, so firstly I found some solutions to the puzzle in flat form and then went backwards to find solutions to the puzzle’s cube form.
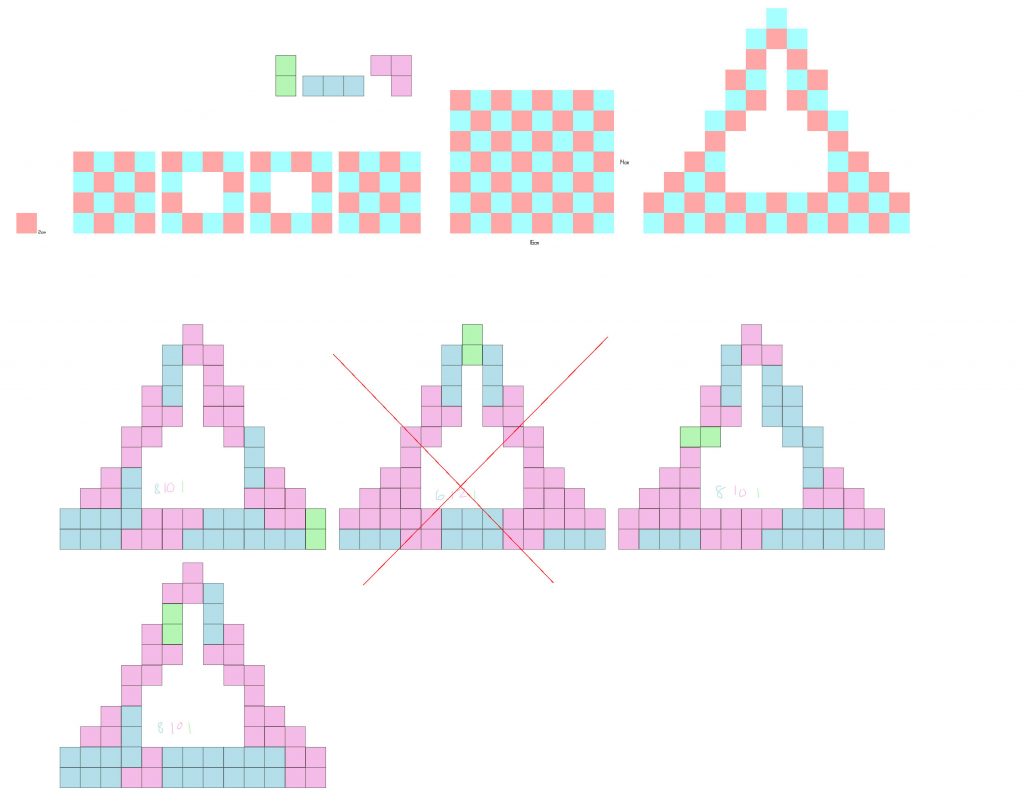
I focused on printing the whole thing (at 37.5% size) because, as I was finding solutions to its flat form, I realized that with the pieces being on a single plane, there was no way for them to hold together as a cube. Or even as a platform, if there was no shaped tray to put them in.
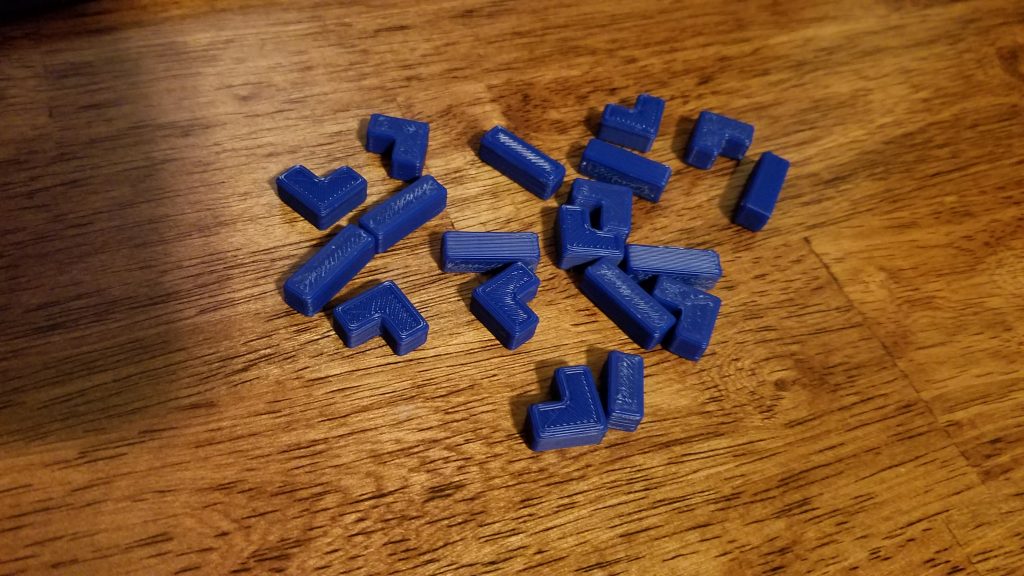
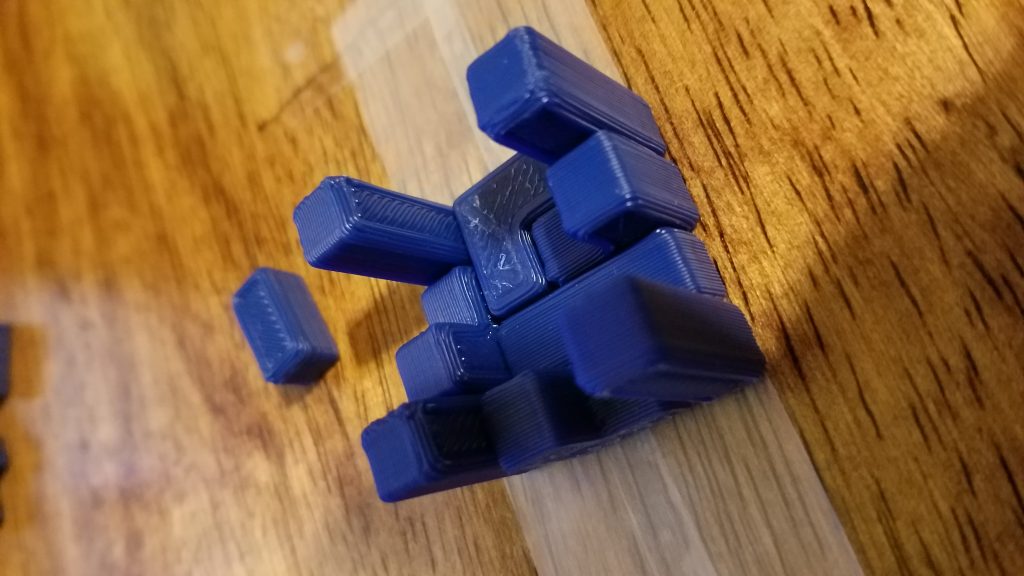
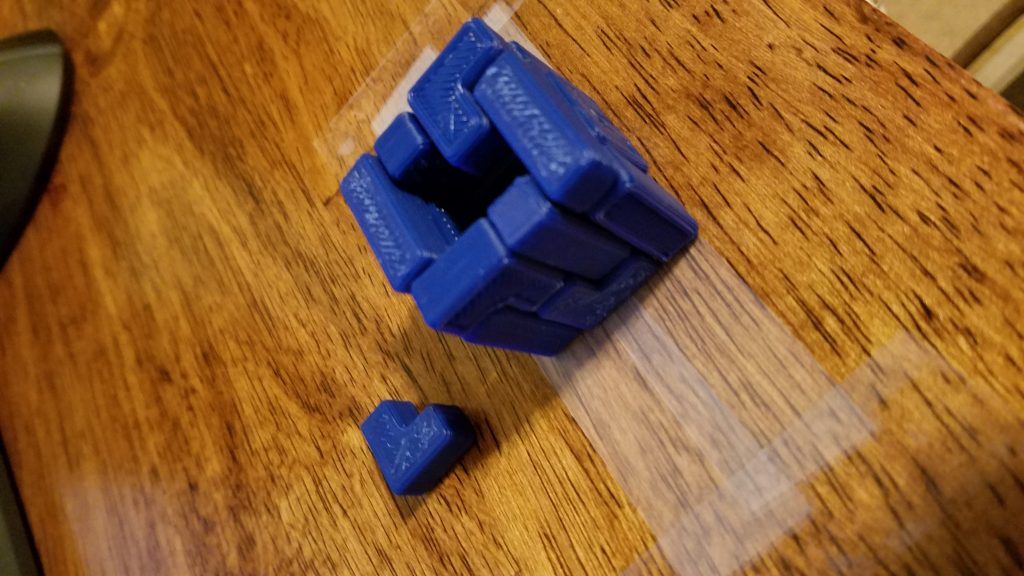
I found solutions to the cube, and while doing so I realized a way to solve the problem. I’m thinking magnets. I don’t have any to work with right now, but now I at least have a place to start. I can next move to print some pieces at full size, put in some magnets, and see where to go from there.
I’m also beginning the process of designing the outside puzzle piece appearance. How the pieces themselves will be shaped is mostly set in stone, and I need to learn to work with the laser cutter, but I think that can come a bit later. I’ll tackle the engraved design alongside the rest of the puzzle work.

Continued Testing
Next I will be dialing in the magnet connections. To begin I laid out my miniature pieces into a cube variation and marked where I believe I would put a magnet in the final version and then counted the total number of magnets for one version – 137 connection points.
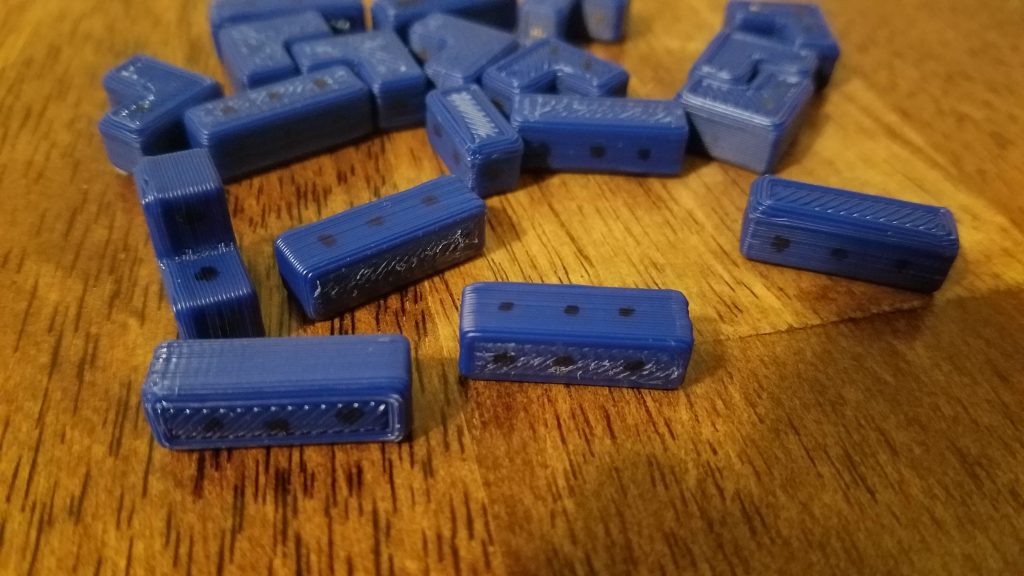
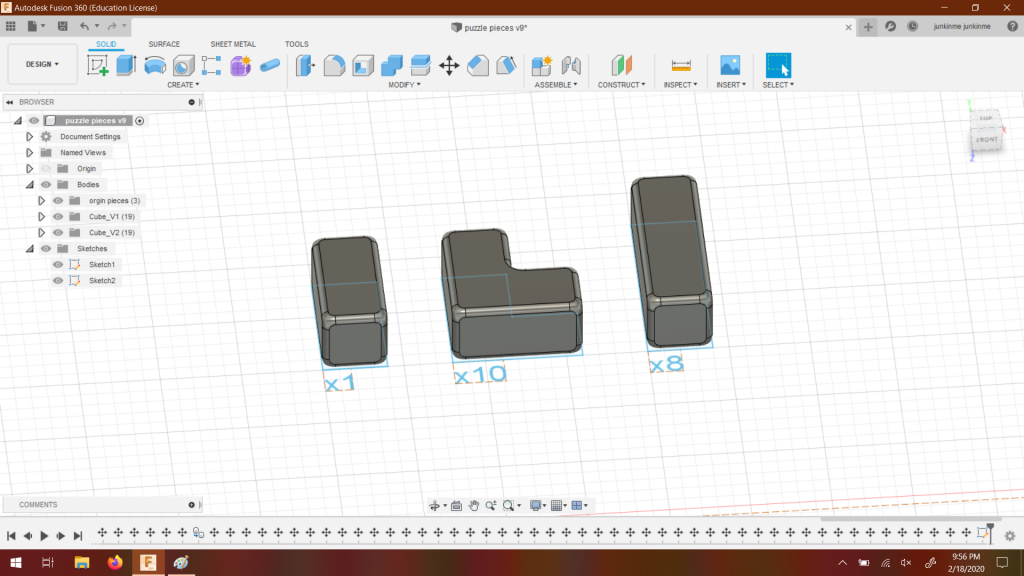
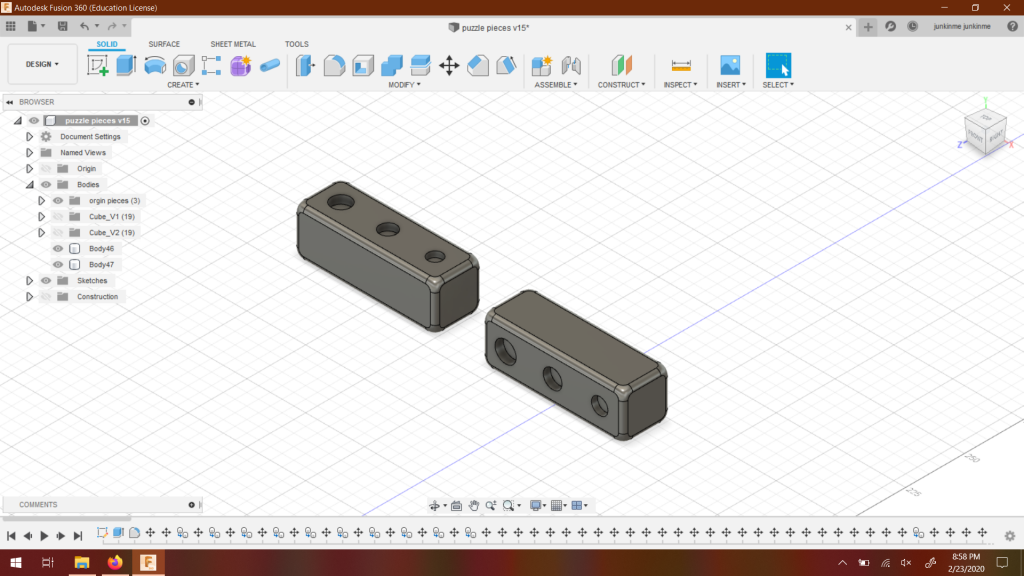
I then designed two versions of one piece with the magnet connections where they would be and printed full-sized puzzle pieces on the two different brands of printers to see which one I preferred, and on those pieces were various hole sizes to dry-fit magnets.
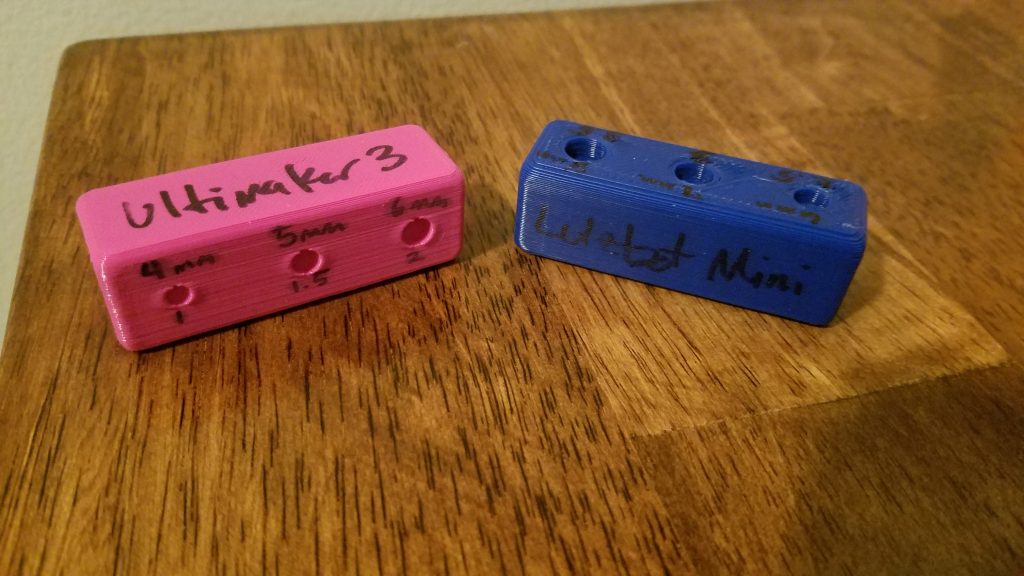
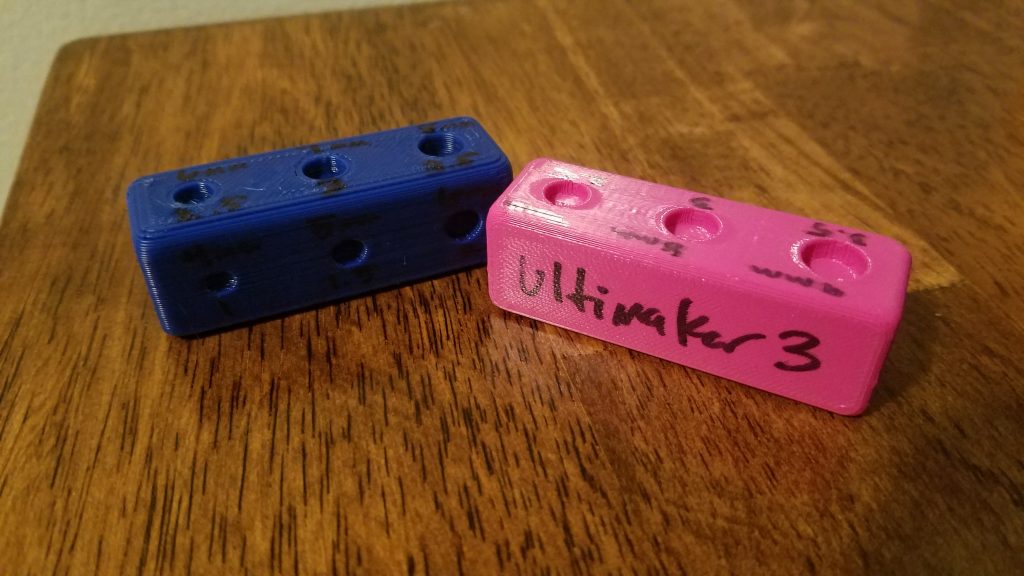
Each hole goes up by 1mm in diameter (starting at 4 and going to 9) and .5mm in depth (starting at 1 and going to 3.5). I did accidentally have two holes that were the same size on one piece, but luckily it was printed on the Lulzbot which I don’t plan to use for the final prints.
I could next start testing the pieces on the different Ultimakers, not just the Ultimaker 3, as well as with different infills to make them stronger to help with resisting possible breaking from the magnet force.
I don’t have the magnets yet, and unfortunately buying small ones isn’t really reasonable for testing since they only sell them in packs of 300 but I found a pack of 80 4x3mm round magnets that I think will go good for testing. I’m not sure what type of magnets they are, I don’t think they’re neodymium. I feel neodymium would be good as it would hold the puzzle pieces together, but my biggest fear is that they would be too strong and you wouldn’t be able to remove the pieces without risk of breaking them – something that a higher infill might fix. If I can find a small pack of small neodymium magnets then I plan to test them too, but I’ve yet to find one that is easily and, most importantly, quickly sourced.
I have also started the process of working on designing the exterior puzzle.