Hello
10 points, due by noon on Thursday 1/10

Hi my name is Shannon Stagliano! I am a Junior SMAD major and my concentration is in Creative Advertising. I am from outside of Philadelphia, Pennsylvania. In my free time I love working out and trying new classes at different studios. I also enjoy designing illustrations on Adobe Illustrator. When I graduate I hope to travel and then eventually pursue a career as an Art Director.
I have never used a 3D printer before todays class but I have done some coding in HTML and CSS in my SMAD 203 class last semester. I am excited to learn the new design software systems and begin to expand my knowledge of coding.
https://www.thingiverse.com/staglisr/about
Thingiverse Model
10 points, due by noon on Thursday 1/10
Designer: Smartdesign
Title: Keychain
https://www.thingiverse.com/thing:3336210

I chose this model because key chains are a practical and useful item that can be made by 3D printers. I like how this designer made the edges smooth in this model.
Thingiverse Print
10 points, due by noon on Tuesday 1/15

My keychain was mostly a success, except for the fact the stars on the American flag were too small to print. In order to fix this issue I think I need to increase the size of the keychain dimensions. I would like to try it out again to see if increasing the size would allow for the stars to become visible.
https://www.thingiverse.com/thing:3347650
20 Forms in Tinkercad
10 points, due by noon on Tuesday 1/15


First Screenshot:
- Blue Triangle Mountains: For this design, I merged four pyramids to make a mountain range
- Pink Star: I used the shape tool and played around with the dimensions
- Yellow Smiley Face: I used the sphere shape tool and flattened it some and then added hexagons and made them holes for eyes. Lastly, I took the half-moon shape and made that a hole for the mouth
- XO: I used the shapes under the “text and numbers” tab
- 2019: I inserted the numbers “2019” from the “text and numbers” tab and then placed a rectangle shape under the numbers to make a background so that numbers stand out and form one shape
- Butterfly: I found this shape under the shape generator tab named “All”
- Skull: I played around with the placement of this object to make sure that if printed it would work and not fall over
Second Screenshot:
- Blue Star: I played around with the star shape and changed the number of points
- SRS: I played around with the “text and numbers” tab to create my initials
- Green and Purple Box: I played around with the green square shape and then filled the inside with a purple sphere
- Purple Squiggles: I used the squiggle shape tool and copied the first one and then merged it with the second one to create a connected squiggle shape
- Yellow and Grey House: I used a rectangle and triangle shape to make a shape that looked like a house
- Ice-cream Cone: I played around with the featured shapes and tried to make it lay side ways
- Pink Sphere house: I used a sphere shape and then another sphere to make a hole cut out in the house
- Purple Heart: I used the heart shape and the rectangle shape and merged them together
Third Screenshot:
- Philly: I used the drawing tool to spell out “Philly”
- Olympic Rings: I used five ring shapes to create my own Olympic symbol
- Yellow Circle: I used a sphere tool and then another sphere to create a hole in the center
- Black Glasses: I searched through the shapes and found the glasses shape and played around with how it would lay properly on the platform
- Blue Sphere: I thought this shape was interesting so I raised it up to make the shape taller
- Purple and Green Hexagon: I took 2 hexagons and stacked them on top of each other than with the third and smallest hexagon I made a hole through the other two
Tinkercad Print
10 points, due by noon on Thursday 1/17

The star model that I printed worked out much better than I thought. It printed flat onto the plate and peeled off easily without breaking. If I were to print it again, I think I would add a small hole to one of the points to make it into a keychain.
Summary of Group Tinkercad Project
10 points, due by noon on Tuesday 1/29
Bachelor Rose
By: Shannon Stagliano and Skylar Simone

This project allowed us to collaborate to create a design that we both felt passionate about. I think that working together helped us to create more ideas and see different ways of problem solving our mistakes. I think that our idea and thought process might need a few more adjustments since the hook on the side of the stem got messed up during the printing process. Overall, I am most proud of our flower design and that we were able to make something of our own that we were interested in.
https://geekhaus.com/isci104_spring2019/2019/01/15/bachelor-rose/
https://www.thingiverse.com/thing:3378909
20 Forms in Fusion 360
10 points, due by noon on Thurdsay 1/31
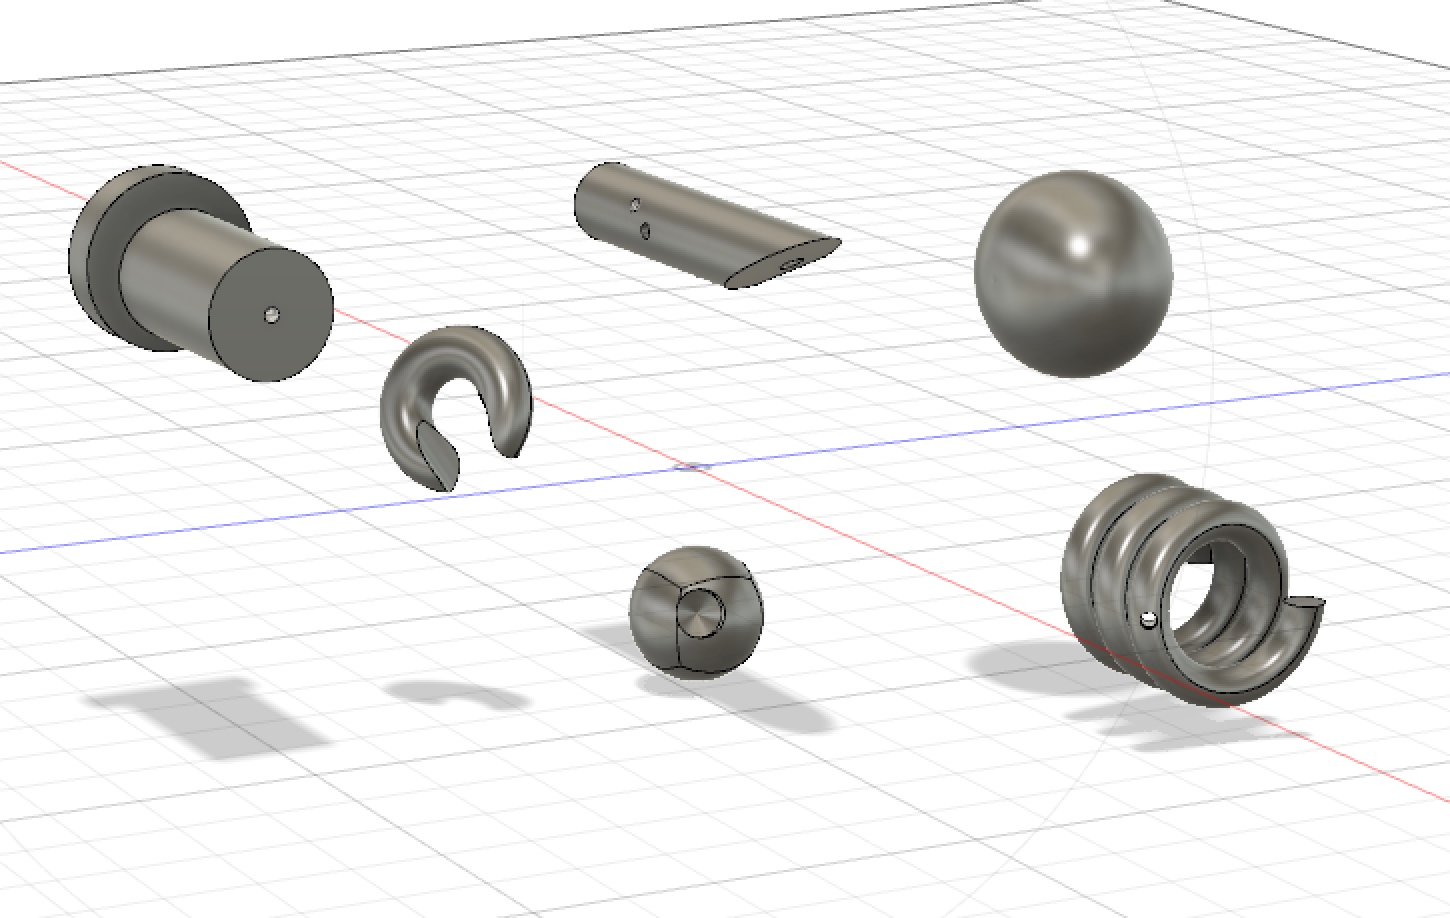
Screen Shot #1
- Starting on the left hand side I created two cylinder shapes and combined them together to make a pipe figure. I then played around with the hole tool and made a small hole through the center
- I used the torus shape then created a circle to cut out a hole to create a semi circle figure
- For the cylinder shape, I played around with the hole tool and created a few from different angles
- I created a sphere, then cut a hole through the middle, then played around with the edit form tool to make the sphere have more sides and look less circular
- I used the spiral shape and accidentally created a hole in one of the spirals while trying to make the spiral smaller
- The plain sphere I created was the first shape that I made on fusion so I kept it simple
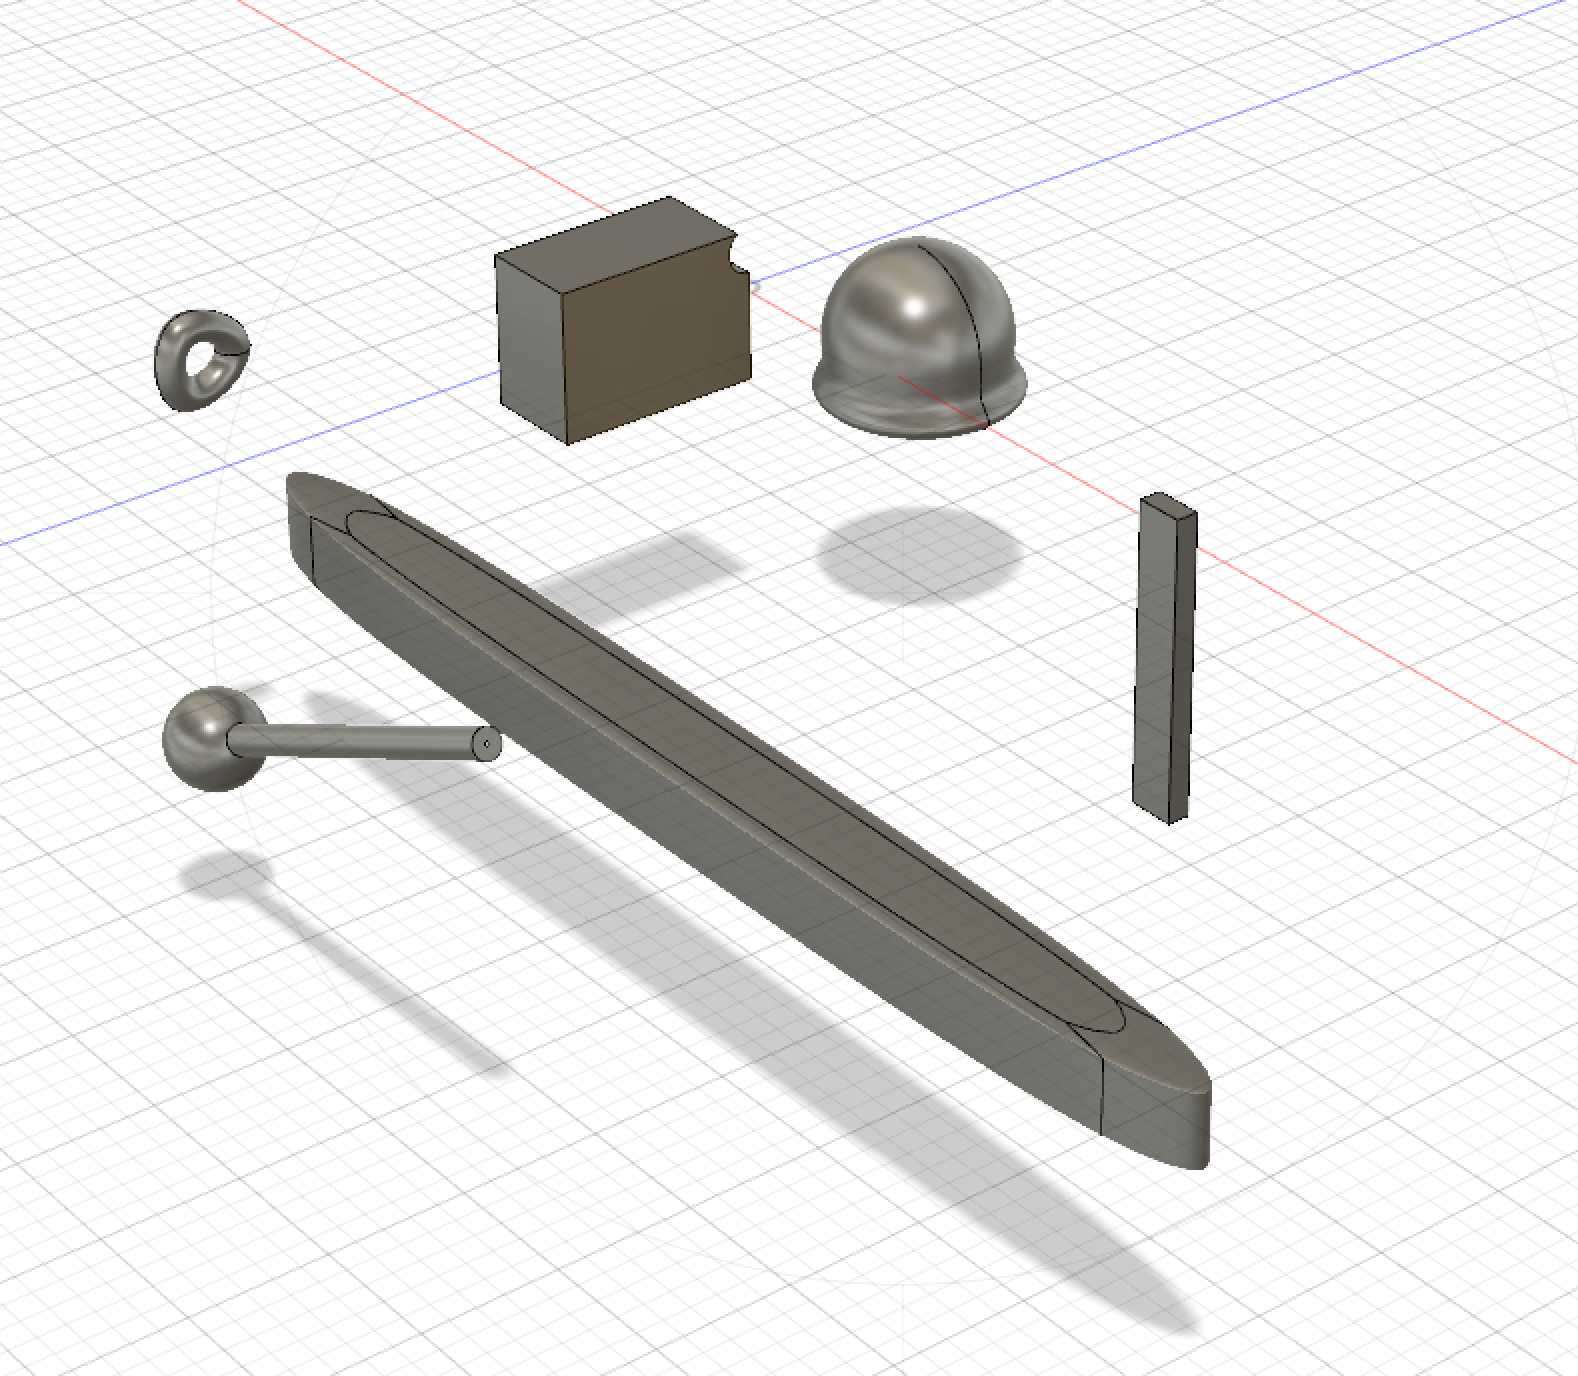
Screen Shot #2
- I created a sphere and then a cylinder then used the combine tool to make a microphone looking shape by extending the cylinder shape
- I used torus tool then changed the workspace from model to sculpt mode and was able to change the torus shape to look more fluid
- I used the rectangle shape then went into sculpt mode and made the edges more pointing and elongated to create a boat looking object
- I used the rectangle tool and then made an arc and combined the two together to make a moon like cut out. I wanted to make more cut outs to look like a piece of cheese
- I took the sphere shape and then played around with the edit form tool and took individual sections of the sphere and molded them to look like a bell shape
- I used a rectangle shape then used the press and pull tool to raise the rectangle
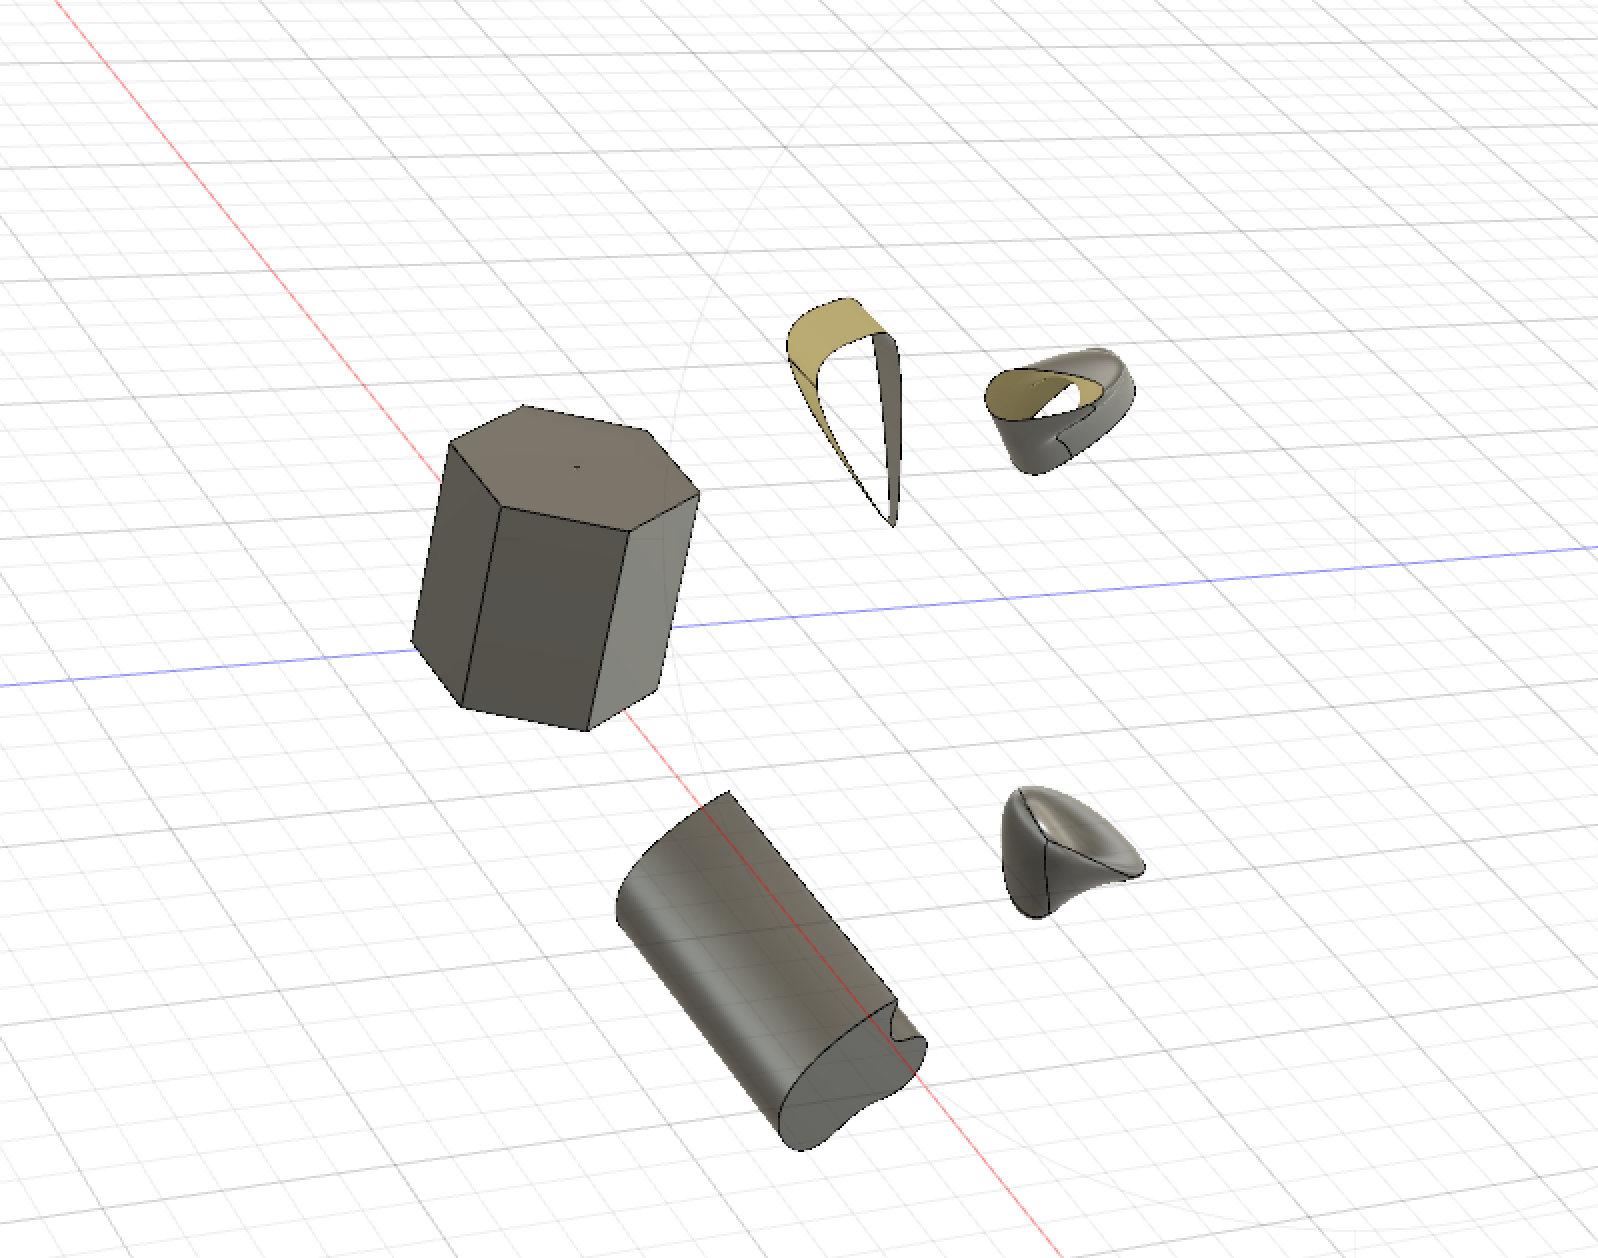
Screen Shot #3
- I used the sketch tool to create the hexagon shape and then used the extrude tool to make the object three-dimensional
- For the other 4 objects, I focused on how to use the sculpt mode to create abstract shapes and played around with the individual sections of the shape to raise or curve different edges
- I found that I liked working in the sculpt mode much more than the model mode
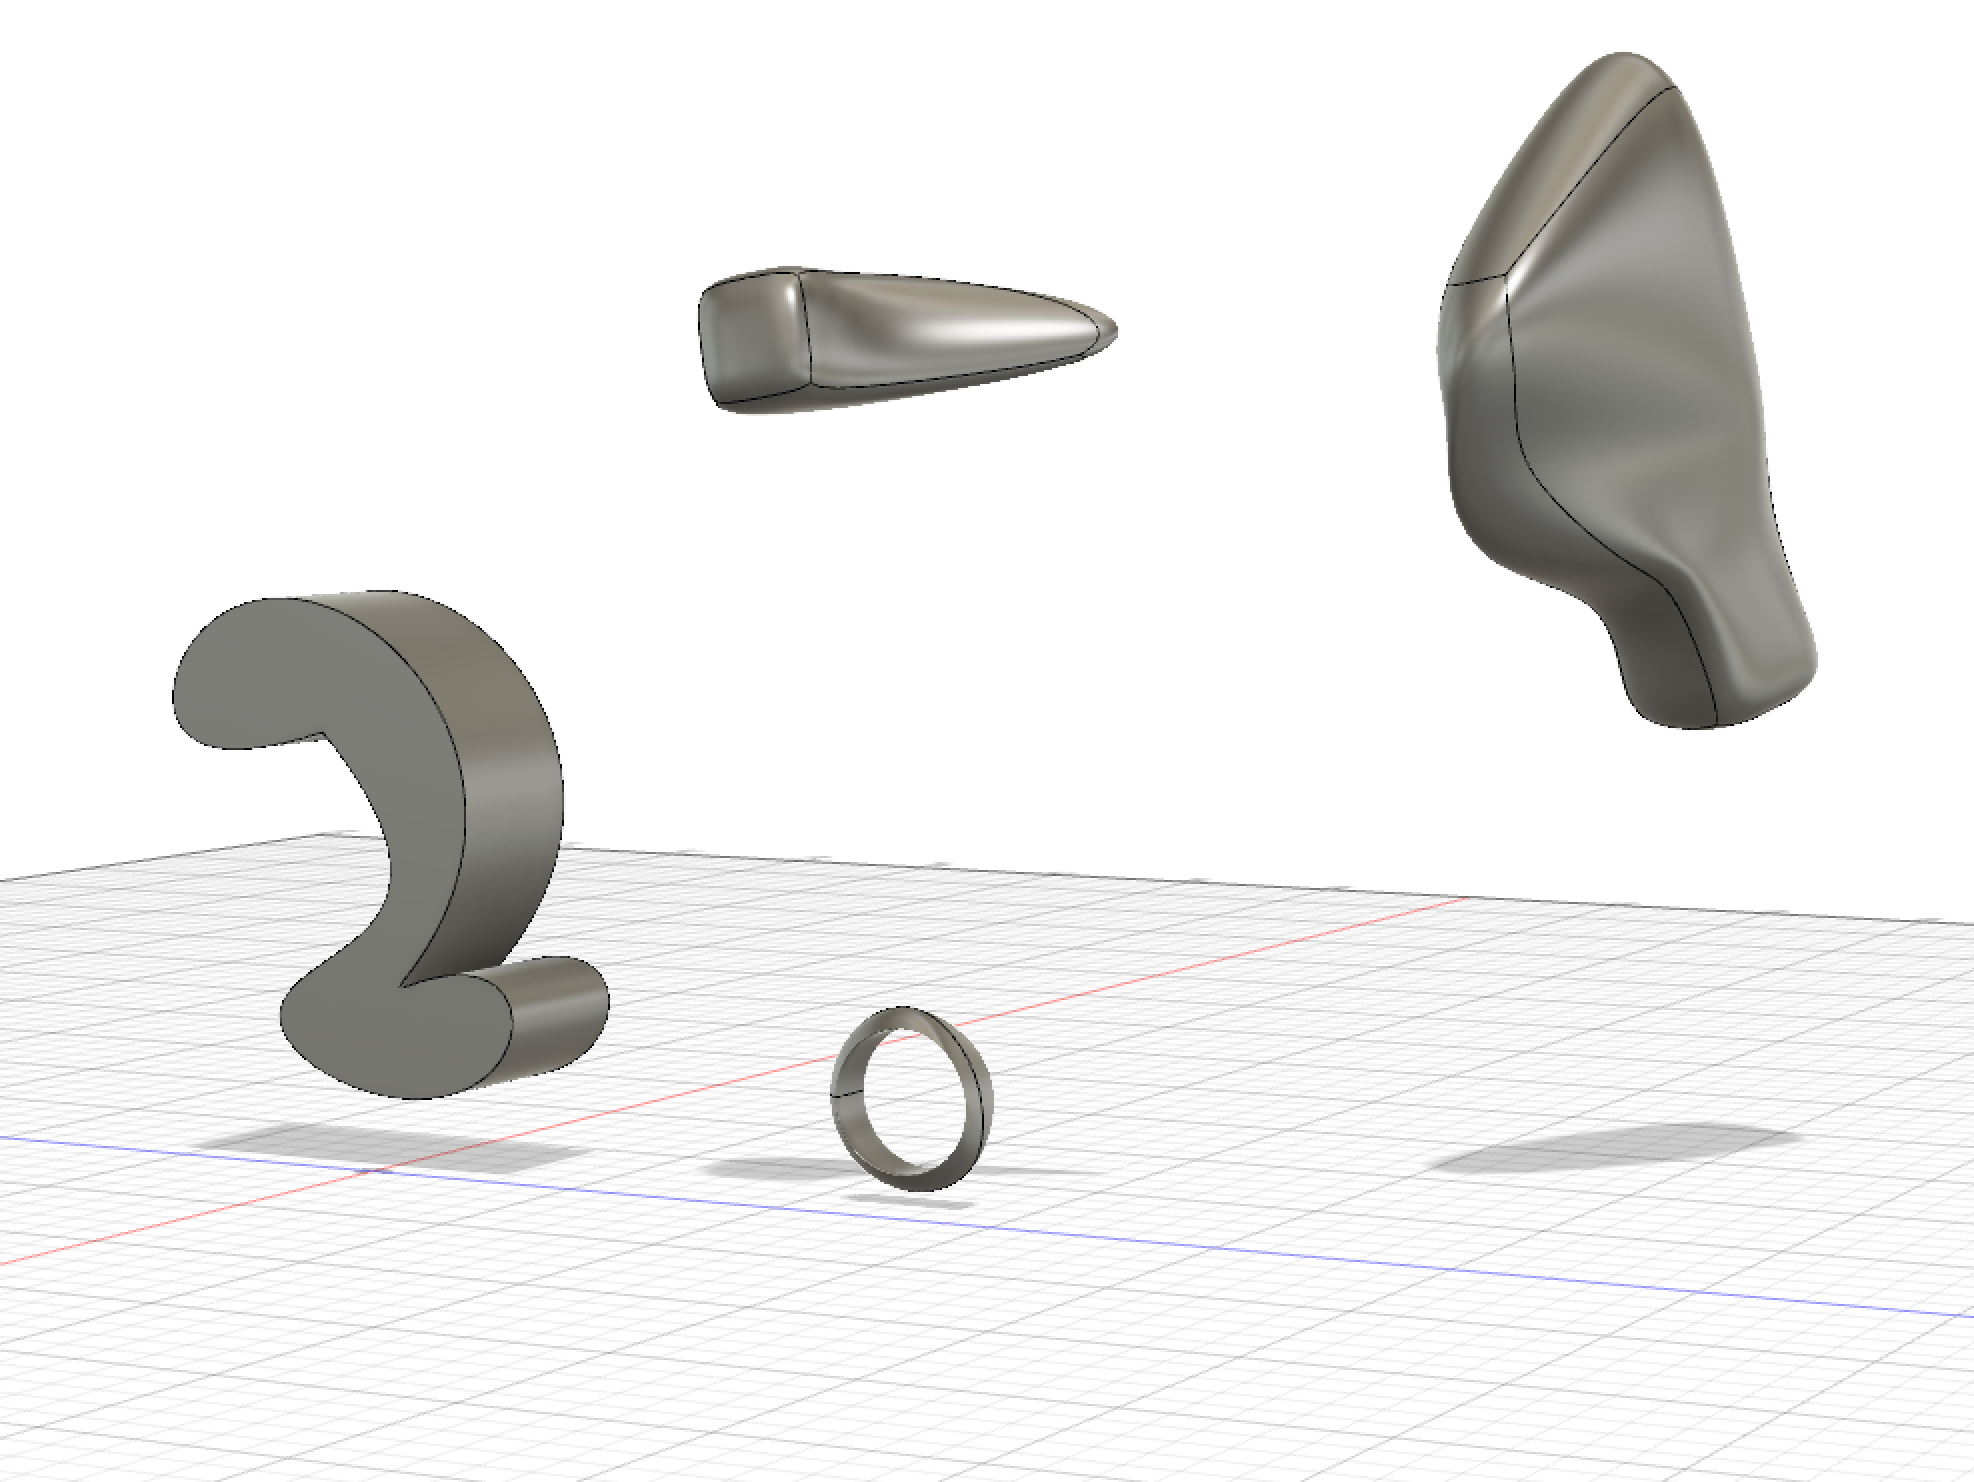
Screen Shot #4
- I used the sketch tool called point to try and create an “S” shape but it came out more like an abstract “2” I then used the extrude tool to make it three-dimensional
- The floating shapes were made in sculpt mode and I drew connecting lines on the shape to make more subsections, then played around with how to curve the edges
- I created another torus shape and tried to make the edges thinner to resemble a ring, I raised it up to look like it was standing on one edge rather than it being flat on the grid
- I need to make sure next time I create an object on the grid that it is not floating in the air
Fusion 360 Print
10 points, due by noon on Tuesday 2/5

The sphere that I created on Fusion 360 printed very nicely without complication. This print was quick and came out clean, unlike some of the other items I have printed.
Fusion 360 Vase Design
10 points, due by noon on Thursday 2/7

To start off, I played around with the circle and ellipse shapes to figure out how to use the loft tool as shown in the tutorial video. In order to create something more unique and to my style, I decided to use the “line” tool so that I could manipulate both the bottom and top shape to the exact way that I wanted it to be. I originally wanted my vase to look more organic but then I liked the way the jagged edges looked so I played around with the points until I liked the shape. I then lofted the two different shapes together to make the vase. My vase creation goes beyond the basic design in the video because I used the line tool instead of using a basic shape that was already created in Fusion 360.
Fusion 360 Vase Prints
10 points, due by noon on Thursday 2/7


I think my prints were a success and I am extremely happy with the way they printed. I think next time I would make it slightly taller so if I wanted to put real flowers in the vase it would hold them without it tipping over. I can now use the design as a pen or makeup brush holder.
https://www.thingiverse.com/thing:3405038
20 Forms in OpenSCAD

First Screen Shot (6)
- For the first shape I created on OpenScad, I played around with a basic rectangle and the dimensions until I figured out how to work the software
- Created a simple sphere and made it have five sides
- Took the style from your Youtube tutorial video and used a different number of sides for the hexagon
- Created a simple cylinder shape with the dimensions of (20,10,10) creating this shape gave me a sense of what certain dimensions would look like especially the height
- Learned from a Youtube tutorial how to take away the inside of a shape, however, I changed the dimensions
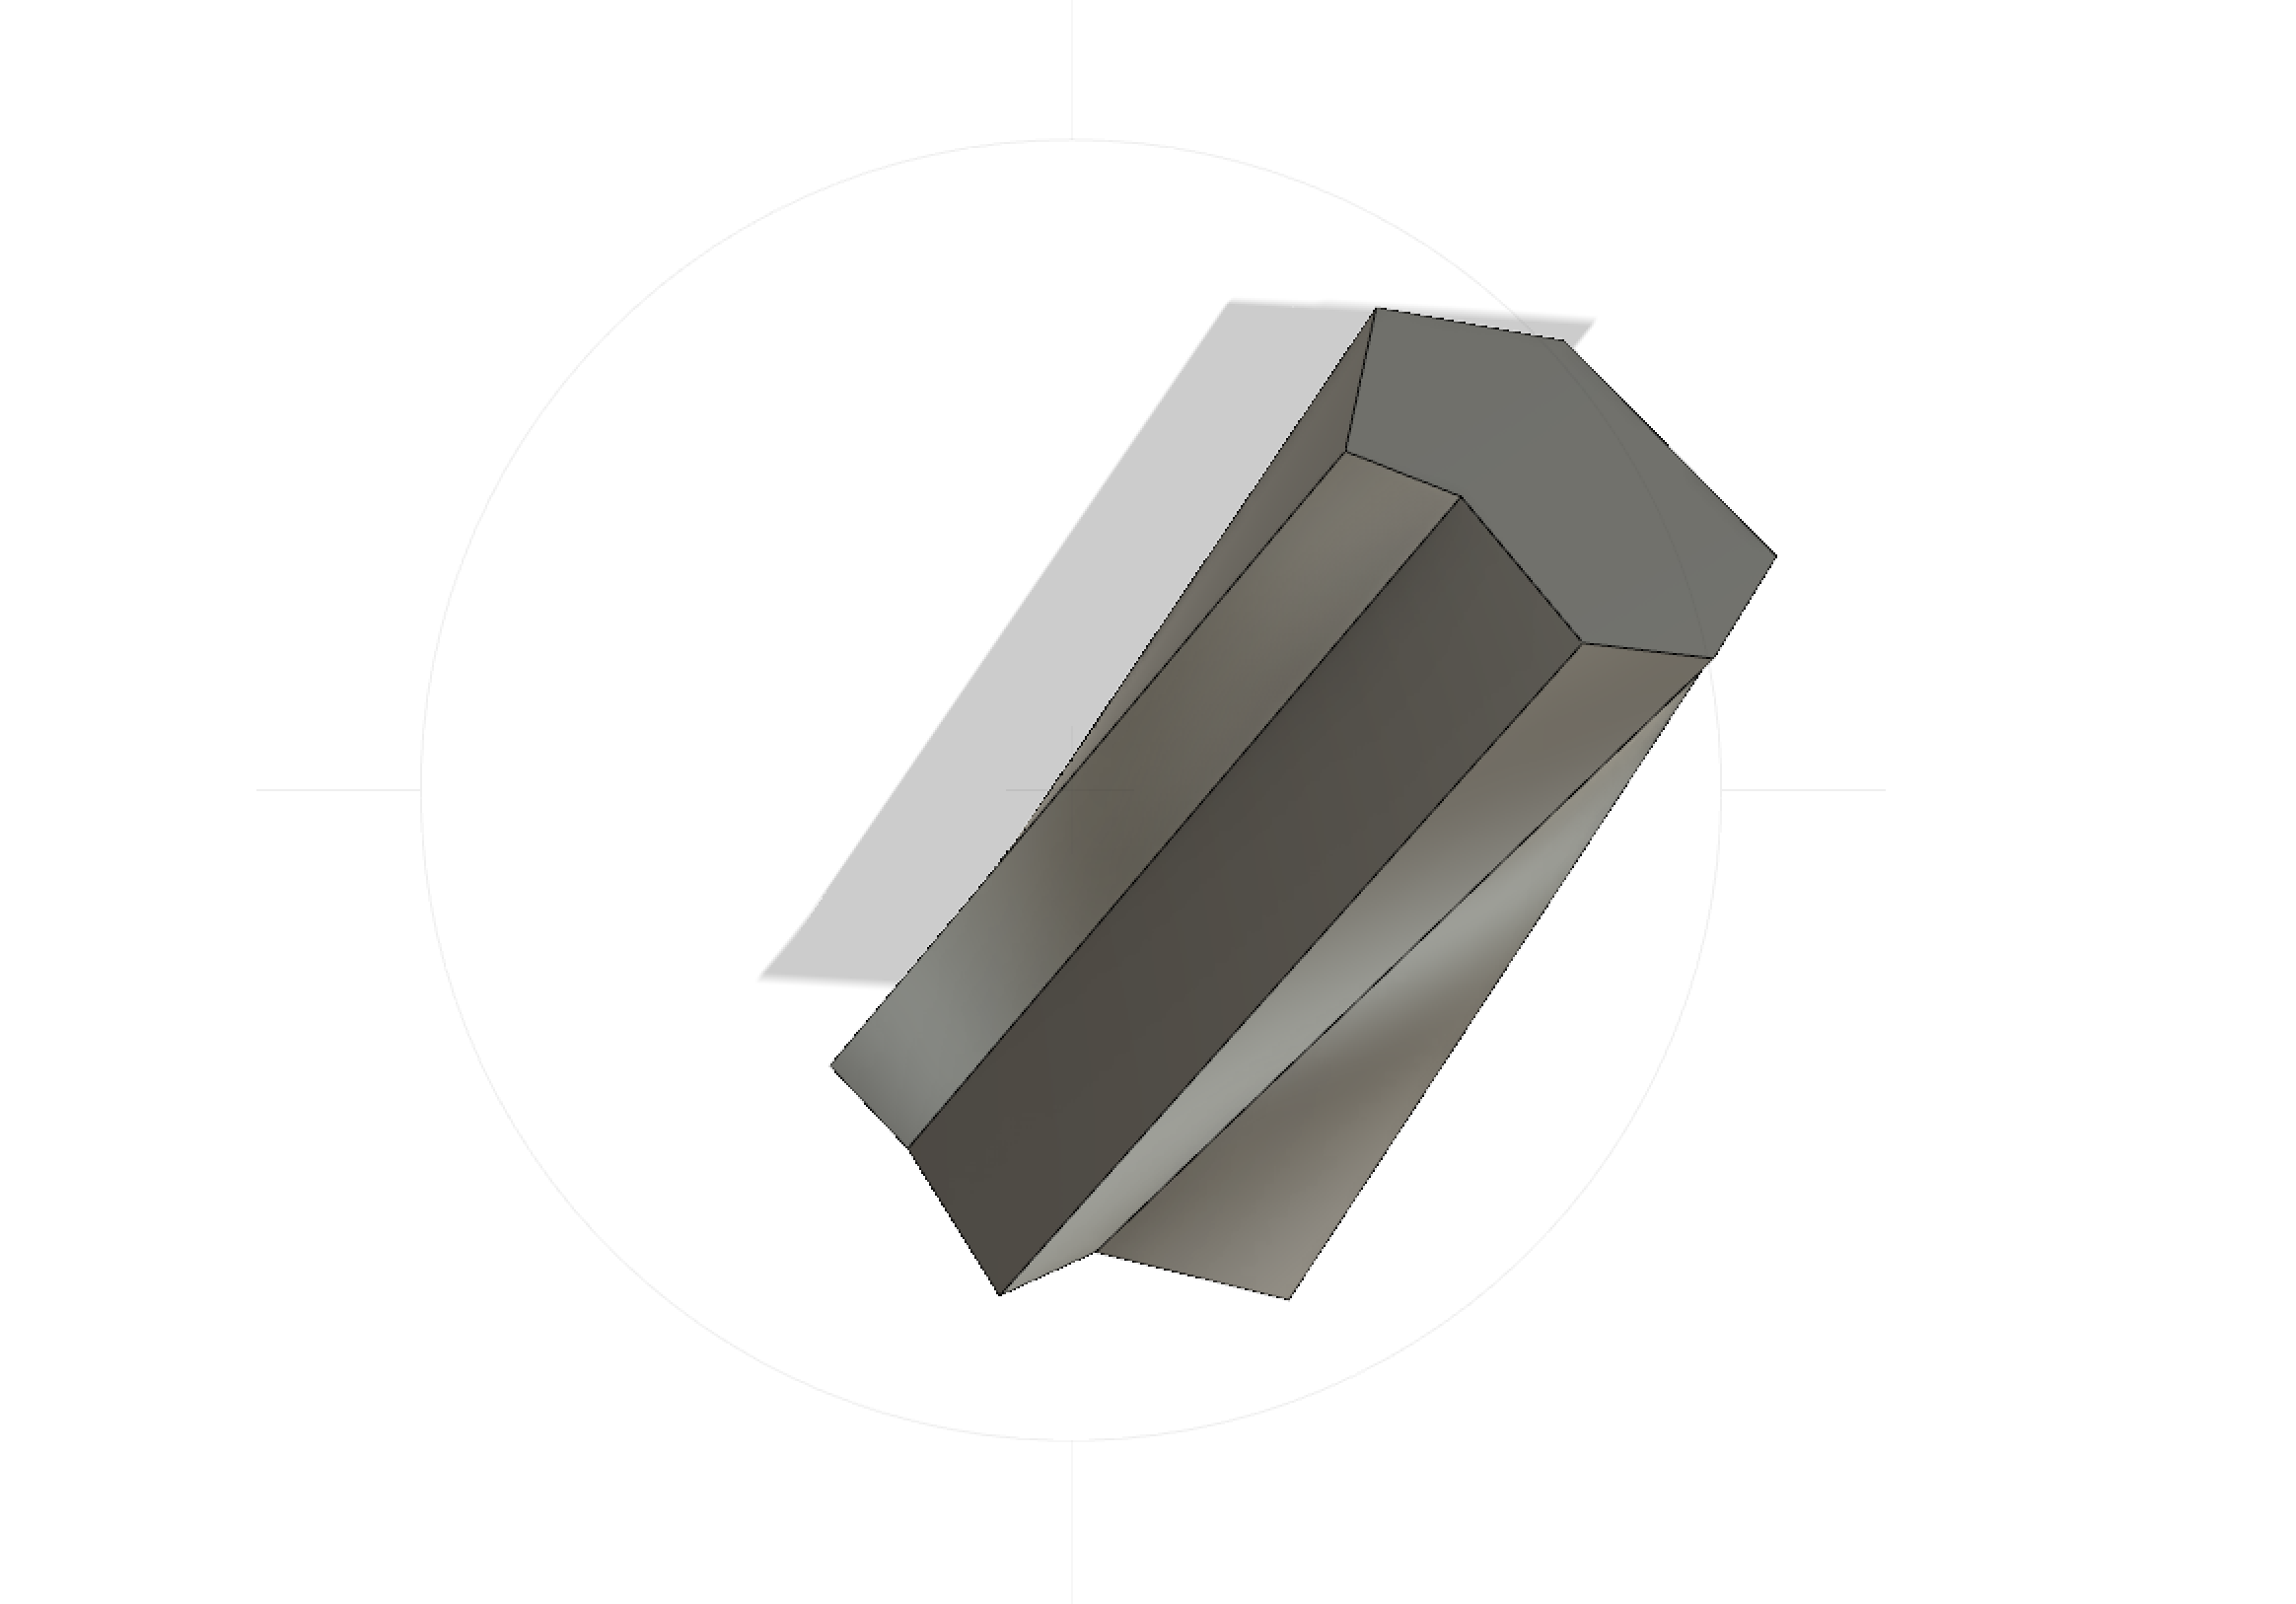
- After creating the simple cylinder, I manipulated the dimensions to create a cone
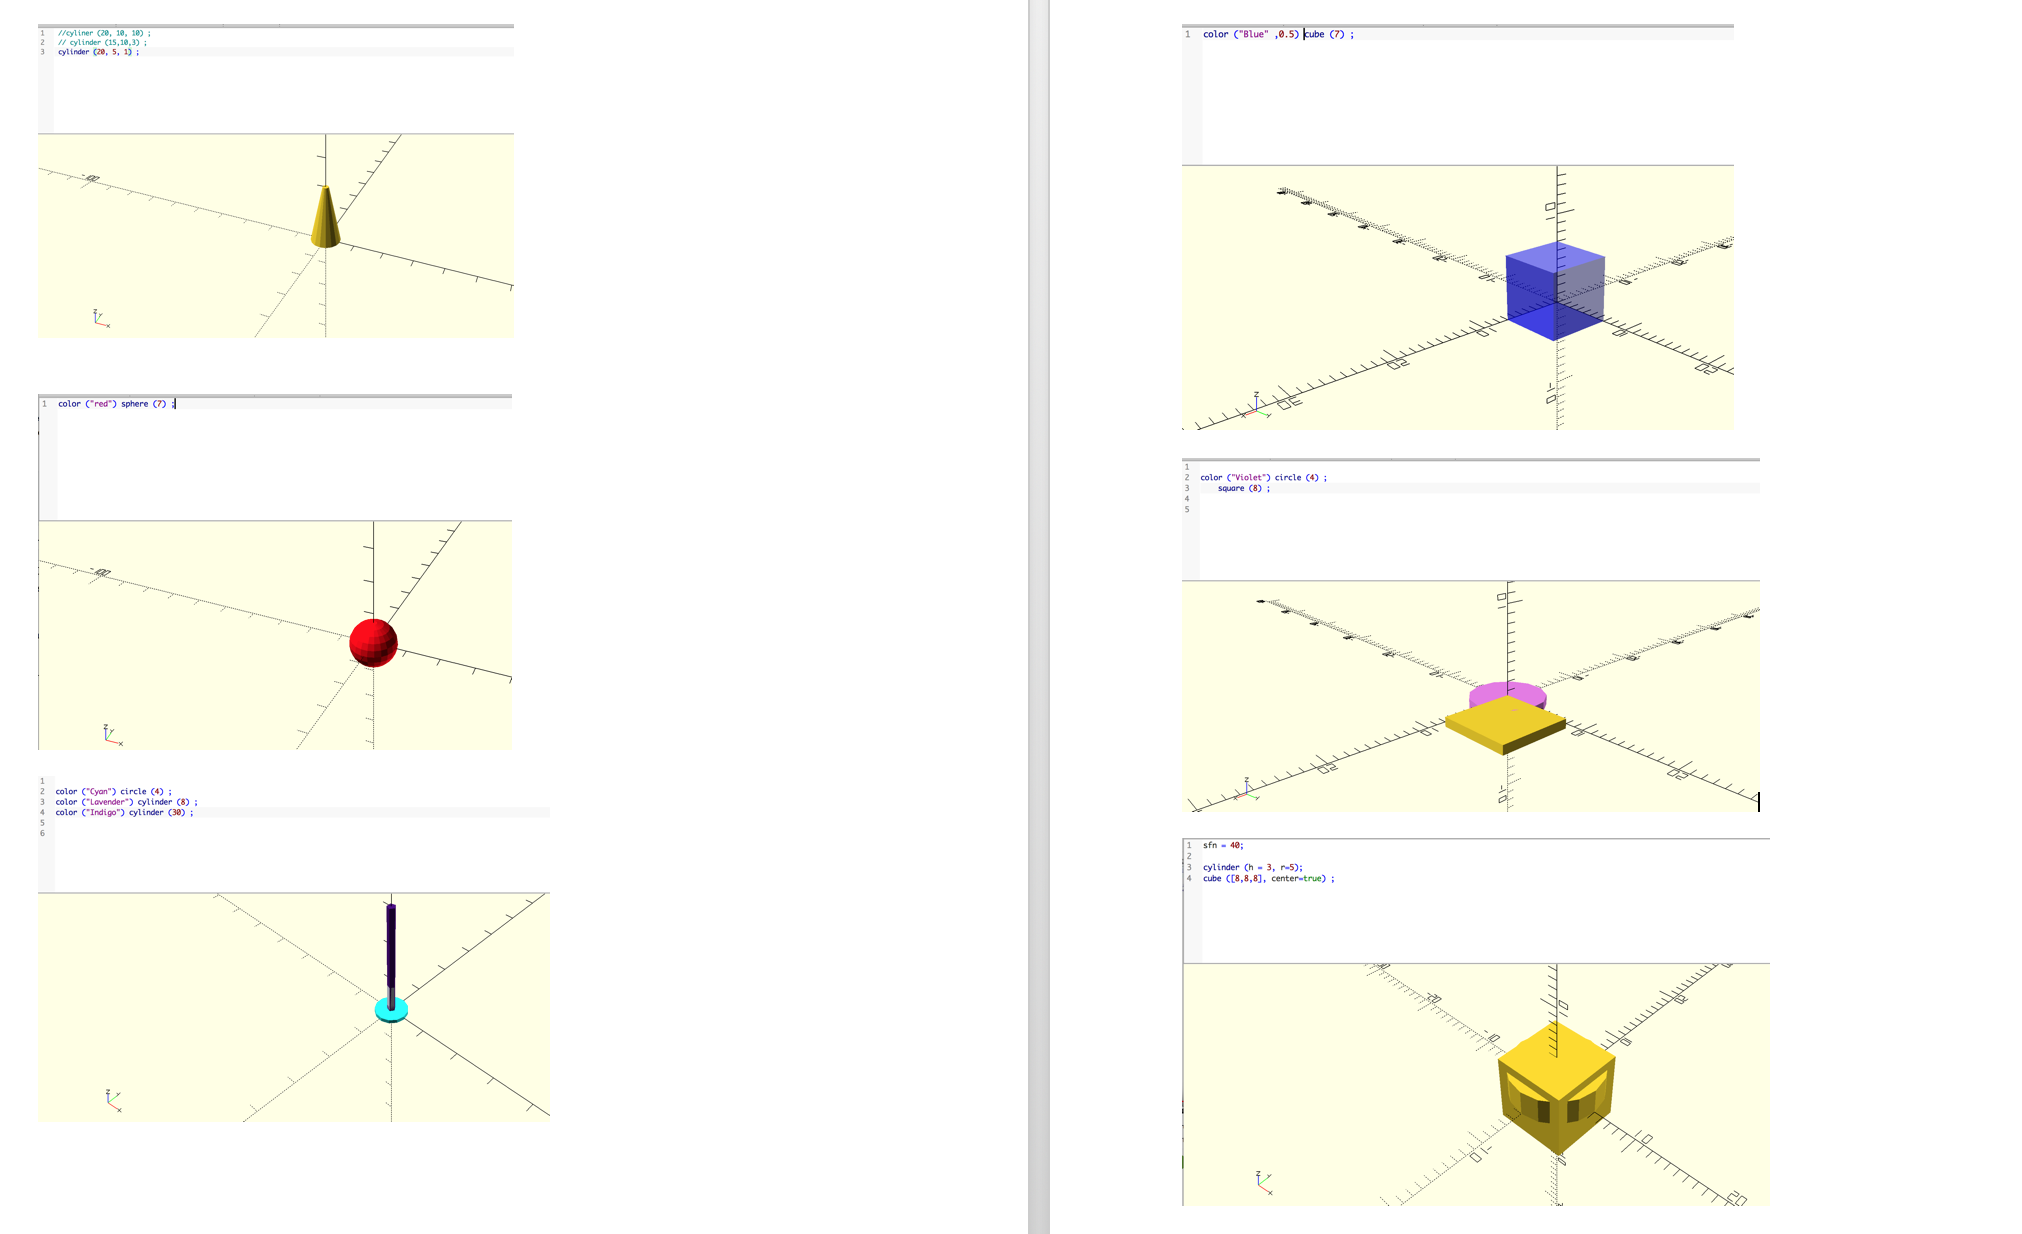
Second Screen Shot (6)
- I created a cylinder but manipulated the dimensions to make it bottom heavy
- I looked up how to change the color so I started off trying out the new feature with a simple cube
- Played around some more with the color feature to make a red sphere
- Finally figured out how to put two shapes on the same platform so I created a 2D-circle attached to a 2D-square and made the circle Violet
- Made a 2-D blue circle and created a thin cylinder on top of it to look somewhat like the stem we created on Tinkercad for the Rose design
- Watched a Youtube tutorial on how to manipulate shapes to be inside one and other, and learned that if you put “center=true” your object will be directly in the center of the grid
Third Screen Shot (6)
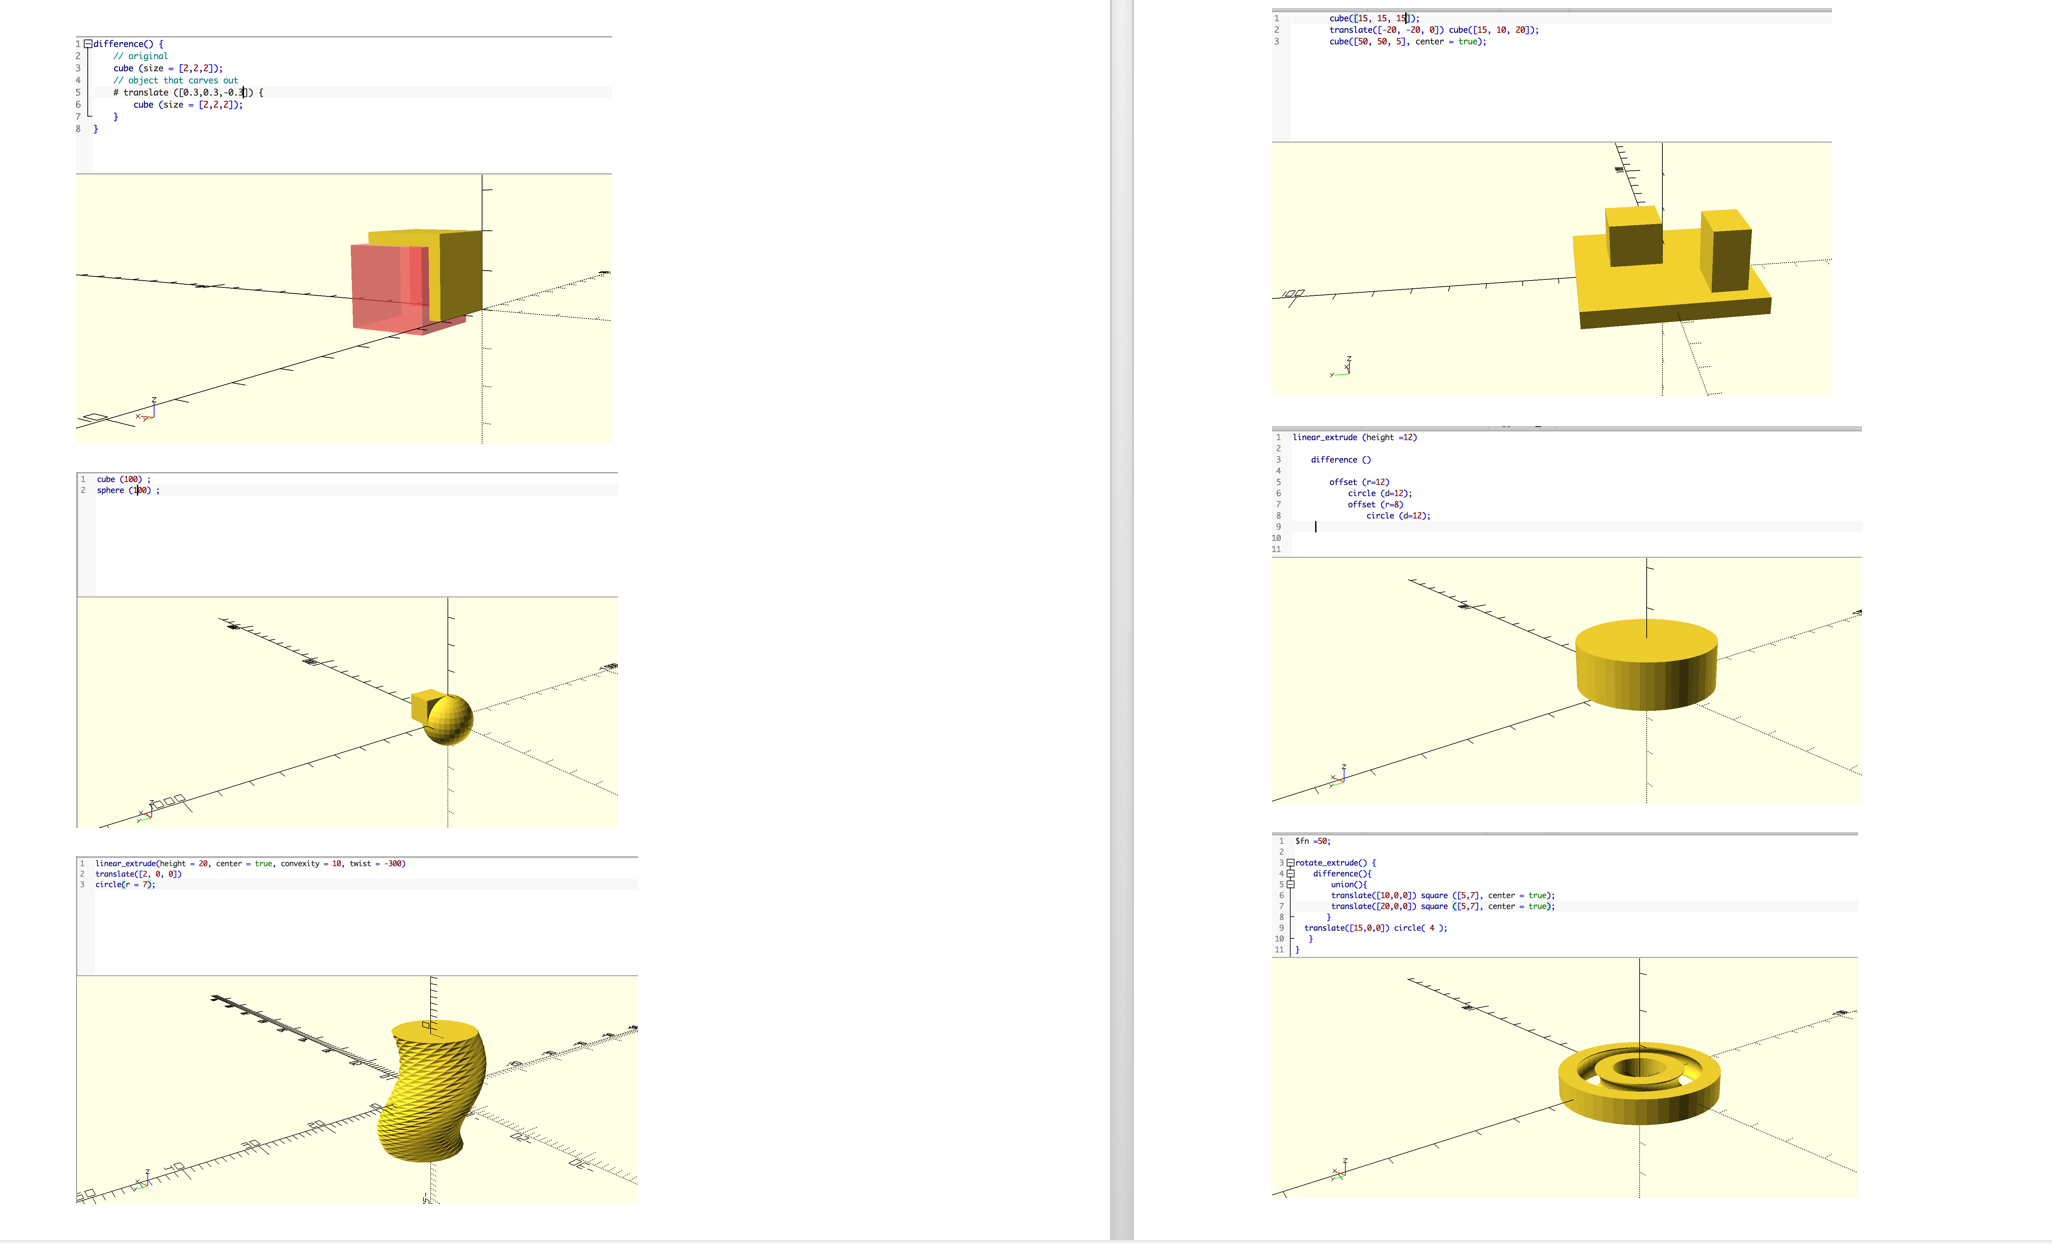
- Learned how to combine two shapes using the “difference” feature
- Found this design on a Wiki Design tutorial, but I manipulated the height of the 3 shapes because originally the two rectangles on top were touching
- Played around with combing a square and a sphere
- I was trying to follow along with a Youtube tutorial to cut out the inside of the cylinder but an error kept occurring not sure what I was doing wrong
- Found this design on a Wiki Design tutorial but manipulated my squiggle to be thicker and shorter
- I thought this design by “mathcodeprint” was super cool so I followed along with the tutorial but manipulated the size and did not include all of the other features they added
 Fourth Screen Shot (2)
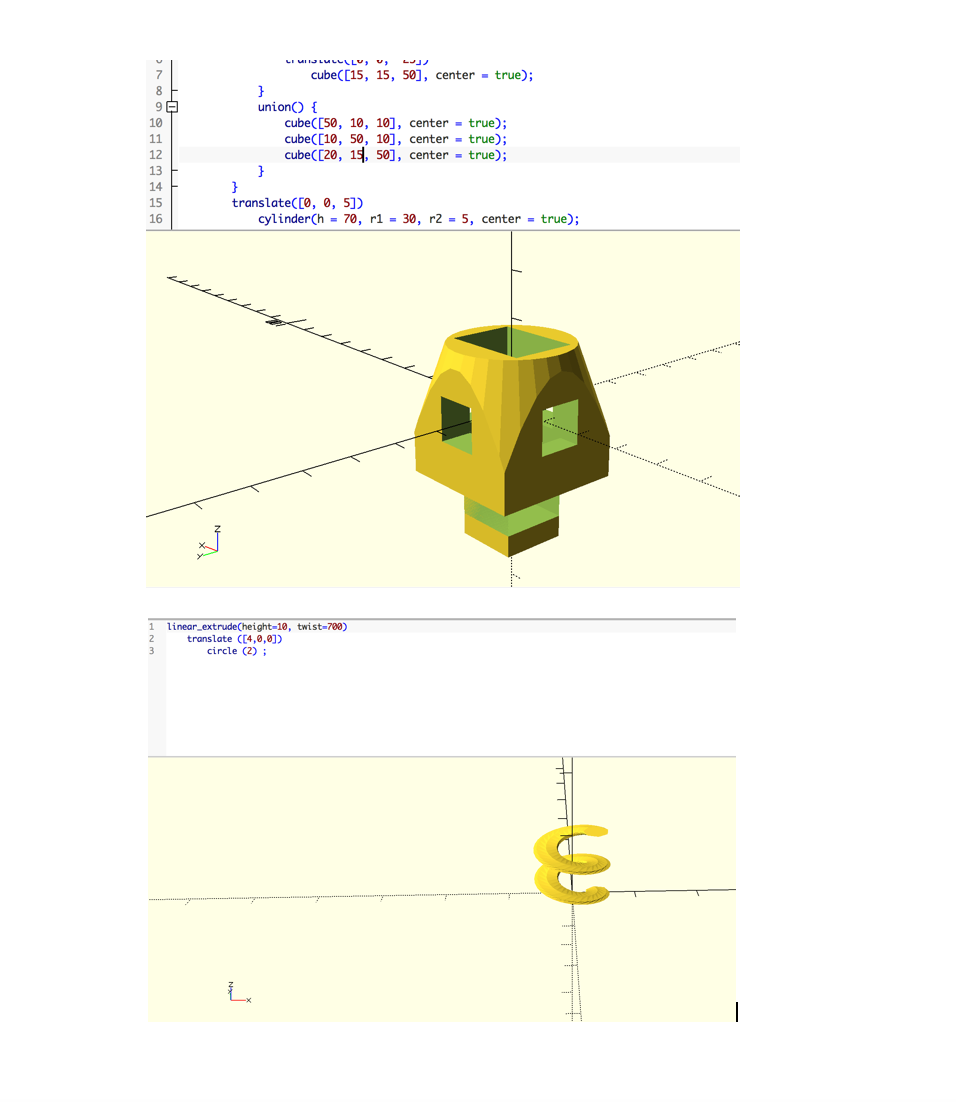
- I found this design on OpenScads example page, however, I manipulated the cube and cylinder shapes to be the size that I wanted
- I played around with the “Linear Extrude” feature, that I found on a Youtube Tutorial called “Extrusions in OpenScad” I made the twist a lot larger and made the height a lot shorter
OpenSCAD Print

This cone print was a success besides having some printer troubles in the beginning and it getting stuck to the hot plate.
Summary of Group OpenSCAD Project
Customizable Coaster – Skylar Simone
https://www.thingiverse.com/thing:3443749
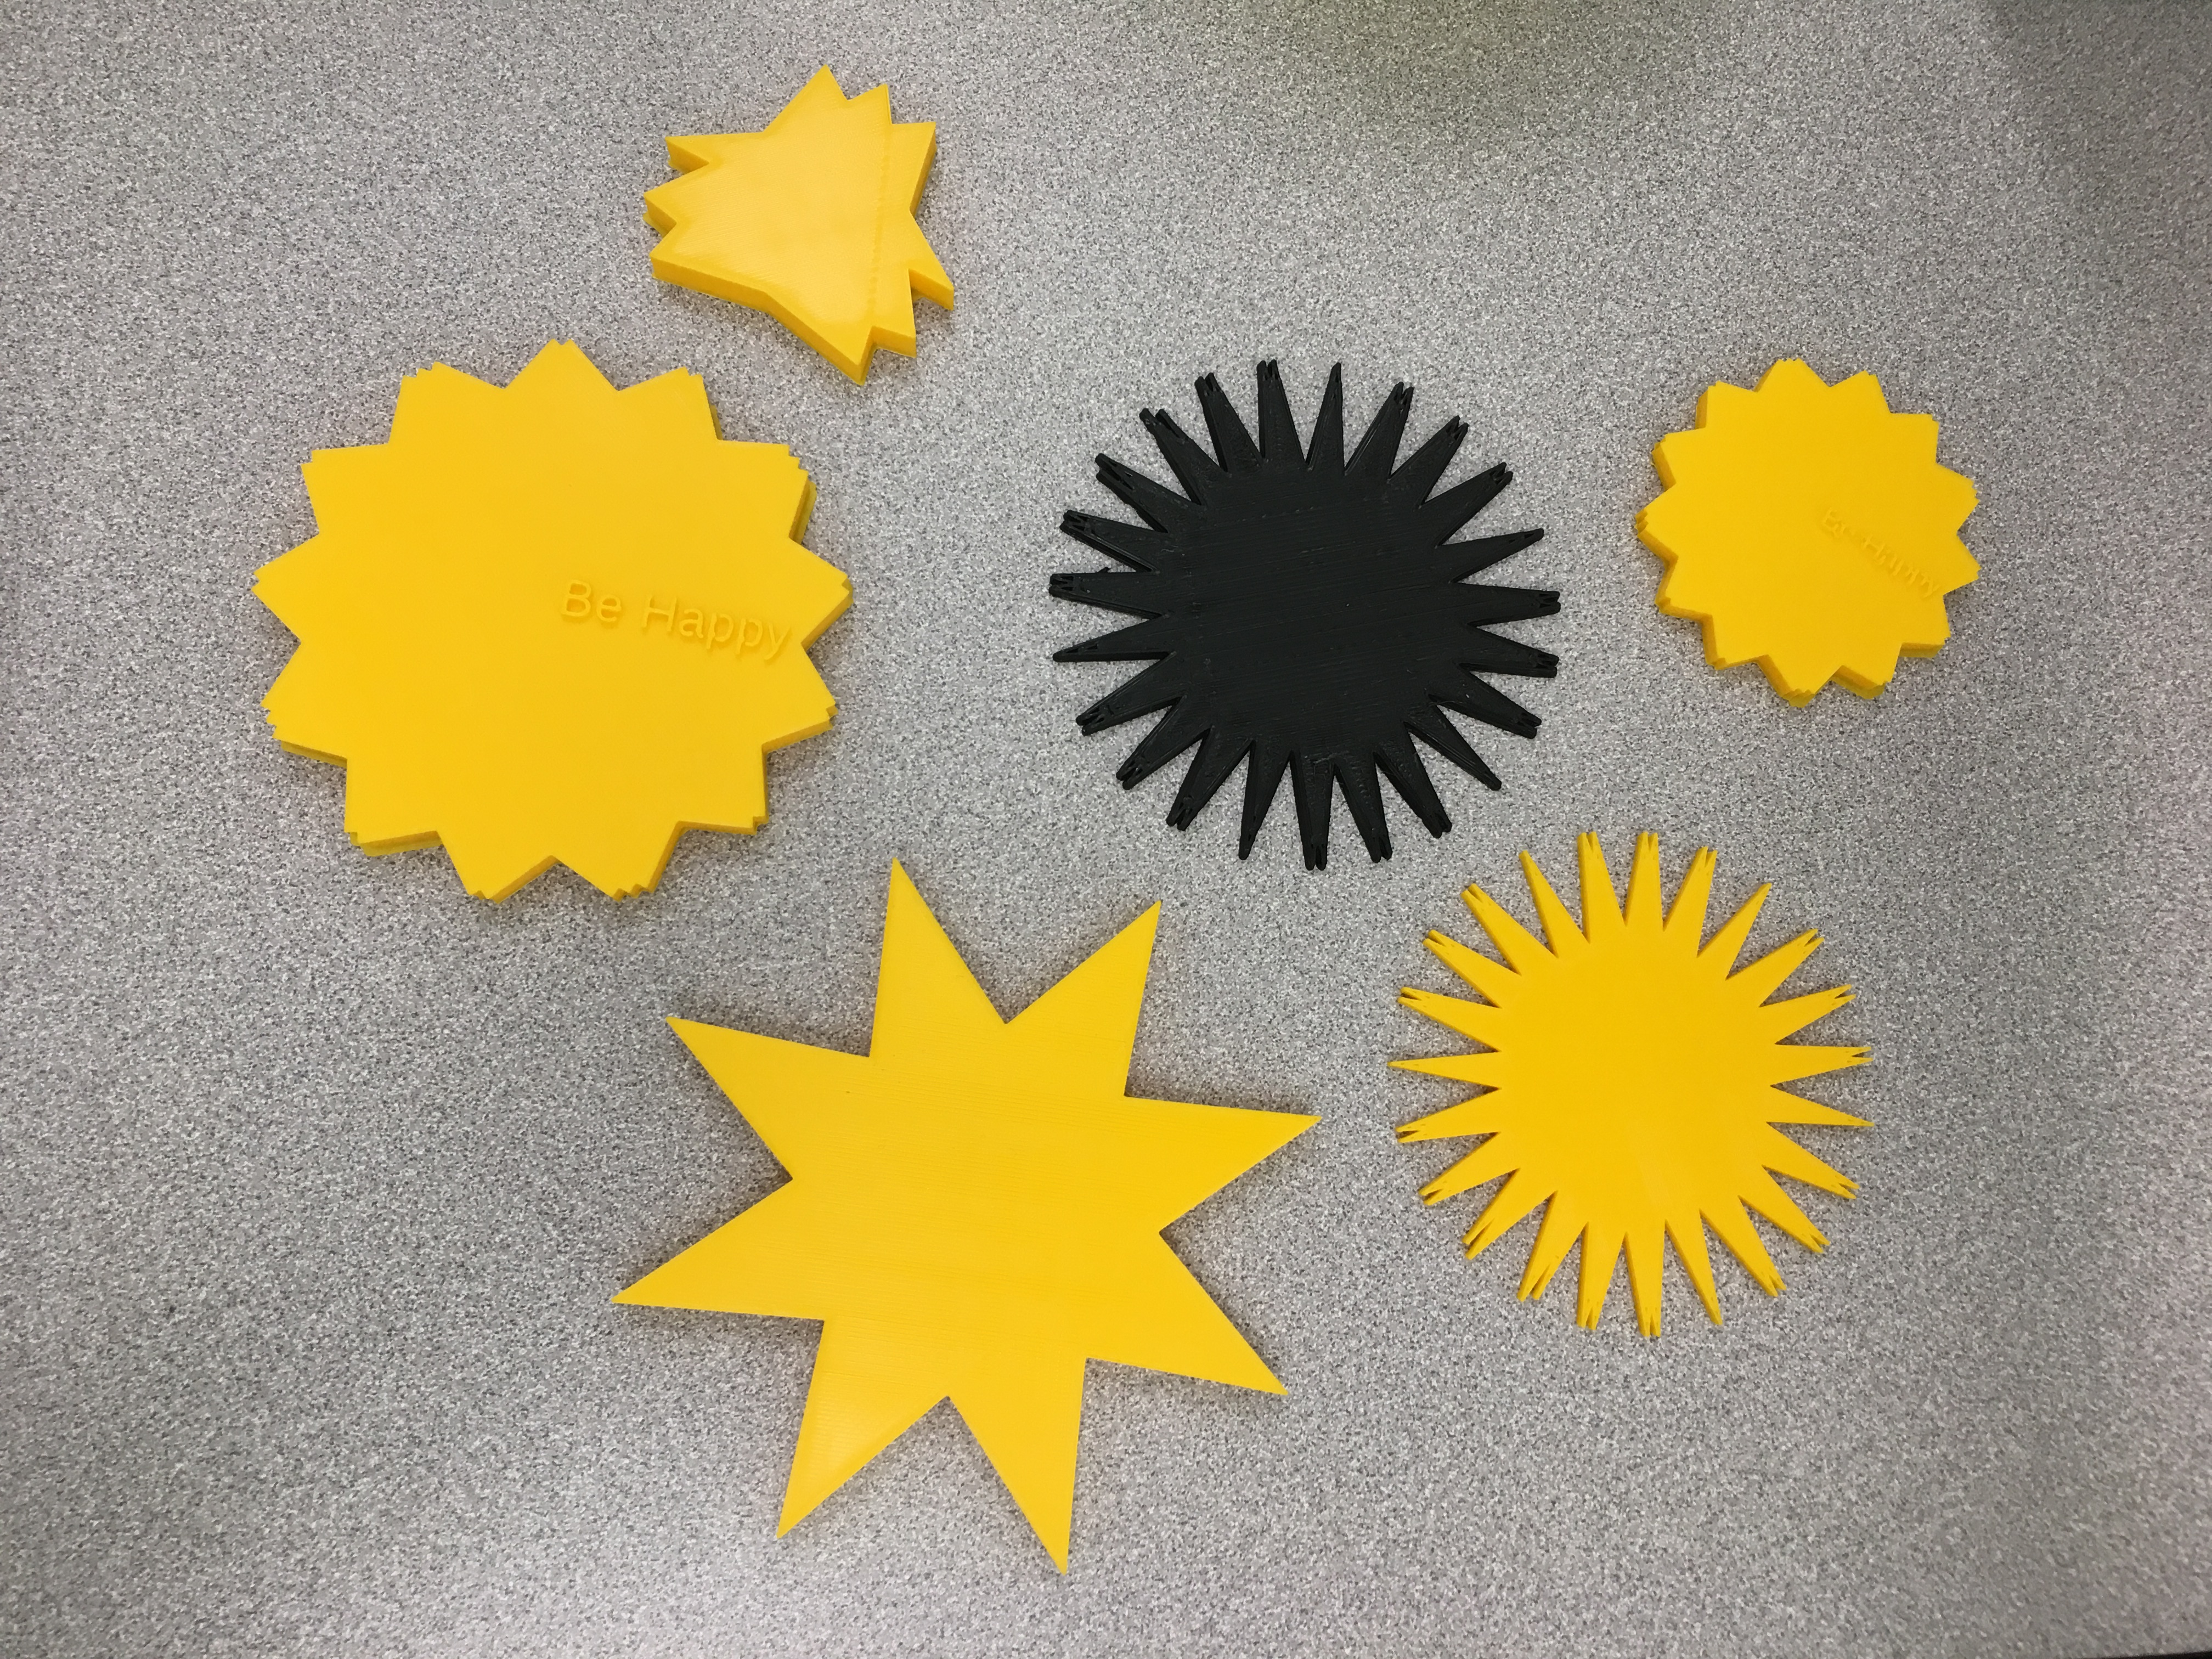
For the final project, we manipulated code on OpenScad to create various shaped coasters. It took some patients and time to figure out which part of the code would change the aspects that we wanted to manipulate. They all turned out much better than I expected and I’m glad that I learned a new software. We had some difficulties figuring out the code to change the parameters to make the coasters customizable on Thingiverse but it was a learning experience. We had one minor issue with our “Be Happy” print because the font got messed up during the printing process, however, we changed the dimension to be larger and it was a success. My favorite print is the “Be Happy” print and the large Star print.
Reflections and Future Projects
During this semester, I have learned that you must be patient with the printers and software because sometimes designs do not print as planned. This course has challenged me to think outside of the box and learn about new softwares such as Fusion 360 and OpenScad. I am most proud of my vase and my coasters. They are both useful and pushed me to learn something new. In the future, I would like to create more customizable keychains and coasters. I really liked the concept of my first flag keychain I printed, however, it did not print very clearly and I would like to print some more in different colors. For the coasters, I would like to print some larger ones so that they can be used for larger mugs and bottles.