Hello
 My name is Kelly Festa and I am currently a junior. I am a finance major with a concentration in European Business, but honestly, I have no idea what I want to do with that yet. I’m from Syracuse, New York, which is a lot colder and snowier than here, but I’m so happy to be in Virginia now! I’ve accepted an internship in D.C. for the summer so I’ll be living there for the summer, and I plan to live more south in a big city after graduation. I love to travel and workout and I recently studied abroad last summer, which was incredible! My favorite places I went to were the Amalfi Coast of Italy, Vienna, and Greece. I love the summer and sunshine, and I can’t wait to travel more as soon as possible!
I have no experience in 3D printing, but I was amazed by what I saw in the first class, and I’m excited to see how I can learn and grow this semester! I’m hoping my 3D printing experience will improve, and that I can become better at it since unfortunately, my penny trap broke and did not turn out too well.
https://www.thingiverse.com/festa2ka/about
Thingiverse Model
Title: Cord holder version 1.3
Designer: owen27
https://www.thingiverse.com/thing:552170

I chose this model because I wanted to make something useful. I constantly get annoyed when my cords are getting all tangled and when I reach for my phone charger in bed I can never find the cord! I thought this would be helpful, while still being easy enough for my second time ever 3D printing.
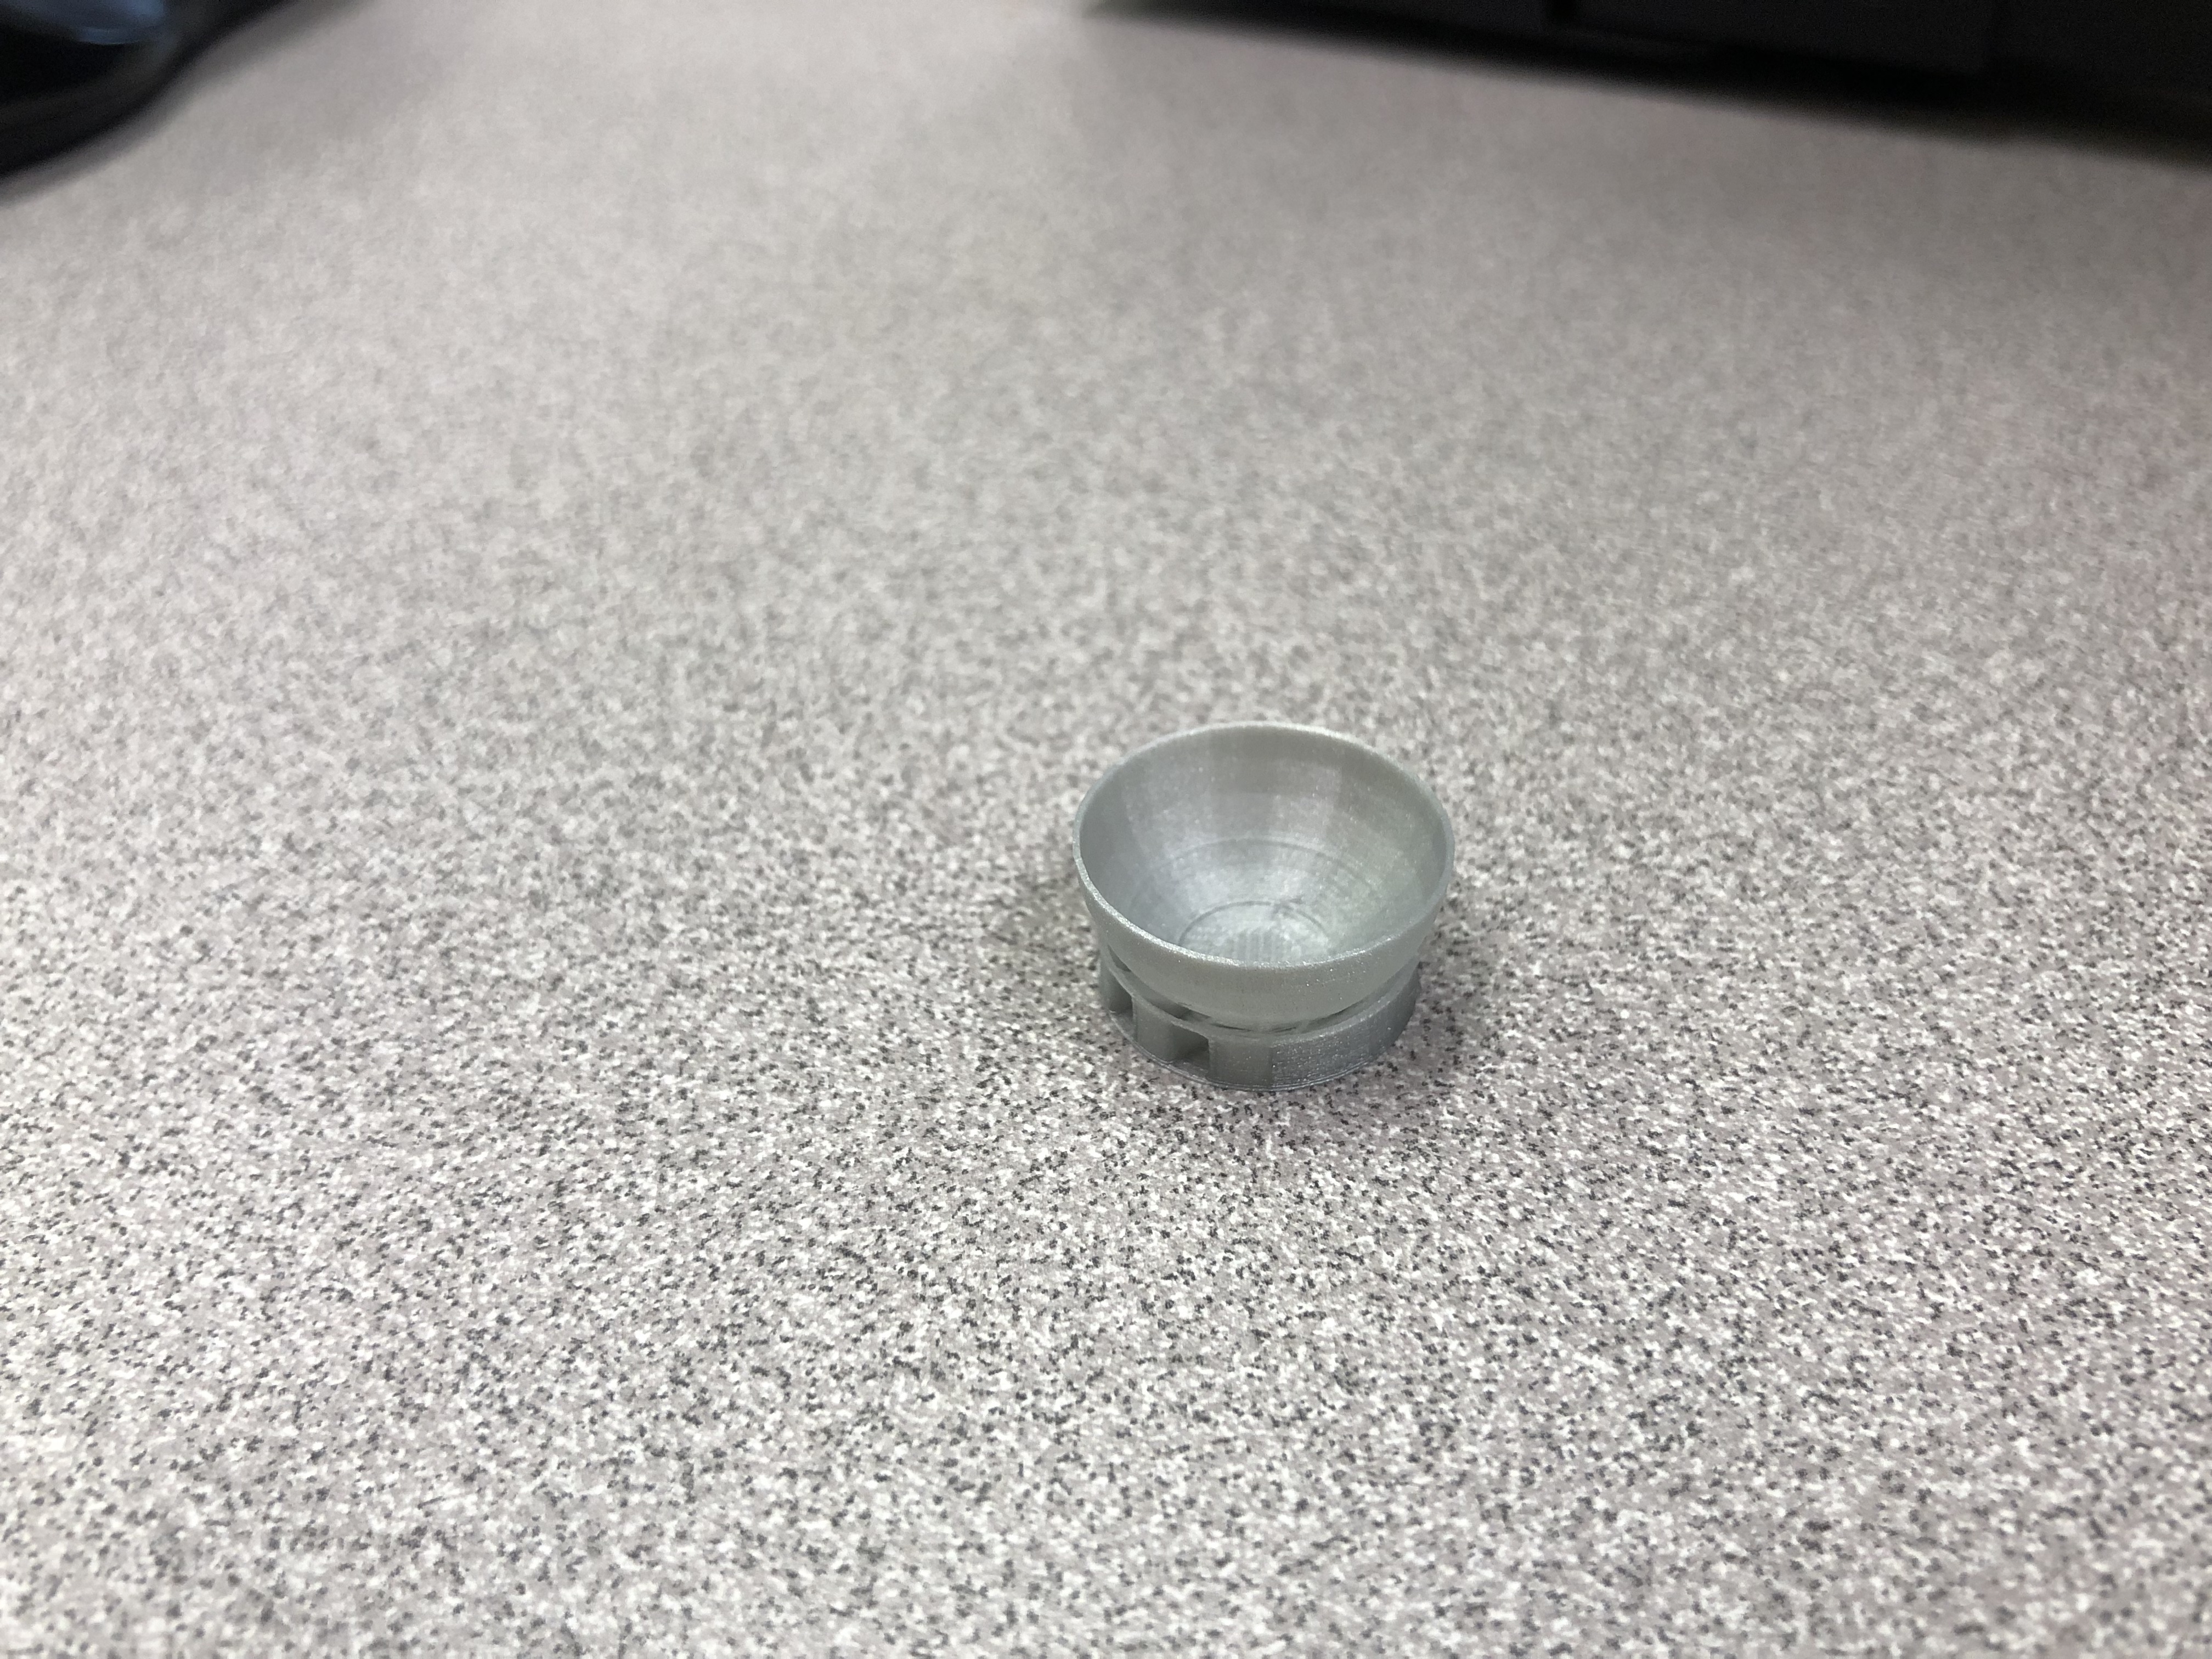
Thingiverse Print
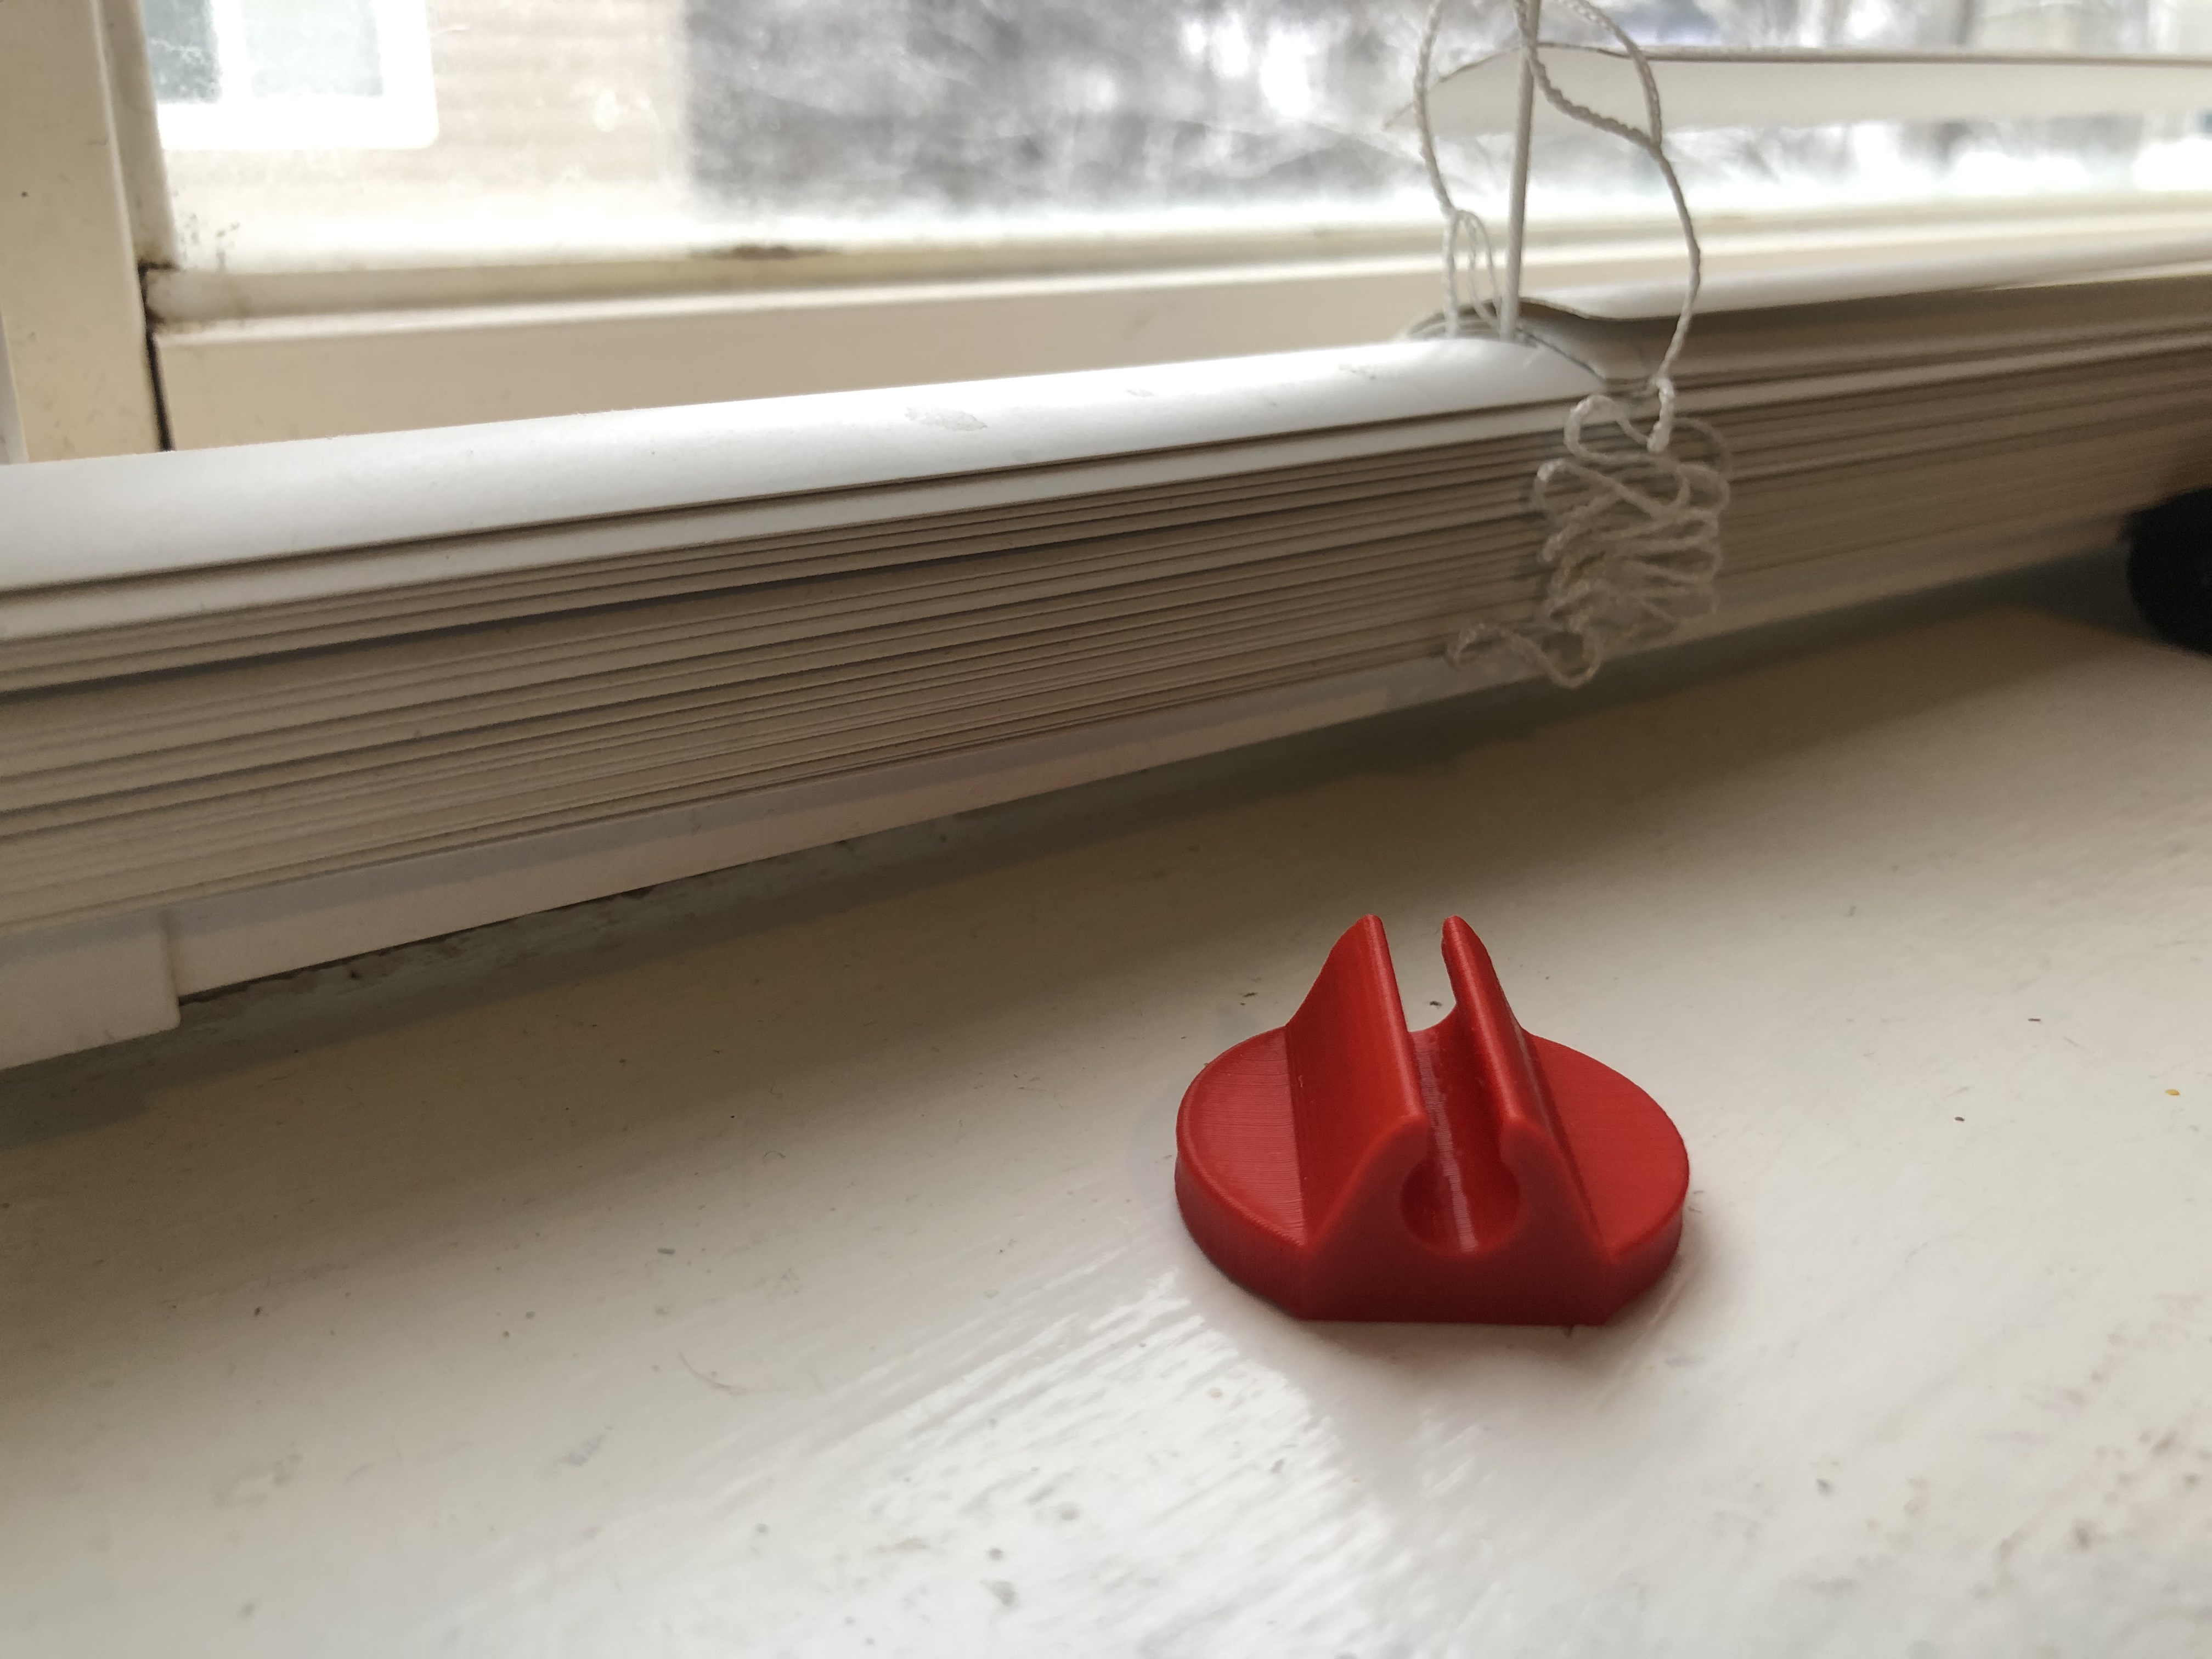 I’m actually very happy with this print! It turned out well and I had no problems while printing it, and it was successful on my first try. This was very pleasing to me since my first penny trap broke when I tried to take it off the printer, so this time I was careful removing it from the printing surface. I already began using this to hold a cord in place, which is exactly what I planned to use it for, so I have no complaints.
https://www.thingiverse.com/make:593901
20 Forms in Tinkercad
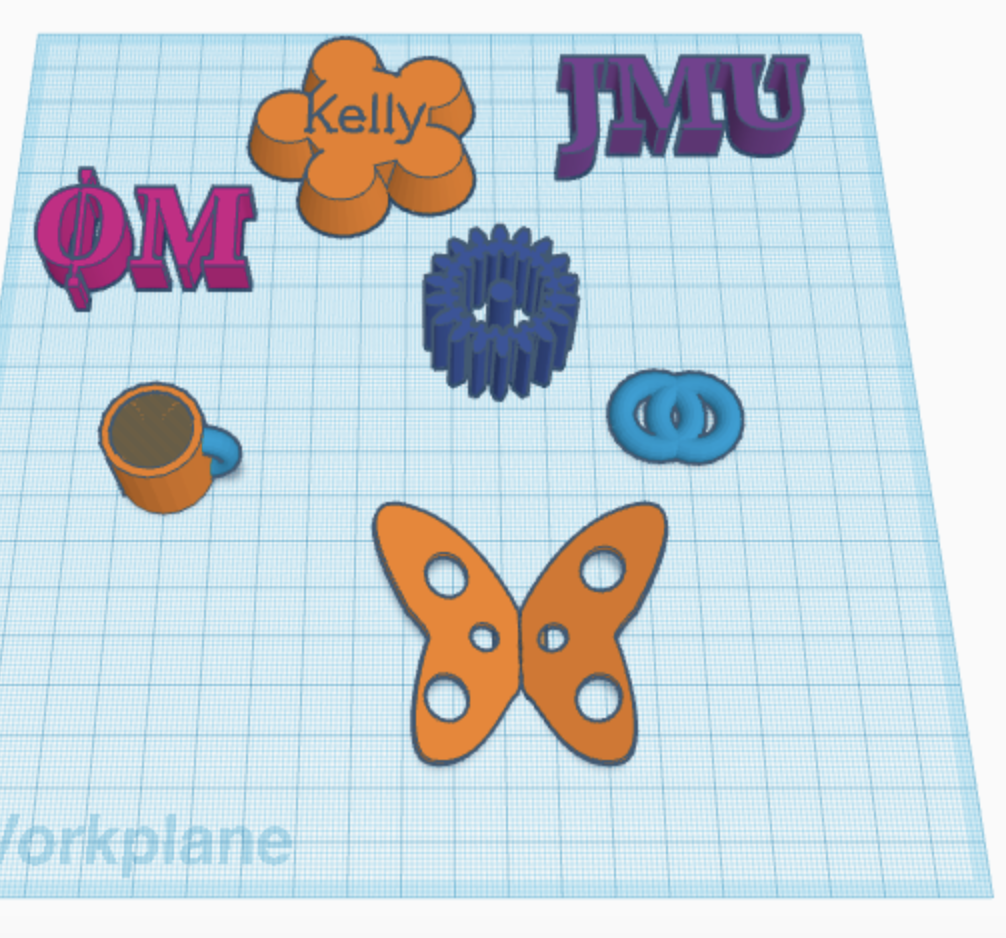
 First Screenshot:
- Phi Mu Greek letters: I used the text tool for this and typed out OM, then I made another text and did the letter I to group with the O to make the greek symbol Phi.
- Orange flower with Kelly text: Here I used the n lobe (convex) shape and put text on top of it that was a hole, and said Kelly. I grouped the shaped to keep them together.
- JMU: I used text to write this.
- Mug: I used a cylinder to make the outside of the mug, then I used another cylinder as a hole to make the inside of the mug. Finally, I used the donut slice shape to make the handle of the mug and the align tool to make sure everything was lined up.
- Gear: I used the metric gear shape as the outside of the gear, then I used the useful gear shape as the inside of the gear as a hole.
- Vesica Piscis symbol: I used two torus rings to make this figure and grouped them while using the align tool to make sure they were even.
- Butterfly: I used the butterfly shape and 6 cylinders used as holes to make holes in the wings. I used the align tool to make sure all the holes were lined up and straight.
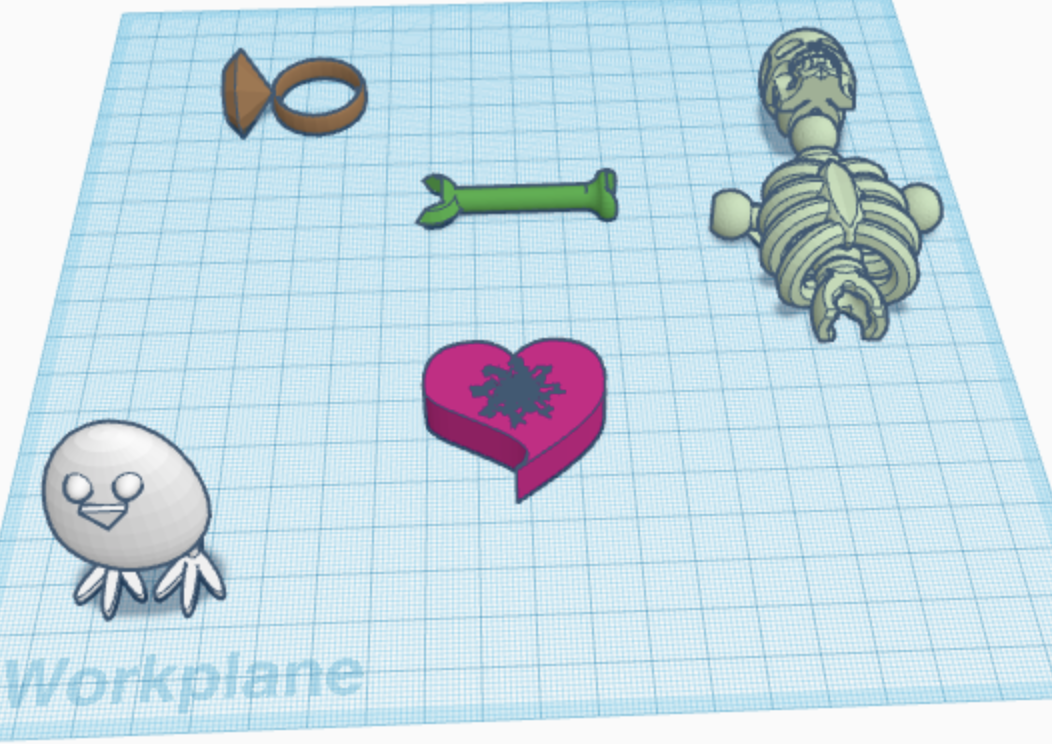
Second screenshot:
- Diamond ring: I used a ring shape for the ring part of it, and the diamond shape for the diamond part of it. I used the align tool to make sure it would be straight and lined up, and then I grouped them together.
- Skeleton: Here I used a skull shape I found under the skeleton tab and then I used a torso shape from the same tab. I used the align tool to line them up and then grouped them.
- Wrench: I used a handle shape I found in the connectors tab, and then I used two polygons as holes on the ends of the wrench. I grouped these shapes to make them one.
- Heart: I used the cute heart shape as the base for this, then I added a snowflake (pseudorandom) shape as a hole in the middle. I grouped these 2 shapes together.
- Egg figure: I used the egg shape I found under the character tab as the body, then I added two chicken foot shapes from the character tab as the legs, and finally, I added two spheres as the eyes and a roof for the nose. I had to use the workplane feature to line all these shapes up correctly, then I grouped them all together.
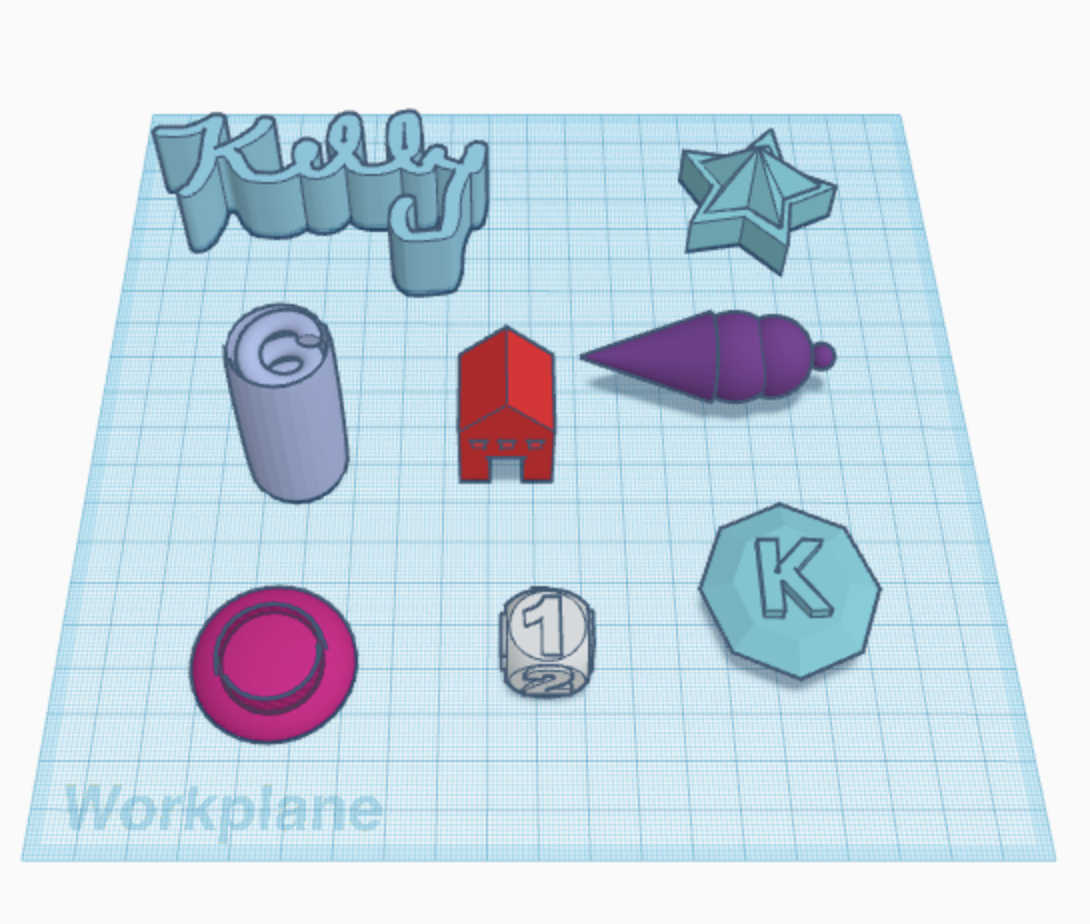
Third Screenshot:
- Kelly: I used the scribble tool to write my name.
- Star: I used two different star shapes on top of each other to make this raised star, then I grouped them together.
- Spring in a tube: I used a cylinder as a hole for the outside of this figure, then I used the spring shape and played around with the revolutions to make it a tighter spring for the inside and grouped them together.
- House: Here I used a box as the base of the house, then I added the roof shape on top of the house, and finally I used 4 more box shapes as holes for the windows and doors. I had to use the work plane feature and the align tool to line these shapes up right and I grouped them all together.
- Icecream cone: I used a cone shape, and then 2 spheres for the scoops, and added a third sphere for the cherry on top. I grouped all these shapes together and used the align tool to make them all straight and even. Later I realized that tinkercad already has a premade ice cream shape for you.
- Sphere with ring: I used the half sphere shape to make the base of this, then added a ring inside as a hole, and grouped the shaped together.
- Dice: I used the dice shape as the base for this, then used the work plane tool on each side of the dice to evenly add numbers shapes, while also using the align tool to line them up. Lastly, I grouped them all together.
- Diamond with K: I used a diamond shape as the base, then added the letter K shape on top as a hole. I grouped the shapes together.
Tinkercad Print
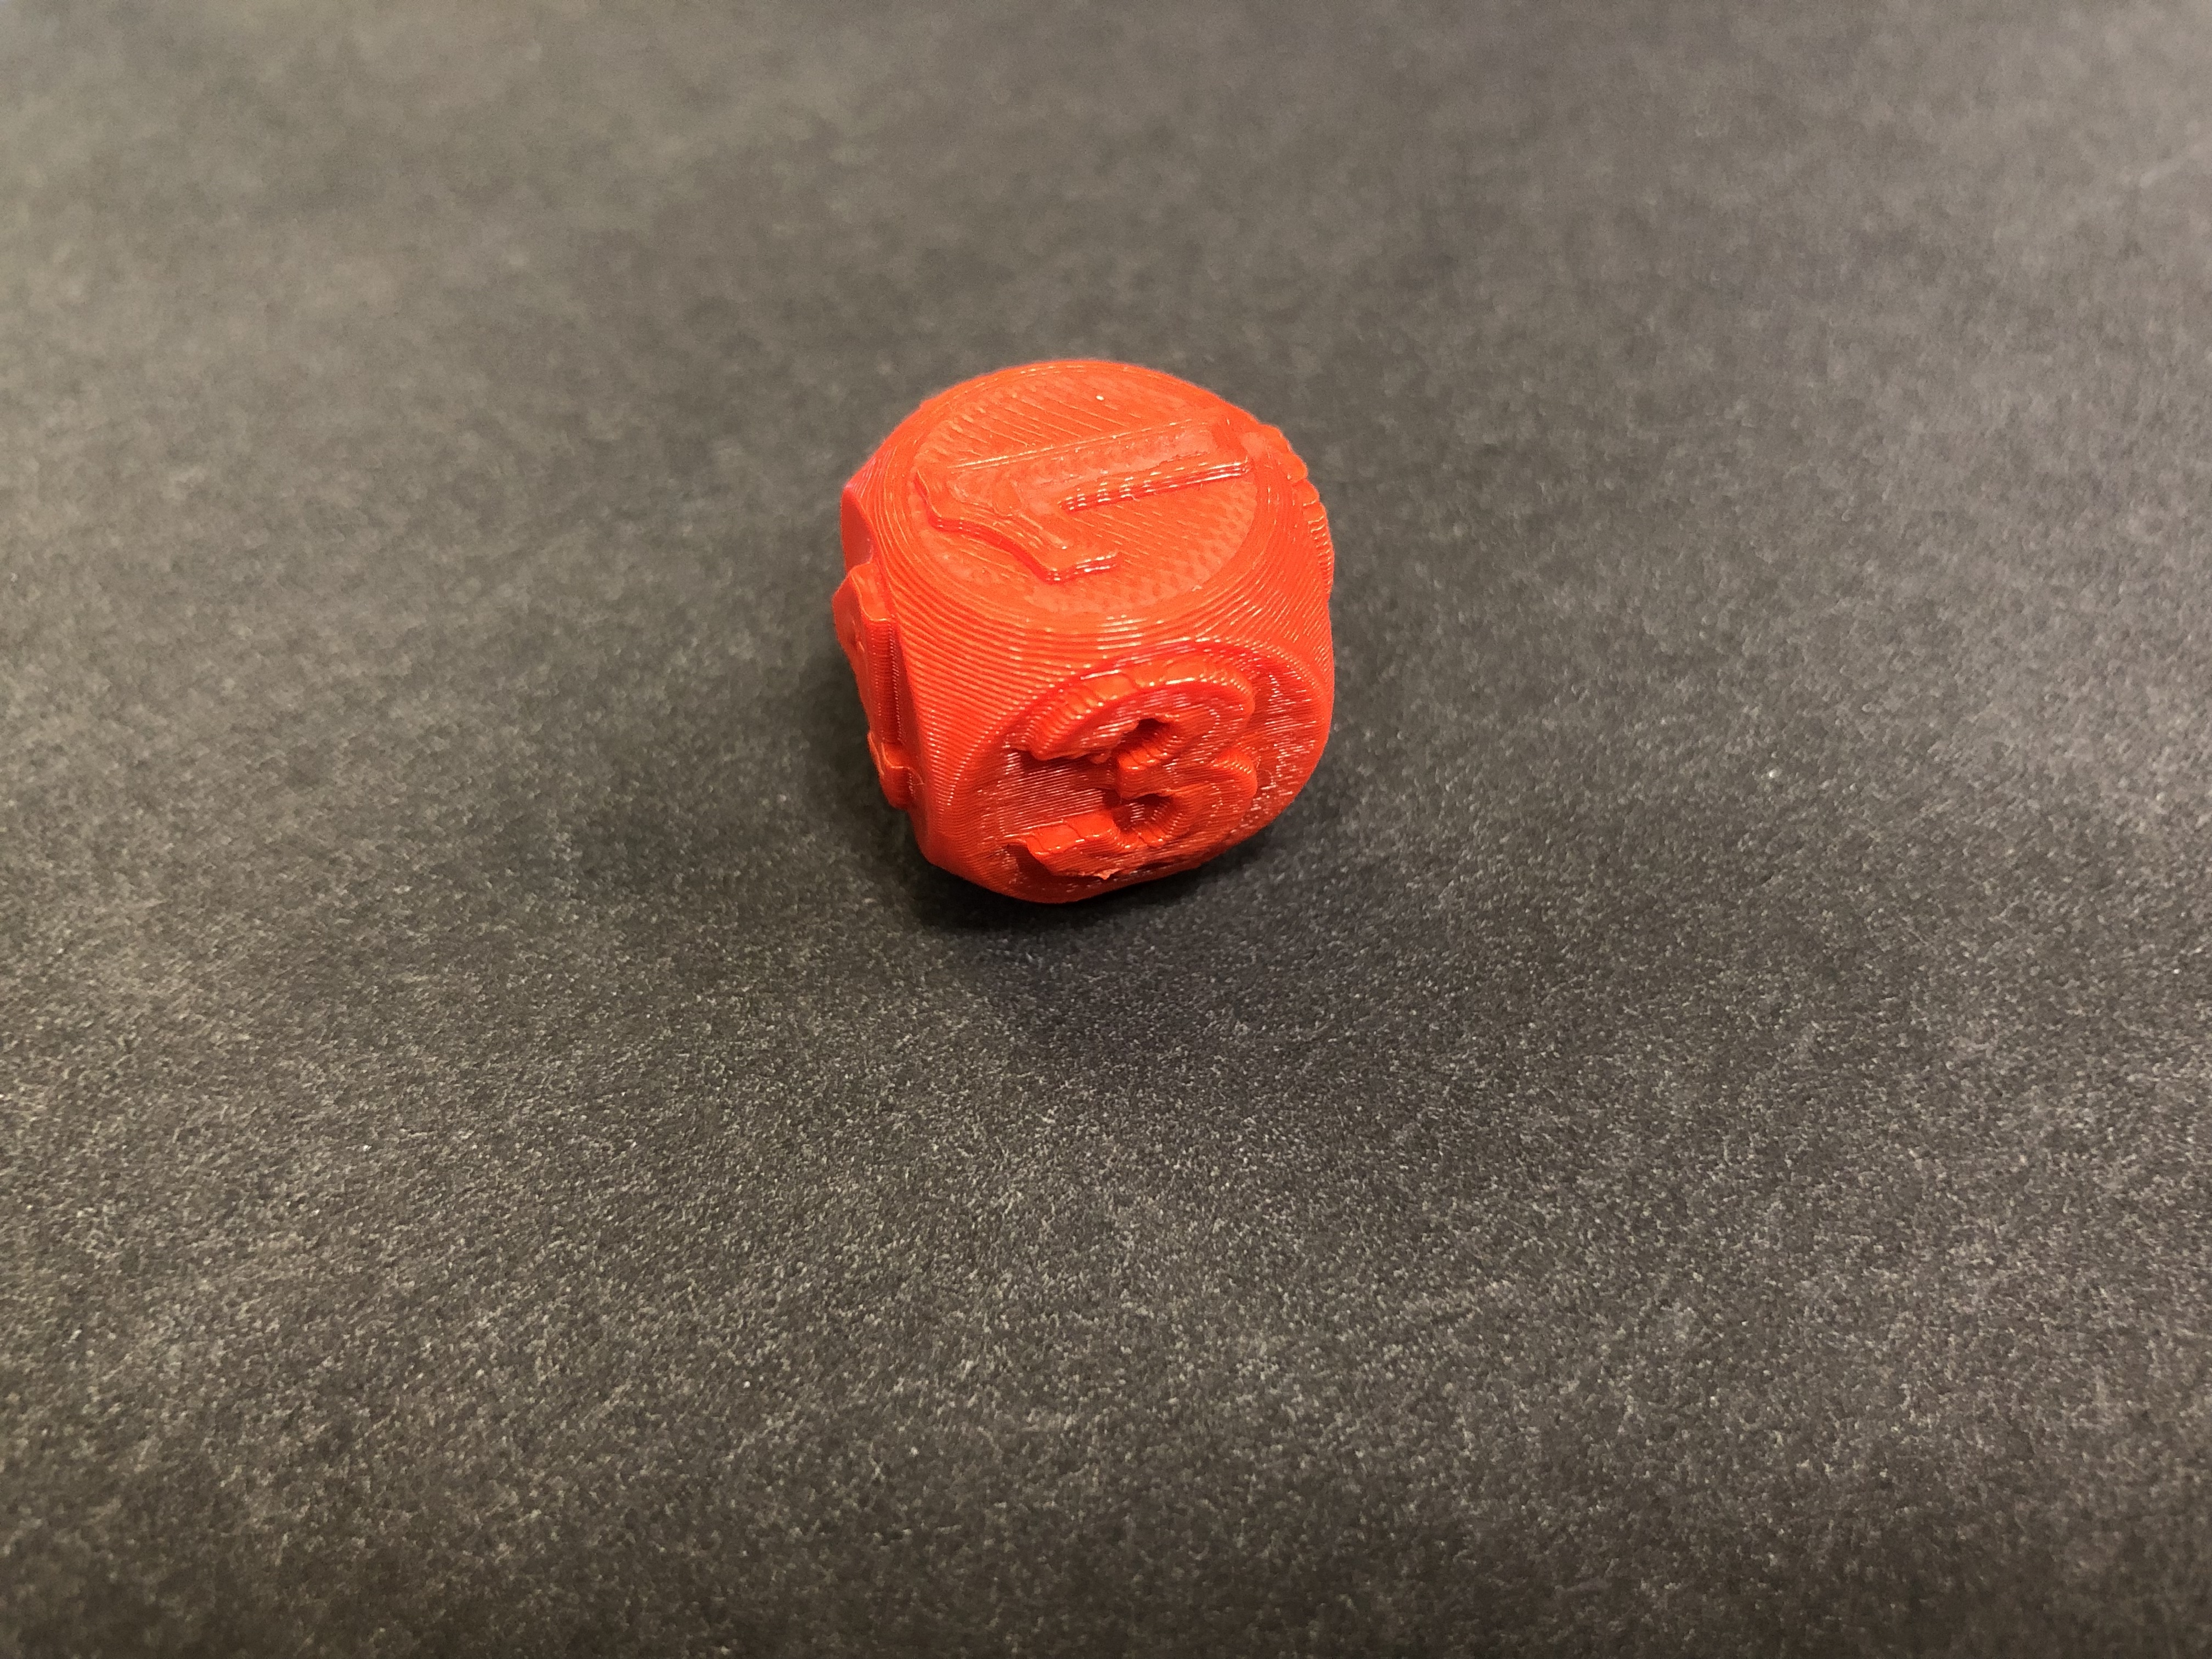
I was very happy with how this print turned out, although it is not the most interesting object, it turned out as good as possible! I was worried about printing some of the other forms I made because I didn’t know whether the dimensions would be too small or too large so I’m happy I chose to make the dice. The only complaint I have about this print is that some of the numbers are a little bit larger than others, and some are a little off centered. Overall, I’m happy with how it turned out since this was the first form I’ve actually made on my own.
Summary of Group Tinkercad Project
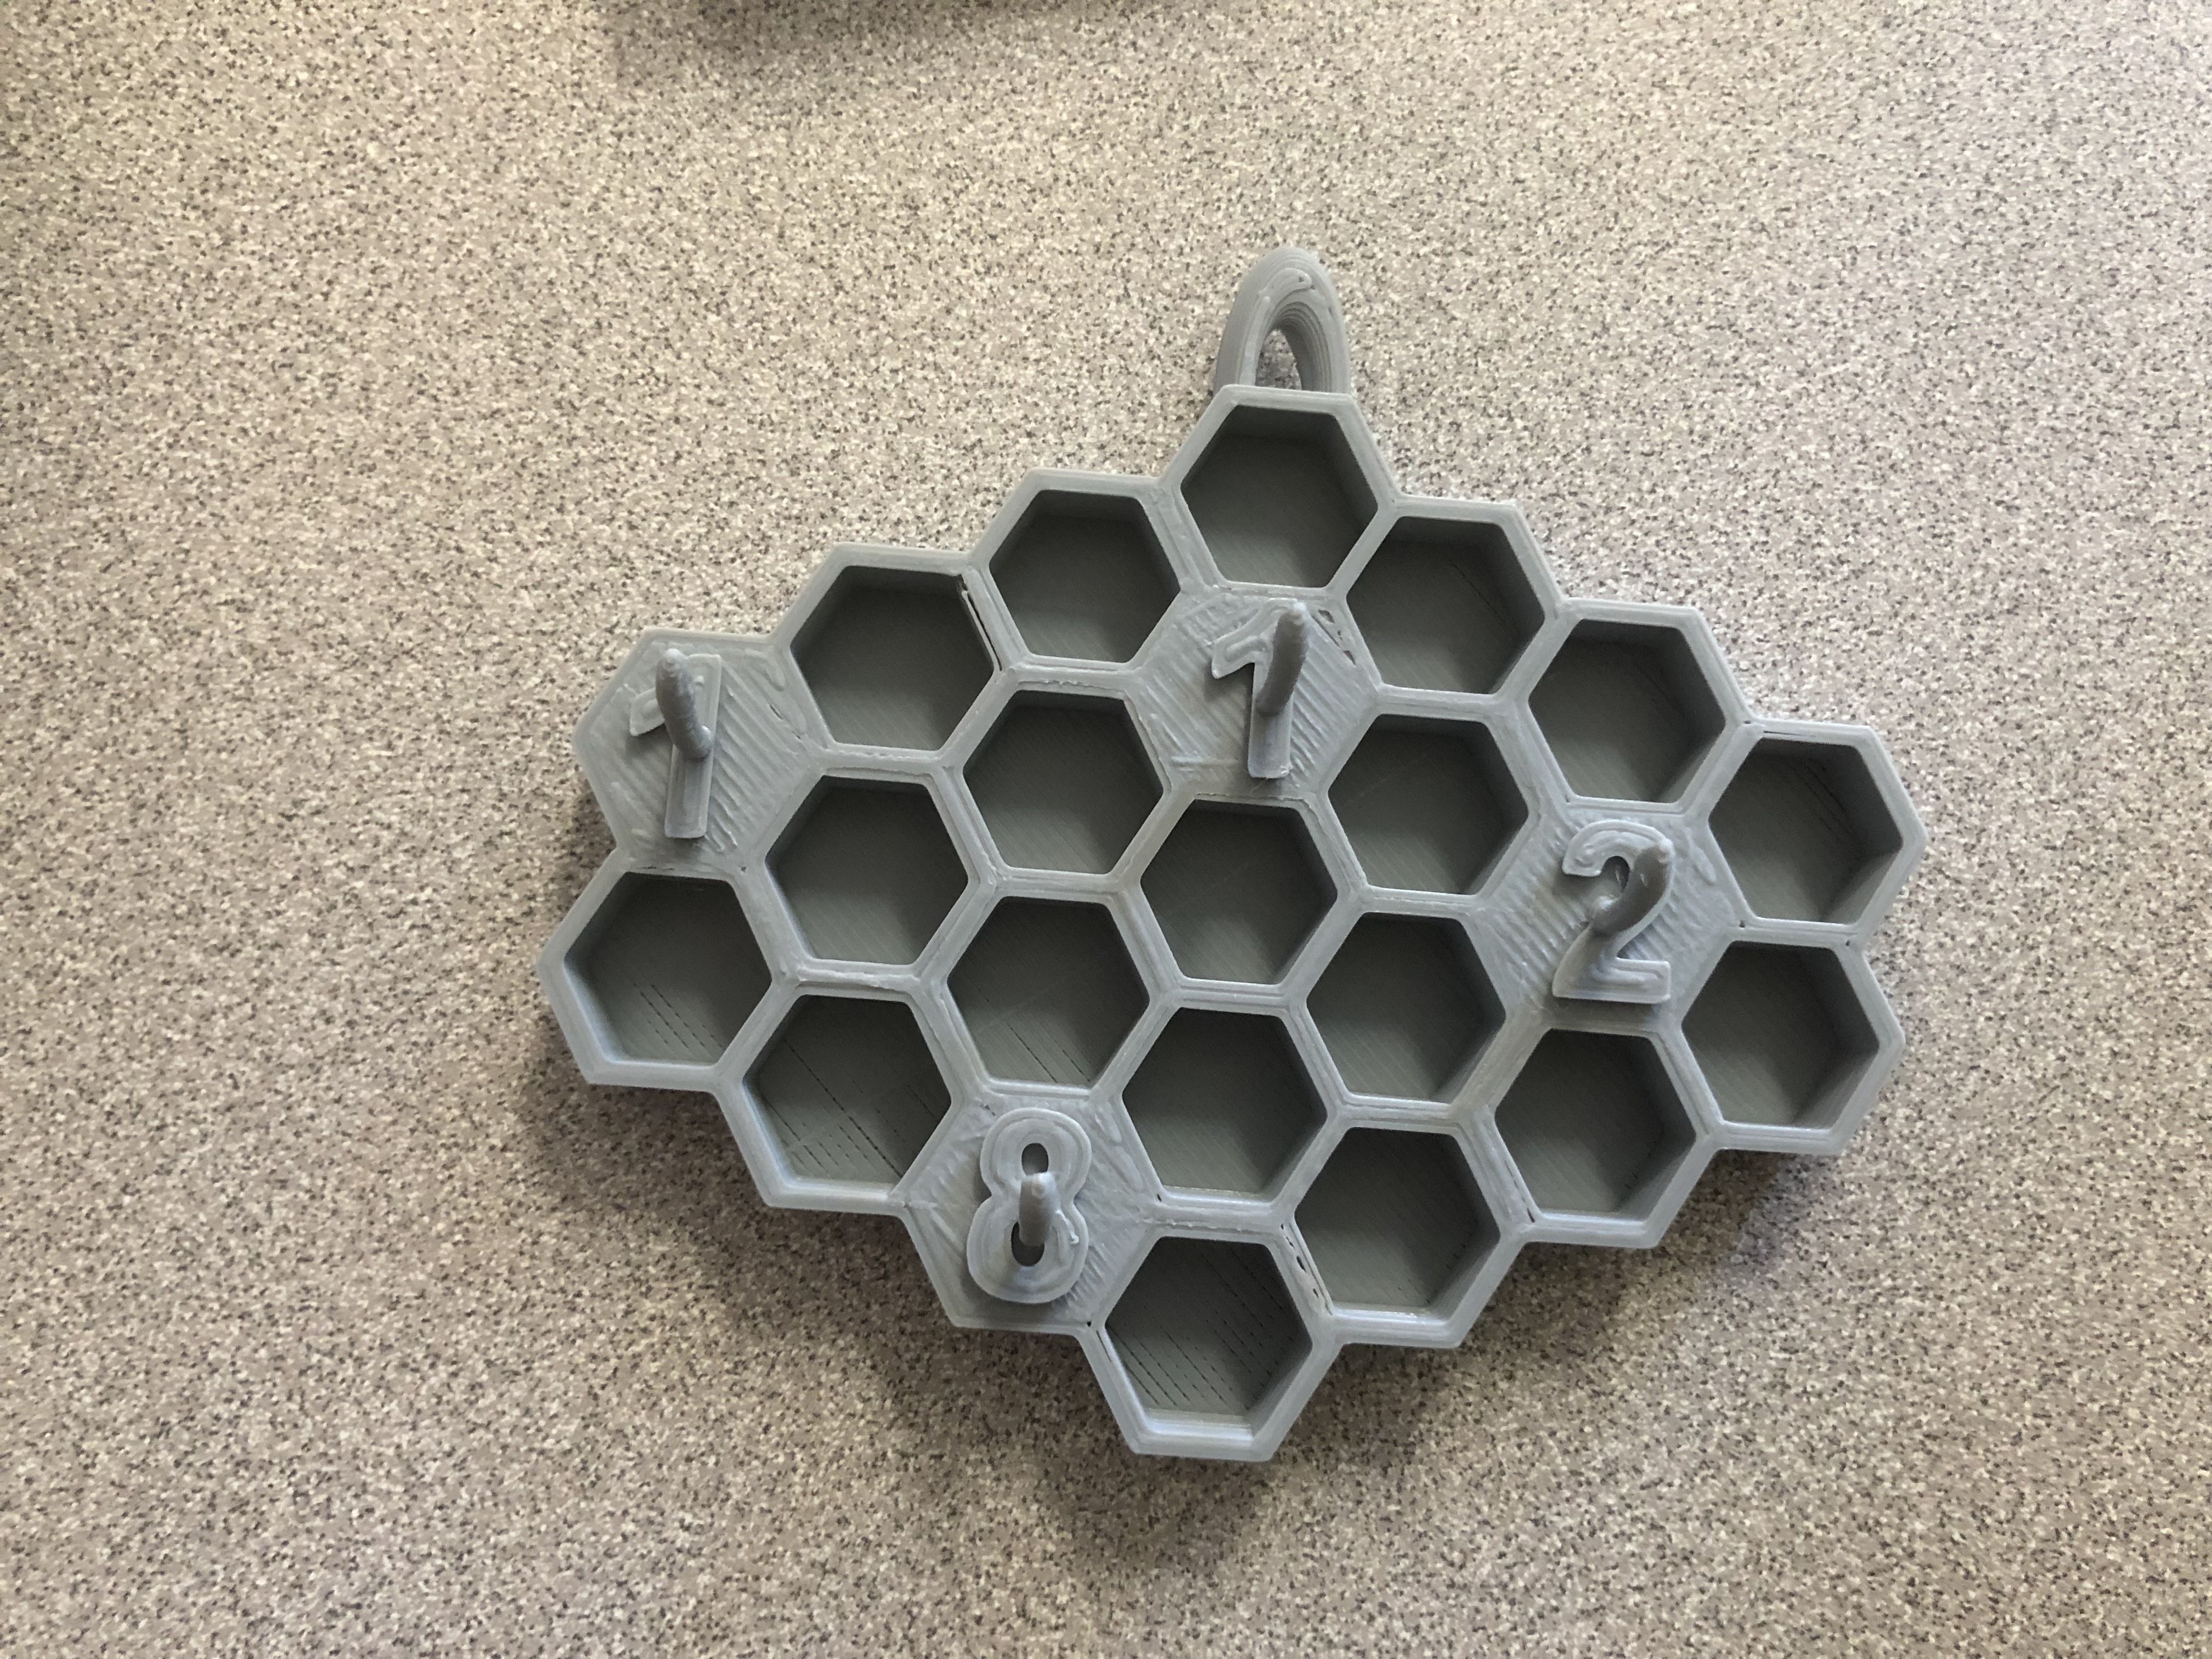
My project was the Honeycomb Personalized Keyholder and my partner was Gabby Dermody. I thought this was a fun project because I liked being able to bounce my ideas off my partner and get feedback from a different point of view. It worked out well because Gabby is a graphic design major so she could help me create my analytical ideas in a reasonable and realistic way. Our project turned out really well, we each personalized the keyholder, she used her roommate’s initials and I made mine with my house number. I am very happy with the final result because it is something that is interesting and visually pleasing, while still being functional. When I started this project I was expecting it to be a fail so it was amazing to see our ideas actually come to life and work! After our class discussion, I realized the hooks might be a little too flimsy for heavy keys so I’m interested to see how it actually performs.
https://geekhaus.com/isci104_spring2019/2019/01/15/honeycomb-personalized-keyholder/
https://www.thingiverse.com/thing:3377246

20 Forms in Fusion 360
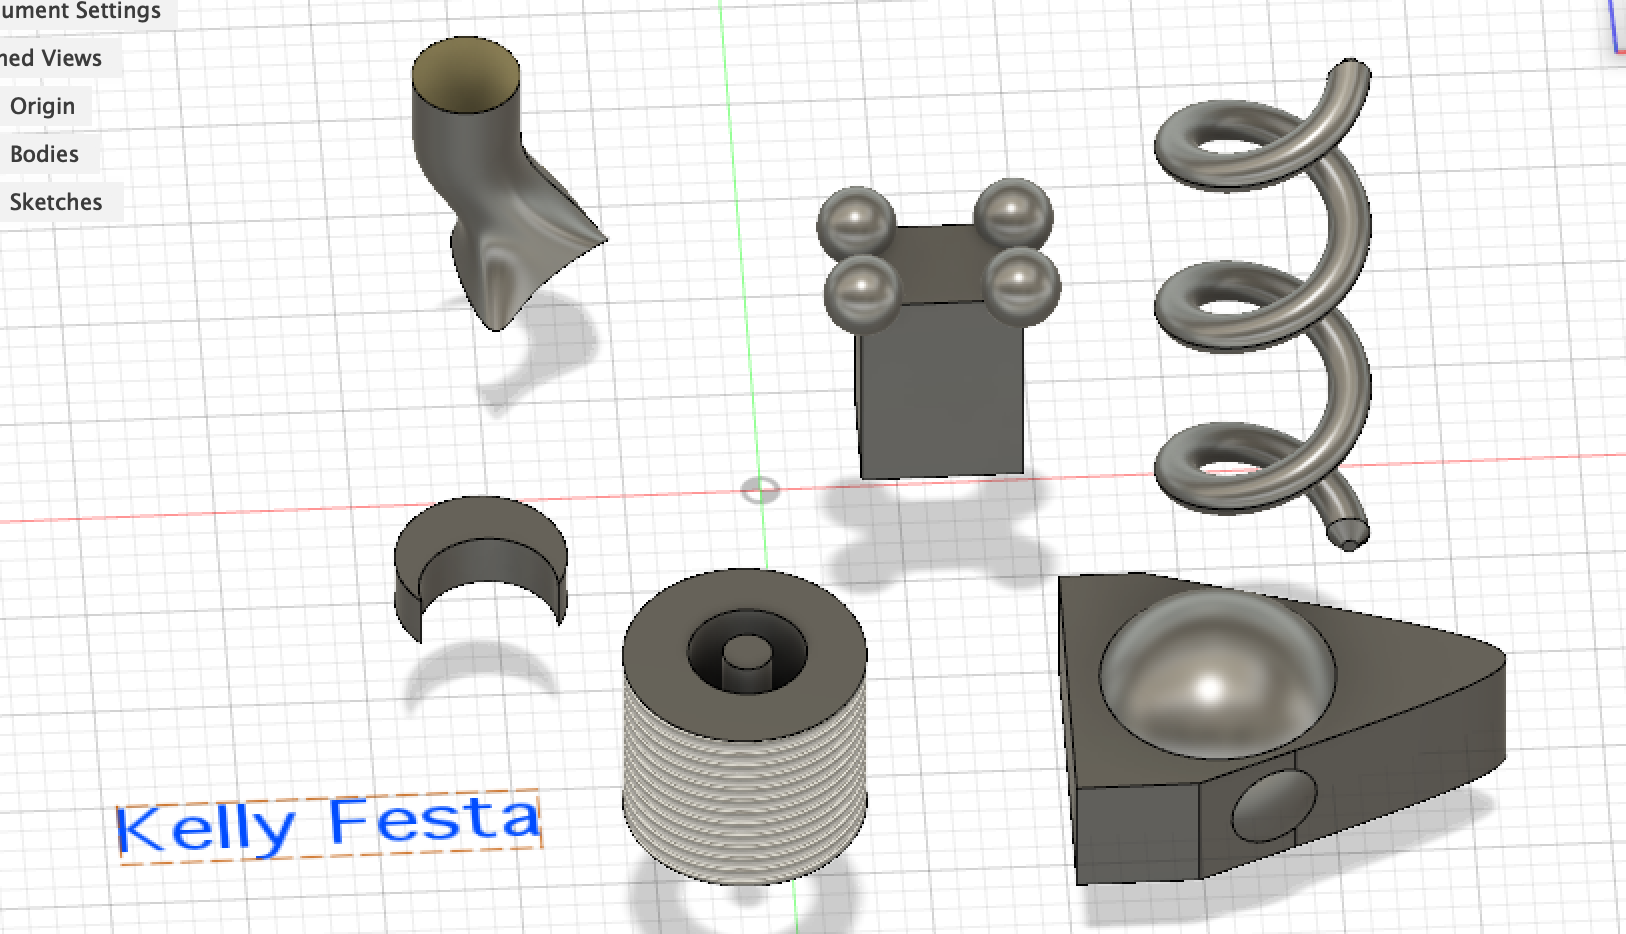
First Screenshot:
- Triangle with beak attached: I used the create form tool to create a rounded box shape, then I used the sculpt environment to pull some of the corners in and up, and then I pulled the last corner out to make a beak shape.
- Cylinder with a hole through it: I created a cylinder shape then used a tool from the right-click menu to create a hole through it.
- Box with rounded edges: I used the create tool to create a box, then I used the fillet tool to round every edge except the bottom to 5 mm.
- 2 circles attached: For this, I used the create tool and I created a torus, then I created a new component and created another torus, and chose the join option in the sidebar to join the two shapes together.
- Pacman with triangle attached: Here I used the sketch tool to create a sphere, and I created a triangle with the sketch tool for the mouth, that intersected with the sphere. Then I extruded the remainder of the sphere to raise it up without the mouth, then I used the sketch tool again to make a second triangle on the other side of the sphere, and extruded that as well to give the Pacman figure a raised triangle across from his mouth.
- Hollow box: For this figure, I used the box shape from create new shape, then I used the shell modification to hollow it out, then I used the chamfer tool to bevel the edges for an added effect.
- Squiggle pipe: I used the sketch tool to create a squiggly line, then I put a pipe on the sketch that followed the path I had made.
Second Screenshot:
- Kelly Festa: For this, I was testing out the text tool on sketch, and wrote my name and made it italic, and Geneva font.
- Wavy floating tube: I used the create from to create a cylinder, then in the sculpt environment I opened up the bottom of it by pulling at the sides and I curved the middle of it, finally I lifted it up off the platform.
- Crescent moon: I used one sphere as the base and then a smaller one overlapping it and used the cut tool to remove the shape of the second cylinder from the first.
- Box with spheres: I made a box with the create form tool, then I added 4 spheres and moved them onto the corners of the box. The move tool is actually pretty difficult to work with.
- Spring: I used the coil tool to create a coil shape and lifted it up to spread out the coils then I used the chamfer tool to make the edges look like a screw.
- Threaded cylinder: Here I made a cylinder shape, then I added threads to the outside. Finally, I sketched two circles inside of each other inside the cylinder and I used the extrude tool on the middle circle to cut it out.
- Sphere in a rounded triangle: For this, I made a sphere shape, then I sketched a conic curve, which made the top of the triangle. Finally, I created a rib which attached the sketch to the sphere and gave it a flat side.
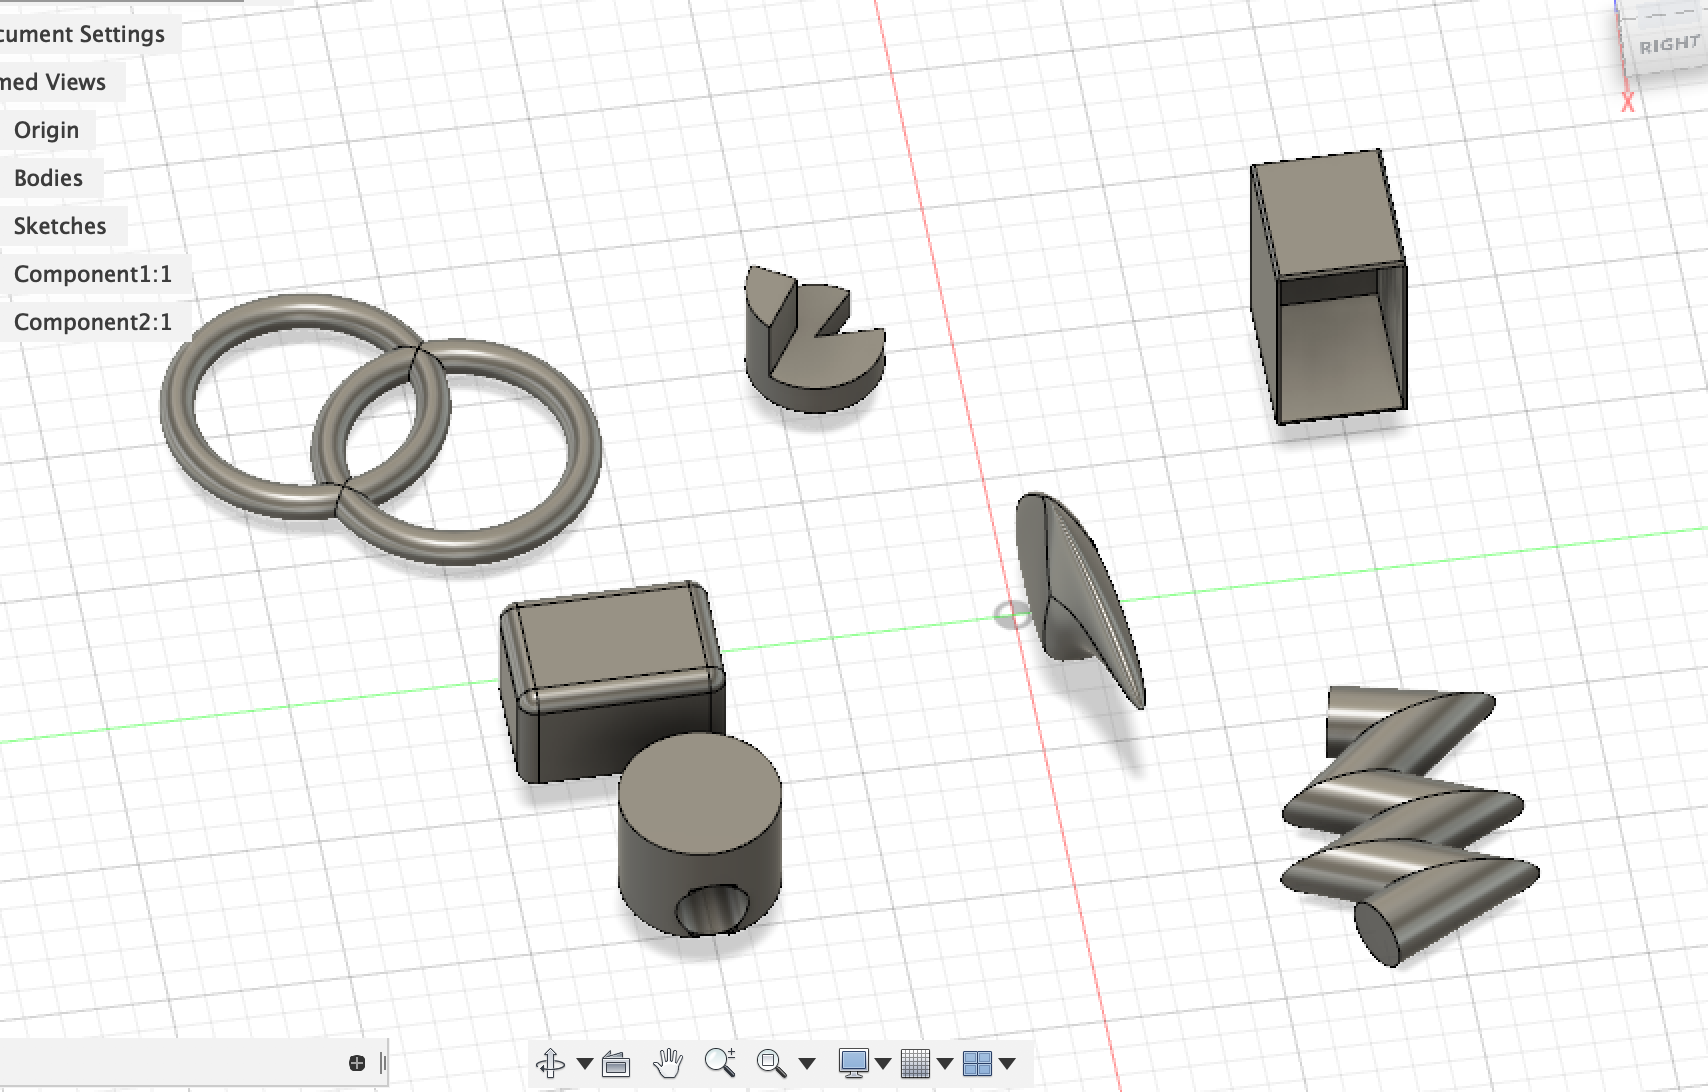
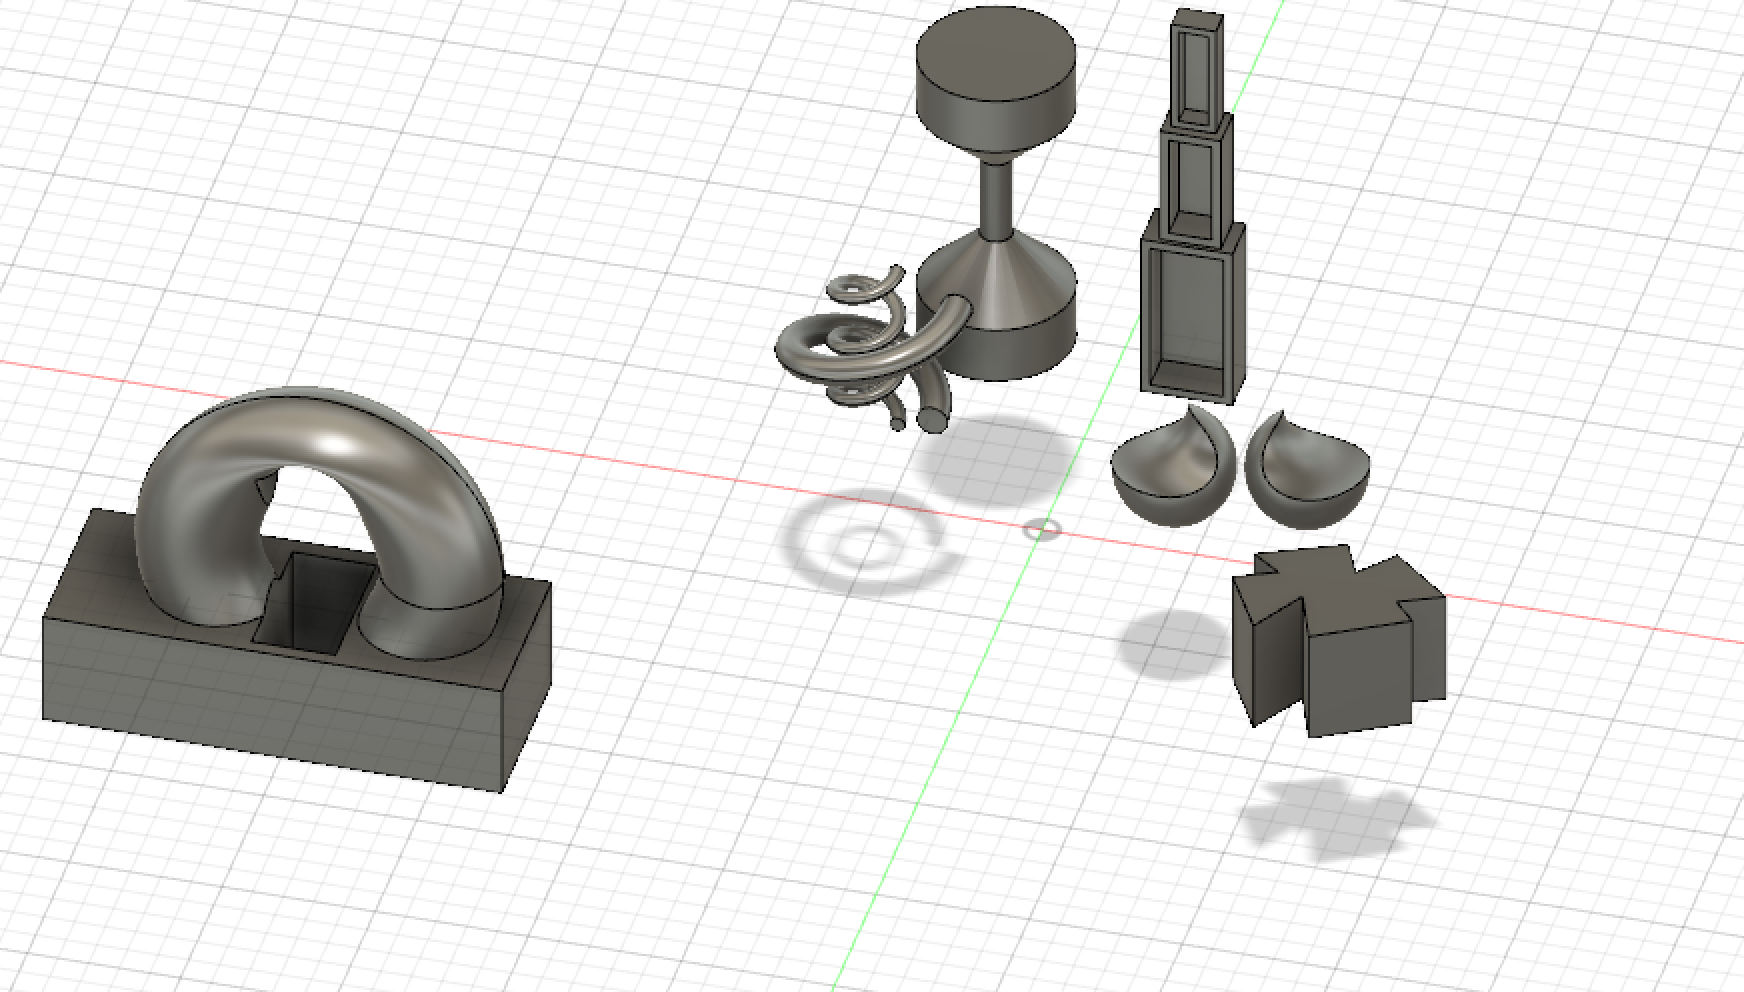
Third Screenshot:
- Double coil: Here I made a large outer coil and spun it 5 degrees then slightly tilted it, then I added a taller thinner coil in the middle.
- Rounded crescents back to back: I made two spheres next to each other, then I made a torus around them and cut through the spheres with it. Finally, I lifted them up and slightly rotated them upside down.
- X shape: For this, I made a series of diamond shapes with the sketch tool. I started with a square shape on the sketch tool and extruded it to make a new body, then I made diamond shapes on each of the corners and extruded them out to cut through the main shape to make it look like an X.
- Ring on a box shape: I used the create form and used the torus shape, and then I edited the form in the sculpt environment it by pulling the top up and the bottom down. Next, I joined it with a box shape, then I added another rectangle to the base and cut through part of that and part of the ring.
- Tower: I made 3 rectangle shapes and turned them 90 degrees so they would be sitting on the smallest side, and I made each of them have a shell, then I moved them so the smaller rectangles would sit on top of the larger ones.
- Dumbell: I made 2 cylinders and used the chamfer tool to bevel the edges, then I extruded the middle of the bottom cylinder to make it like a pipe, then I flipped the other cylinder over to attach it to the pipe to make a figure like a dumbell.
Fusion 360 Print
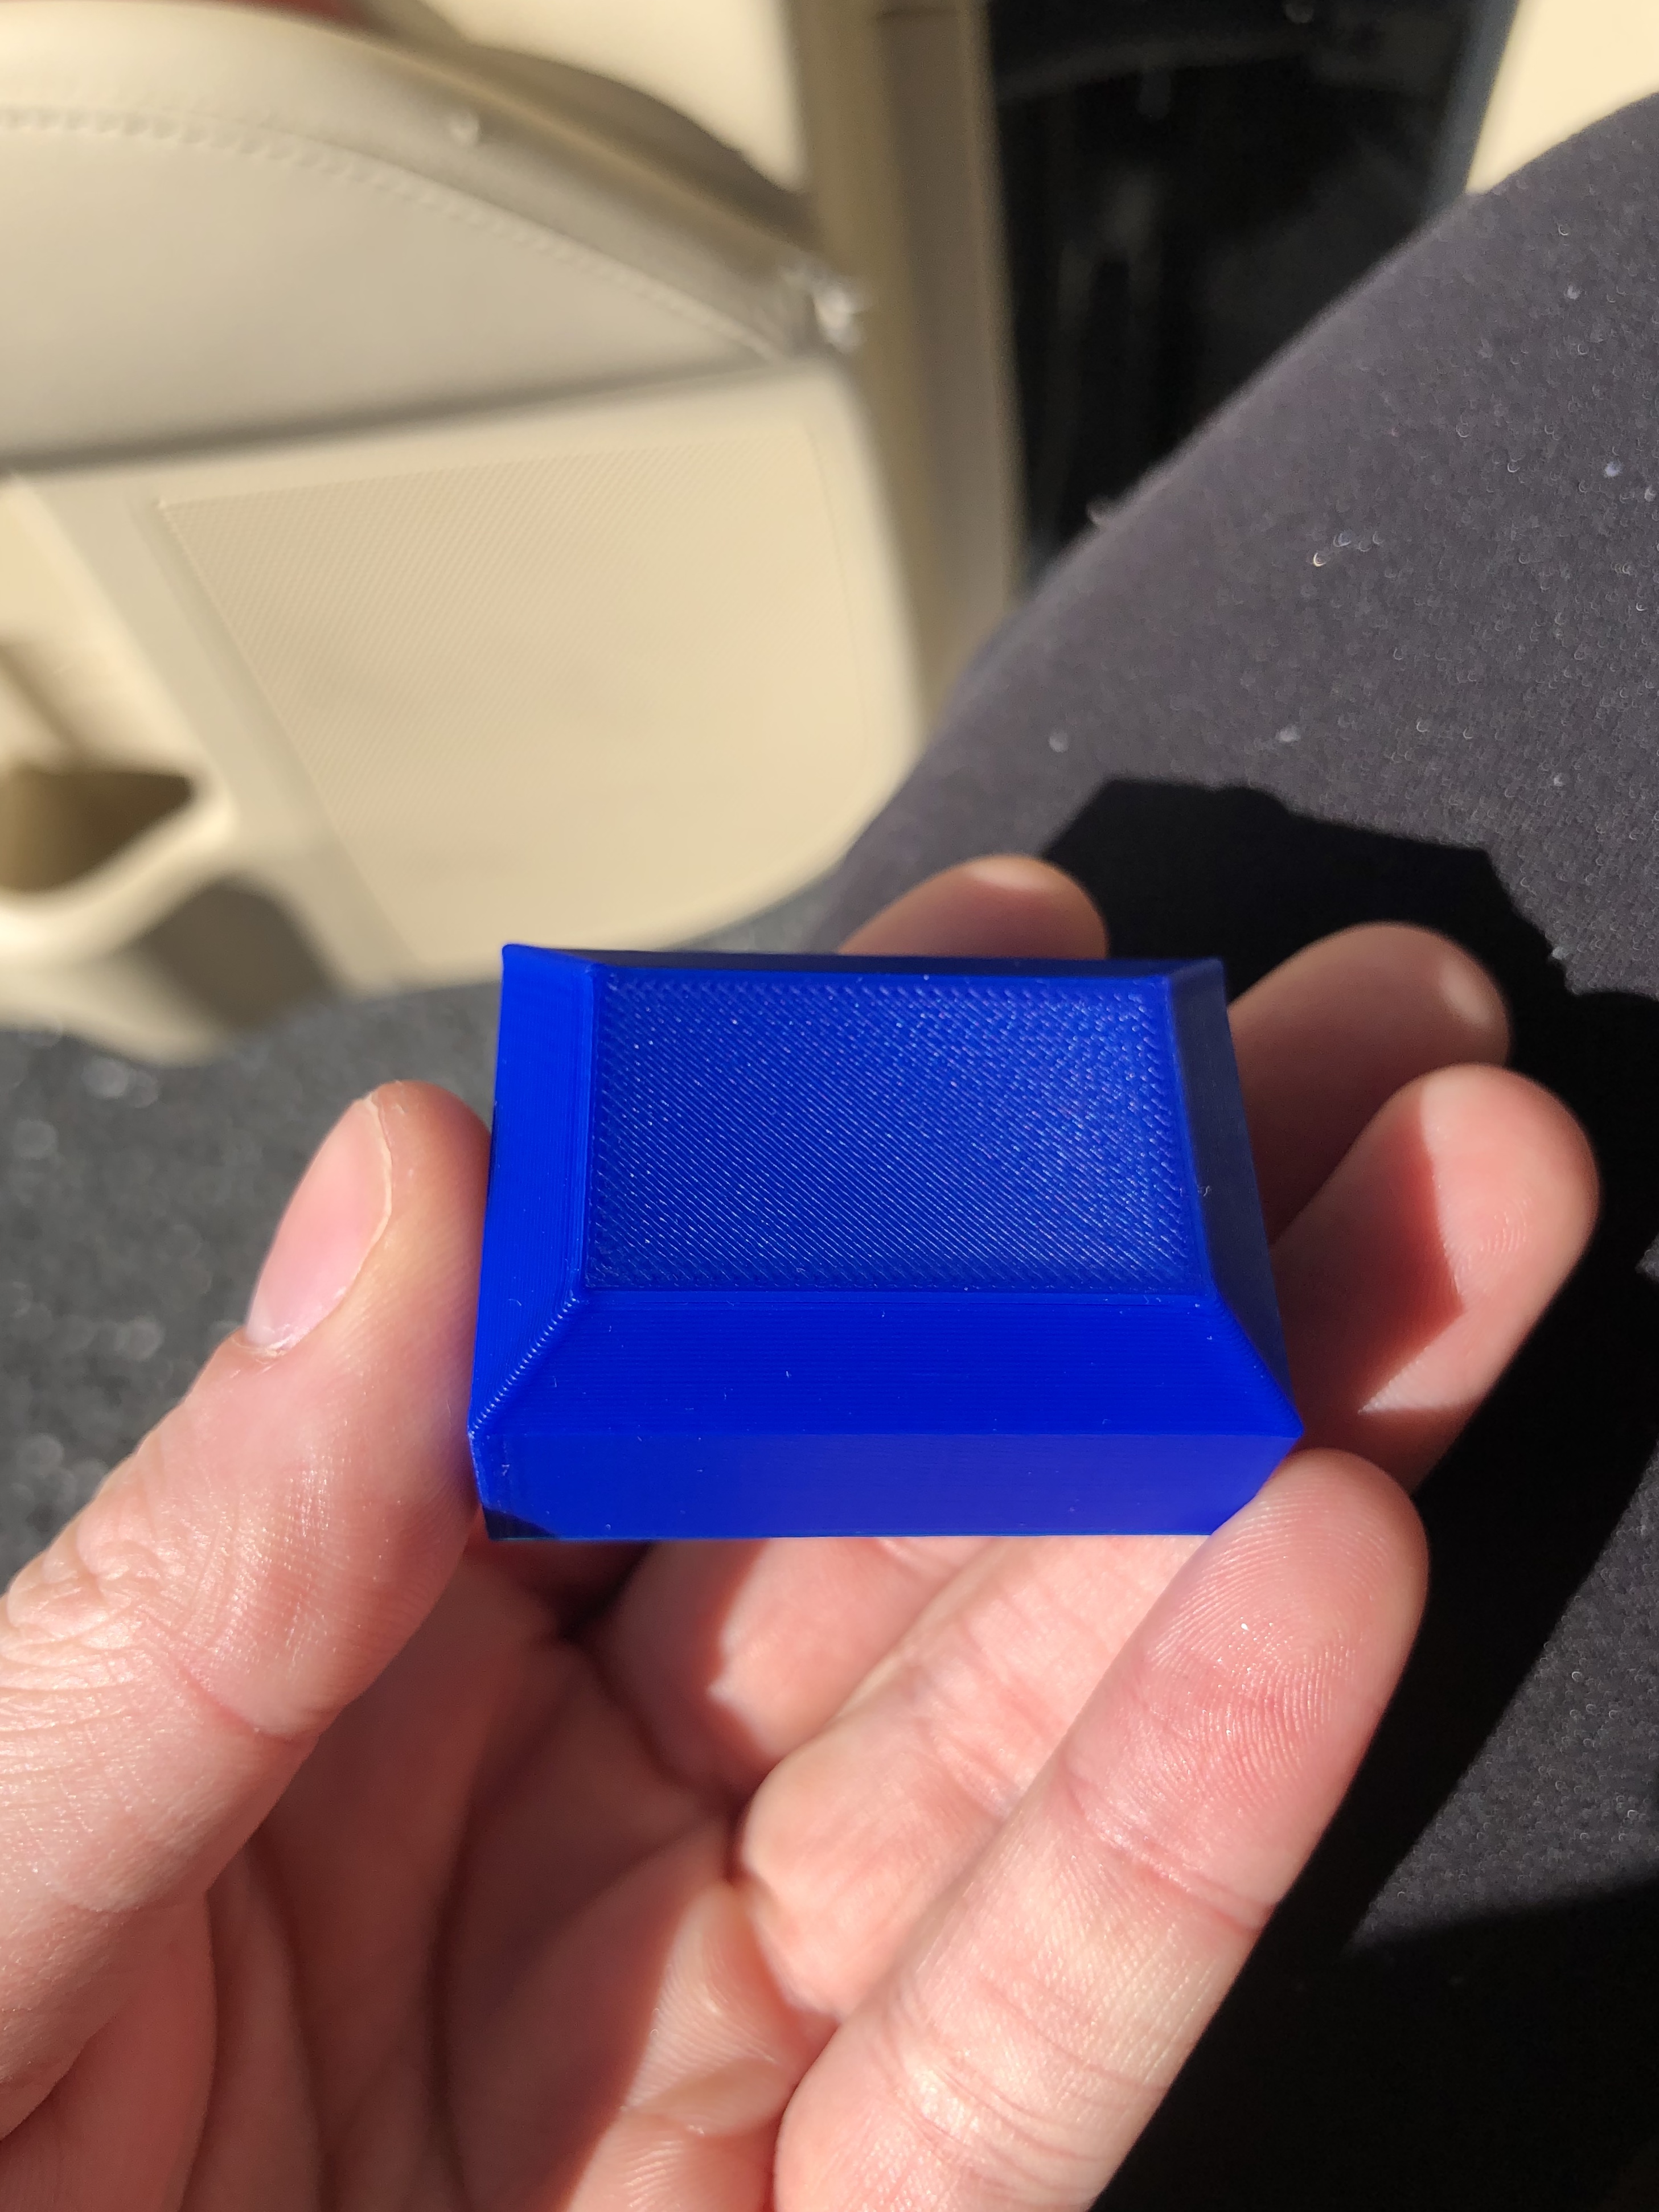
The print was a success, but unfortunately, I was having problems with Fusion 360 wanting to update on the computer when I tried to open my forms, so I just quickly made a rectangle shape and used the chamfer tool to bevel the top edges. But it turned out really well and printed flawlessly. Although I didn’t print one of my forms that I originally made it was still pleasing to see a form I quickly made print so well. I would like to print one of my other forms soon when I get the chance, just to try another one out and see my work come to life!
Fusion 360 Vase Design


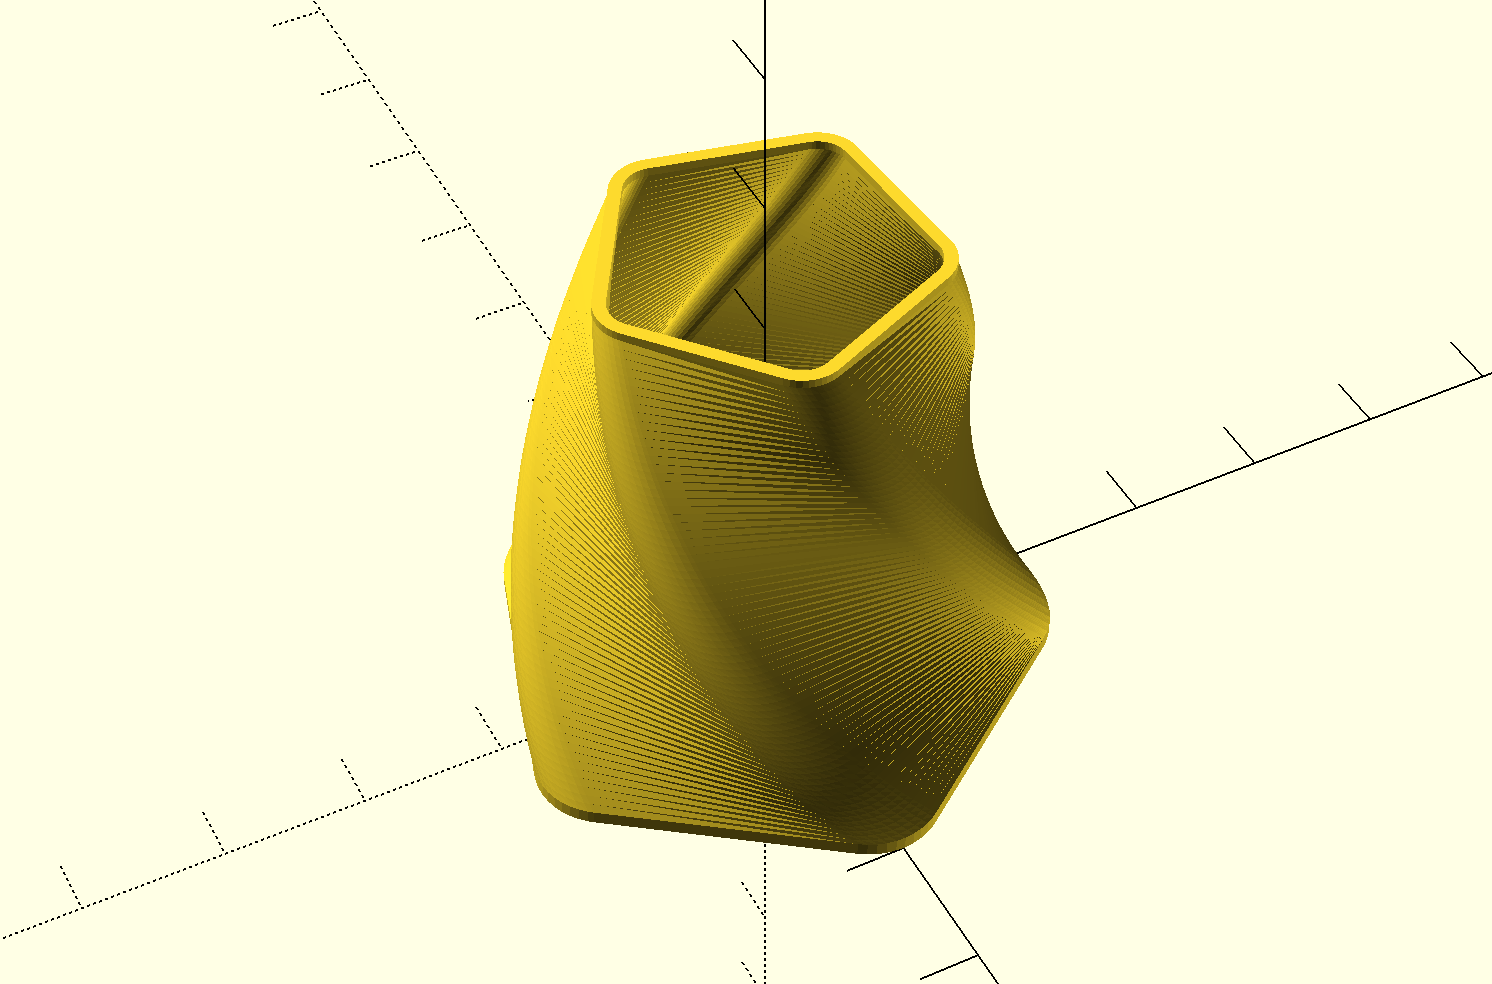
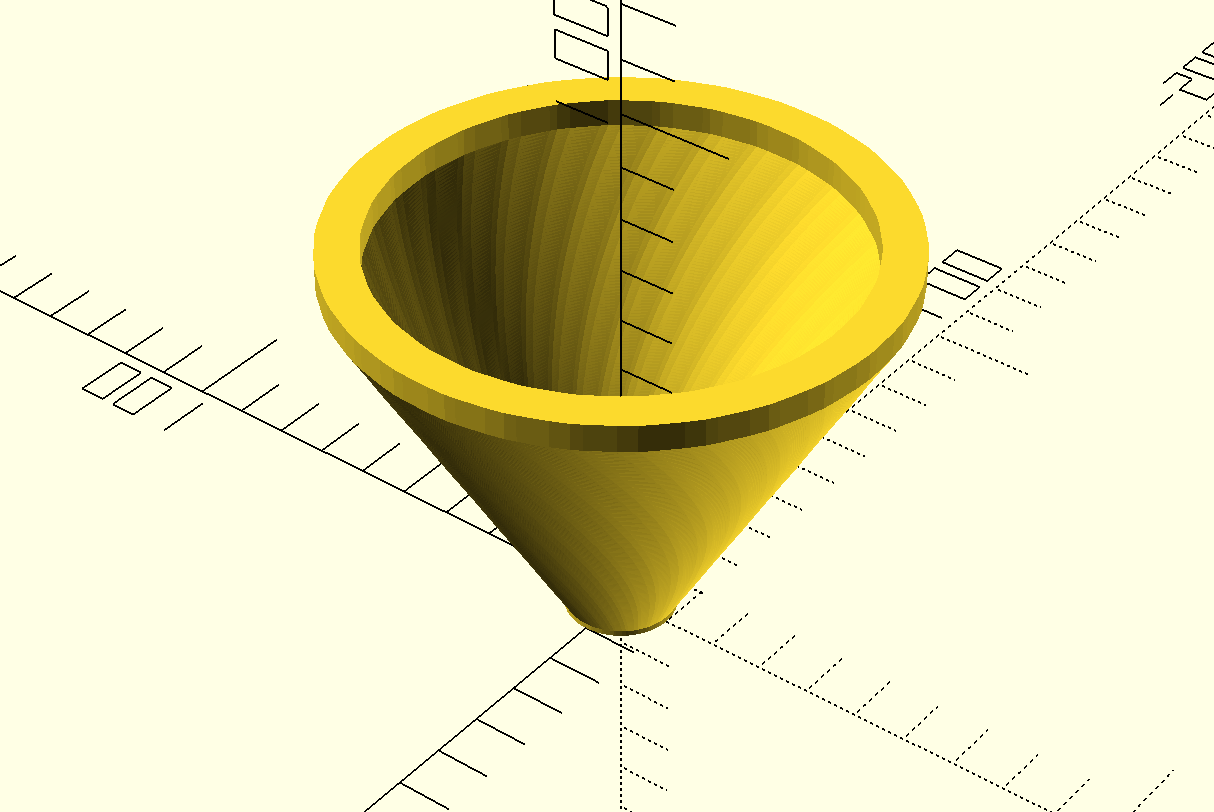
I started by using the sketch tool and made a circle right around the origin, then I made an offset plane up a little bit, and made another circle using the sketch tool still centered around the origin. Next, I began to manipulate the circle by pulling it to make rounded corners, and it ended up becoming more of a square shape with rounded corners. Then I used the sketch tool to make profiles along the side that curved out a bit, and I used the loft tool to make the form really come together. I selected the planes and the profiles along the side to make sure my vase turned out as I wanted it to. Lastly, tugged at the sides while it was lofted to make them curve and spin a bit more. It ended up becoming more like a large bowl than a vase, but I’m very happy with how my form turned out because I think this is something I could actually use compared to a vase, which might not have been functional. I used similar techniques to what was done in the video, but I put my own touch on it by manipulating the shape for the rim and creating an interesting profile that was visually pleasing. It goes beyond the basic design in the video because I used my own shapes instead of just using the spline tool, and changed them to be what I wanted, I also created a specific profile like I wanted instead of making it squiggly, I think my design is very unique and different from what everyone else produced.
Fusion 360 Vase Prints
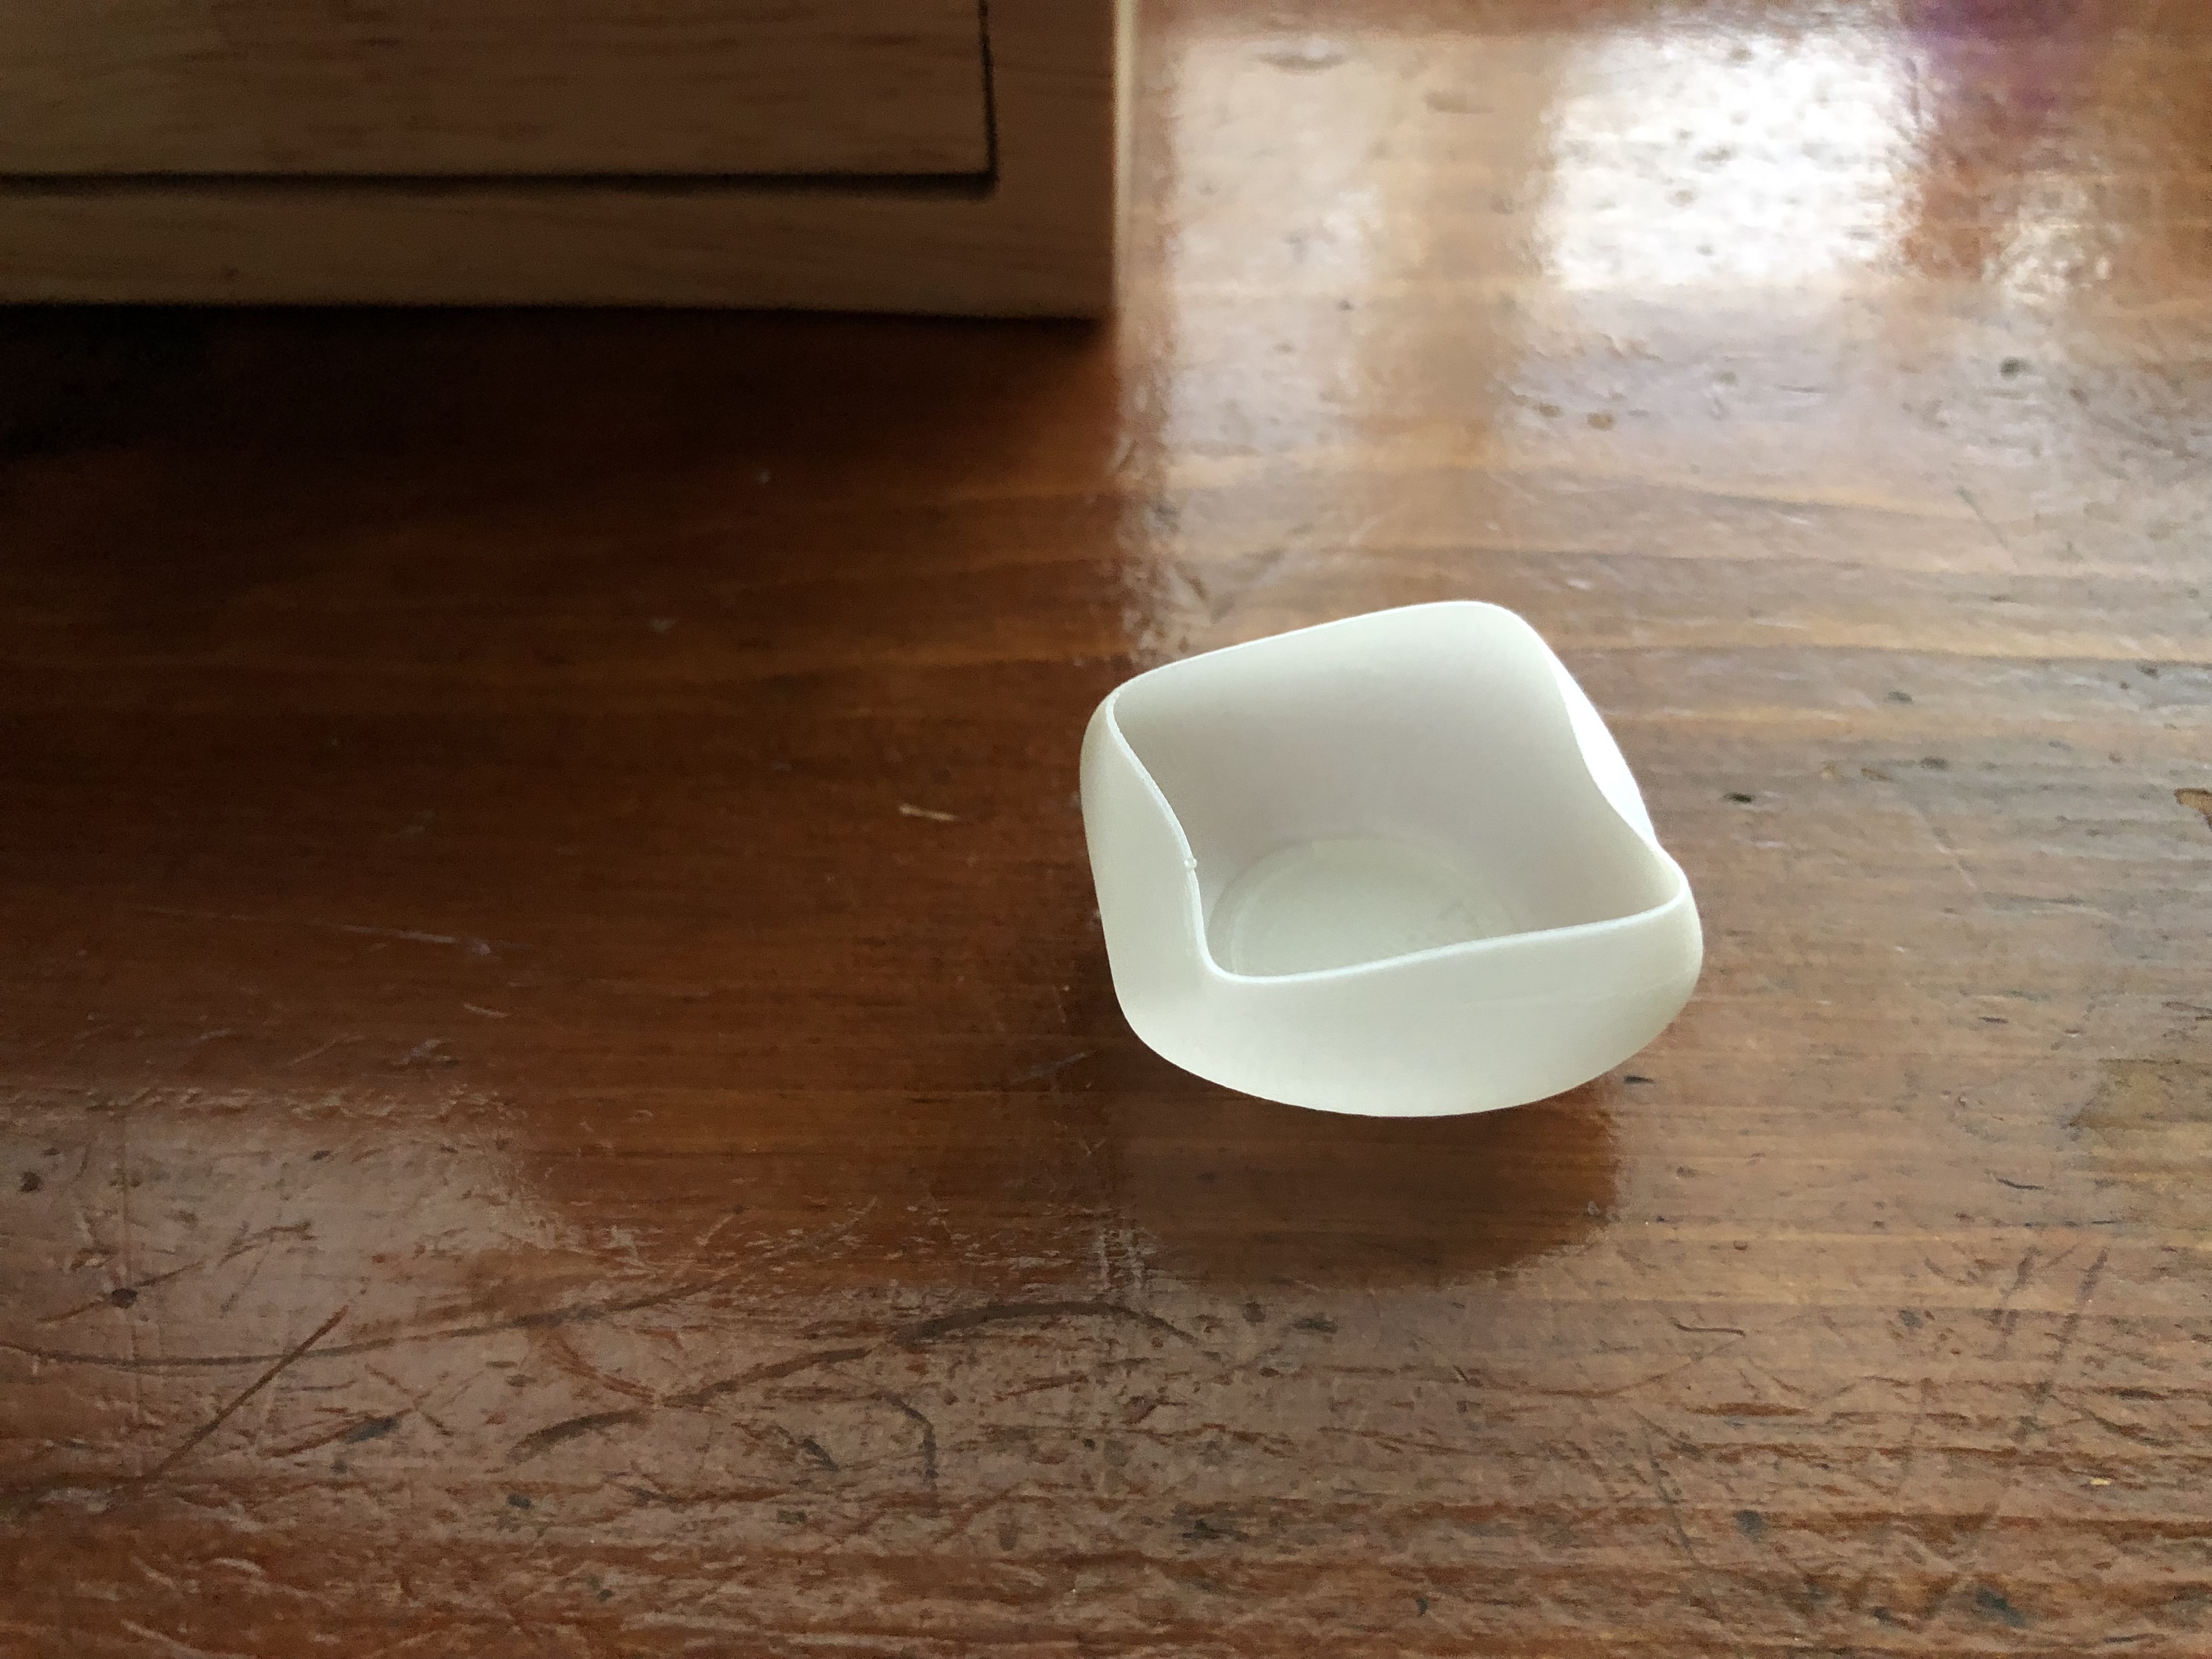

My vase was a success! I was very happy with how it turned out, it looks great and is an interesting form! I think this is actually something I could use, maybe as a pot for a small plant or just a bowl to hold some stuff in my room. Although it does not look like a traditional vase I think it looks great and is an interesting form that could not be bought. I’m glad I chose to make my form like this because this was the third variation I made, but definitely my favorite.
https://www.thingiverse.com/thing:3404087
20 Forms in OpenSCAD
- For my first two forms, I changed the polybowl code that you provided us with and changed the number of sides to be more and less, I also changed the diameters, and the body twist, the body flare, and the body height. The first screenshot has fewer sides, a shorter height, more body twist, and less body flare.
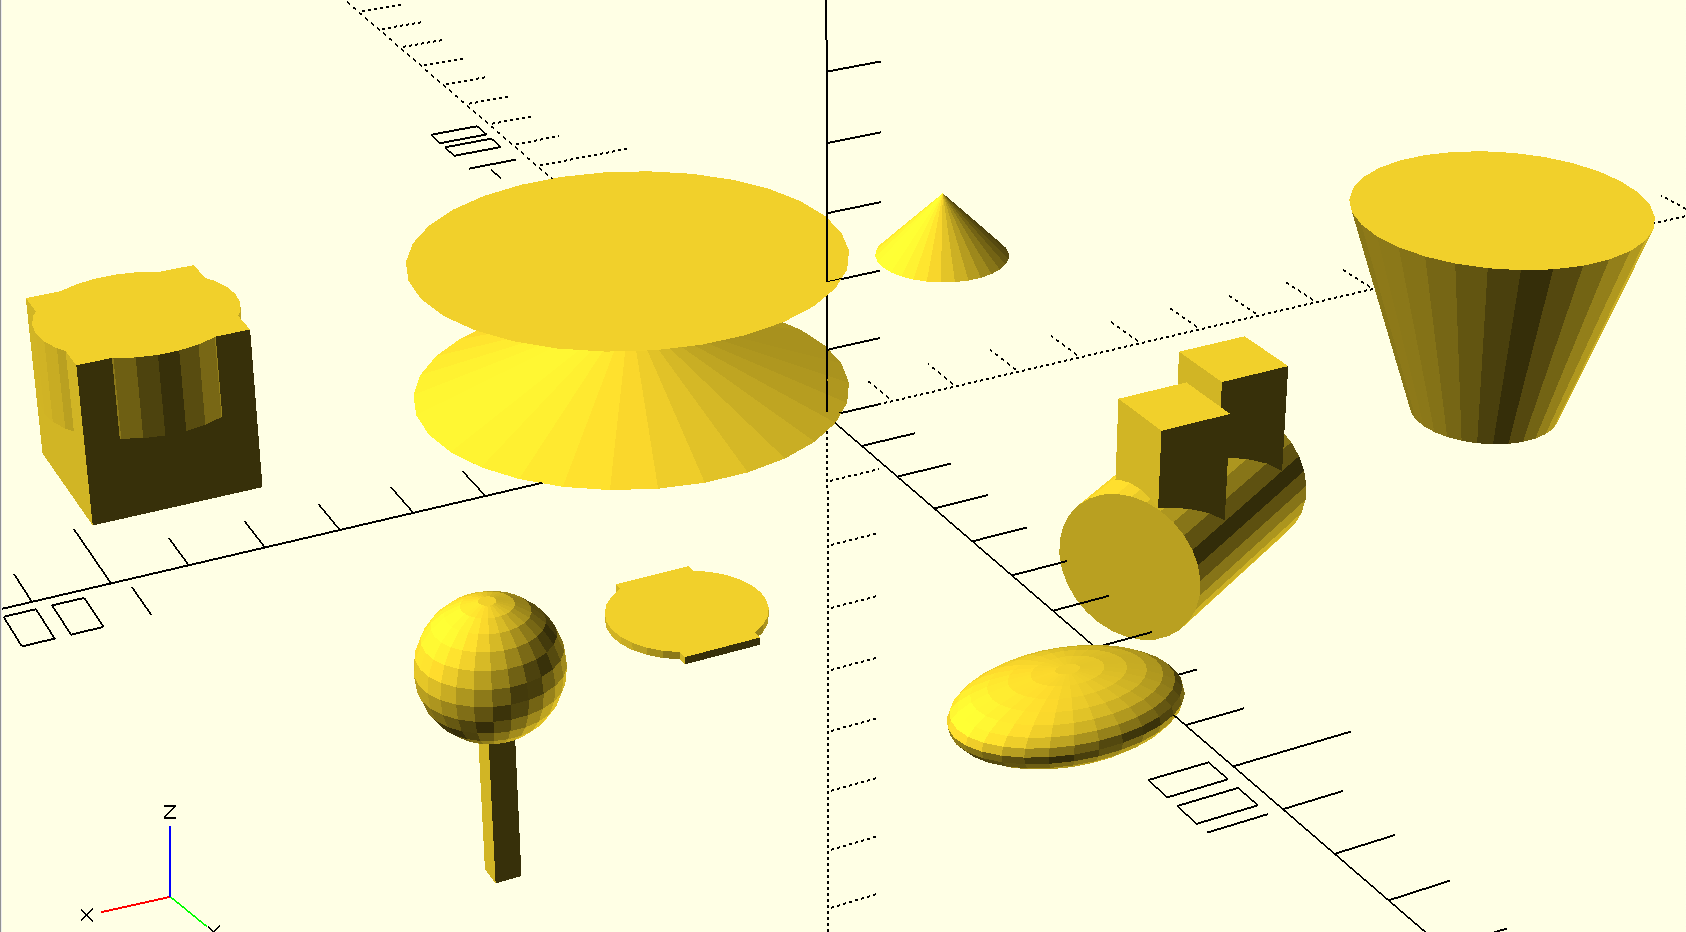
For these shapes I watched youtube tutorials to learn how to work with the software:
- Circle with top and bottom lip: I made a square with the center as true, then I put a circle on top of it. These were both 2D forms.
- Cone with wide top: I used the cylinder shape and made the top wide.
- Cone with pointed top: I used the cylinder shape and made the top zero so it came to a point.
- Tube with cubes coming out: I rotated a cylinder and added two cubes that I translated to come out of both ends.
- Wide hourglass shape: Here I used a cylinder with a wide diameter and short height. Then I made another cylinder of the same size and rotated it and translated it to sit on top of the first cylinder. It was very interesting to me to see all the different forms I could make with just the cylinder tool.
- Lollipop: I made a cube with a sphere on top.
- Oval: I made a sphere and scaled it to change it to an oval shape.
- Quatrefoil like shape: For this, I used the union tool and made a cylinder on top of a cube.

- Sphere with a piece missing: I used the code that was given to us as a practice on the google doc, then I made the radius smaller, and made the piece taken out of the sphere larger.
- Pink cube: Here I made a simple cube and then I used the color tool and played around with colors until I found one I liked.
- Cone with a piece missing: I used the difference tool and made a cylinder, then made a cube that cut through it.
- Circus tent looking shape: I used the Minkowski tool that I learned from a youtube tutorial and then made a cube with a cylinder around it.
- Sphere slice: I used the intersection tool that I learned from a youtube tutorial and then made a sphere with a cube intersecting it.
- Thick flat circle: I used the Minkowski tool again and made a cylinder with a sphere around it.
- Sphere with a slice through it: I used the difference tool and made a sphere, then made a cylinder that cut through it.
- Kelly text: I used the text tool I learned through a youtube tutorial and wrote my name.
- Triangle: I used the polygon tool and specified 3 different points for each edge.
- JMU: I used the text tool again and changed the color of the lettering to make it purple and I also made it bold.
OpenSCAD Print
This print was a fail. I wanted to try to print something that was very different from everything I tried before, so I attempted to print my sphere with a slice through it. I added supports in hopes that it would still be able to print the top piece, but I actually had to cancel the print because it was just making a glob of filament in the middle. Although it was a fail, I’m glad I tried something different because I learned from it and now I feel more comfortable in knowing what will, and will not, successfully print. I’m excited for the opportunity to try and print more things from openSCAD after this experiment.
Summary of Group OpenSCAD Project
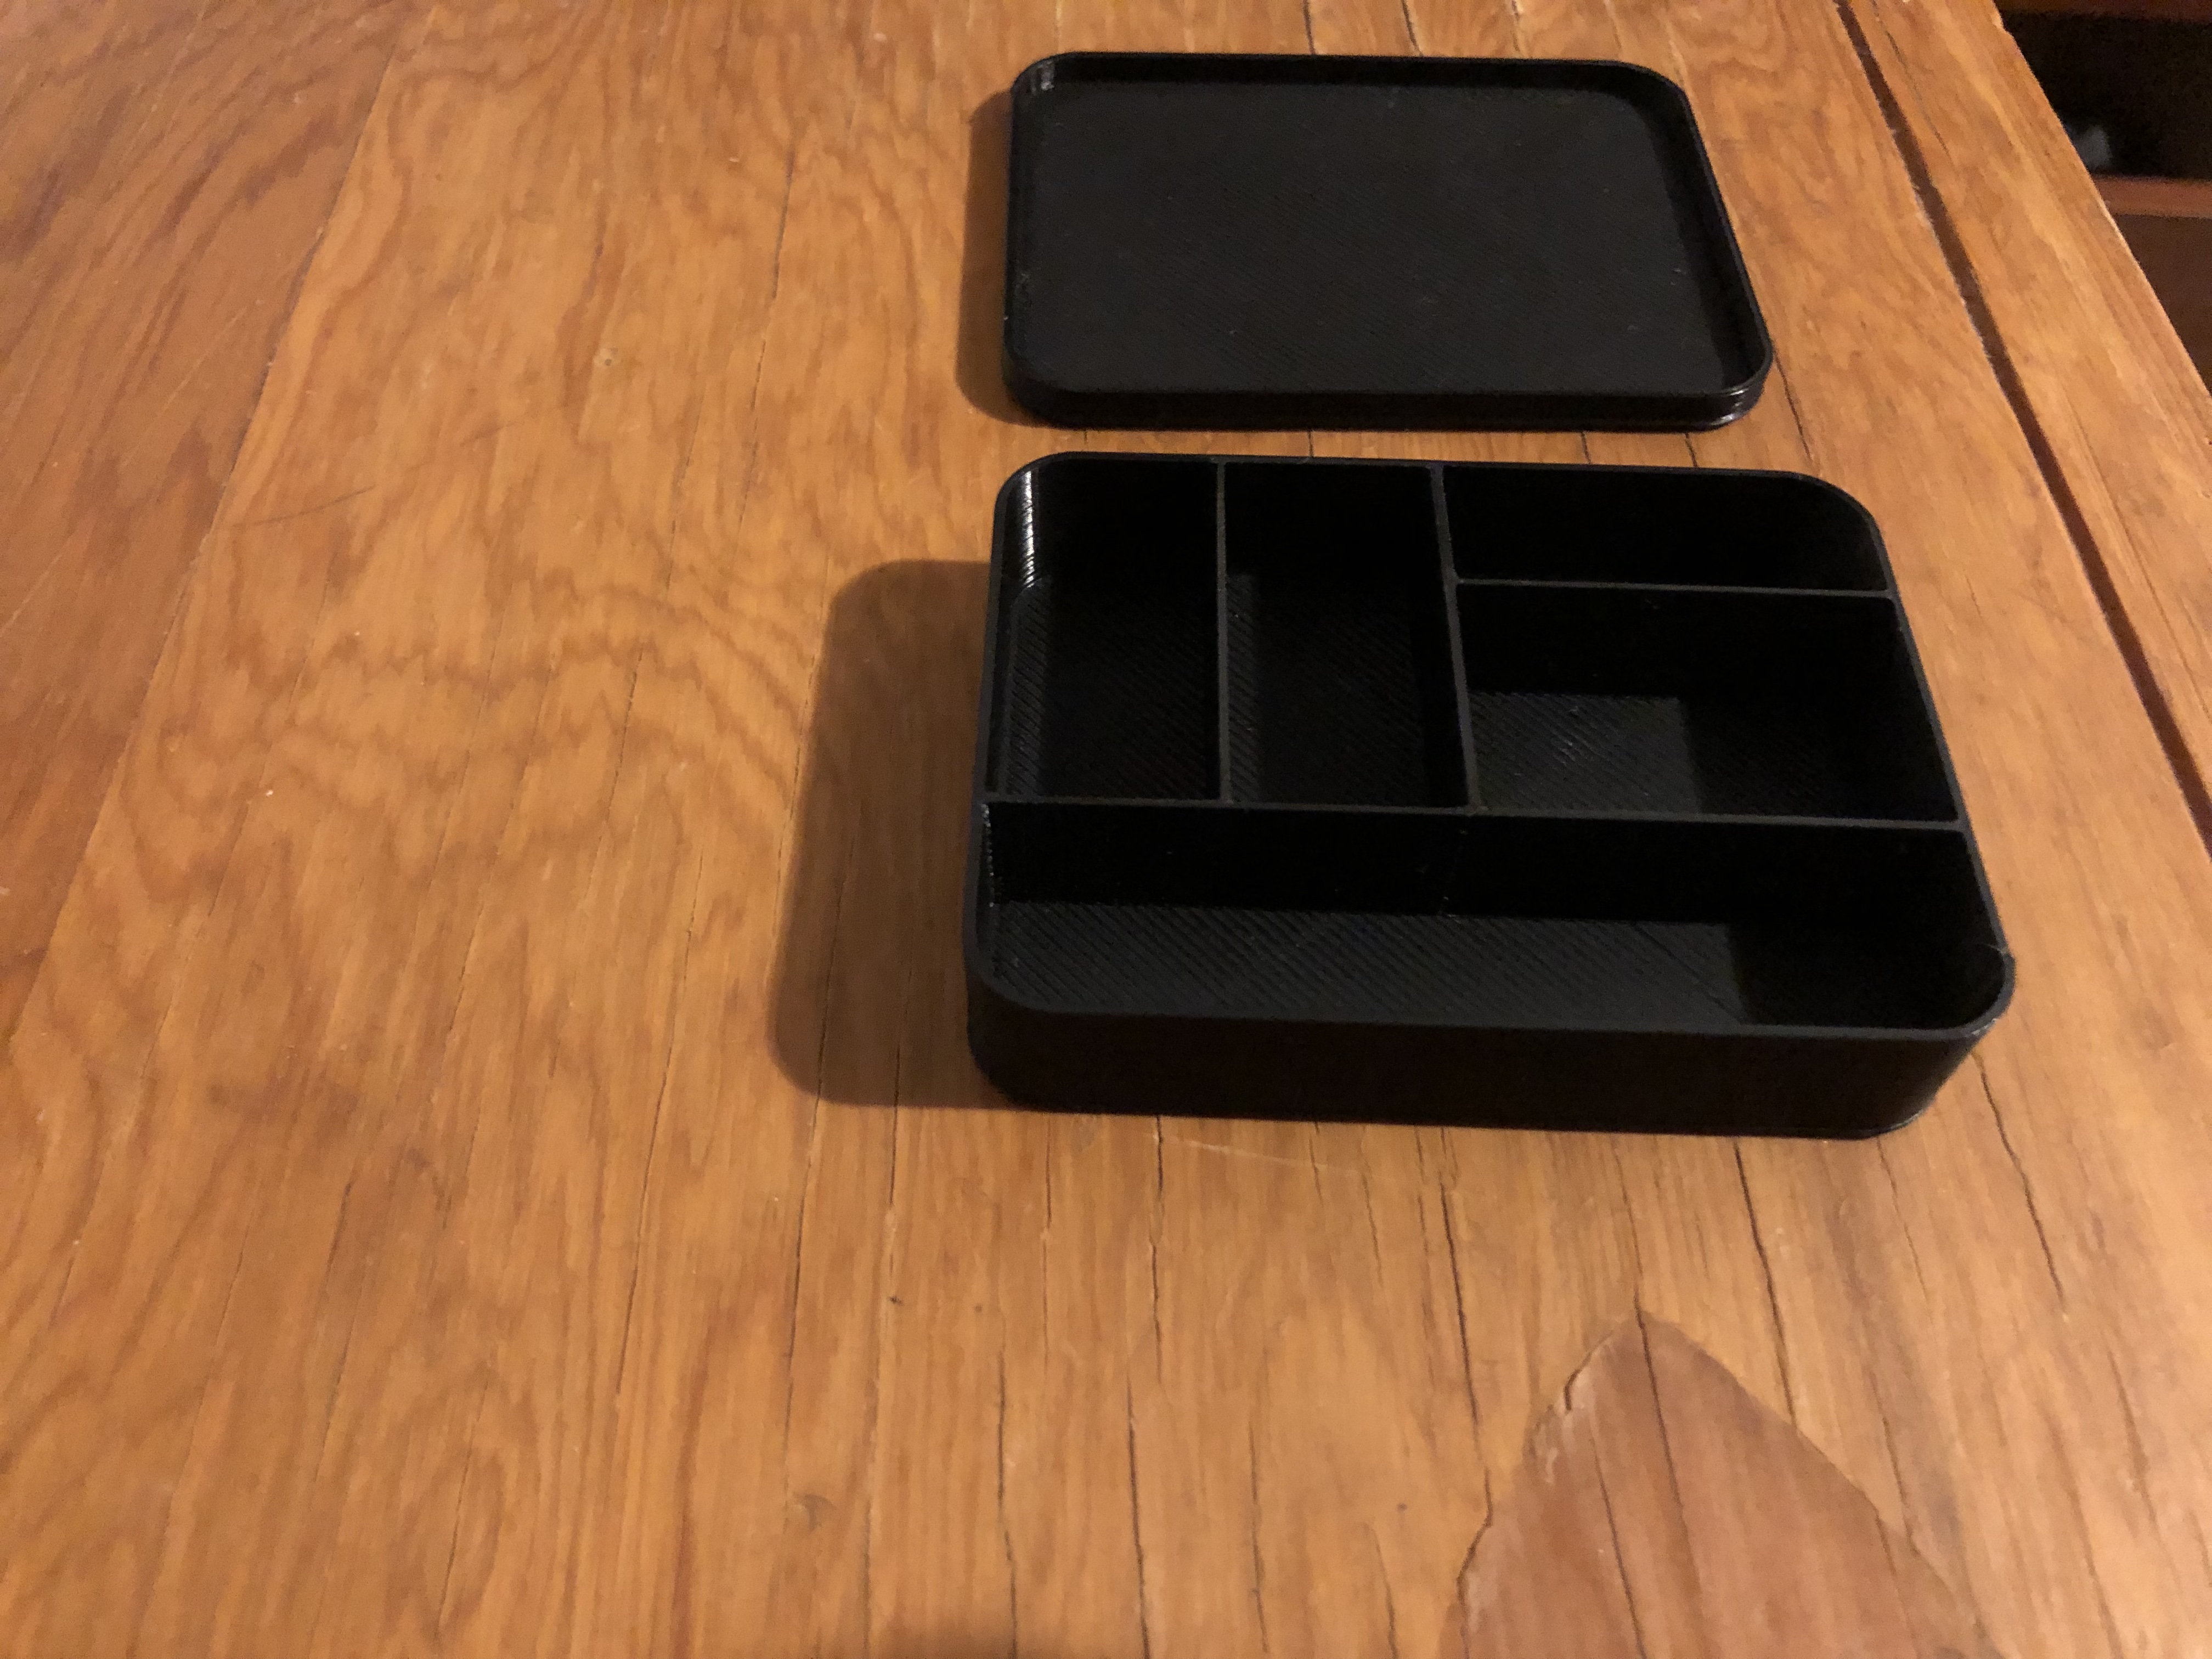
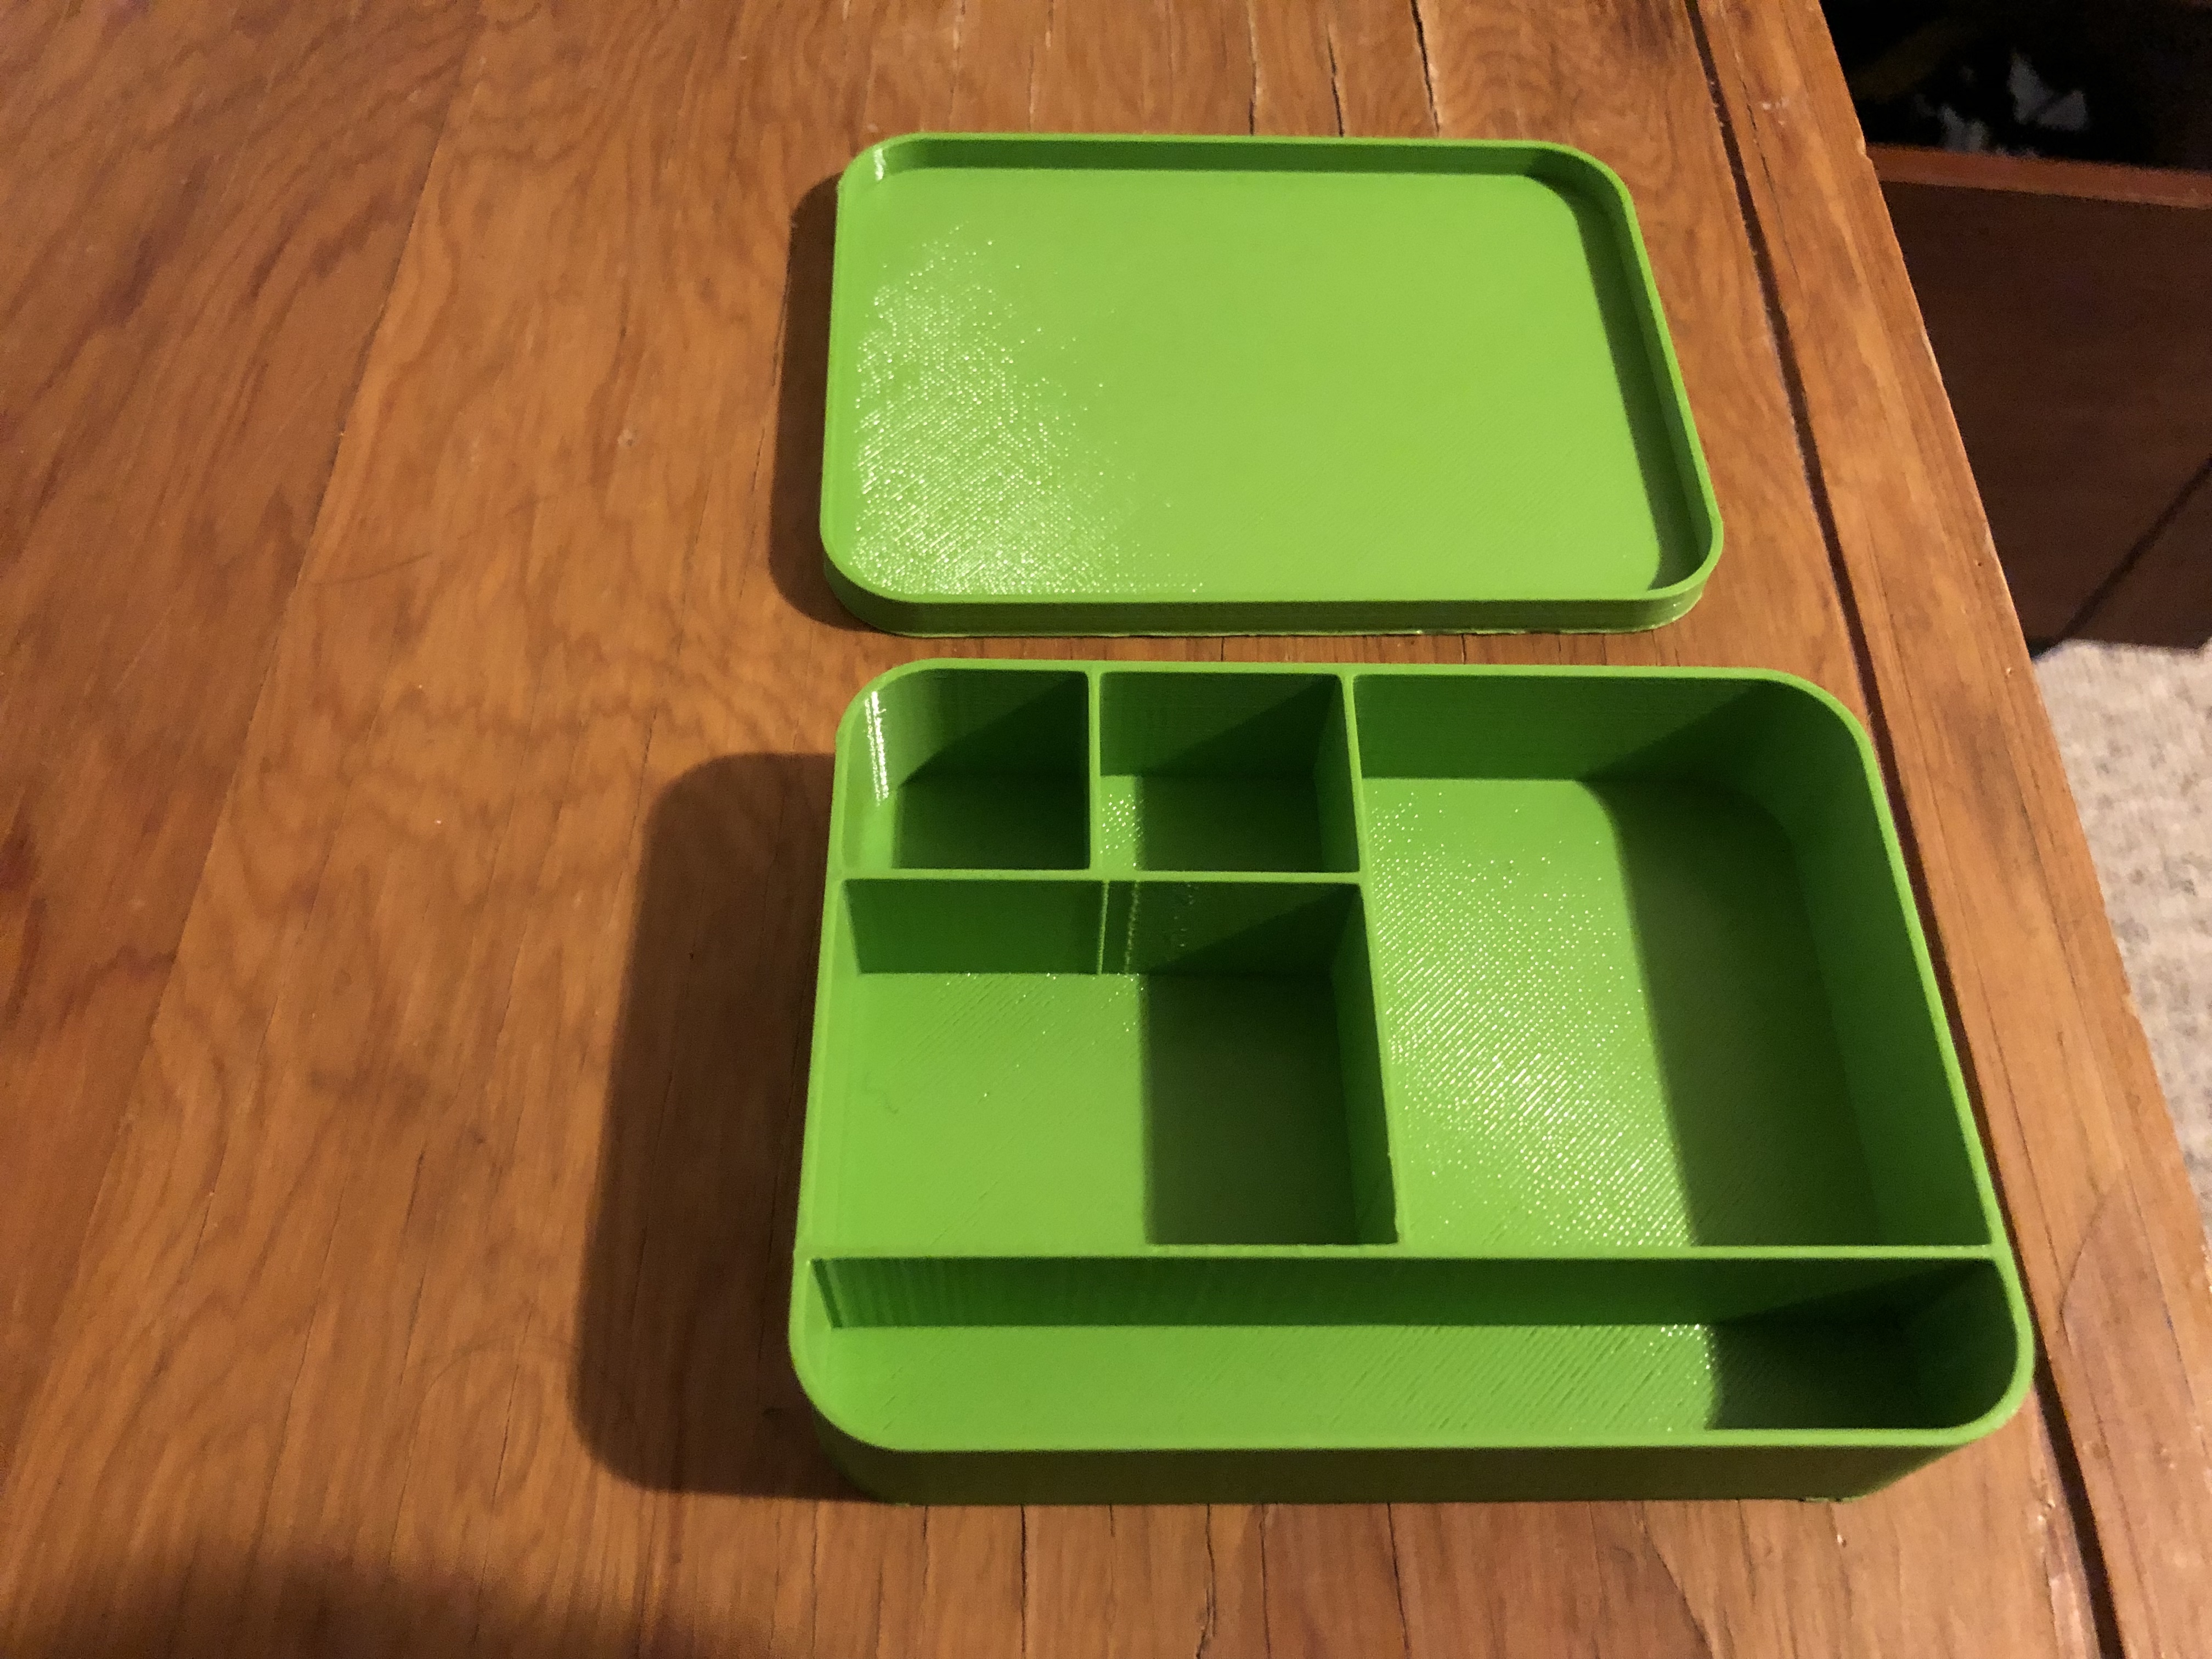
Our project was the customizable jewelry box and my partner was Gabby Dermody.
https://geekhaus.com/isci104_spring2019/2019/02/12/customizable-jewelry-box/
Our project was a jewelry box where you could customize the size and arrangements of the sections to be more tailored to your jewelry storage needs. There were 4 different arrangements, and some had large sections for necklaces, and smaller ones for rings, and other sections in between. The customizer allowed you to choose between the arrangements we made to allow you to make the jewelry box more useful for the jewelry you have. I really liked how our project turned out because this was something I’ve always been annoyed about because I think its really hard to find a “perfect” jewelry box. I started this class wanting to make stuff that I would actually use because I already have so many extra trinkets in my room, and this is something that will definitely be put to use. I’m glad we chose to do a design like this and I am very happy it was a success.
https://www.thingiverse.com/thing:3443676
Reflections and Future Projects
This class has taught me so much more than I originally expected. I started this class with zero knowledge of 3D printing, and now I feel comfortable with printing nearly anything. I originally hated almost all the software we used to create forms, but after working with them for a while I’ve become comfortable with them and also have come to appreciate them. I have been very impressed with my progress throughout this class since I have made a lot of things that I thought would have been out of reach for me. I also made some very functional items that I have already been using and definitely will continue to use. I am really happy with my success throughout this course because before I signed up for it I had never even really thought about 3D printing.
I plan on continuing my 3D printing experience to keep up with my current knowledge and continue learning. Eventually, I would like to make more bowls that I could use for some of my makeup and I would like to make a desk organizer. Unfortunately, I’m not the most creative person so I have a hard time coming up with new ideas to print, so I will definitely be looking to Thingiverse for more ideas in the future. Thingiverse has given me a lot of inspiration already so I would like to continue looking to it for more ideas, but instead of just downloading the STL I would actually like to create it myself to continue challenging myself and to be able to create my own spin on it. I also plan to continue working with openSCAD to make interesting forms that I could print. It took a while for me to learn how to work with it but I’ve grown to appreciate it and I plan to continue to watch youtube videos to learn more techniques and to gain more inspiration.