Hello

Hi! My name is Margaret Grace Howard, but I go by my middle name Grace. I’m currently a sophomore marketing major but thinking about switching to accounting. I am from Leesburg Virginia and went to high school at Loudoun County HS. Some of my hobbies include running and hanging out with friends. Here at JMU I am a member of Kappa Alpha Theta.
I currently have no prior knowledge about 3D printing, but am really excited to learn. This semester I am hoping to learn new skills that I can apply to other aspects of my life and career. I think it’s really cool how we learn some code for this class and it could possibly relate to my major in the future.
Thingiverse Link:
https://www.thingiverse.com/howardmg/about
Thingiverse Model
Flamingo Charm, By ScrapPrinting, Link: https://www.thingiverse.com/thing:2267706

I chose this to print because I love flamingos and thought this would be really cute on a keychain or a necklace.
Thingiverse Print
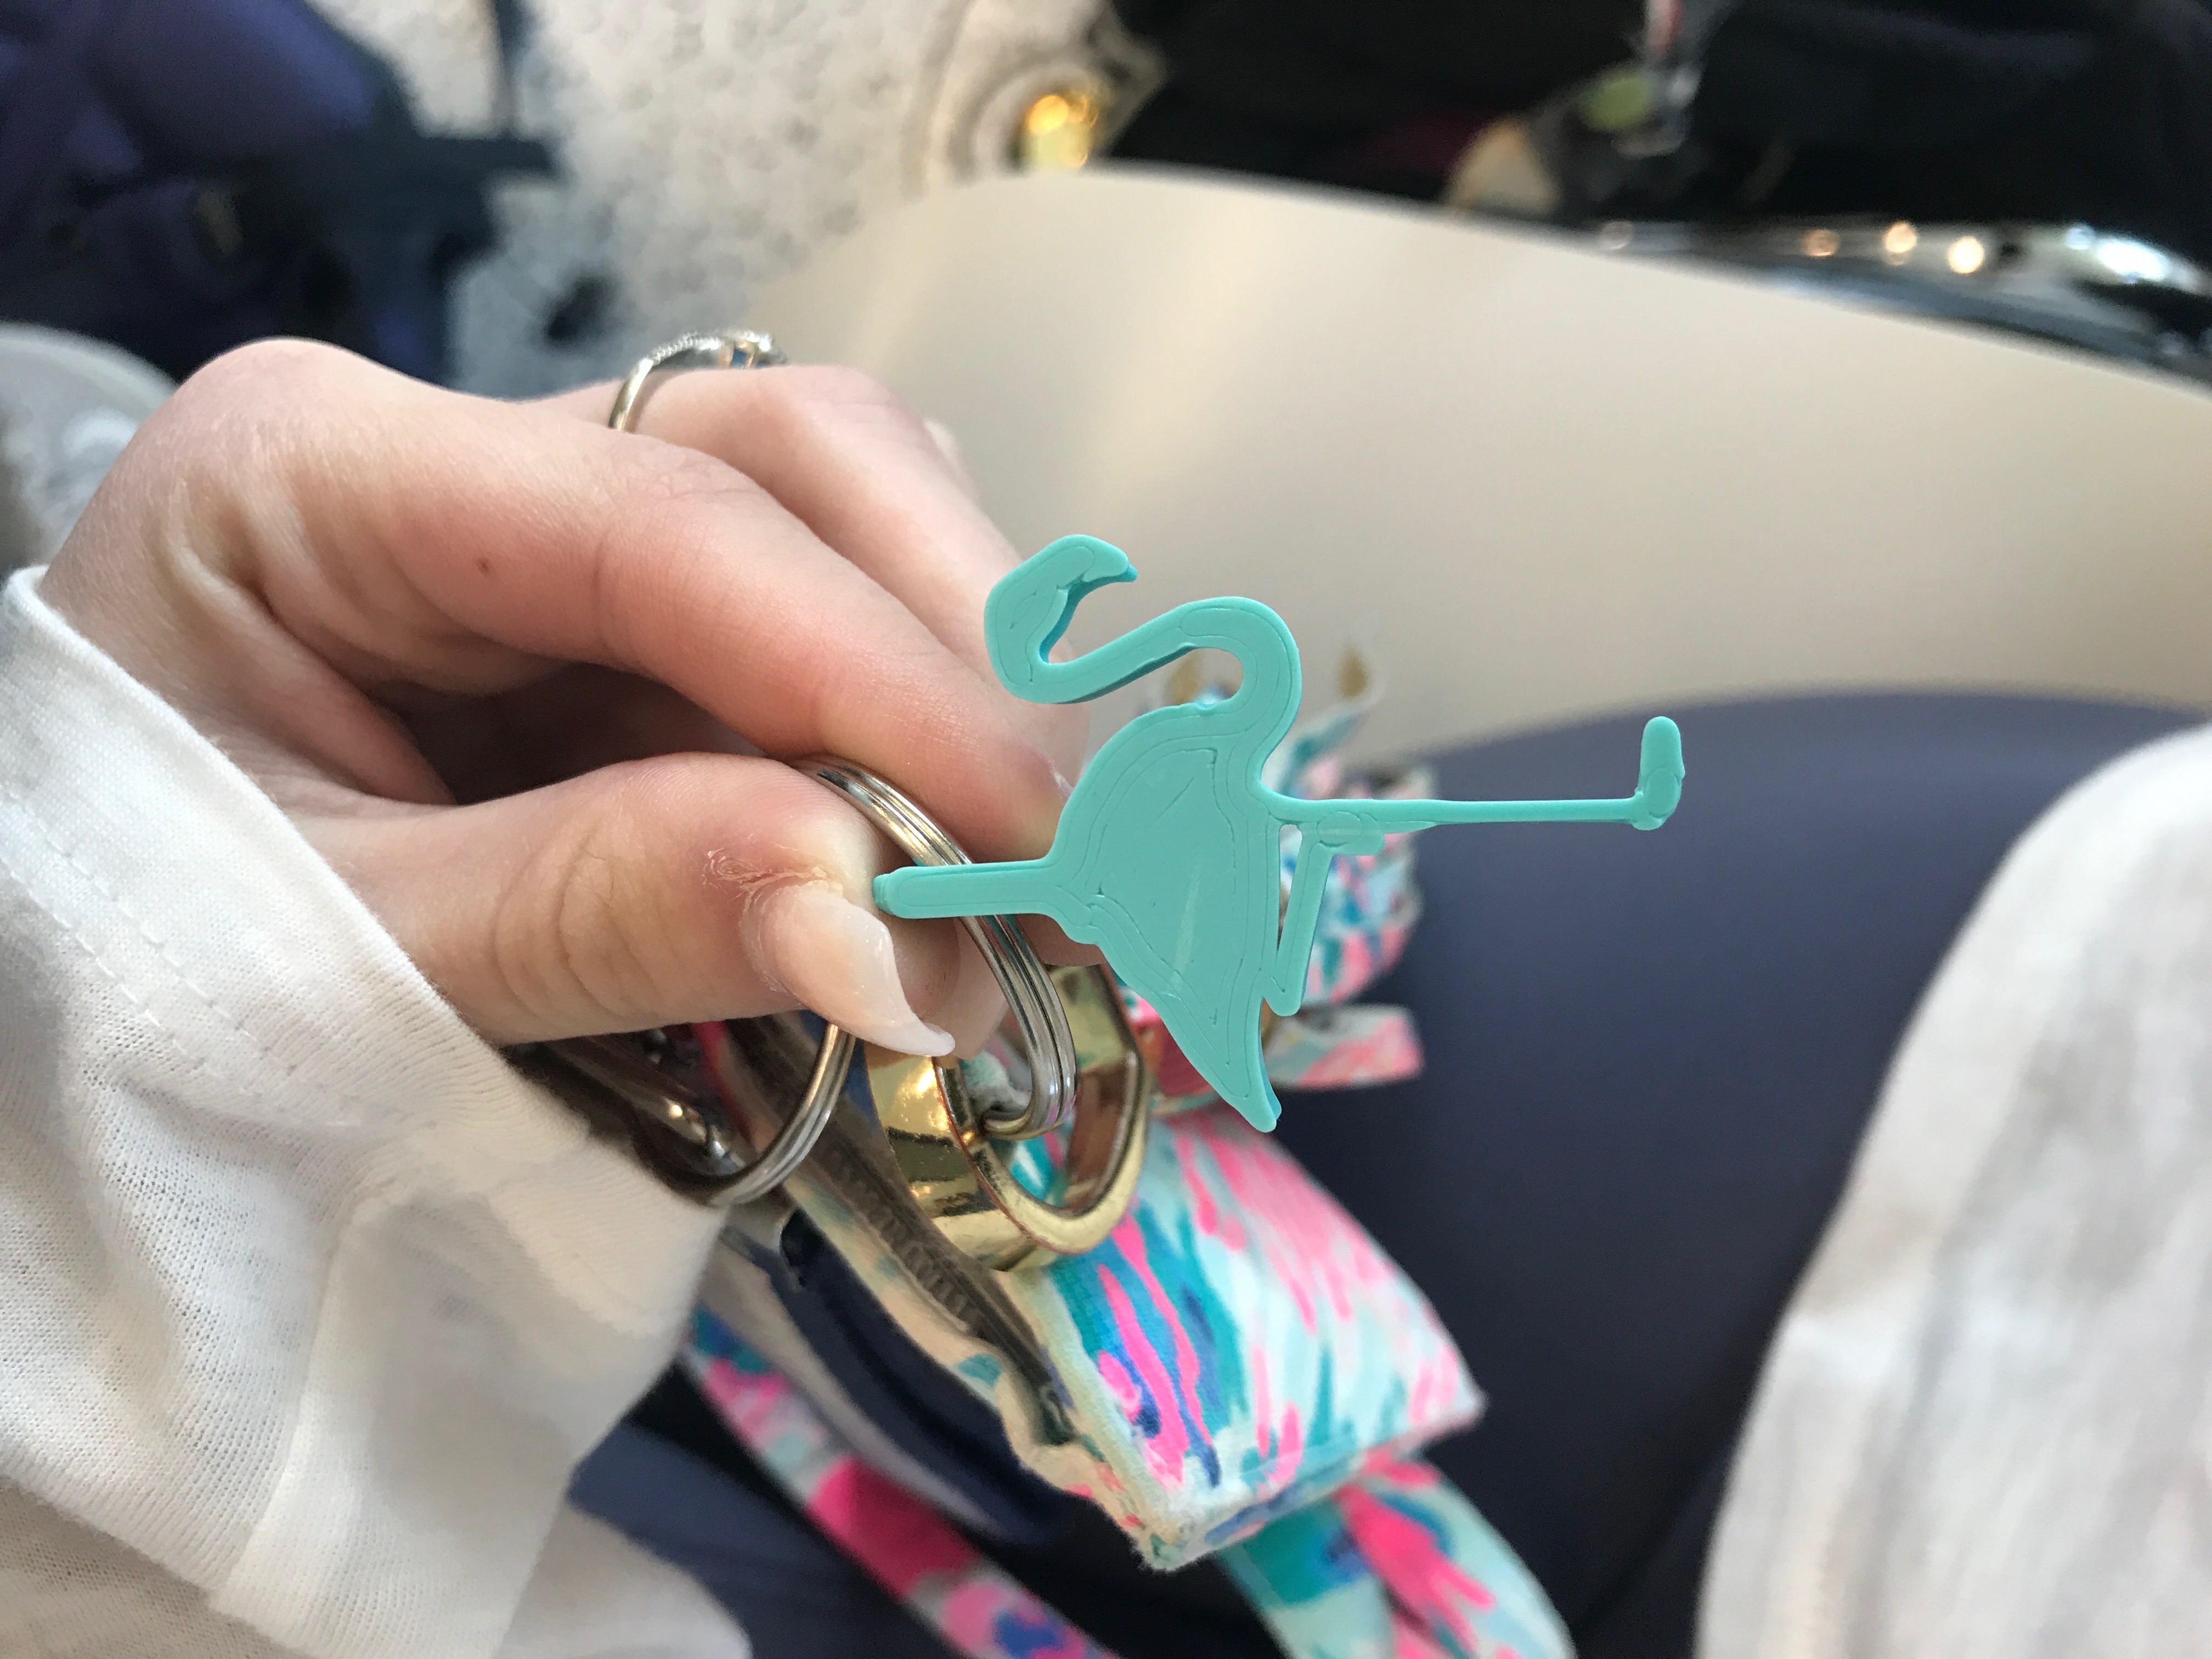
My flamingo charm was a success. It was really easy to print and only took about 15 minutes to finish. It turned out really cool and looks really good with my keys.
Link to Thingiverse make: https://www.thingiverse.com/make:628580
20 Forms in Tinkercad

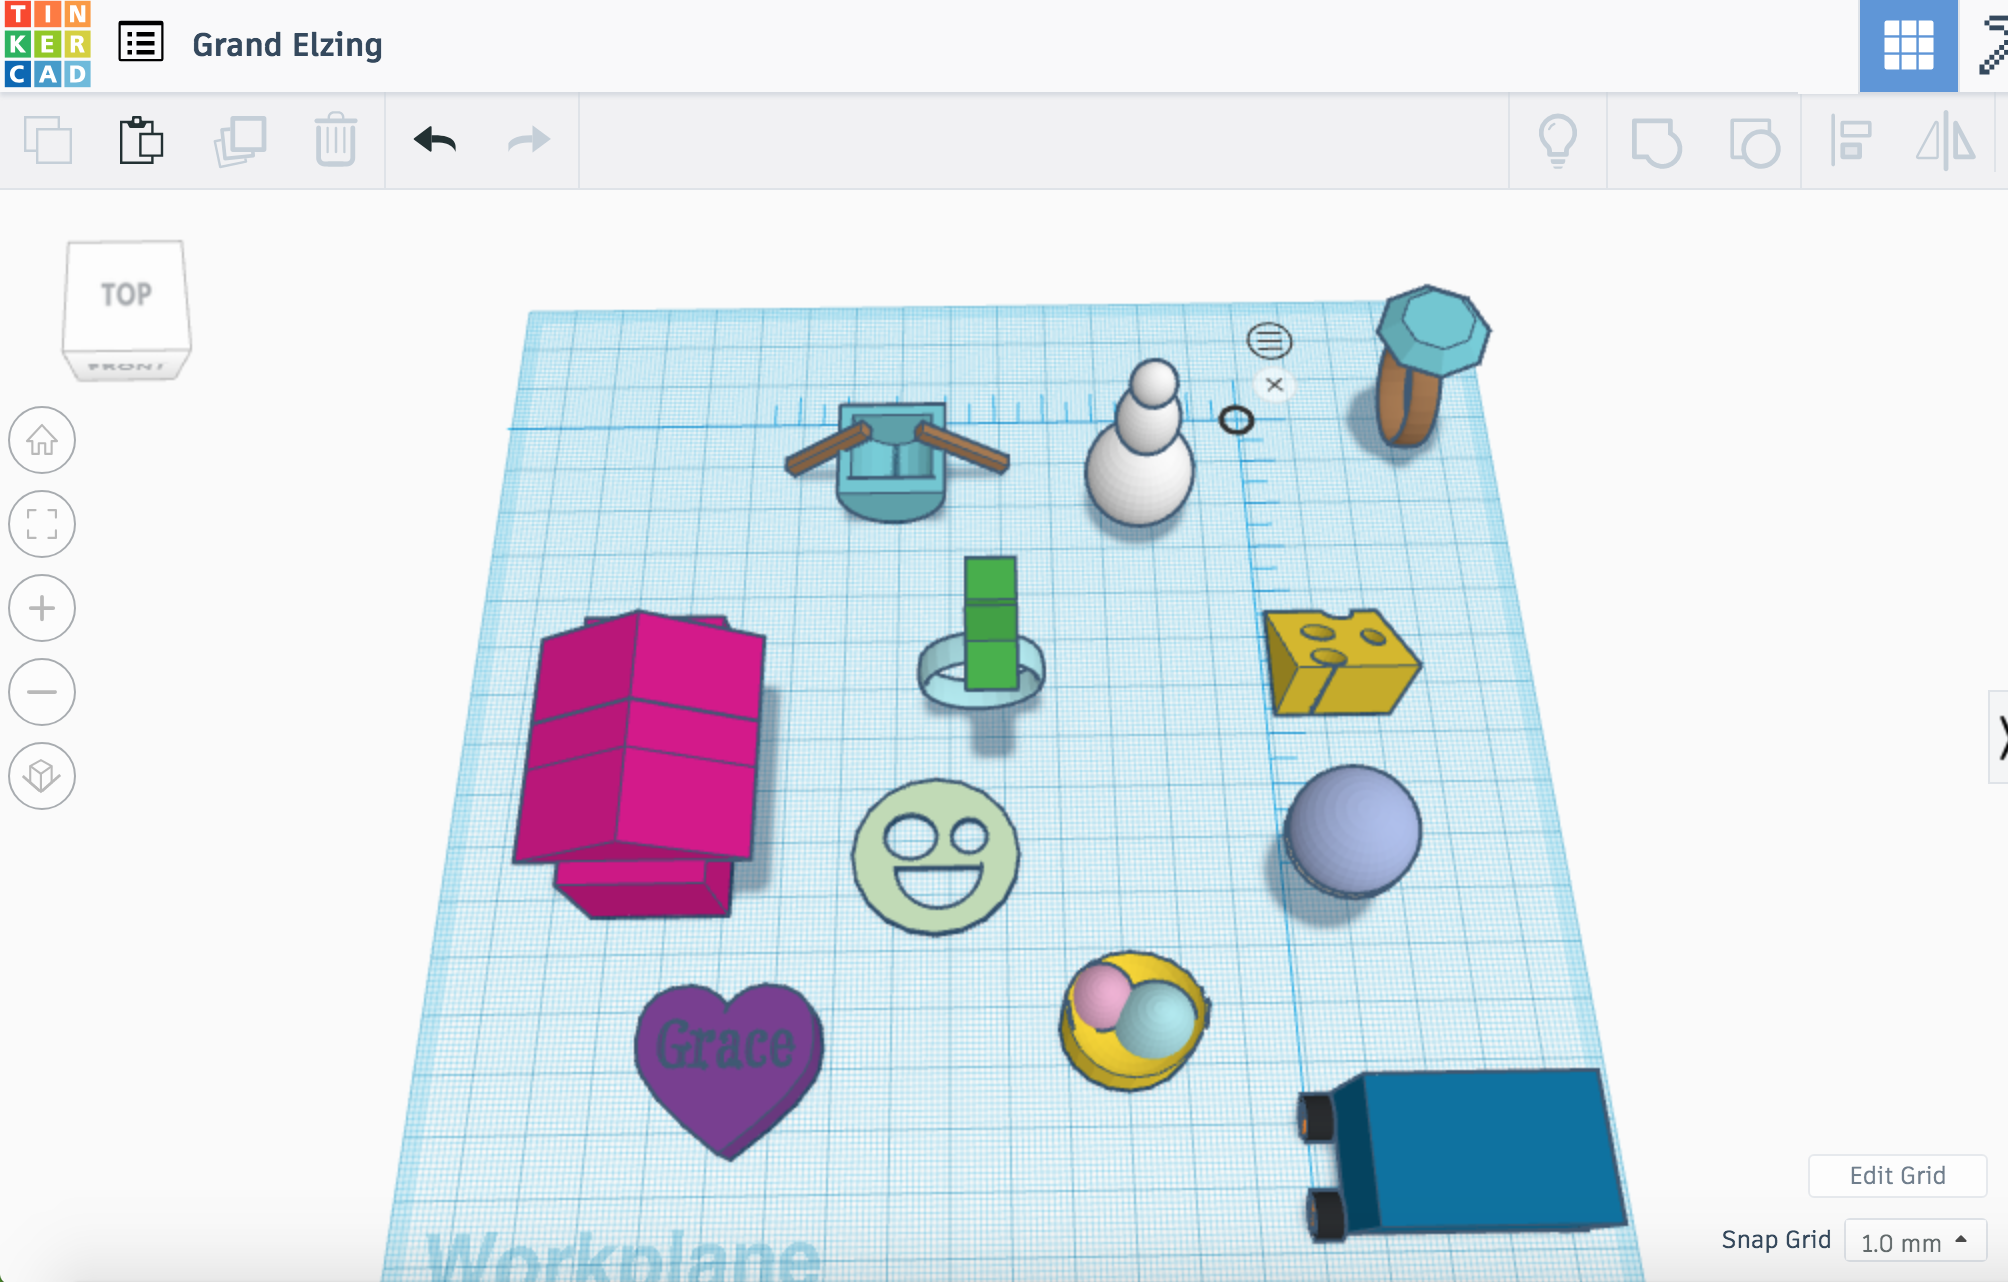

In the first screenshot I made:
- My sorority letters — I made these by typing in the text shape
- A fire pit — I made this by using the scribble shape for the flames and also I used the adjusting and ruler tools
- A flower — I made this by just putting circle shapes together
- A dice — I used the dice shape and added black circles for the dice numbers
- A crayon — I made this using the adjusting and ruler tool by joining two shapes
- A moon — I made this by putting a hole in a circle
- Mountains — I made this by joining together three pyramids
- A succulent plant — I made this by putting a hole in a square and adding what I thought looked like a cactus.
- A shooting star — I made this with a star shape and the scribble tool
In the second two screen shots I made:
- A boat — I made the boat by putting a hole in a half circle shape and added oars with square shapes
- A smile face — I made this by adding holes to a flat circle with shapes
- A heart with my name — I made this by adding my name in the text shape then aligning it with the heart and making it a hole
- A house — I made this by using the align and ruler tools and I joined the two shapes together as well.
- An easter basket — I made this by putting a hole in a circle shape and then added two egg shapes into the basket
- A car or bus — I made this by using circle shapes to make axels for the wheel shape I used and then added a square on top
- A snow man — I made this by using three circle shapes and then using the ruler tool and aligning them
- A cheese — I made this by using the wedge shape and then added circle holes to it.
- A star ring — I used the ring shape and added a star on top
- A diamond ring — I used the ring shape and added a diamond on top
- An ice cream cone — it’s hard to see but I used a cone shape and added a circle on top
Tinkercad Print
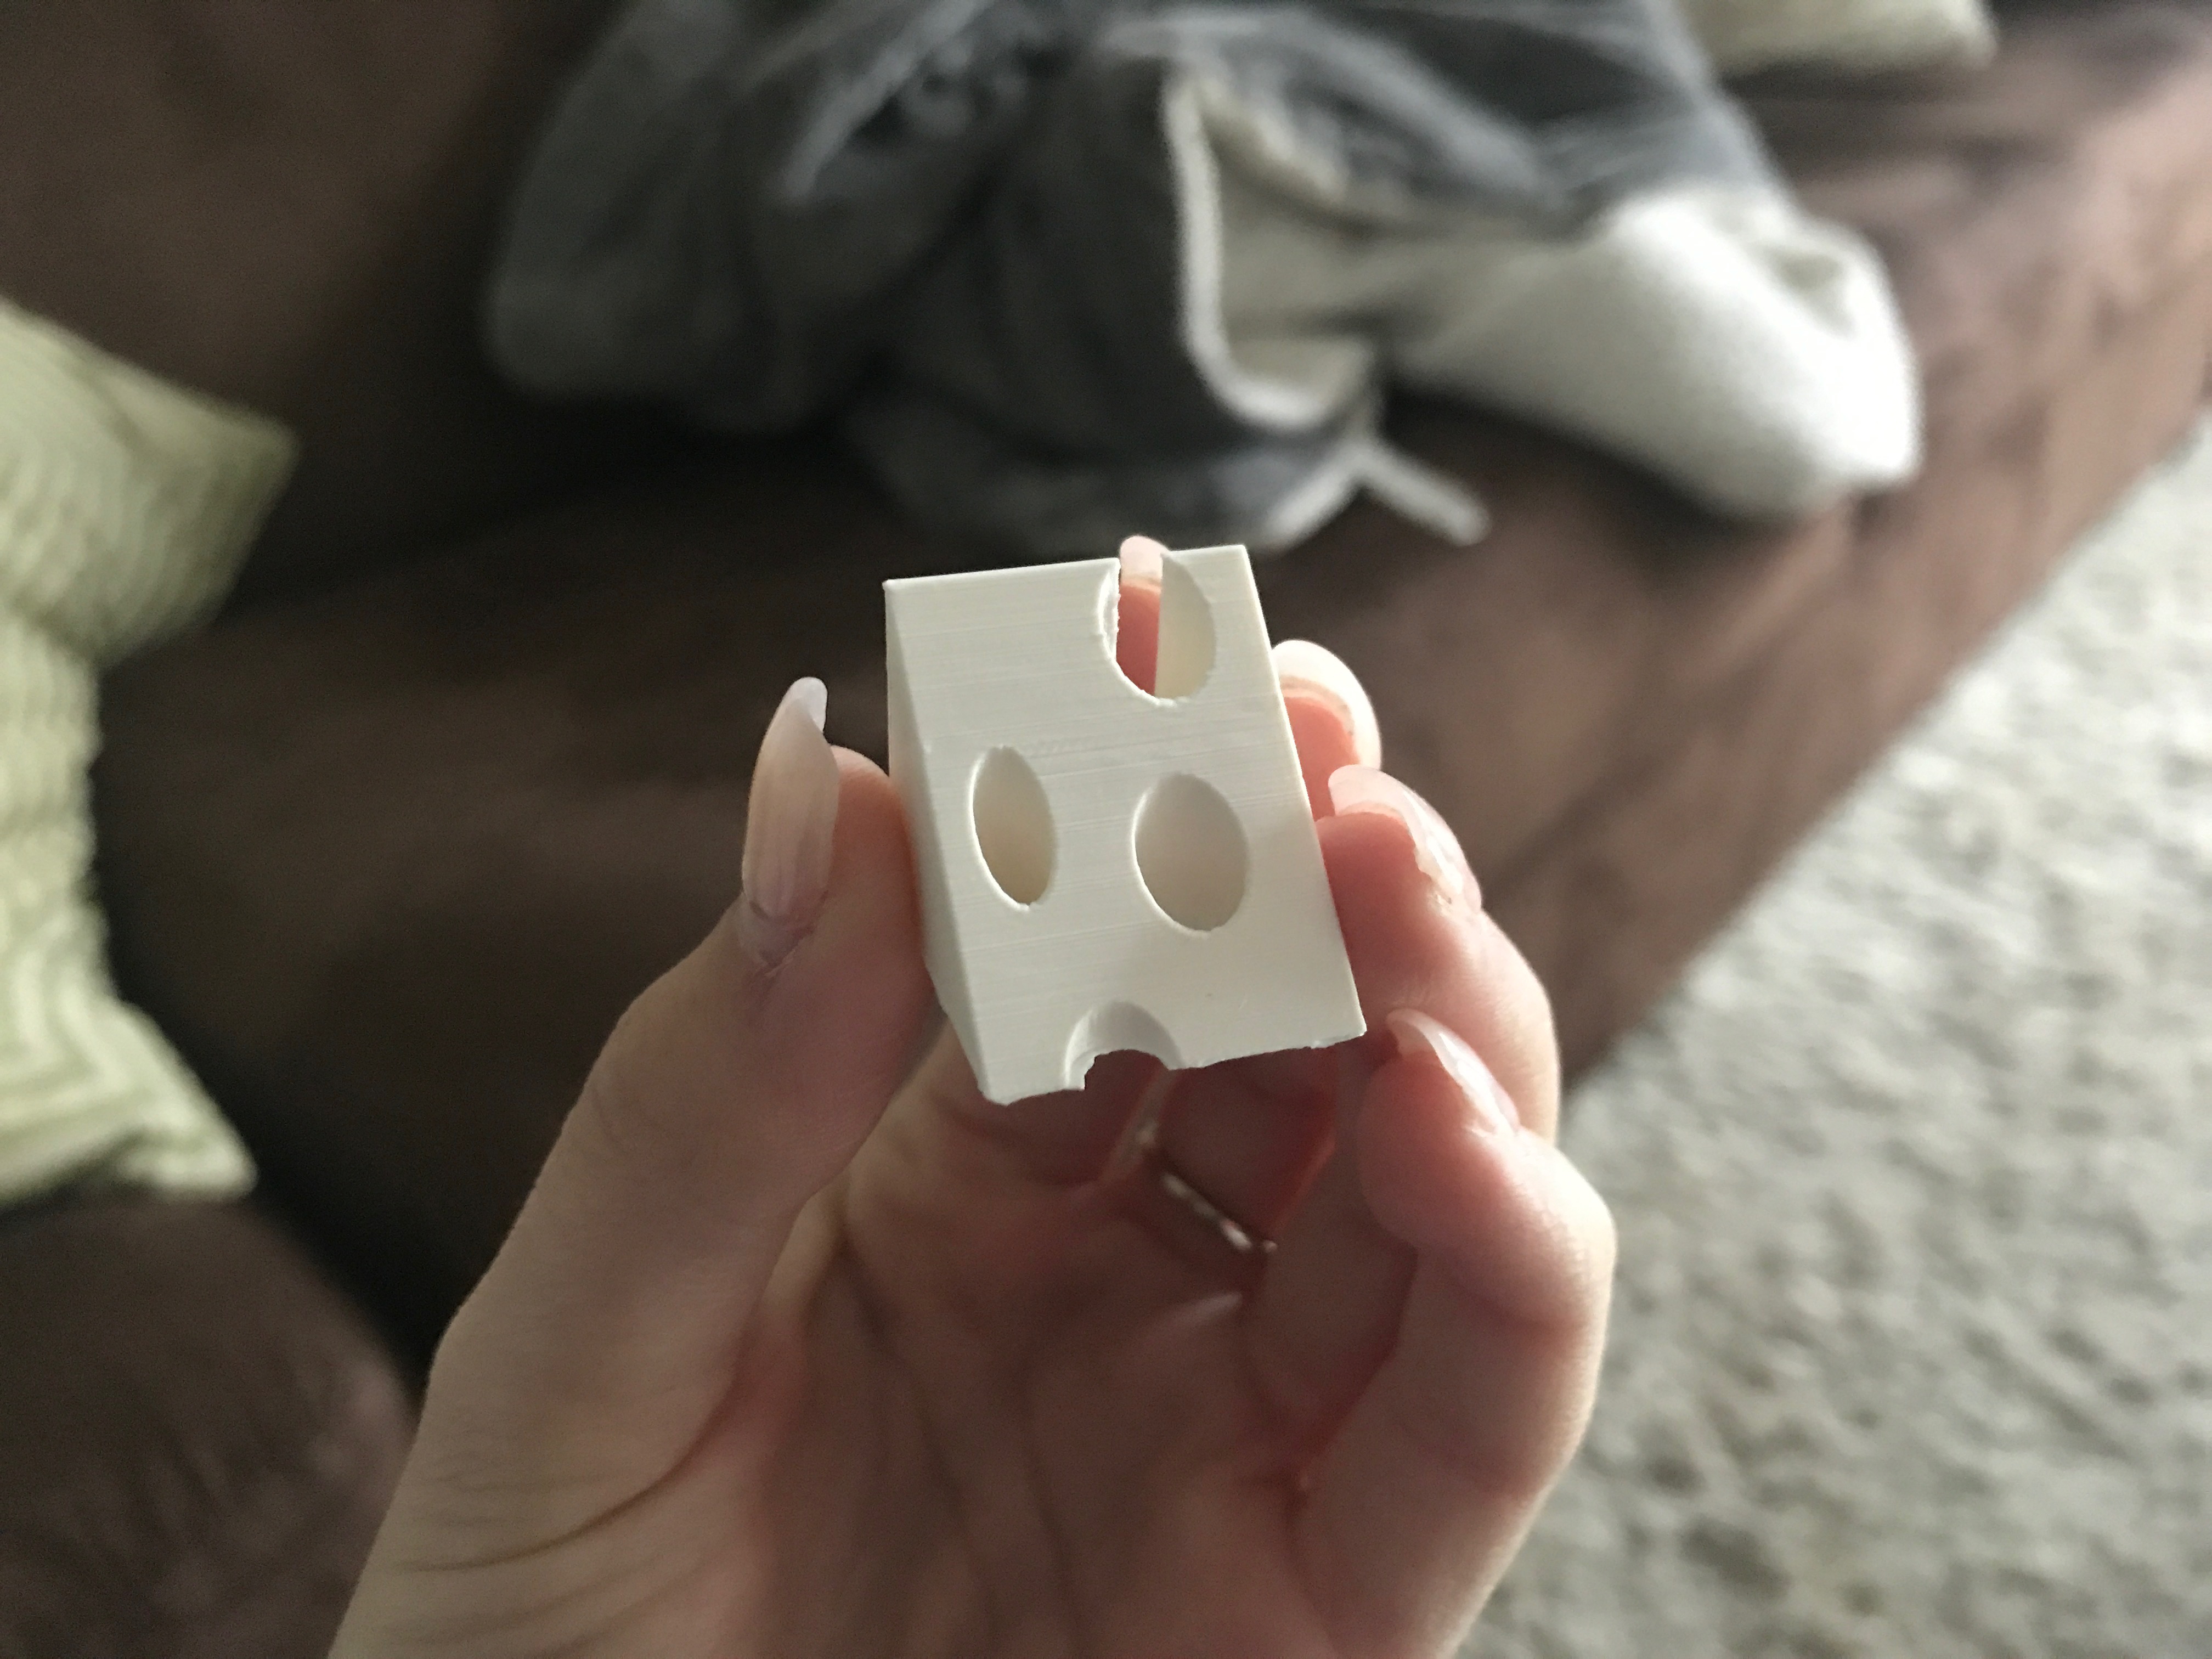
I think this model was a success! I made a cube of cheese. It printed pretty well and nothing went wrong during. The only thing about the model was that there was a small hole in the back that wasn’t supposed to be there (you can see the hole in the back in the picture), but for the most part it was a success. What I would change next time would be to try and figure out why there was a hole in the back and fix that.
Summary of Group Tinkercad Project
Dachshund Print with Hannah Wilton-Jones
Link to group post: https://geekhaus.com/isci104_spring2019/2019/03/19/grace-howard-and-hannah-wilton-jones/
Link to Thingiverse: https://www.thingiverse.com/thing:3518162
This project was to make a model of a dachshund because both my partner and I have this breed of dog. This project was a challenge because we designed the whole thing on tinkercad. It was hard to make the dog look realistic. Overall, I think the project was a success, we were able to print it and get the things that needed extra support to print.

20 Forms in Fusion 360

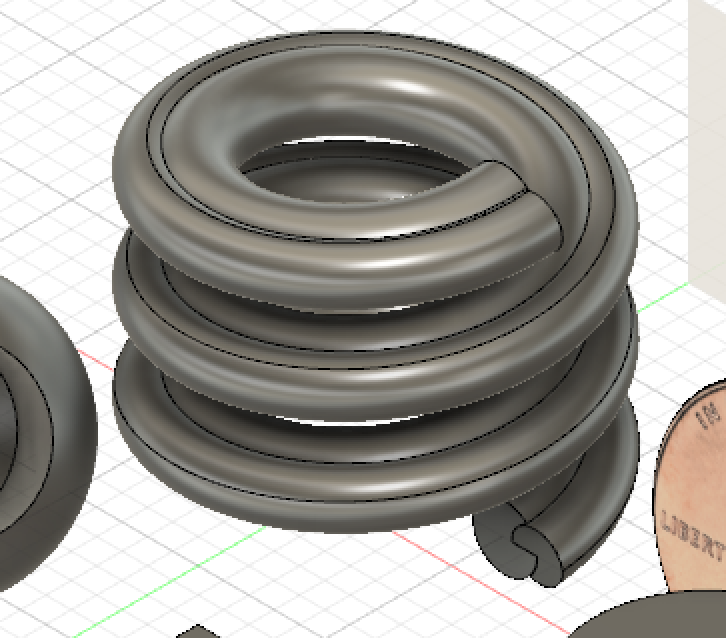
Shape 1: for this shape I made a coil by using the create tool
Shape 2: for this shape I made a circle by using a sphere and put a hole in it.
Shape 3: for this shape I made a rectangle with the create tool and then I put a hole in it with the hole tool.
Shape 4: for this shape I made a coin by using a cylinder shape and rotating it by using the modify tool and then added an image of a penny that I pulled offline, so it looked real.
Shape 5: for this shape I made a box and then the shell tool to cut out the middle part, then I used extrude to pull the shell out farther than the rest of the body.
Shape 6: for this shape I inserted a ring
Shape 7: for this shape I put a rectangle shape on the bottom and a cylinder shape on the top and then I used the loft tool to connect the two of them together.
Shape 8: for this shape I inserted a pipe onto the coil shape that I already had created. It is hard to see but if you look closely you can see there is two of them. (I added a close up of the picture to show)
Shape 9: for this shape I inserted a pipe by using the sketch tool and then added a pipe to it.
Shape 10: for this shape I made a tray thing by using the draft tool.
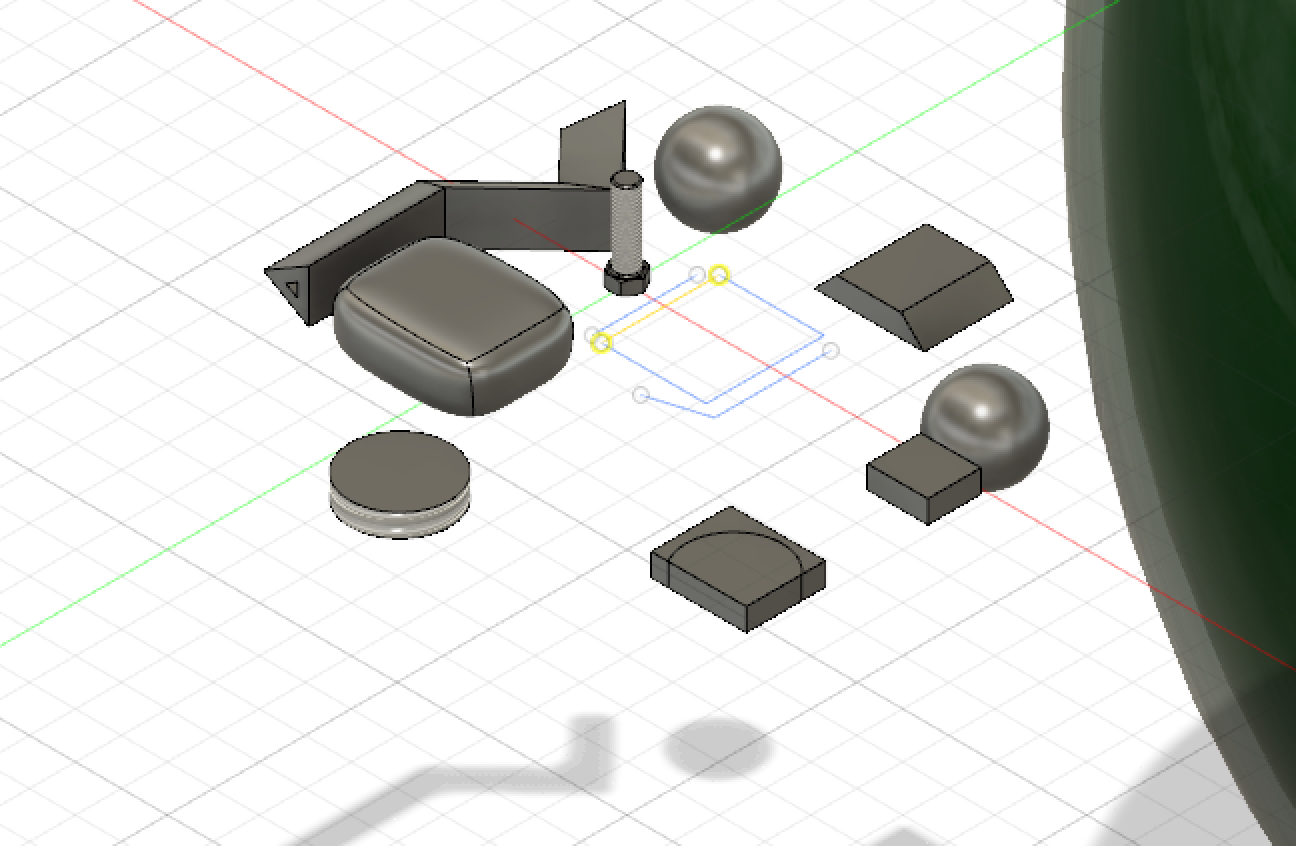
Shape 11: for this shape I made a triangular pipe by using the sketch tool and pipe tool.
Shape 12: for this shape it’s not really a shape but I tried to make this shape by using a sketch tool and the sweep tool, but I could not figure out how to even though I watched a video. You can see the sketch of what I was trying to sweep.
Shape 13: for this shape I made a rectangle shape but did it in model mode so that the edges were rounded on the rectangle.
Shape 14: for this shape I used create to insert a rectangle and then used chamfer to tilt the two edges towards the body.
Shape 15: for this shape I inserted a rectangle shape and then used the sketch tool to sketch a circle. Then I used the split body tool to split the rectangle with the circle that I sketched.
Shape 16: for this shape I used the join tool to join a circle I inserted and a square that I inserted as well to join them together as one shape.
Shape 17: for this shape I inserted a cylinder and then used the thread tool to make the edges threaded and look like a screw.
Shape 18: for this shape I used an add in tool and ran the bottle shape, it ran really big and I was unable to shrink it back down but I zoomed out to add an additional picture of it. (shown below)

Shape 19: for this shape I added a bolt by using the add in tool
Shape 20: for this shape I added a spur from the add in tools.(shown below)

Fusion 360 Print

I made this object from Fusion360. Fusion was really hard for me to use so this print is really simple looking. Basically what I did was I took two boxes and connected them together. Originally I tried to do two spheres on top of each other but the spheres didn’t print right so I decided to use squares instead. So in that case, the square print was a success but the sphere print (not pictured) was a failure.
Fusion 360 Vase Design

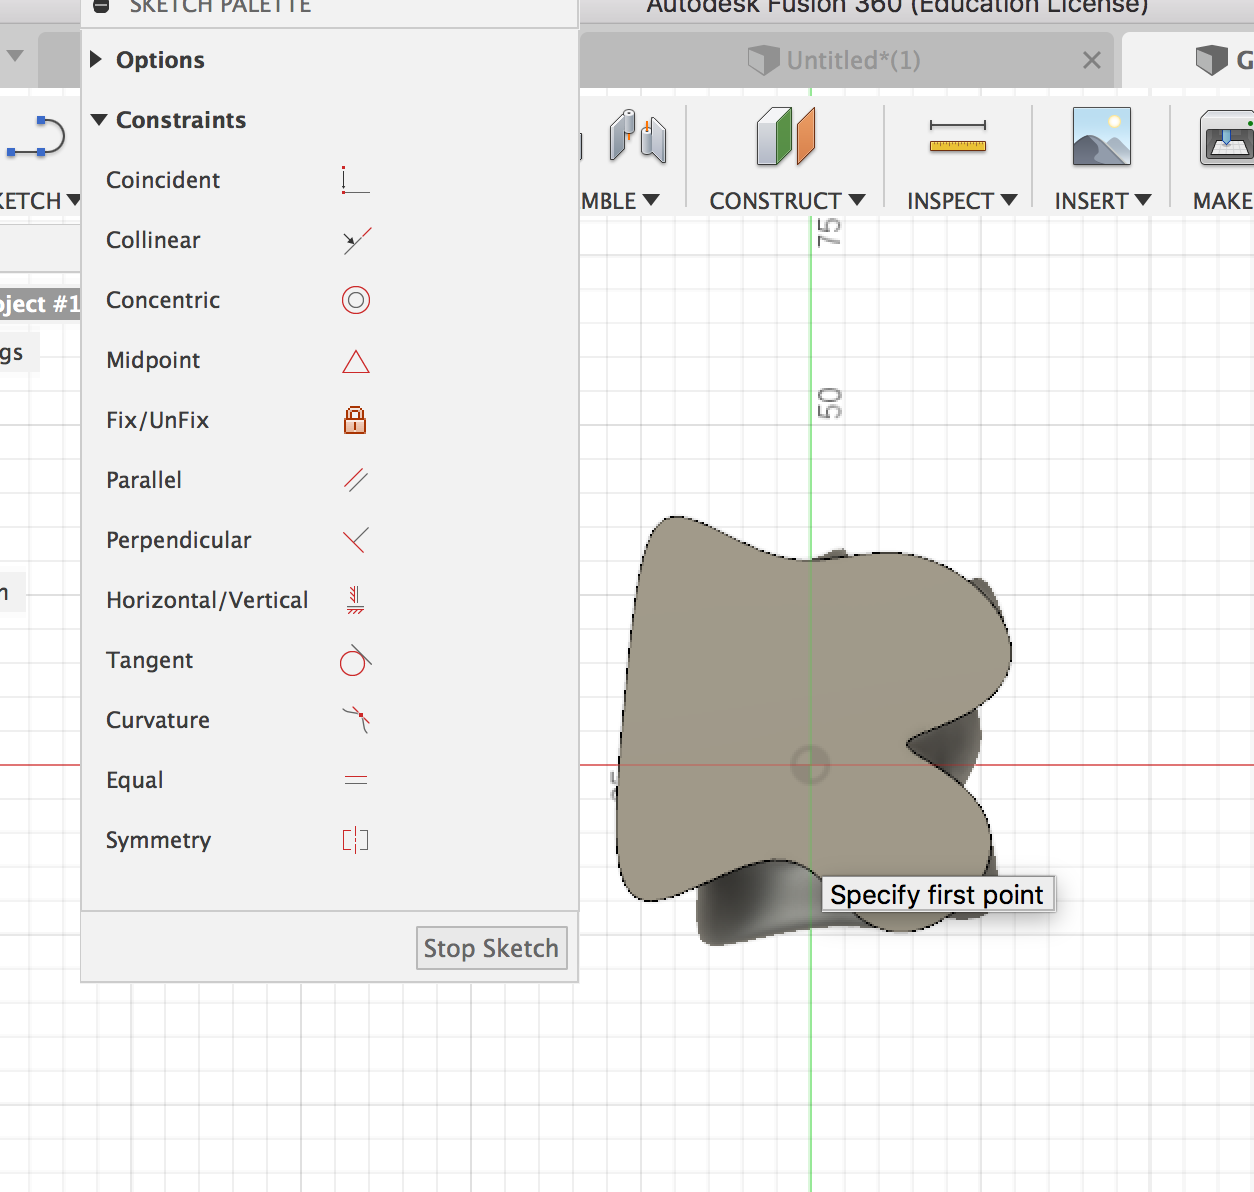
To start I used the sketch tool to sketch a circle for the bottom of my vase. For my design process I constructed two offset planes from the circle sketch. After I had all my offset planes I wanted to make a cool shape with my vase. To add a cool shape to my design I used the sketch tool with a spline. Finally I used the loft tool to connect all the three planes together. Afterwards I played around with the points and dimensions of my vase to make for an interesting shape. I really like my vase because I managed to make it have really cool folds.
Shown in the first picture above is how I used the loft tool and on the side is were I played with the dimensions to make my vase look different.
The second picture above demonstrates how I used the spline sketch tool to create a wacky shape. Although not pictured are the exact spline points I chose it shows how I used the tool.
My final design goes beyond what was shown in the video because I tried to make my vase fold more than what was shown in the video, I did this by making my spline plane more inwards and then also I changed the dimensions of my vase afterwards in order to get the exact shape that I wanted.
Fusion 360 Vase Prints
Small Vase Demo
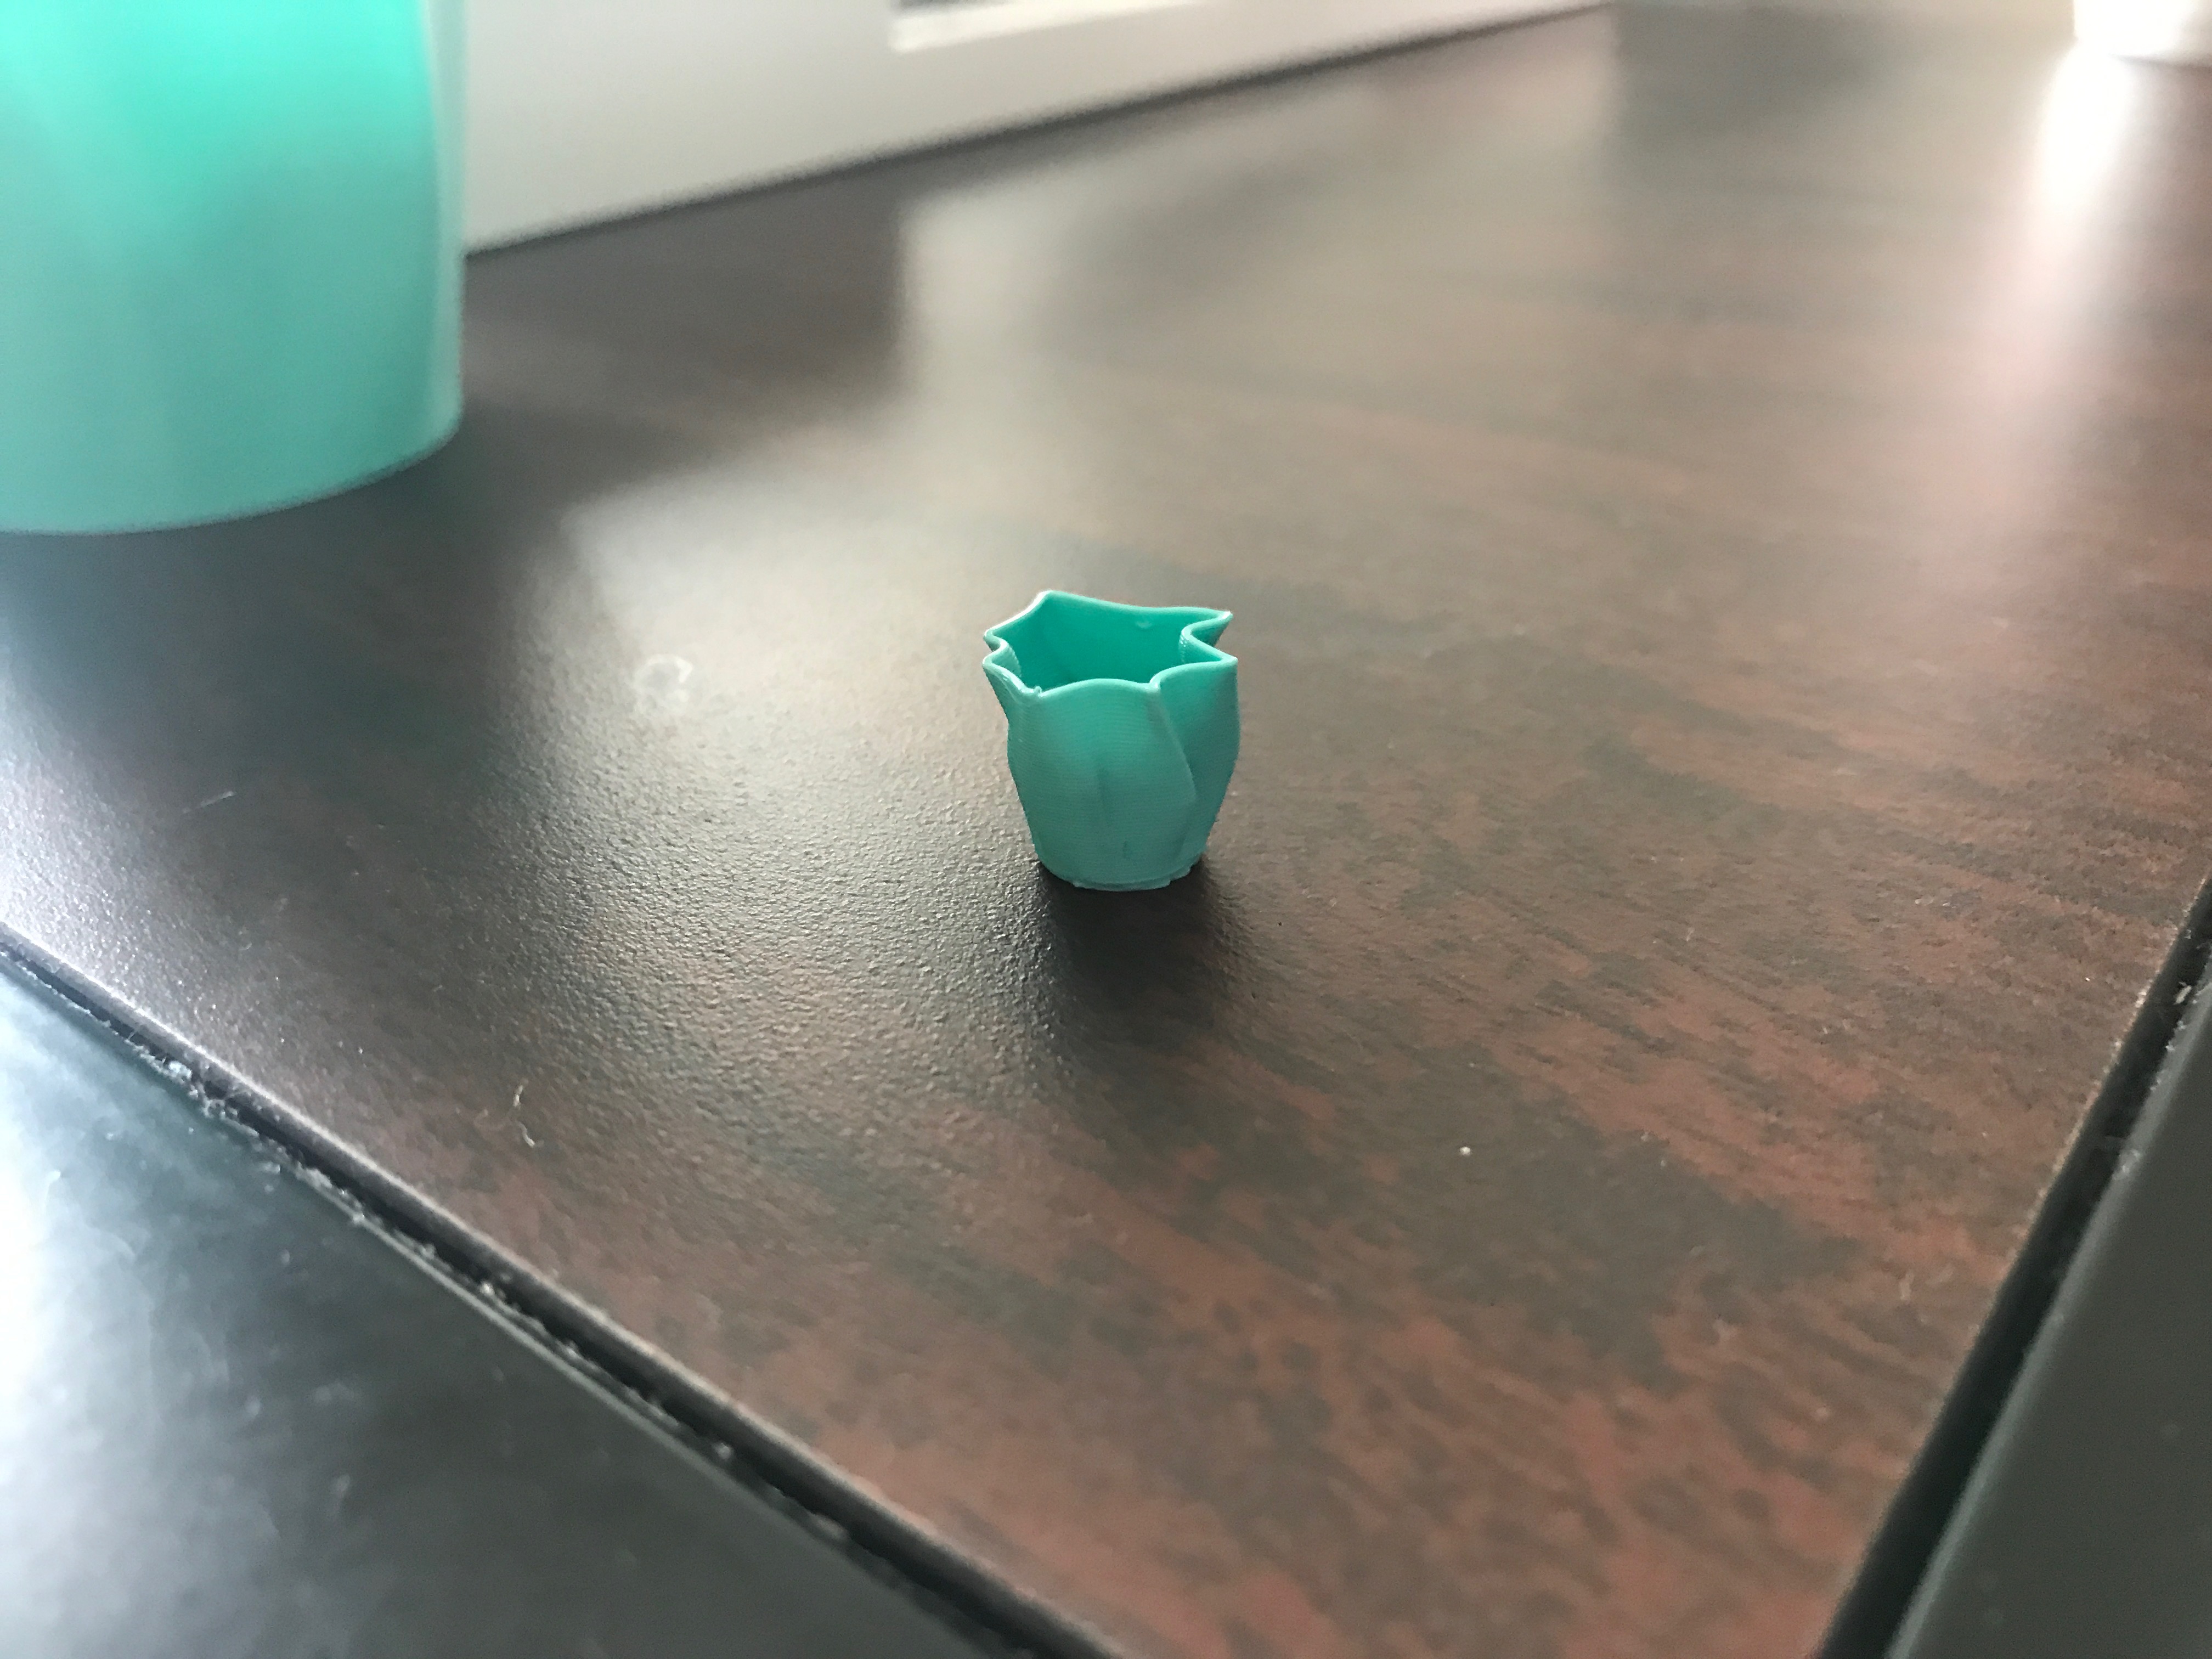
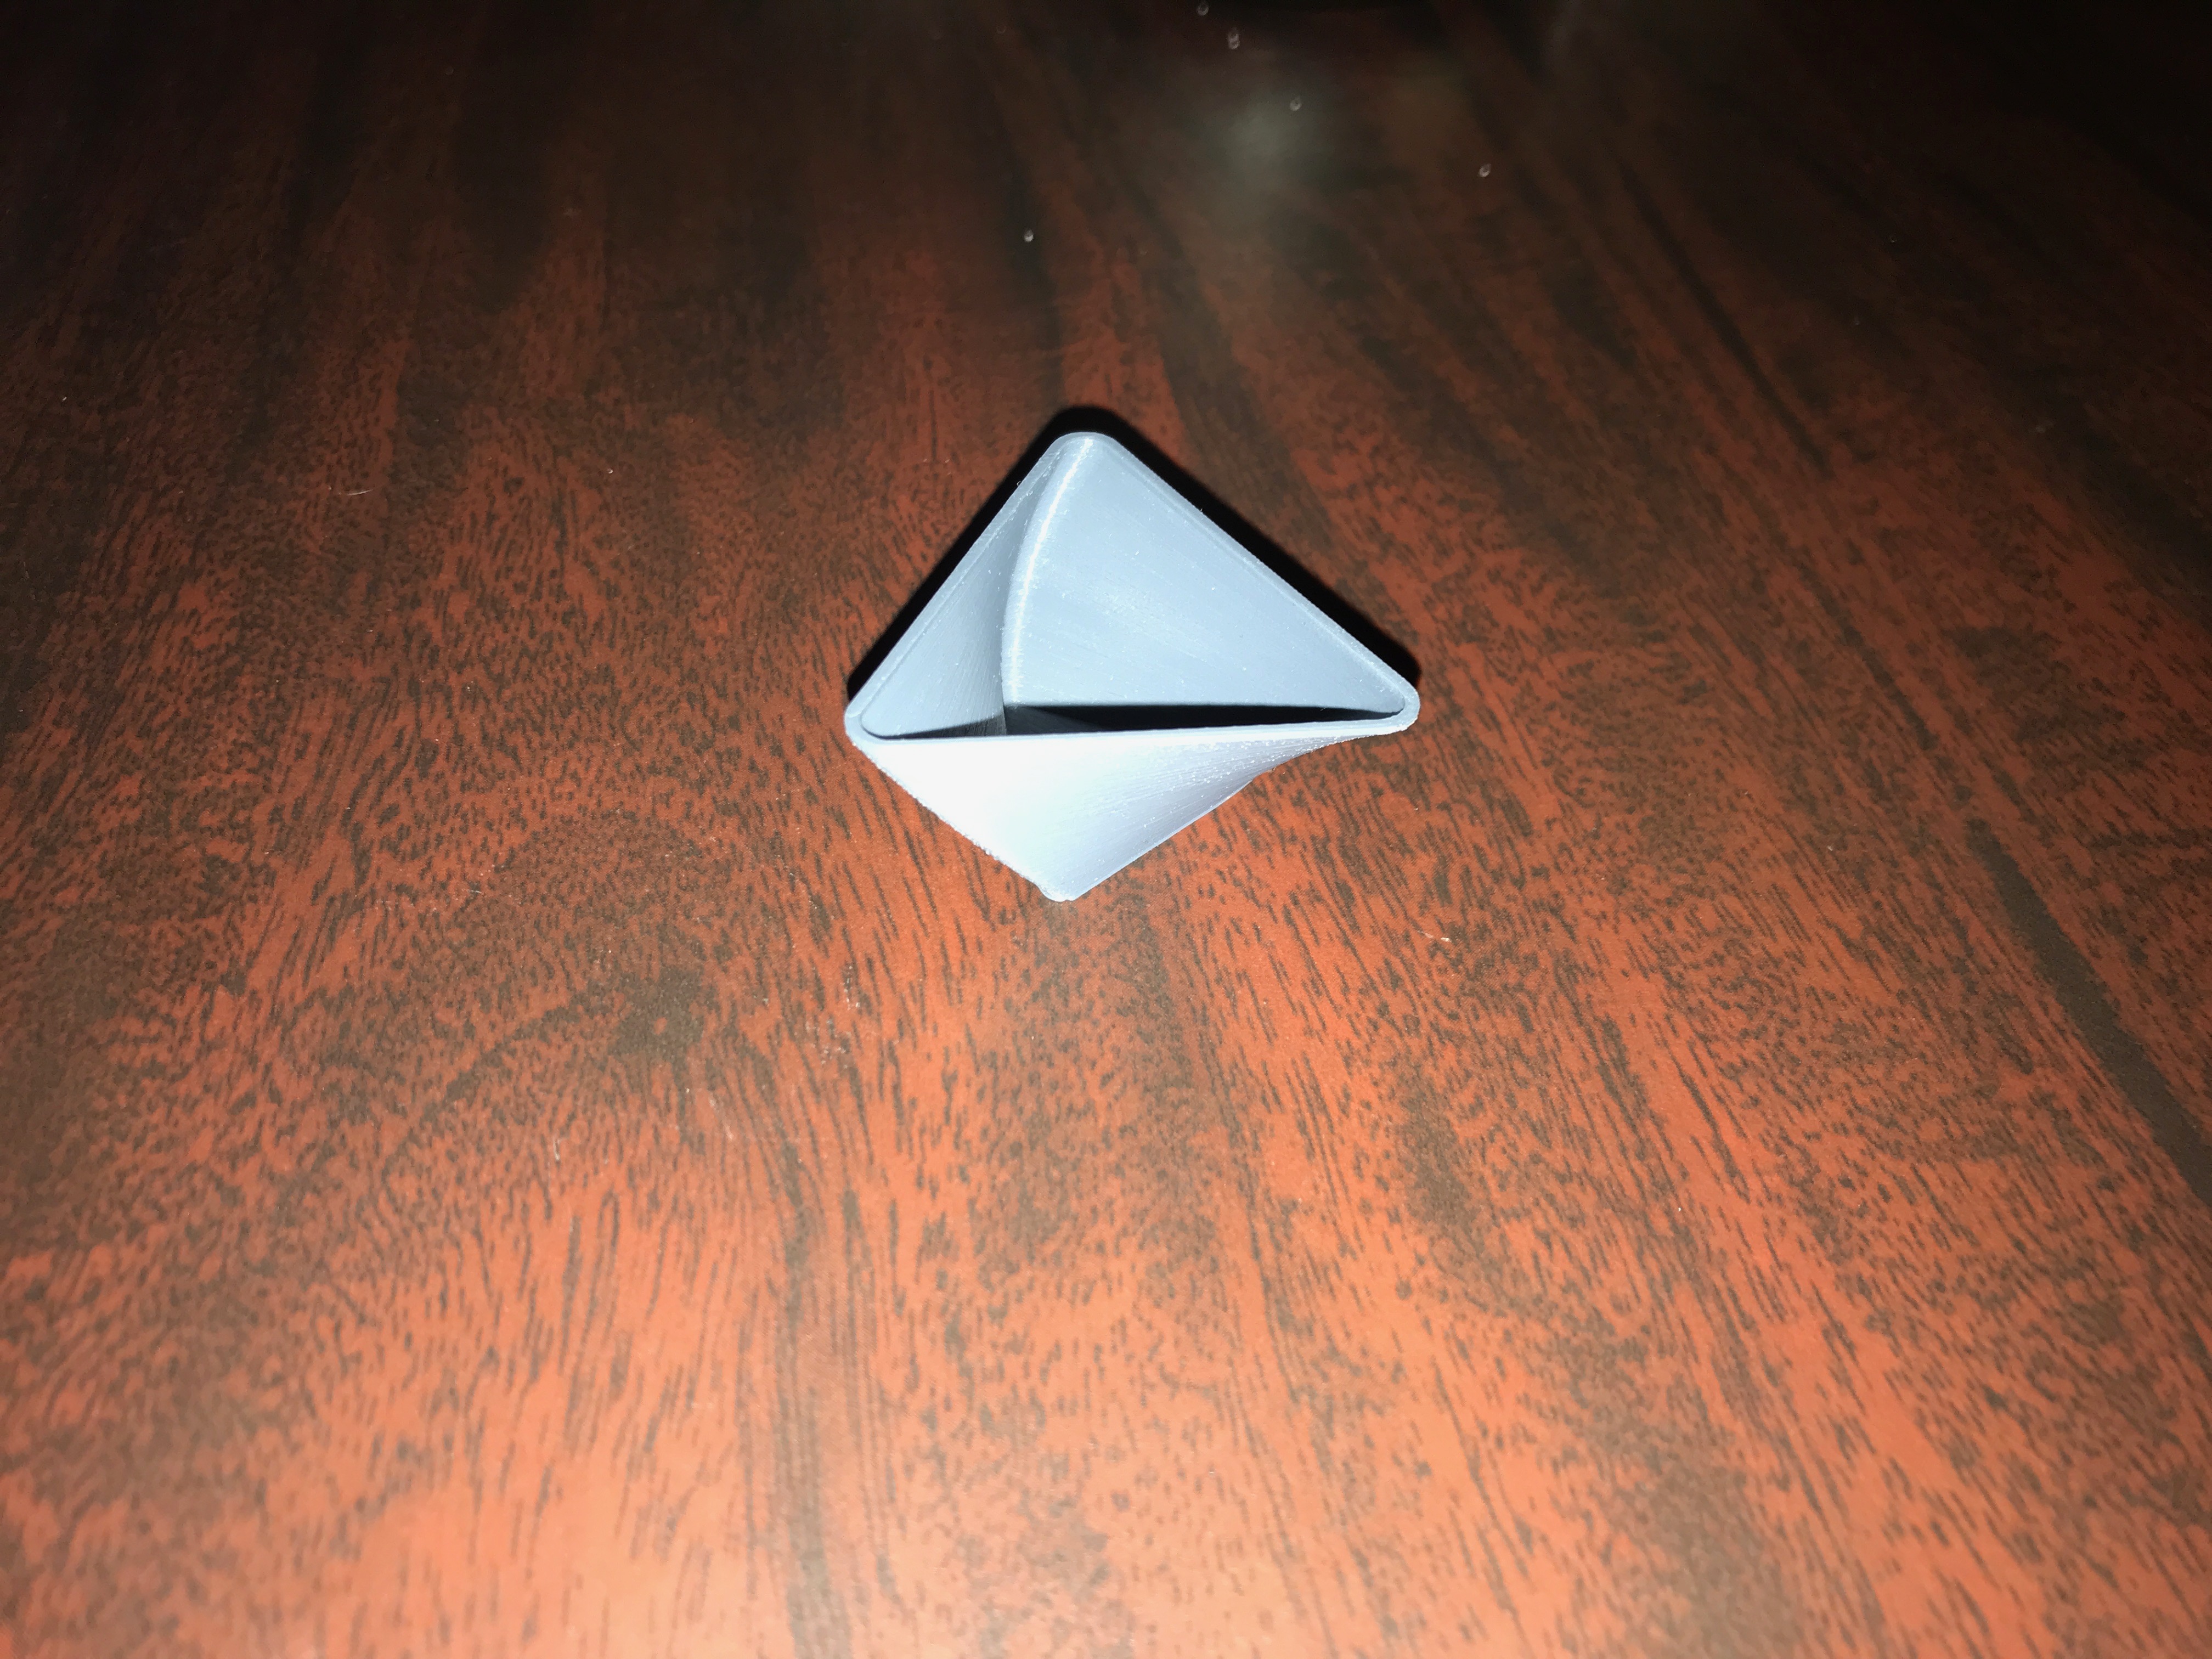
Finished print


I thought this print was a success! I really like how it turned out and how the folds and twists I added ended up looking. The only thing that I would change about this print is that I feel like I could have made it a little bit bigger than it is currently. But other than the size I am please with the way it turned out.
Thingiverse Link: https://www.thingiverse.com/thing:3550317
20 Forms in OpenSCAD
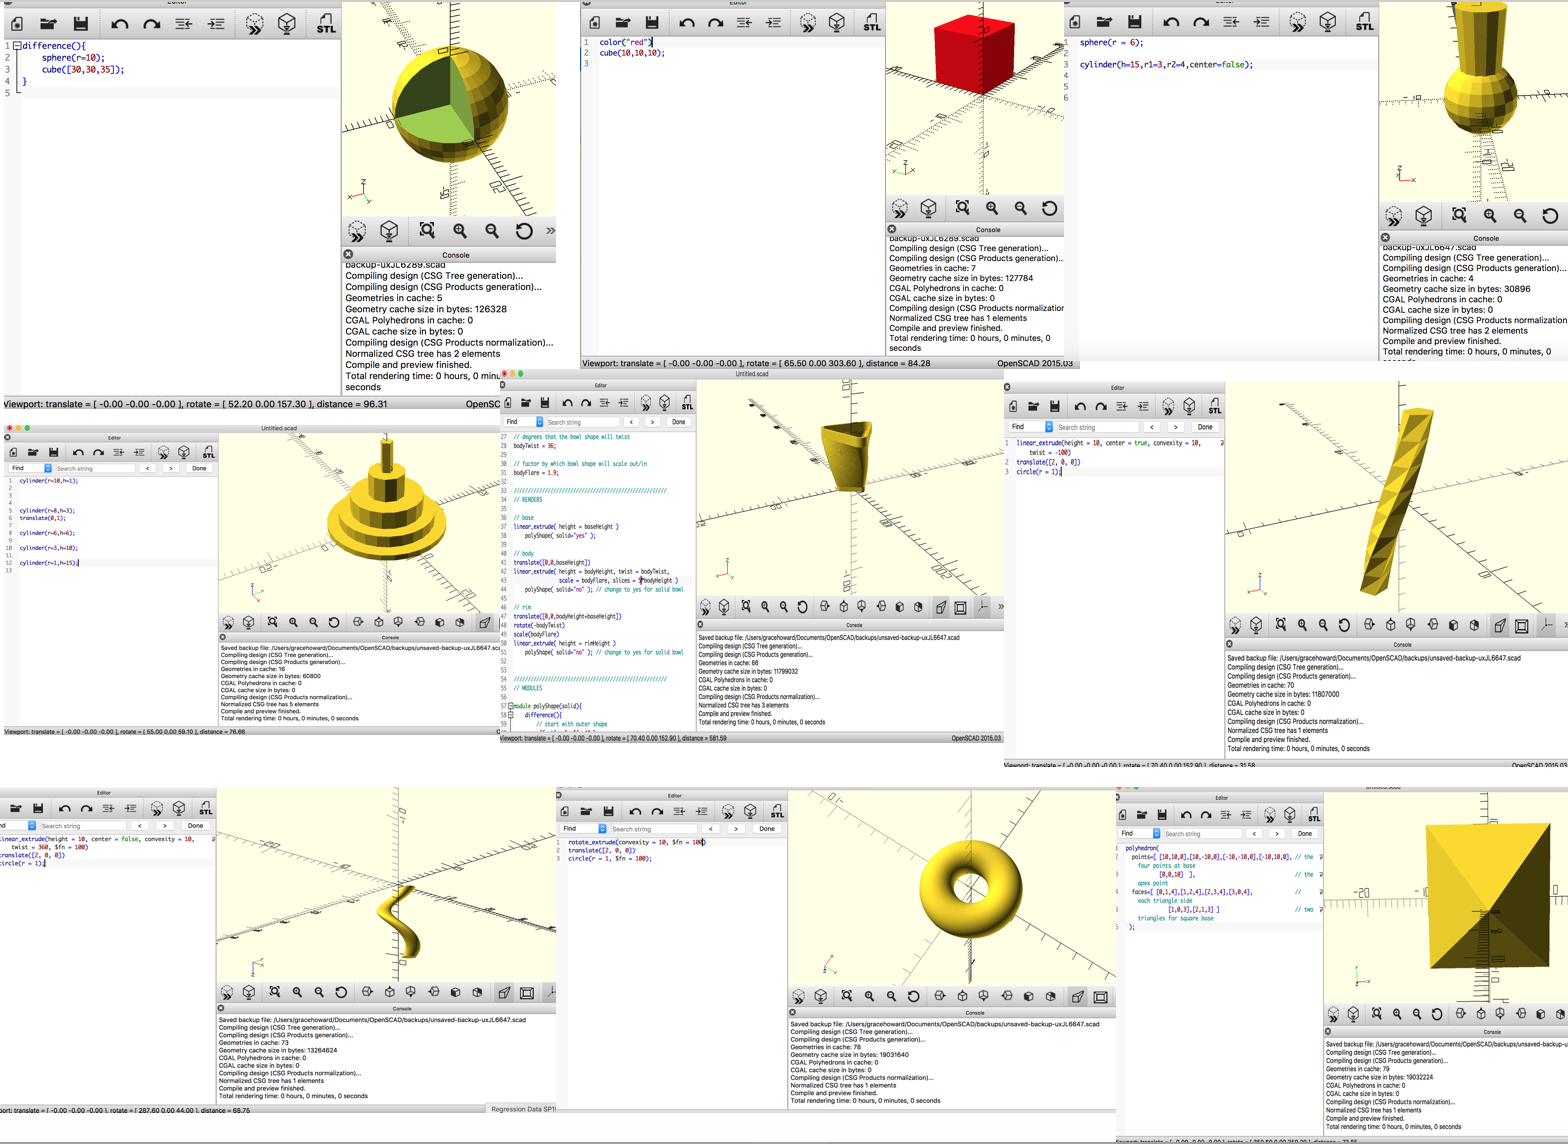
Object #1: For my first object, I made a sphere with a cube in it. I made this with the code from one of the openSCAD tutorials. The code for this used sphere and cube
Object #2: My second object was really simple, but for this one I made a cube but changed the color of it. I did this by using cube and color.
Object #3: for this object I made a cylinder and a sphere. For my cylinder I made the top radius bigger than the smaller radius so it gave a hat shape coming off of the sphere.
Object #4: for this object I stacked cylinders on top of each other using translate and the cylinder tool. It make a cake looking shape.
Object #5: for this object I used the poly bowl youtube tutorial. I copied the code from the comments and then changed it to make the bowl look the way I wanted it to look.
Object #6: For this object I used the linear extrude tool on a circle and added a twist
Object #7: For this object I again used the linear extrude tool on a circle and played with the twist and other features
Object #8: For this object I made a donut. I made this object by using rotate extrude, translate, and circle
Object #9: For this object I made a pyramid. I made the pyramid by using a polygon and playing with the features to make it look like what I wanted it too.
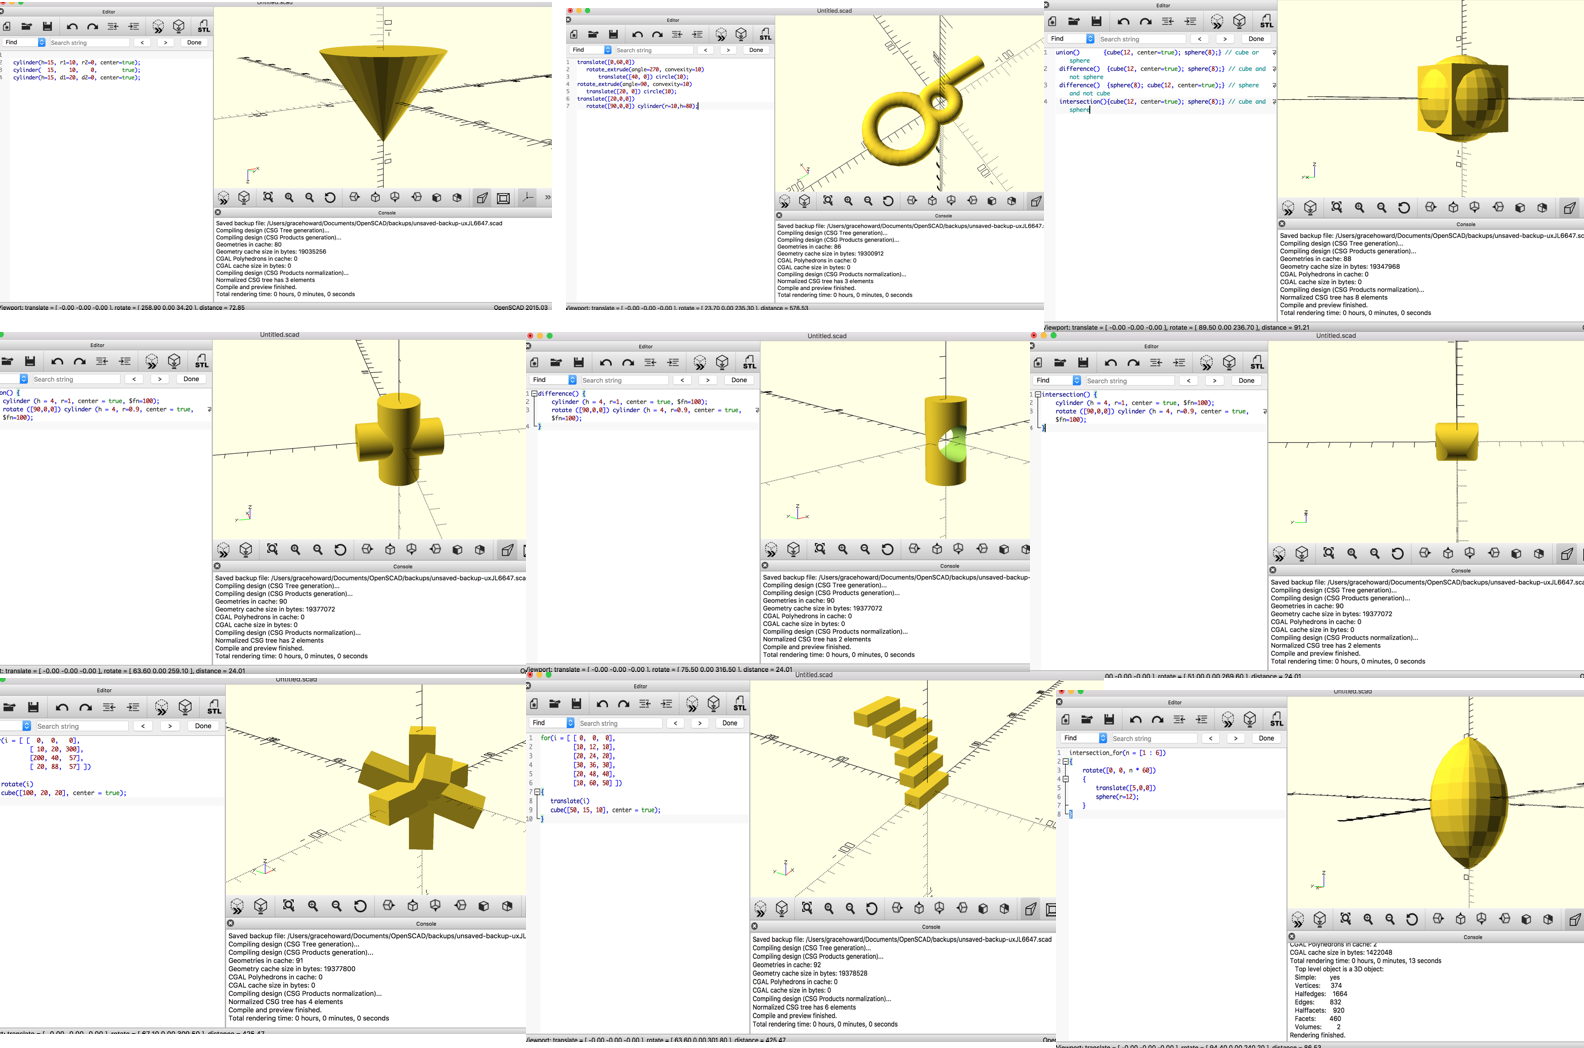
Object #10: In this object I made a cone by using the cylinder tool and playing with the dimensions.
Object #11: For this object I took code that I found online it was originally a hook but I modified it to look different.
Object #12: For this object, I made a cube with a circle inside of this. I did this by copying code and using the cube and sphere tools combined with union difference and intersection.
Object #13: In this object, I used the intersect tool to make two cylinders intersect into a plus sign.
Object #14: For this object I did something similar to my last object and I used a cylinder and instead of making a plus sign I made a hole in the cylinder.
Object #15: For this object I used a cylinder and altered the edges of it to be more round to make a ovalish sized thing.
Object #16: For this object I made a cube thing but out of rectangles. I did this by coping code and then altering the code how I wanted it to look. I used the tools rotate and cube
Object #17: For this object I made a bridge like thing with multiple cubes and translating.
Object #18: In this object I made a easter egg looking sphere thing. I made this by using a sphere and intersection tools.
~ I couldn’t fit the other two in the screen shots with the others so I added them down here ~
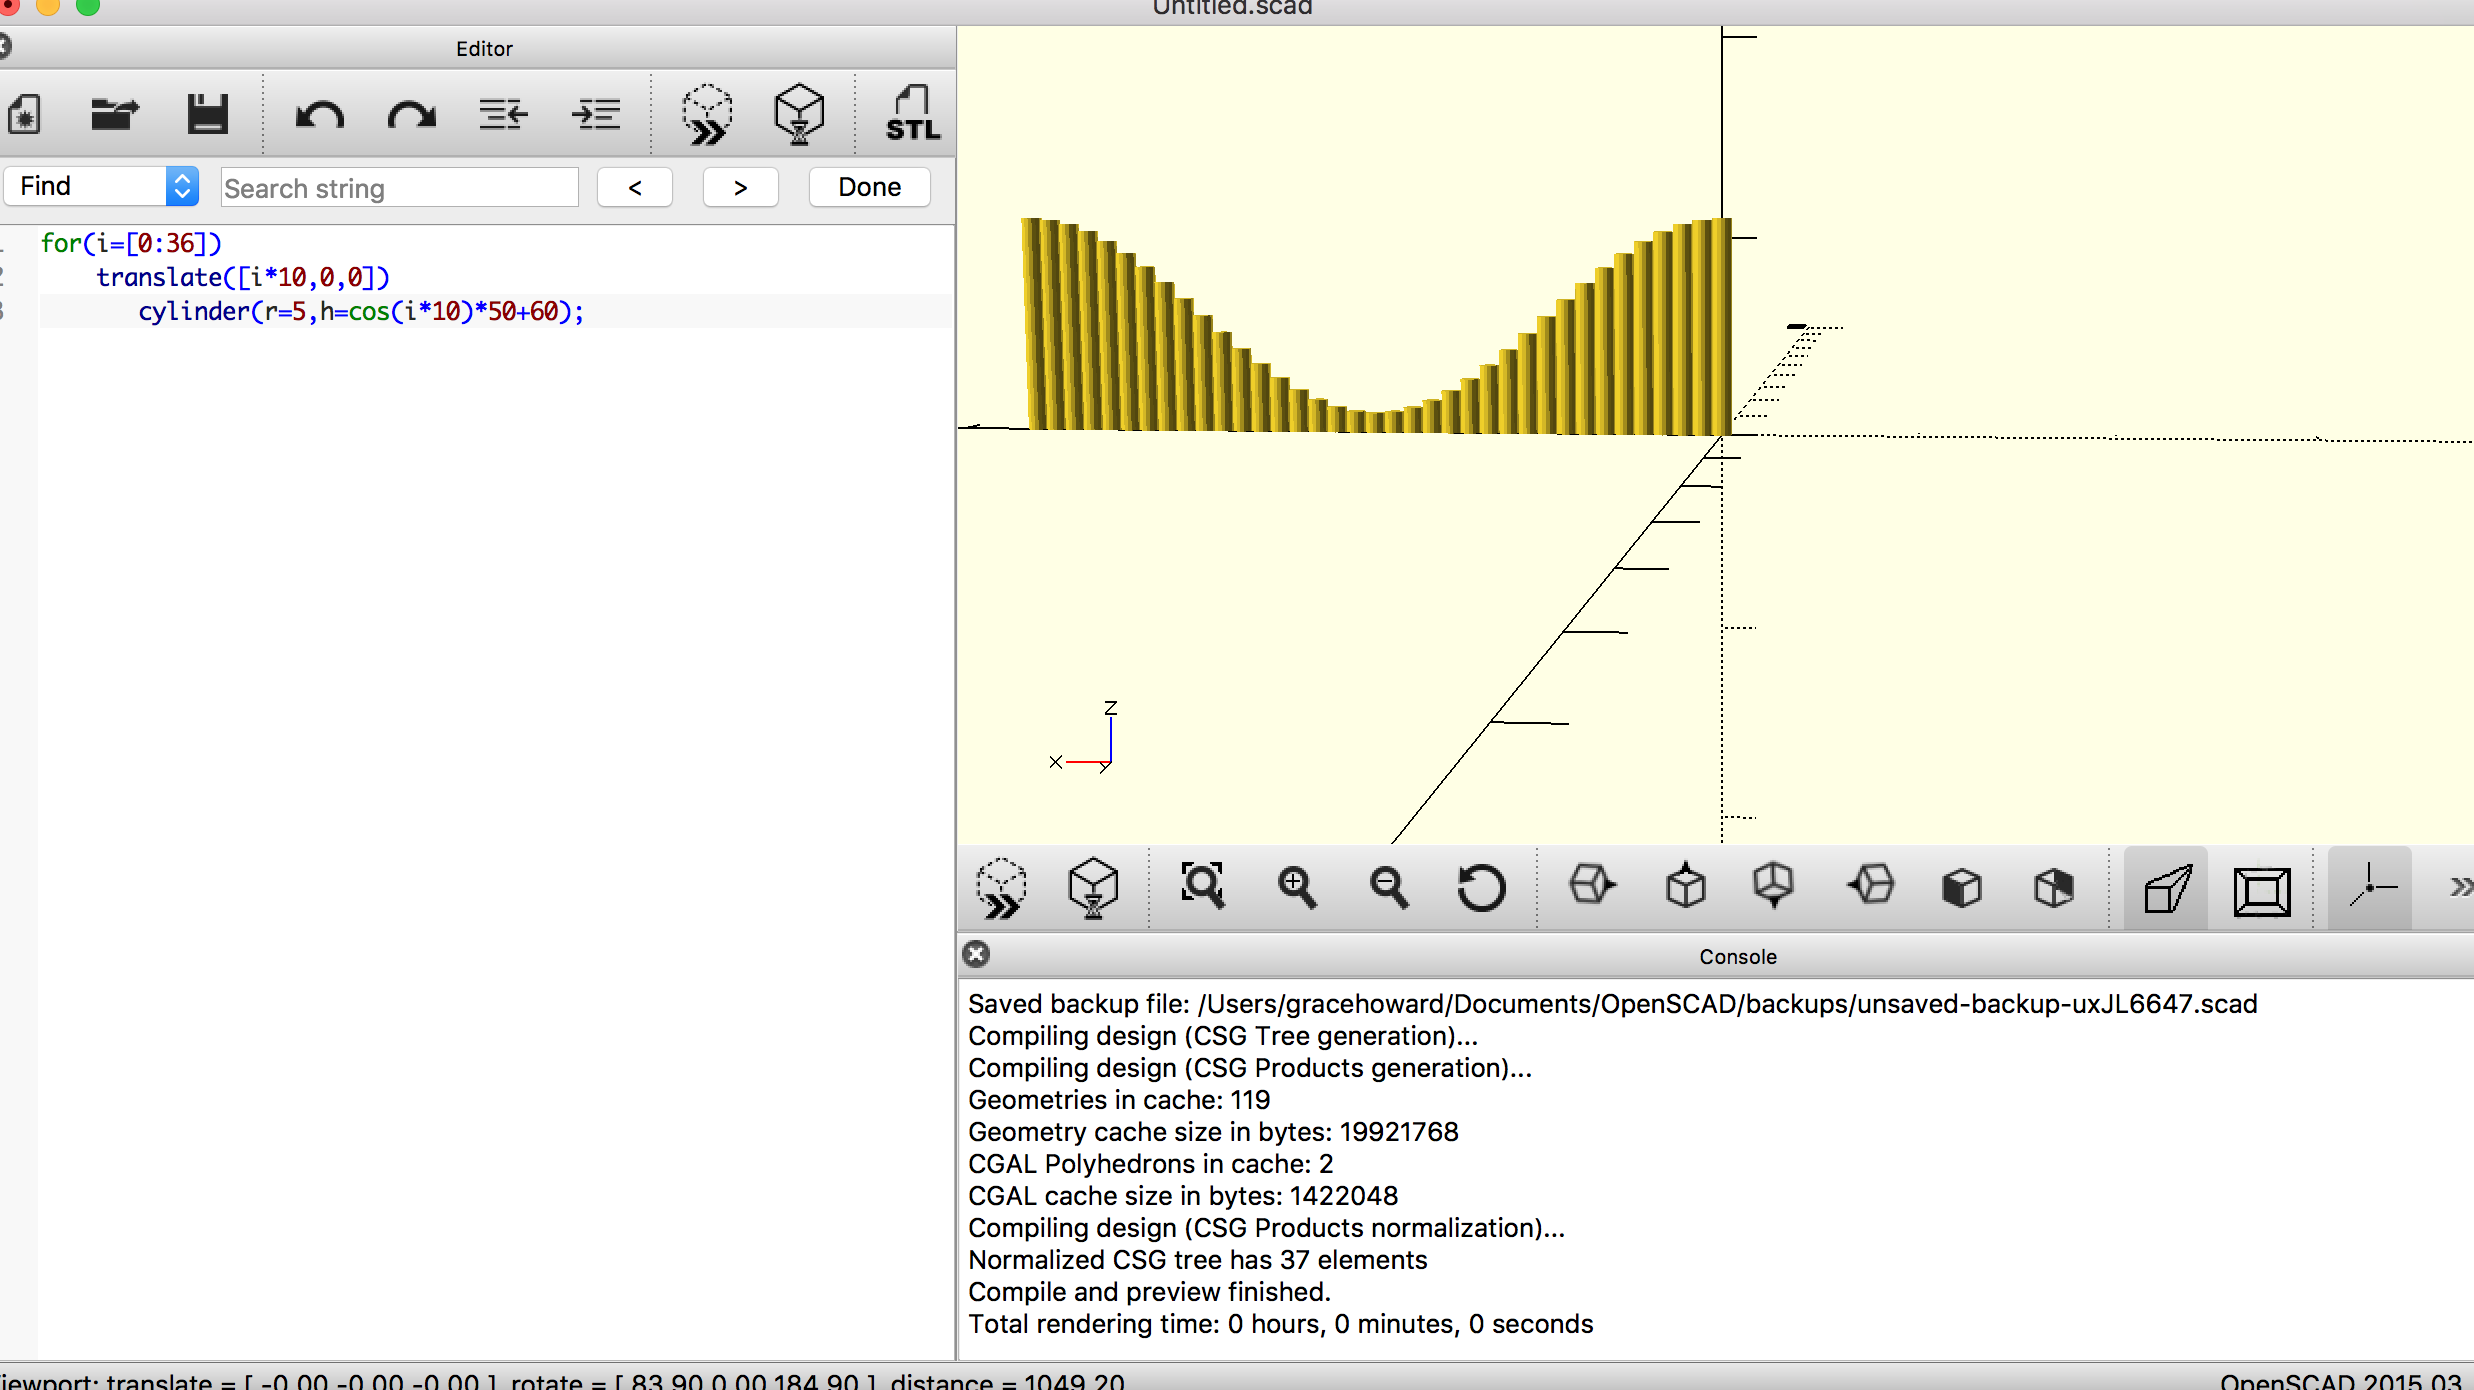
Object #19: For this object I made a wall with lots of cylinders by using translate and the cylinder tool.
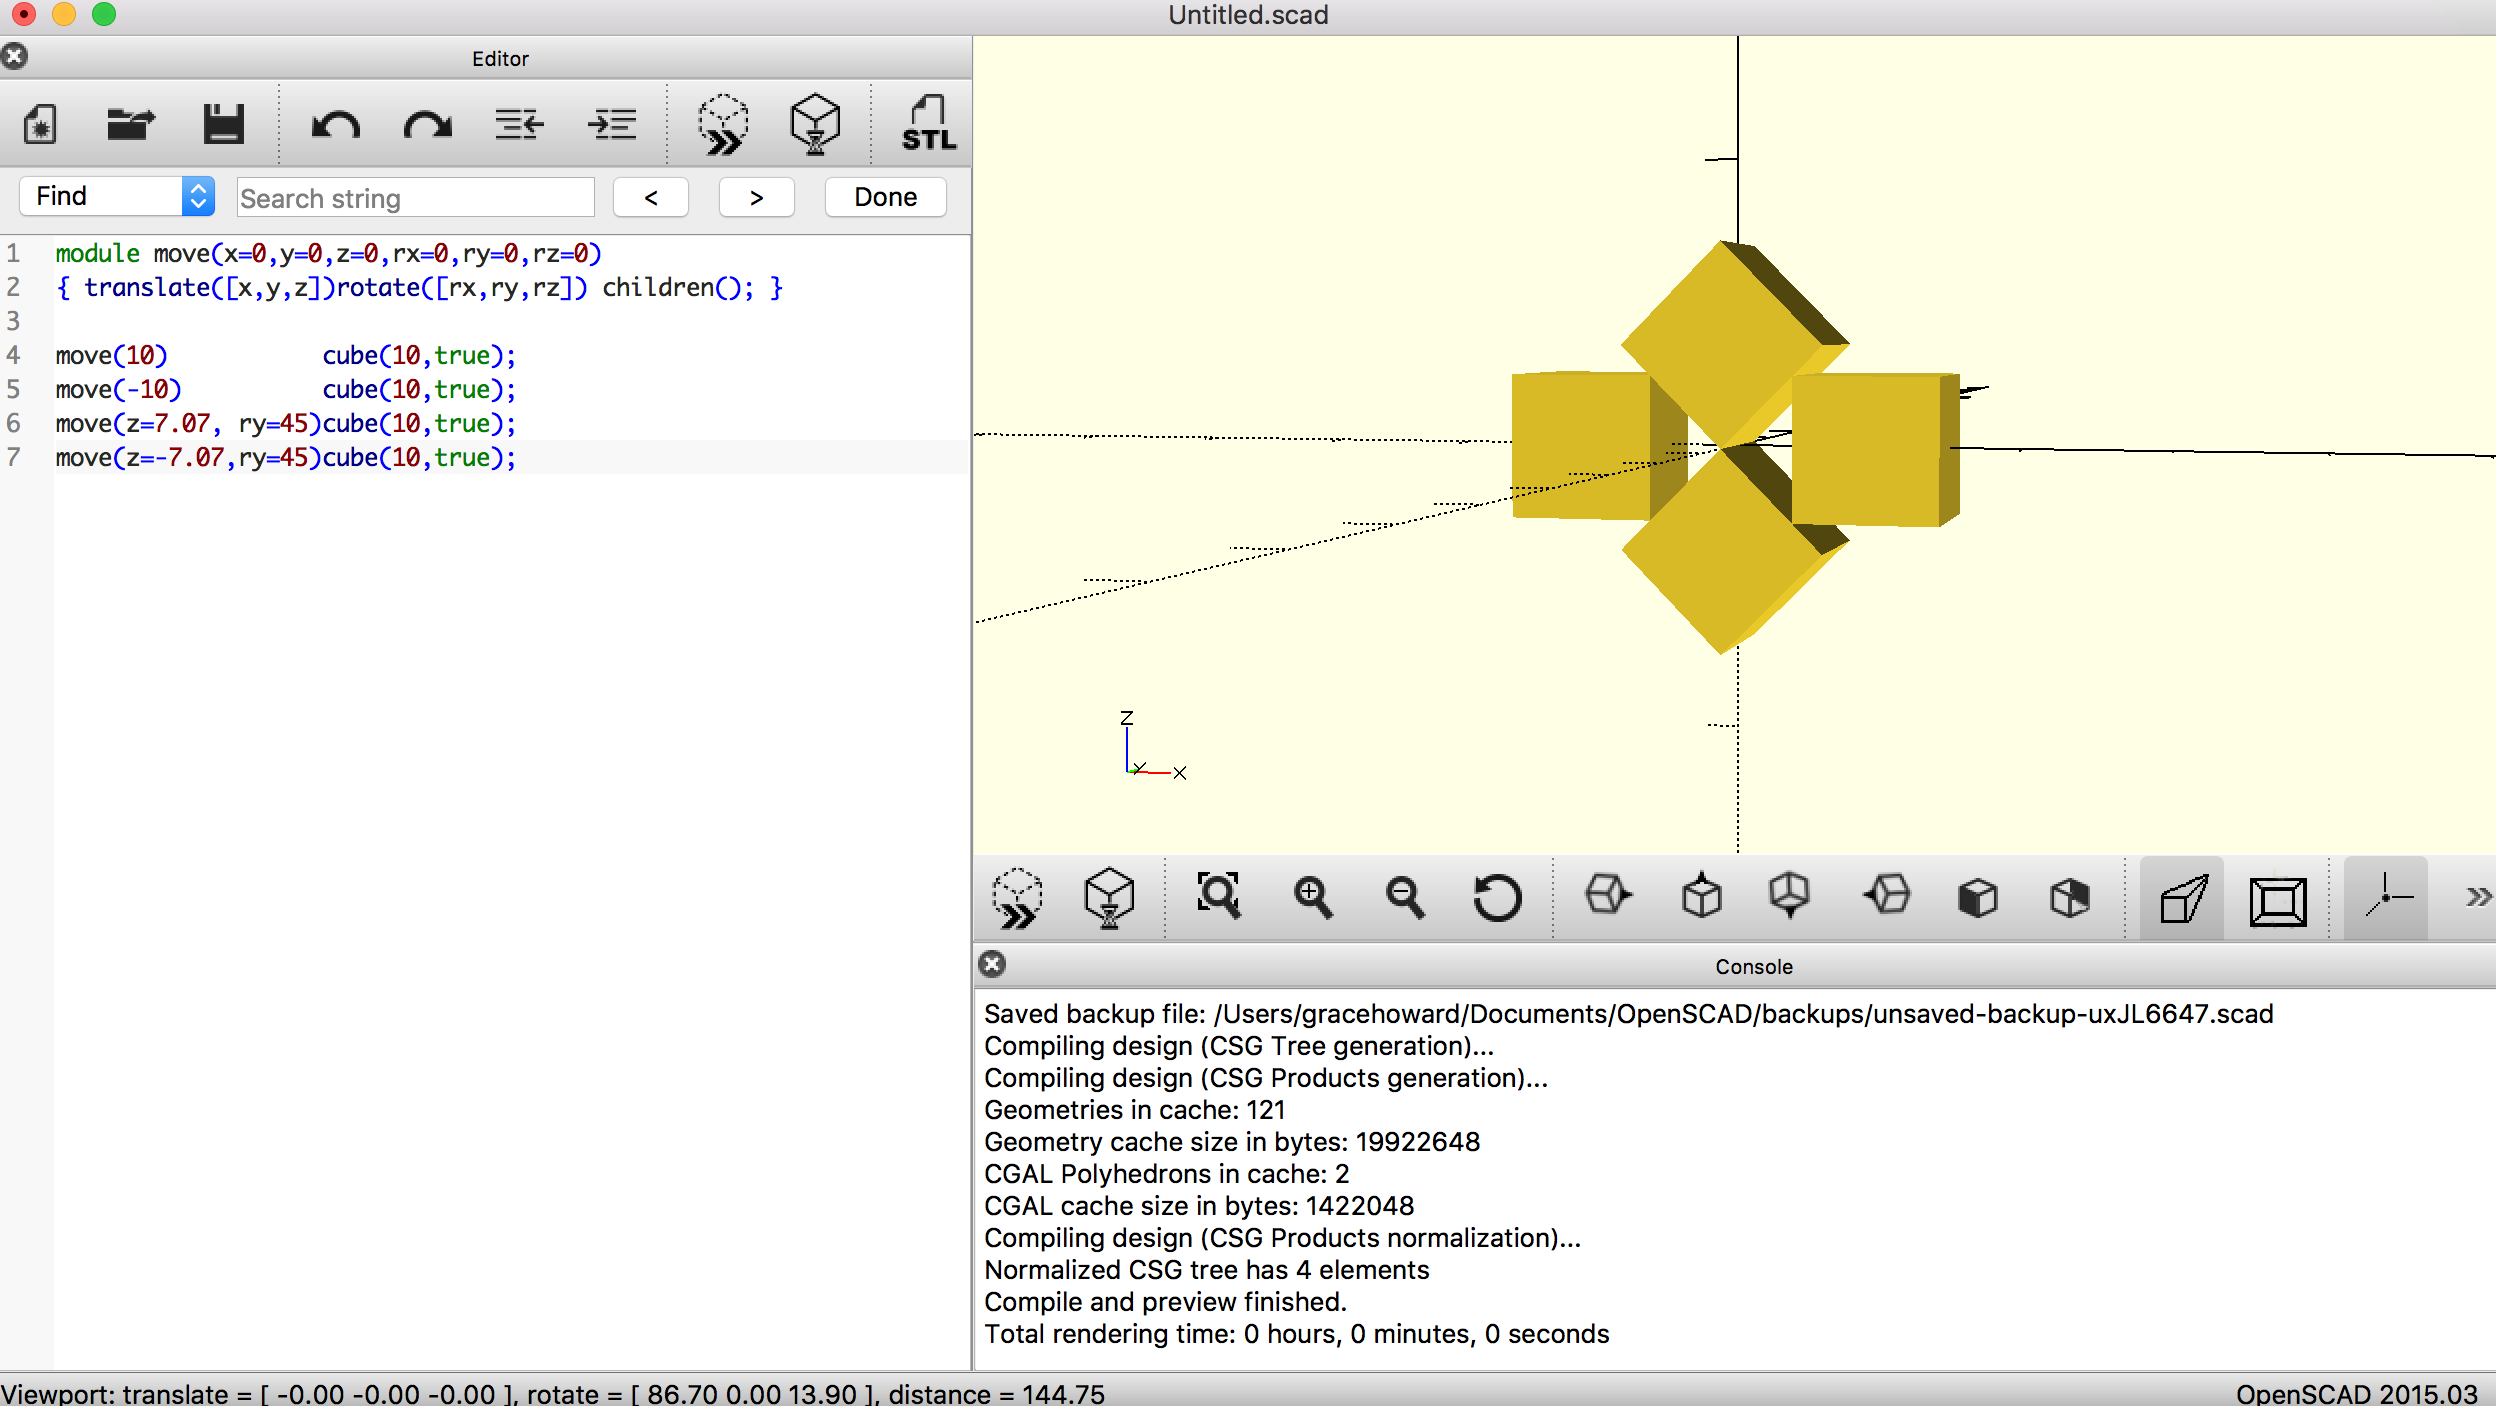
Object #20: For my last object I made a bunch of squares all together to make a diamond like shape. I did this by taking code that contained cube, move, and translate.
OpenSCAD Print
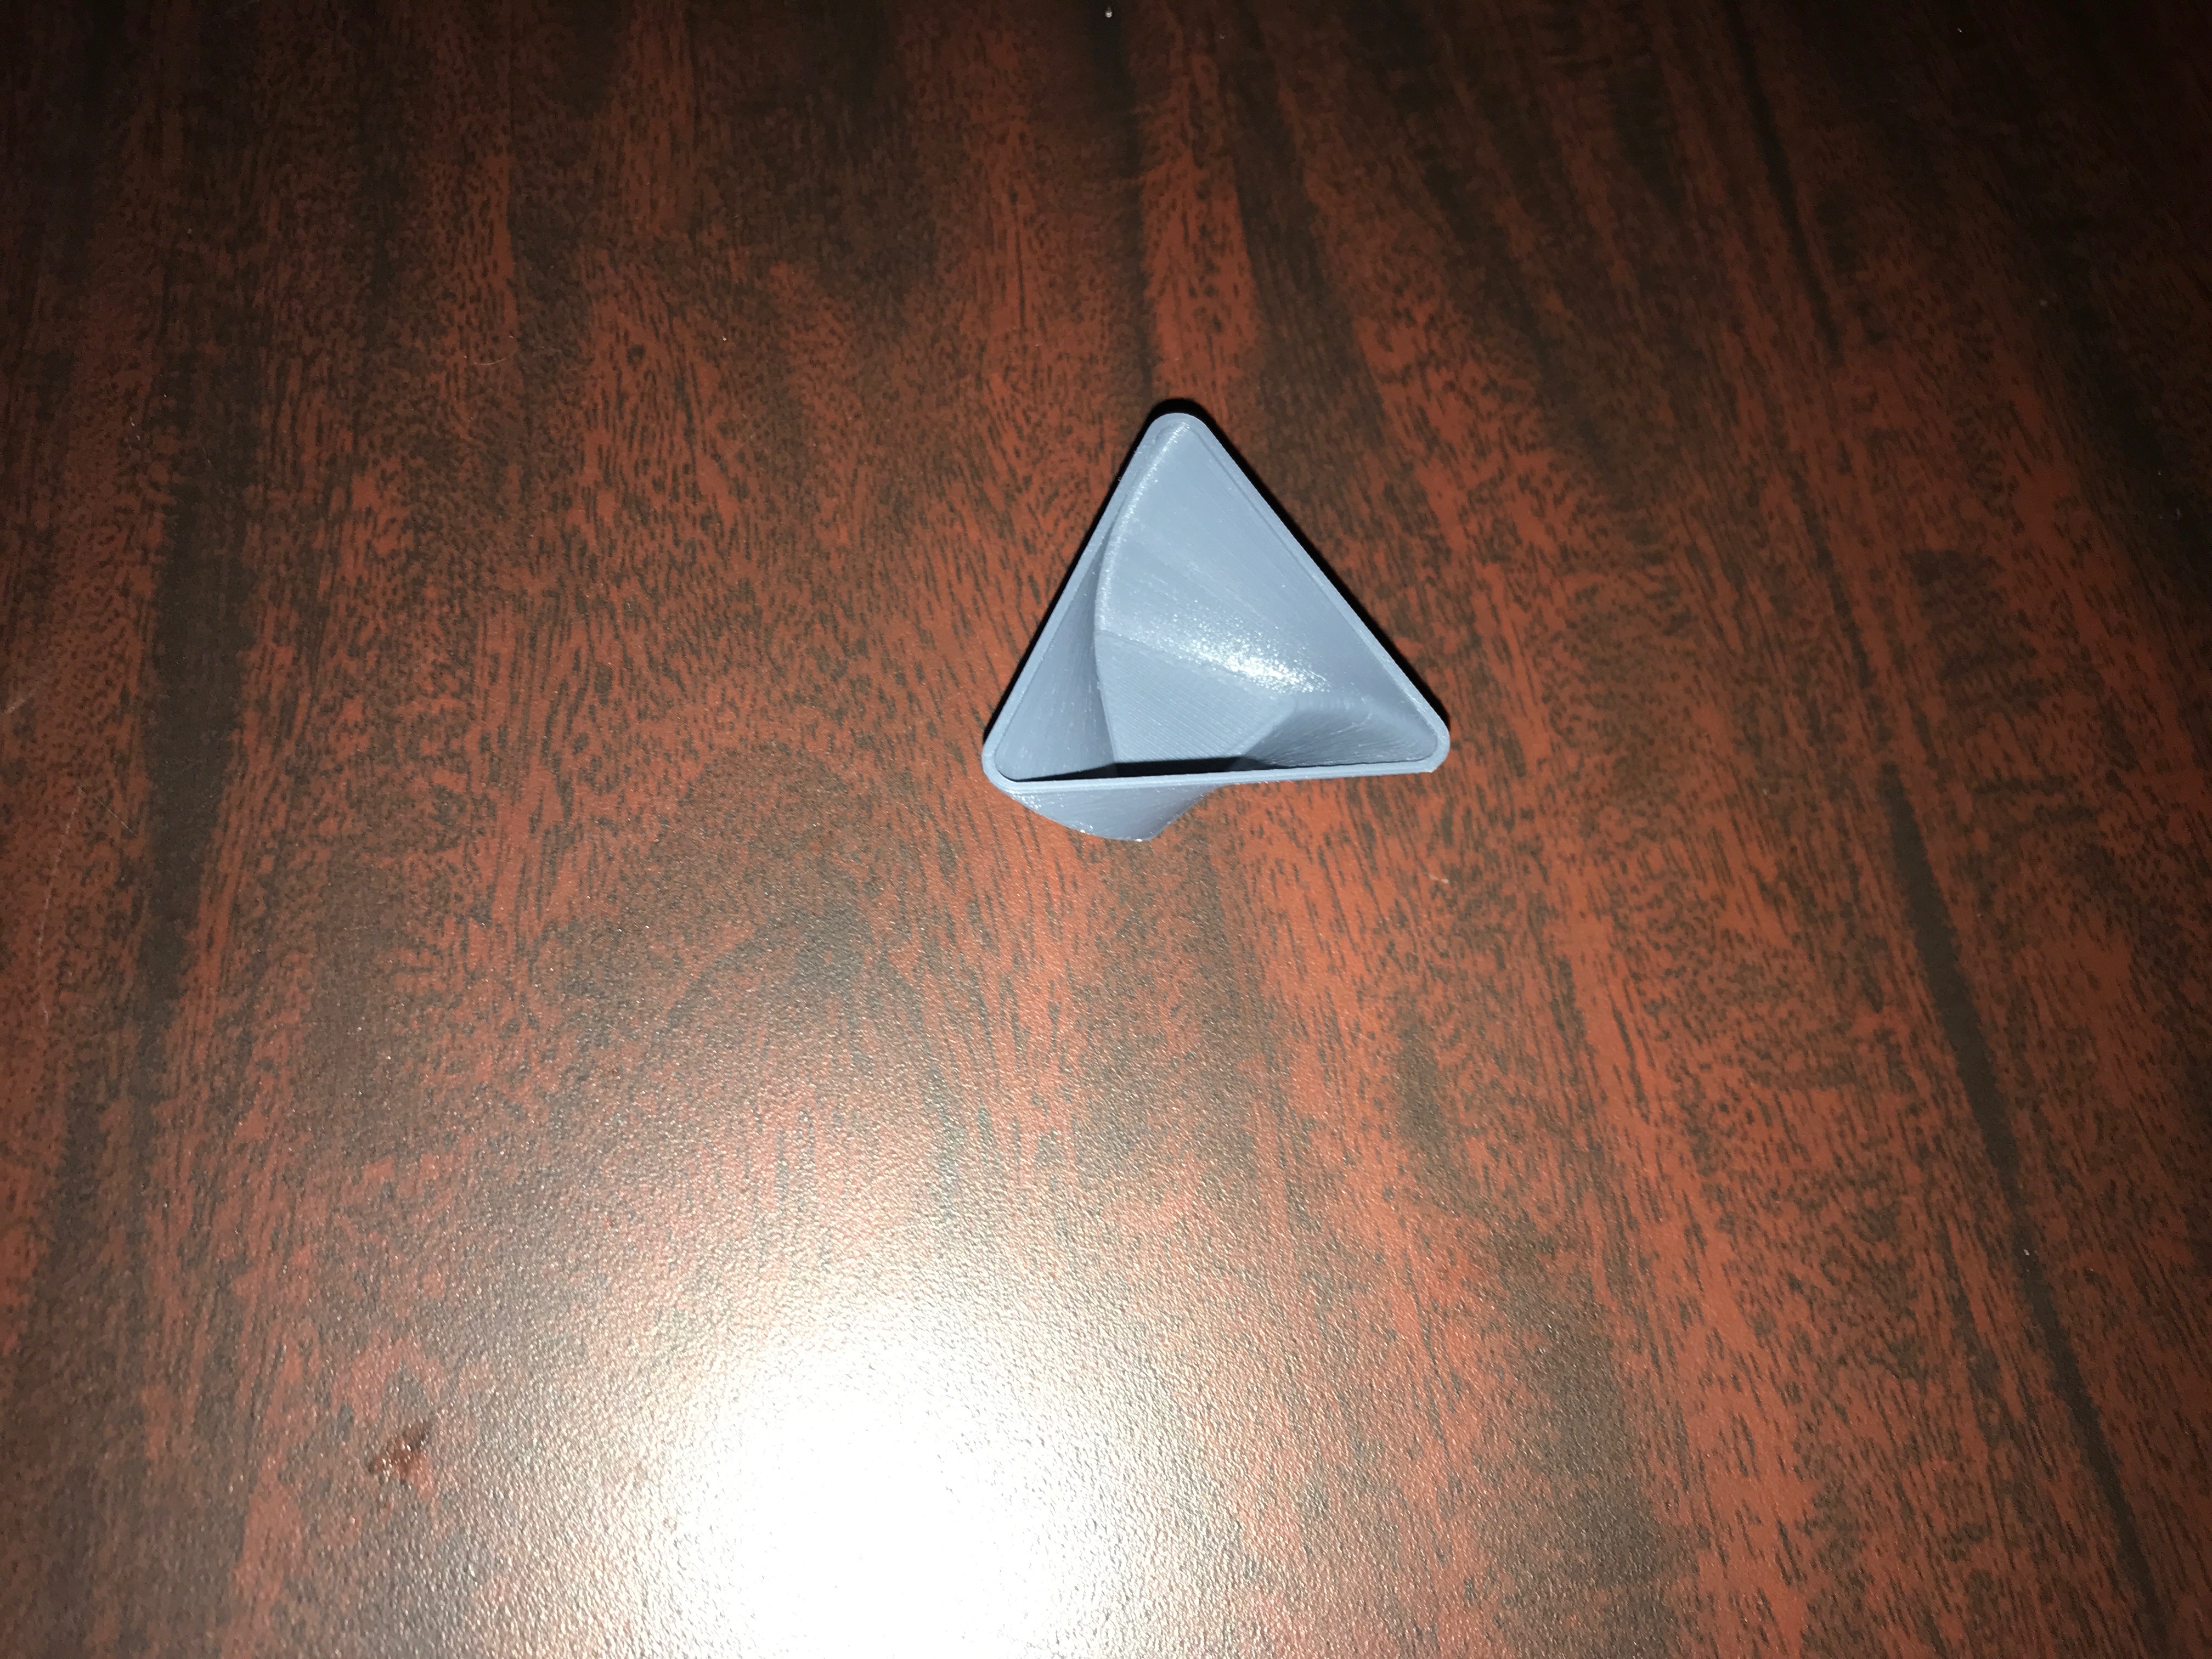
I think this print was a success. I printed a bowl from the youtube tutorial from openSCAD. Also I changed the dimensions of the bowl and made it different. I think it printed really well it’s really solid and the swirl pattern looked really good. I wish I had made it a little bit bigger just because its pretty small but I wanted to get it done in one class period. I wonder if I printed it a lot bigger if the spiral would look good.
Summary of Group OpenSCAD Project
Lego Ring w/ Hannah Wilton-Jones
Thingiverse Link: https://www.thingiverse.com/thing:3583229
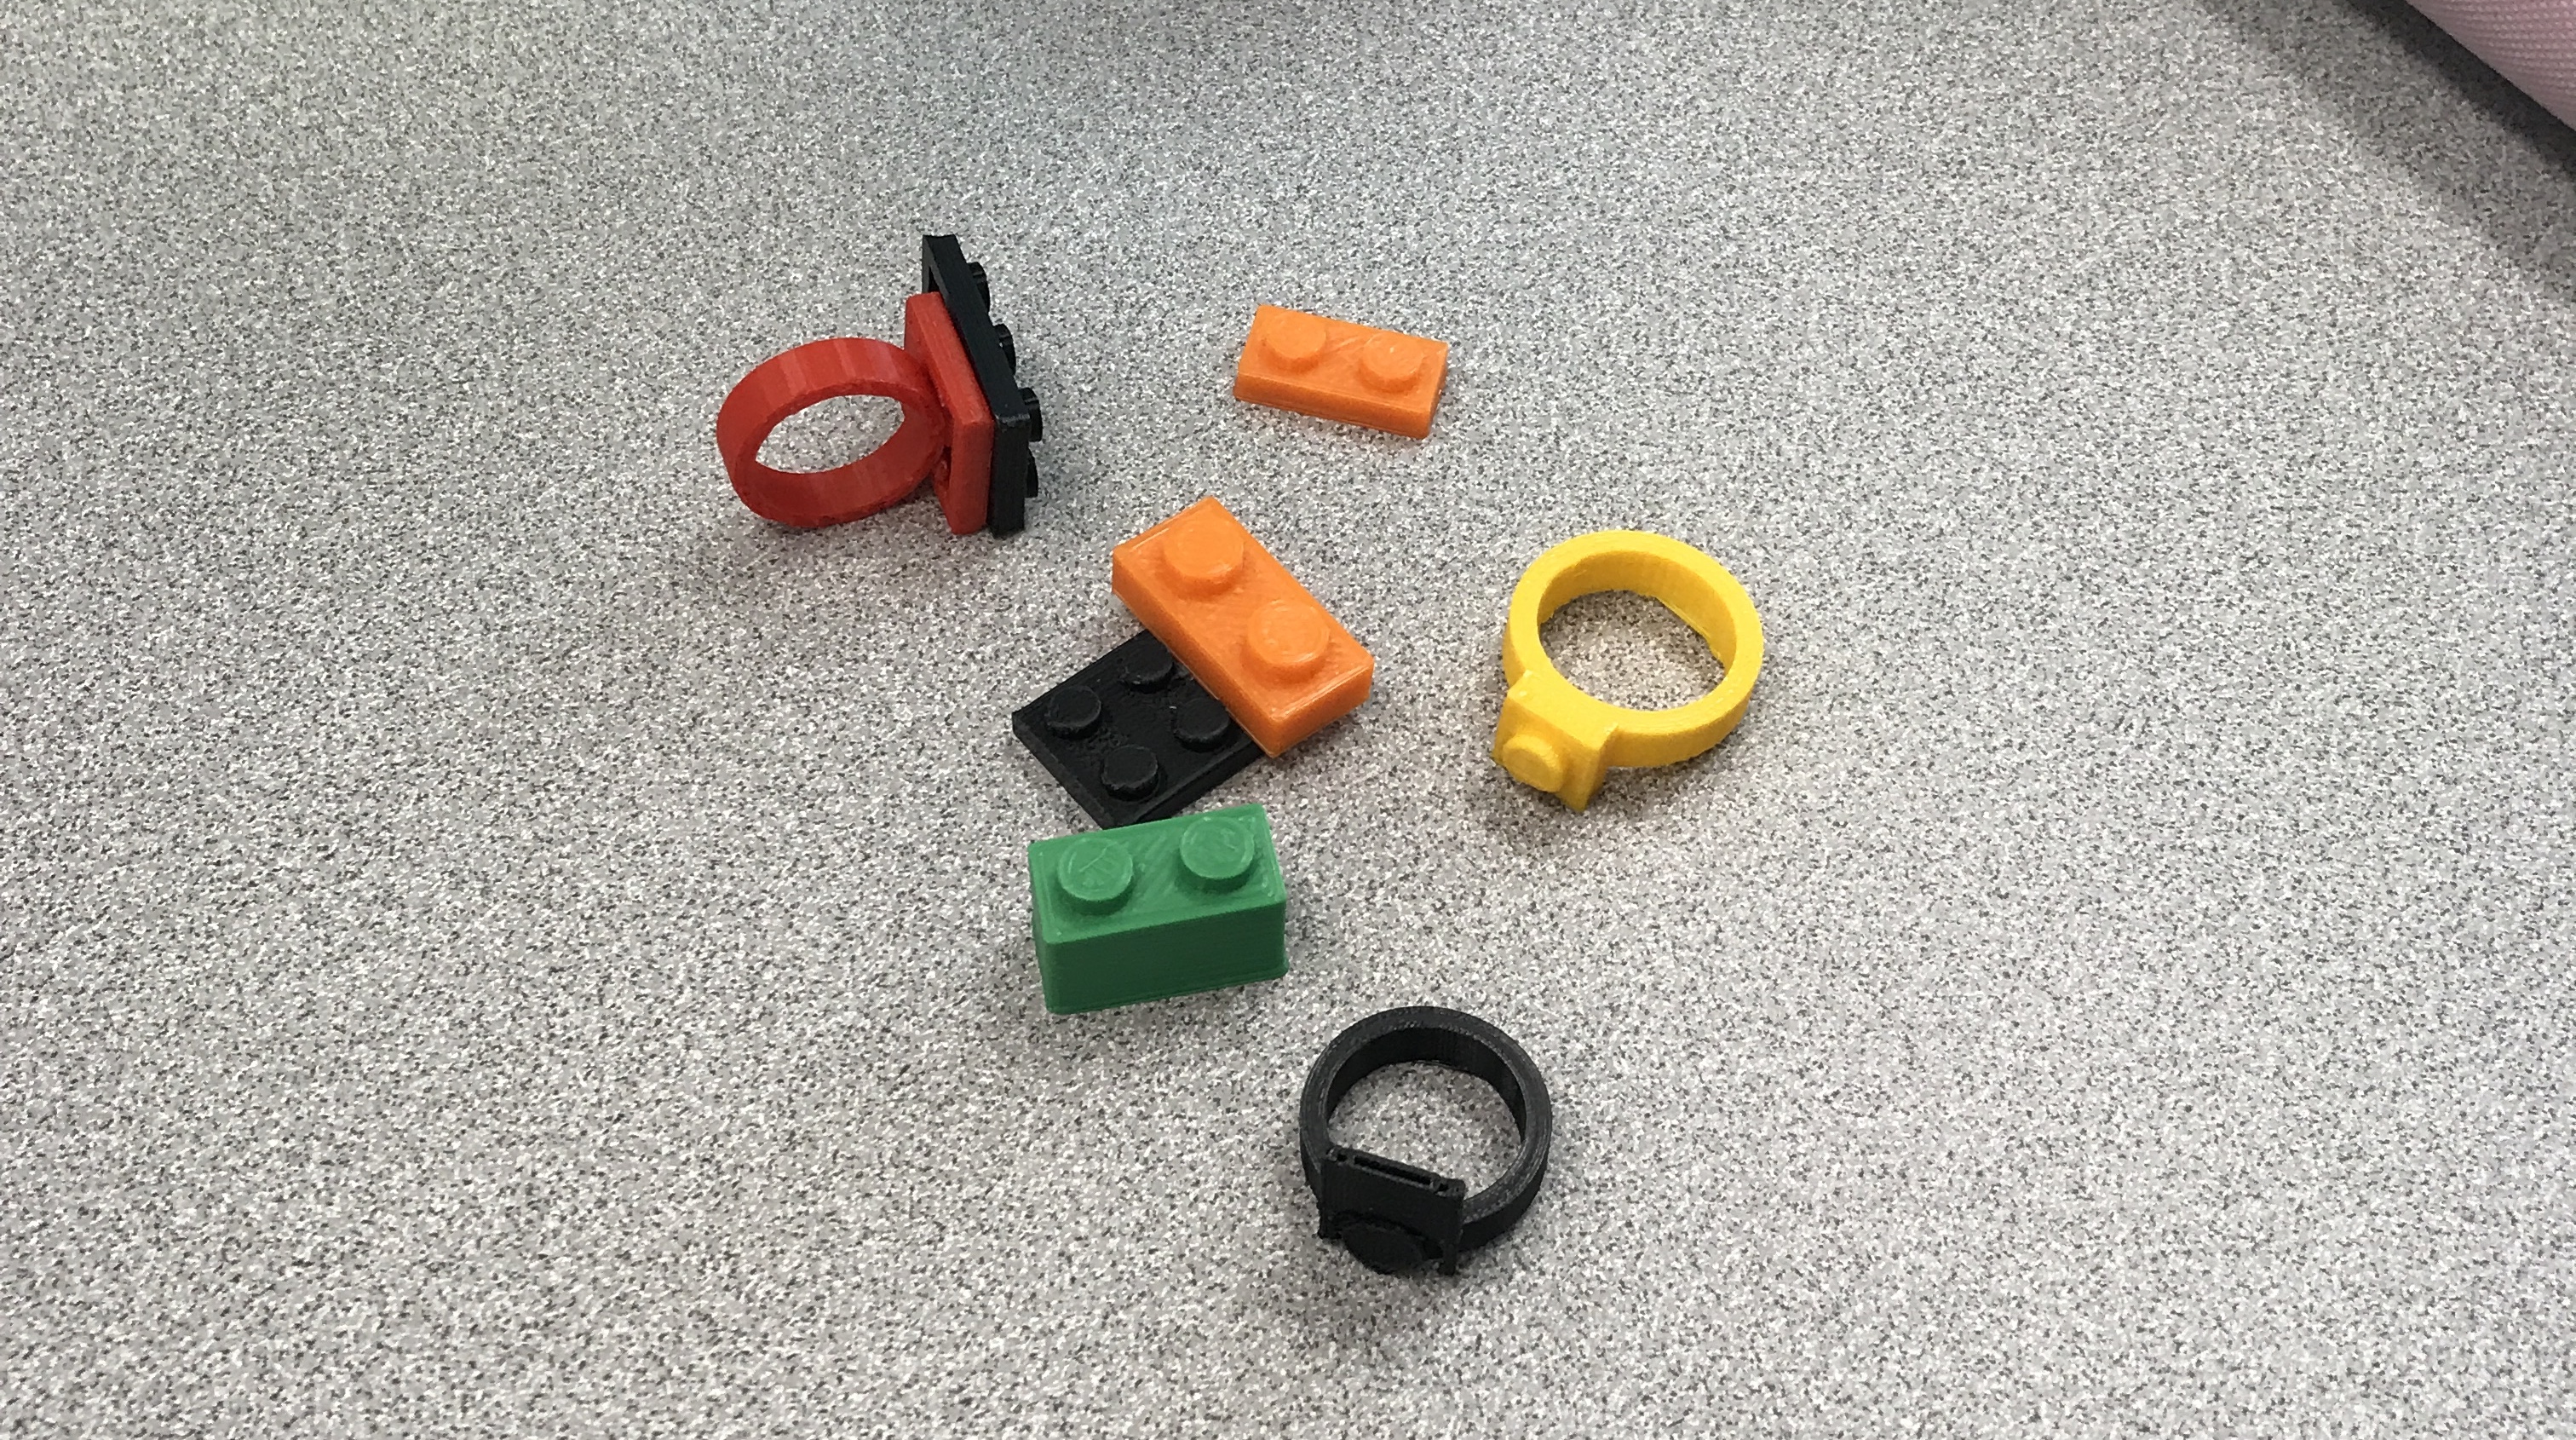
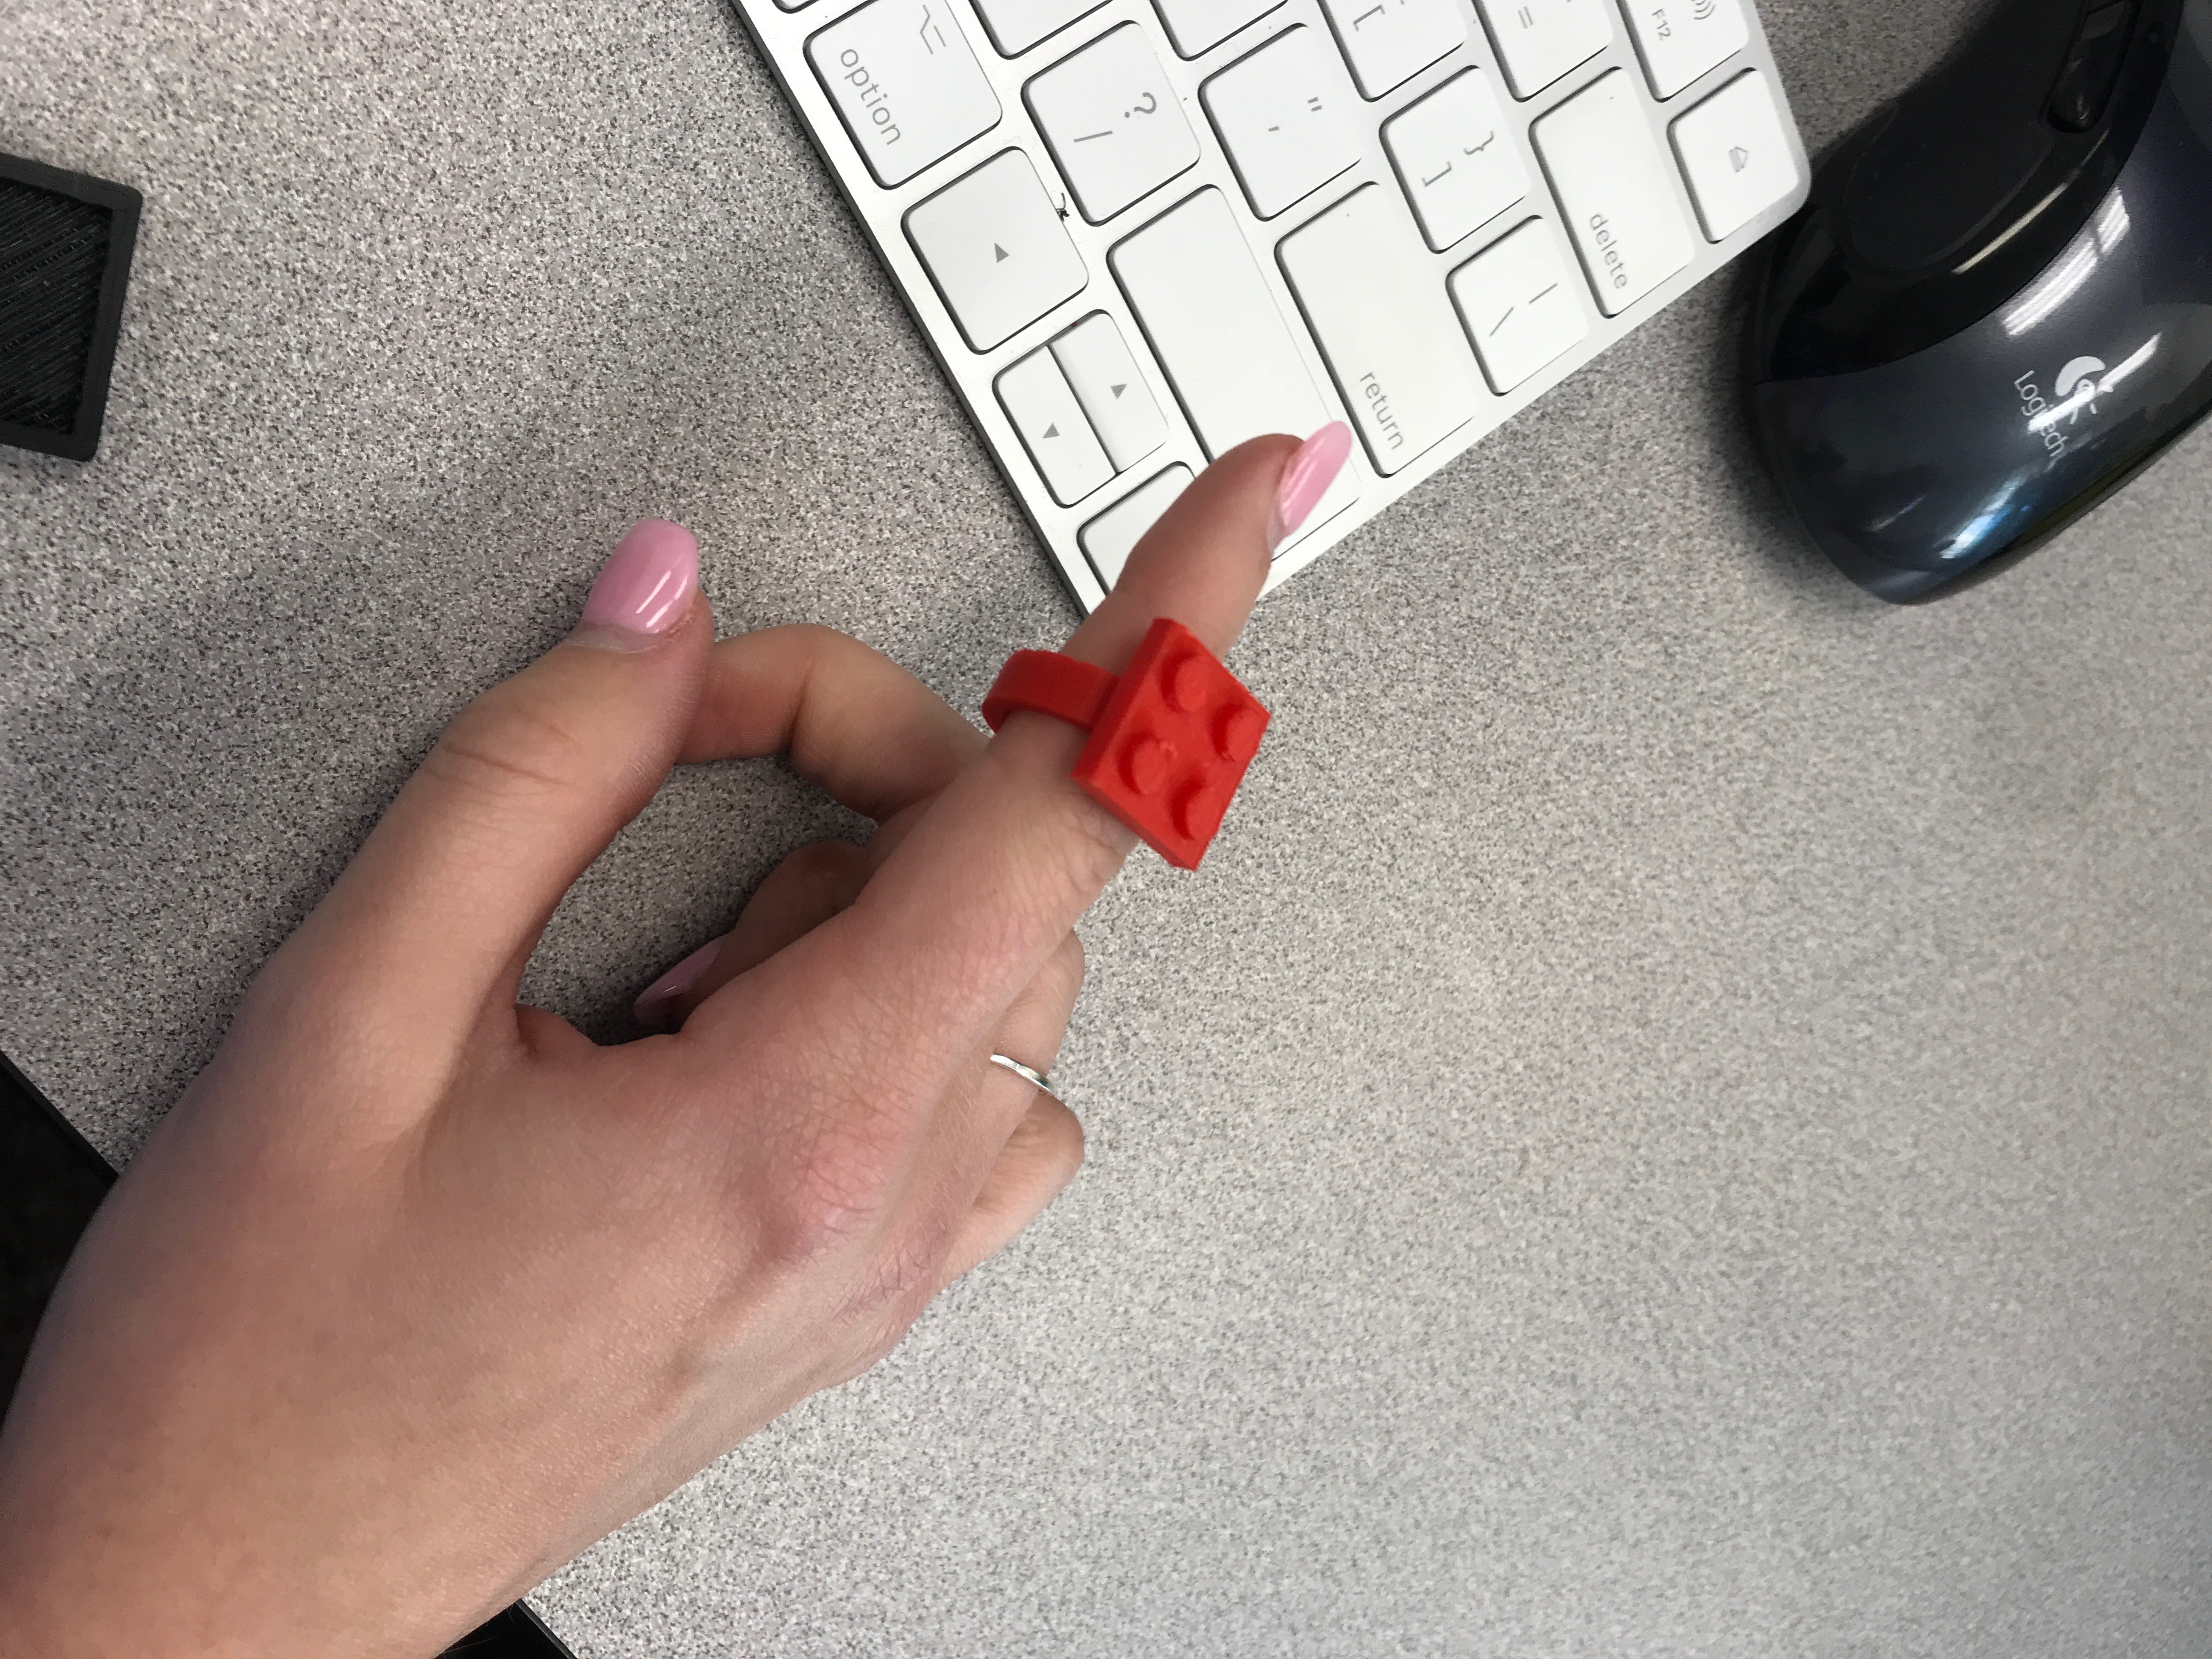
I think our project turned out really well. We had a hard time figuring out how to make our code customizable, but eventually it turned out really well. I think coolest part of our project is how the lego ring actually works with other 3d printed lego pieces. We put a lot of work into making the rings just right and it paid off. Super happy with how the final product looks.
Reflections and Future Projects
I really enjoyed this class and learned new skills that I never thought I would. I think it’s really cool to now be able to say I have experience with 3D printing and know what an STL is and that I can operate different softwares. Also, the openSCAD code I learned was really cool because I have never used code before this class.
In the future, I would like to print more. I think someday printing a straw would be really cool because it’s reusable and helps the environment. I originally picked this as my first print idea but it was too advanced for me at the time, so it would be cool to go back and see if I could print it with the knowledge I have now. I think this would be really hard to print given the small hole and how it could need advanced support, but I think if I keep exploring what I can do with 3D printers I might be able to do it one day.