Hello
My name is Whitney and I am a Social Work major in my first semester at JMU. In fact, I am actually coming back to school after a seven year hiatus. I guess it took me a little while to figure out what I wanted to be when I grew up.
Outside of JMU I am a very busy little bee. In addition to my twenty-seven kids and their multitude of activities (in reality it is actually only four kids, but as any mom will tell you somehow it always feels like more), I am also a Girl Scout co-leader to eleven amazing elementary school girls. Some days it feels like I don’t even have time to sit down and breathe. Although, I guess so you don’t think I have no life of my own I will add that on the rare instances I do have free time I enjoy reading and playing absolutely mindless games on my phone.
I have always been the kind of person who enjoys doing puzzles, whether it be something on paper or a jigsaw. And like most people I have challenged myself to getting down to that very last peg on the “jump” puzzle. So, I am excited by the opportunity to try to gain a better understanding of the different types of 3-D puzzles and maybe create my own that I can challenge others to solve.
This is me.

I actually feel like I look good in this picture. Most of the time though this is me…
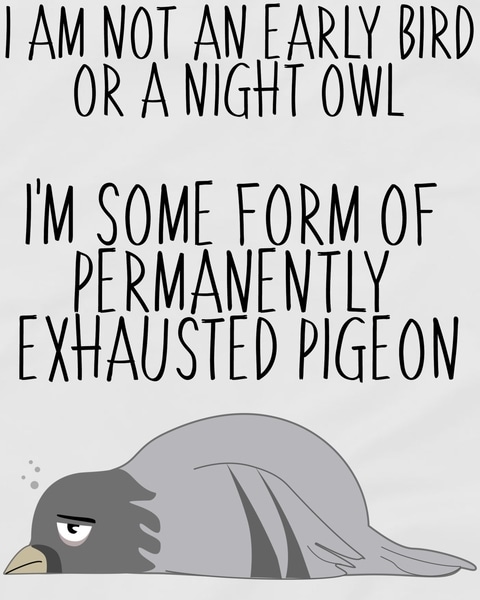
You can find me at….
Initial Puzzle Research
One of the biggest things that I found was that while I may have seen a puzzle type before, I never actually knew what it was called. This actually makes it hard to look up, since 3-D puzzle types literally brought up so many landmark 3-D jigsaws that for a minute I thought I was taking a trip around the world. I was finally able to find a few that peaked my interests.
https://www.youtube.com/watch?v=mbuYa8t2uA4
This may look like a normal lock, but it is in fact a trick lock. In most cases key goes in, pushes a few tumblers, it releases the latch and the lock opens. But a trick lock works a little different in that you have a to solve a puzzle in order to make it open. In some cases it could be a few simple steps that you need to complete, other times you could spend hours trying to decipher the puzzle that will make the key finally turn. (I watched one YouTube video where a guy was working on one for almost two hours before he solved it)
I think one of the biggest draws for me on this one was that it reminded me of the puzzles in some of the video games I used to play, and to be honest I think that also made me skeptical that I could create something that intricate. The reason why I USED to play those types of video games is that inevitably I had to find a walk through to tell me how to solve the puzzle which takes the fun out of it. So I was at a loss on how I could take this idea and translate it into something I would be able to construct without a degree in advanced engineering. That’s when I was fortunate enough to have someone come to the rescue.
In the above video the solution ends up being that the key doesn’t matter and an adjustment on the lock itself is what allows it to open. Here’s where the suggestion came in.
There is a YouTube video where a gentleman was trying to understand a Tesla Valve so he decided to print a 3-D model. The basic idea behind the valve is that it allows things, gases or liquids, to flow in one direction but not the other. ( Here is a link that explains it in greater detail https://www.youtube.com/watch?v=tcV1EYSUQME ) Well if we know that the valve can be 3-D printed, why not use that as the way to release the lock?
While I still think it may be above my pay grade, it does open up the possibility of a way this could be created using a 3-D printer.
https://www.pinterest.com/pin/527132331357390347/?lp=true
The other type of puzzle that caught my eye was the wooden puzzle. If you look at the different puzzles I’ve pictured, the thing that really stood out to me was how broad the style is. While you still have the aspect of your typical jigsaw you can also see how varied the puzzles can be. In the case of the frog you can still see the haphazard edge that you are used to seeing, but they are designed in such a way that it allows them to not only create the shape, it is also able to stand. The cats are literally wooden cat figurines that in one case can interlock to all rest on a single piece. The North America shape is able to hold animal cut outs that at first glance probably looked like wouldn’t fit into such a confined space. And the last image uses variations of the same shape fit together.
To me this speaks to a flexibility that you don’t normally see in puzzles. Whereas other puzzle types limit your imagination this type of puzzle demonstrates that the possibilities are endless.
Thingiverse Puzzle Print
So as you may have noticed from previous postings I like jigsaw puzzles. So when I went on Thingiverse looking for something to print and came across this little gem (see below) I felt an immediate draw. I love the way that you have these pieces that look completely different, yet somehow they fit together to create a square.
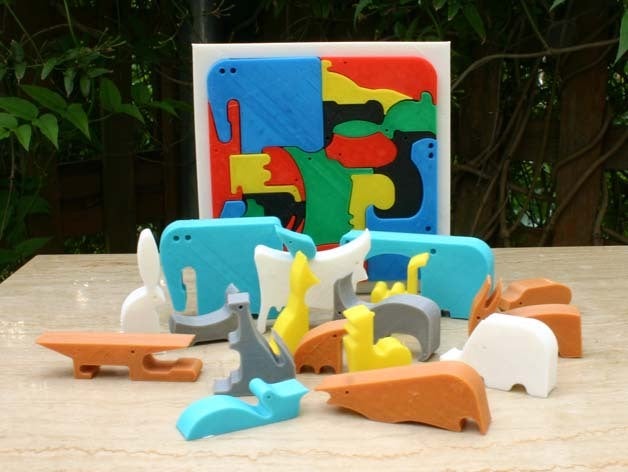 (18animals puzzle by onepointdiy https://www.thingiverse.com/thing:357444 )
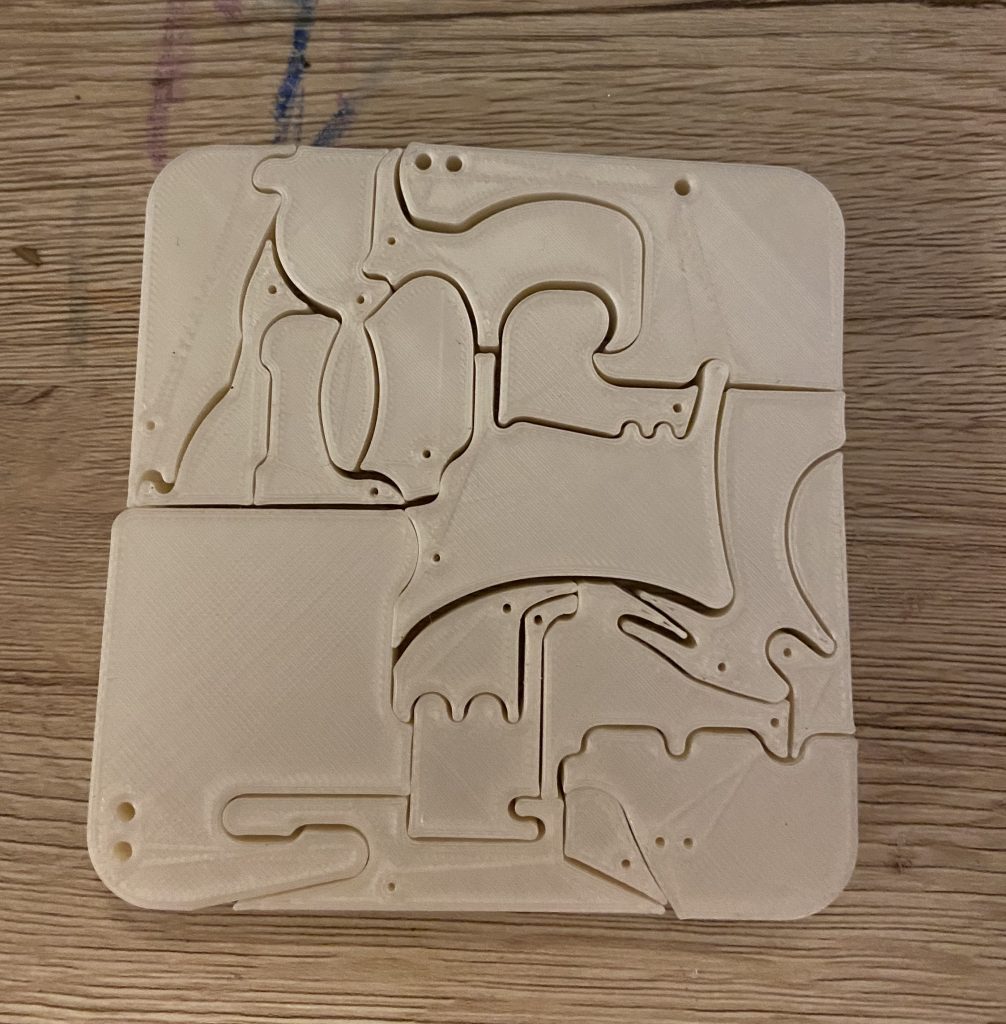
While I love the concept, I wasn’t quite as impressed with the final product. The print job took a while because it is so thick, so it definitely something that you have to wait around for. But my biggest issue is that the pieces came out very loose fitting. So I had a hard time moving the puzzle off the tray, and has led to some pieces getting temporarily lost. https://www.thingiverse.com/make:754349
Tinkercad Cube Puzzle
This was a definite challenge for me. I had the hardest time figuring out the concept of even creating the pieces much less how to put them together to create a 3-D cube. After a while I really started to feel like you need a degree in Engineering to do this. So, I called someone who originally went to college to study Engineering, my brother. This actually ended up being really helpful because we discovered that I am completely hopeless at thinking in three dimensions, which led him to giving me a different approach and badda bing badda boom I was able to create a puzzle. (He was able to create an entire puzzle just for fun in the time it took me to create the first piece, but I did it and that what is most important.)
So this is my design.
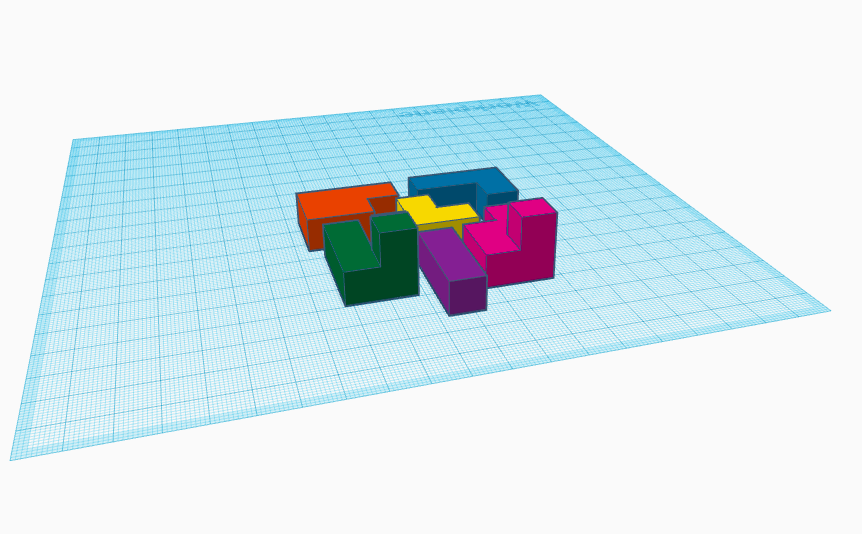
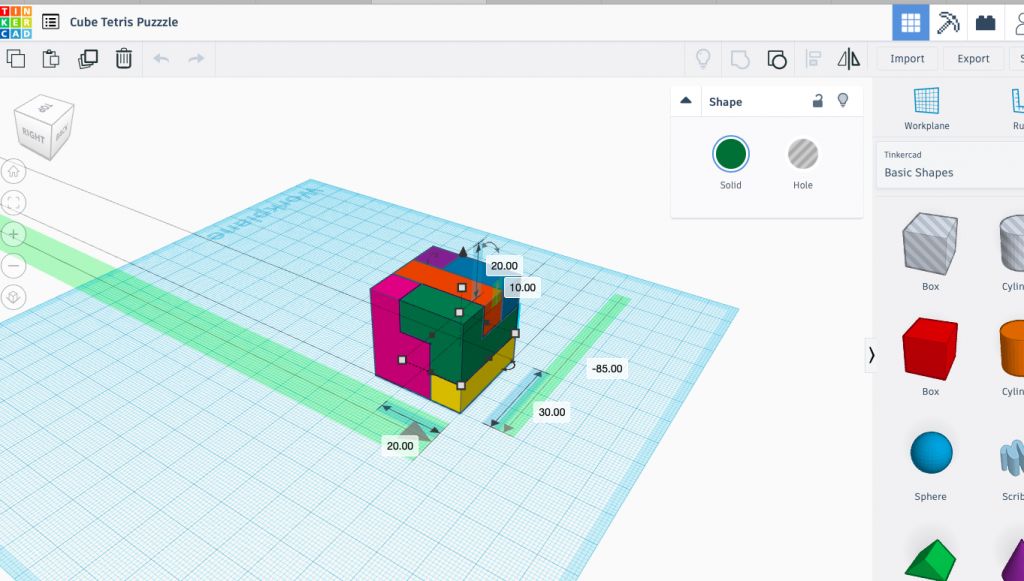
For the most part printing was pretty straight forward. I had a couple minor snafus figuring out exactly how things should be set up in the system. But when it came time to actually take it off I was absolutely terrified because it was sticking and for a minute I genuinely thought it either wasn’t going to come off or it was going to come off in broken pieces. But it finally released with only minor issues.

And here we have my nice completed 3-D puzzle. Ironically, even though I literally created this puzzle, I still had trouble piecing it together. I guess I really can’t see in three dimensions…lol.
Cube Puzzle Iteration
My puzzle does go together, so I approached this from the perspective of not so much what doesn’t work, as what don’t I like because ultimately I’m not happy with the final product.
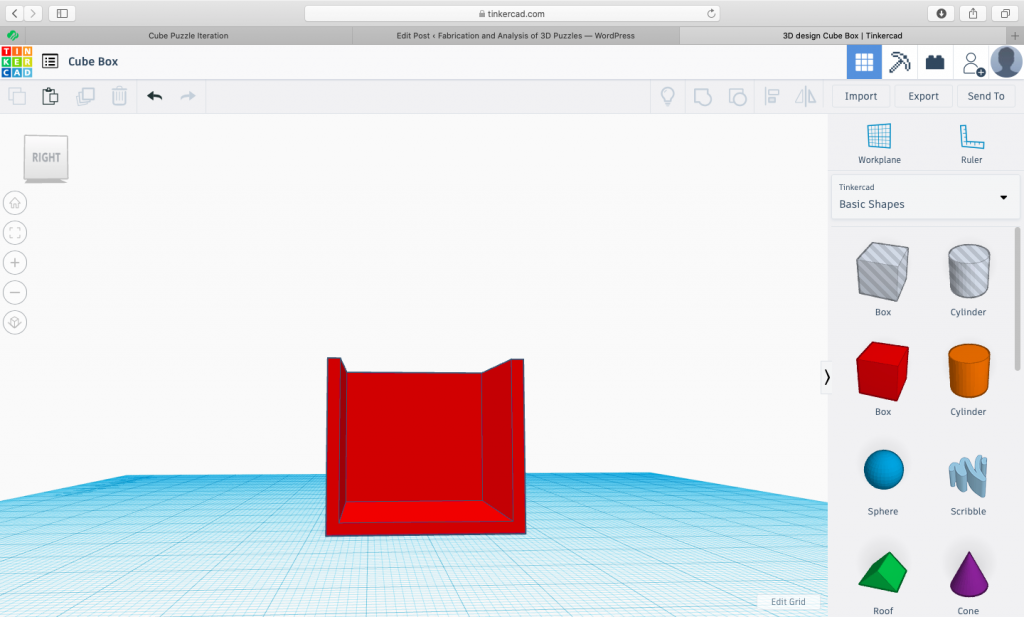
First, I need some kind of enclosure. Trying to hold the pieces together while I put them together is absolutely maddening. So I created something that is essentially a hollow cube, with two of the sides missing. What I thought was going to be a really simple fix turned out to be anything but. Trying to figure out the measurements to have a space that was open enough to allow for the puzzle to comfortably fit, while not being so large that it just kind of floats inside was a headache. When I created the puzzle I used the boxes of the Tinkercad design tool to help with measurements and alignment. So that meant that when I was trying to piece together the enclosure I had to do it free hand. My end product turned out too small, way too small.

The other thing that bothered me was that one little straight piece. When I think of a puzzle I think of x number of pieces that can mesh together to create a finished product. For five out of the six pieces that holds true, but then you have this last little piece that almost seems like an afterthought. “Oh wow, I have this empty spot left over I just need to fill it with something.” But here’s the funny thing about that, my fiancé does the puzzle and he thinks that the oddball straight piece actually works for the design. It gives the illusion of ease, when in fact he thinks my little six piece puzzle is frustratingly difficult and I need to find a way to make it a little easier. Which means that I’m kind of stuck in that proverbial spot of rock and a hard place. Do I make adjustments to the design, and if so how? Or do I leave it alone and maybe just see if using multiple colors will make me feel more satisfied? This isn’t something I can just come up with fix for because I’m still not sure what exactly is bothering me. On a side note in trying to tweak my Cube Exploded, I somehow managed to completely alter the file and it is now just one piece instead of the full six. So before I can do anything, I need to either recreate the original file, or find a way to bring it back.
For the moment though my puzzle is up and ready to go on Thingiverse.
https://www.thingiverse.com/thing:4128923
And I will continue tweaking the design and revising the upload until I am happy with it.
Cube Puzzle Wrap Up
Okay everyone, buckle up because you are about to go for a log winding ride through my last few days in trying to make my puzzle better. Not perfect, because I am nowhere near skilled enough to navigate any program well enough for that, but at least a little more workable puzzle.
Without further ado here is a literal collage of things that I have been doing.
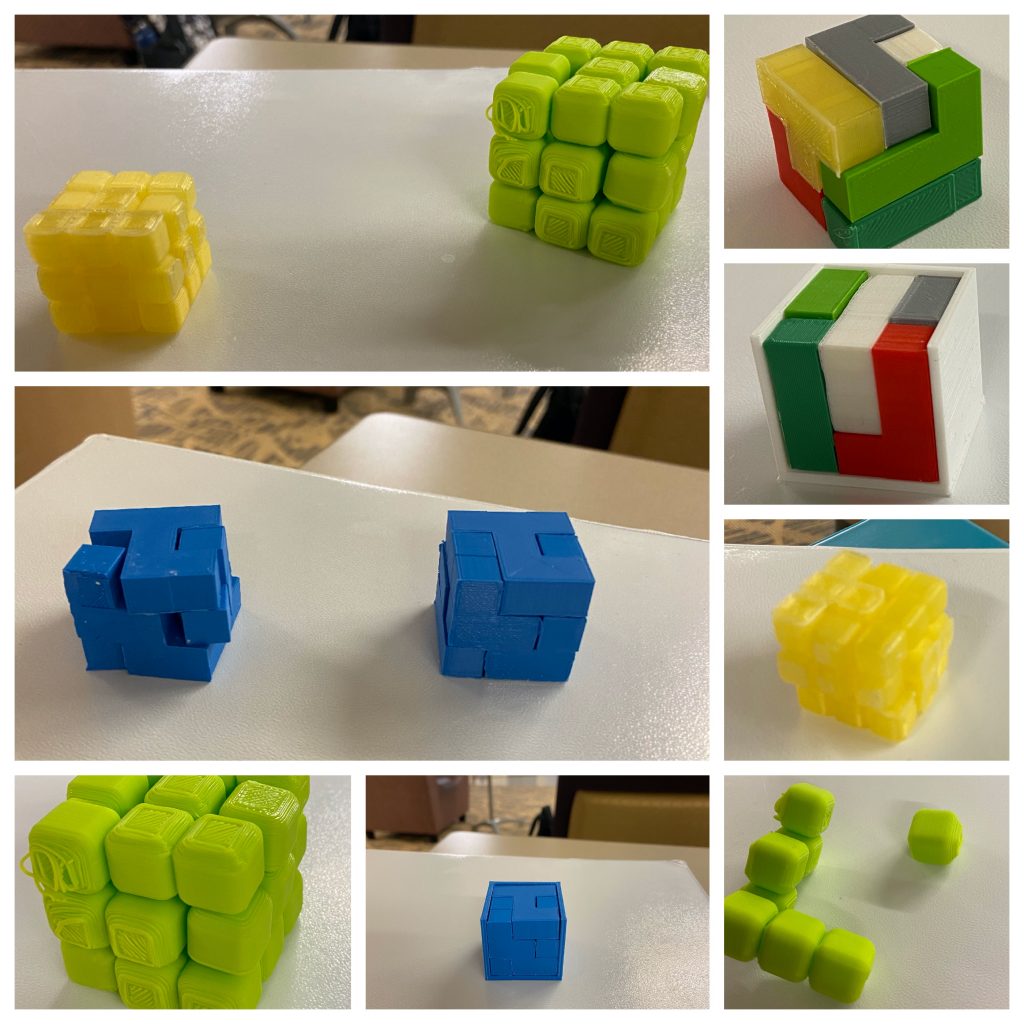
First (top right) I tried recreating the puzzle, but using multiple machines to try and bring in a little color. While it did help a little as you may notice the machines were very heavy in variations of the color green, so I was left feeling like I had created an homage to the flag of Italy. Don’t get me wrong I’m all about sending love to my ancestry but it it didn’t give me warm feelings, and it still fell apart really easily. Sooooooo, I decided to fix my box. (top middle right)
It did help….a little. My measurements were still a little off so the pieces just slid back and forth. Oh and that %^$* straight piece would just decide to you know, fall out. I was nowhere near happy with my final product.
So then came the great redesign (bottom middle right). I basically took that irritating straight piece apart and added its components to the other five pieces, and went from having true squares as my base to a more rounded shape. As I am sure you can see, calling that a disaster is an understatement. Not only are the pieces barely cohesive, but well they don’t really fit together.
Okay, maybe it’s just the odd ball shape, let’s go back to the true square shape. (middle left) I feel like this picture does not truly give justice to the mind numbing hours I spent trying to get this to work. Somehow, and I am still baffled as to how exactly it happened, my measurements would just up and change or a piece that was fused to its buddies in perfect alignment was suddenly .5 mm 0ff. While that may not seem like a big deal, it is, a very big deal and meant that the pieces would ultimately not fit. What you see before you is the 1st and last prints. Not the multiple copies I had to print because pieces just don’t fit, or the times the printer decided it didn’t like me. Even though I did finally get a copy that would fit together without too much force being applied, the pieces were still too loose and didn’t want to stay together so I tweaked my measurements and made a new box (bottom middle) which does mostly keep it together.
Lastly I decided to try and see if I could make the first redesign work. I made sure everything was lined up as it needed to be and increased my scale to 150% (top left) when I printed which did improve the fit. But as you can see (bottom left) there are some whispies where the machine spooled while printing, and one of squares decided to remove itself from the piece it was supposed to be attached to. (bottom right)
At this point I must sadly say that if I never see another version of any of my plans it will most definitely be too soon. Speaking of plans, heres a few pictures showing the changes I made.

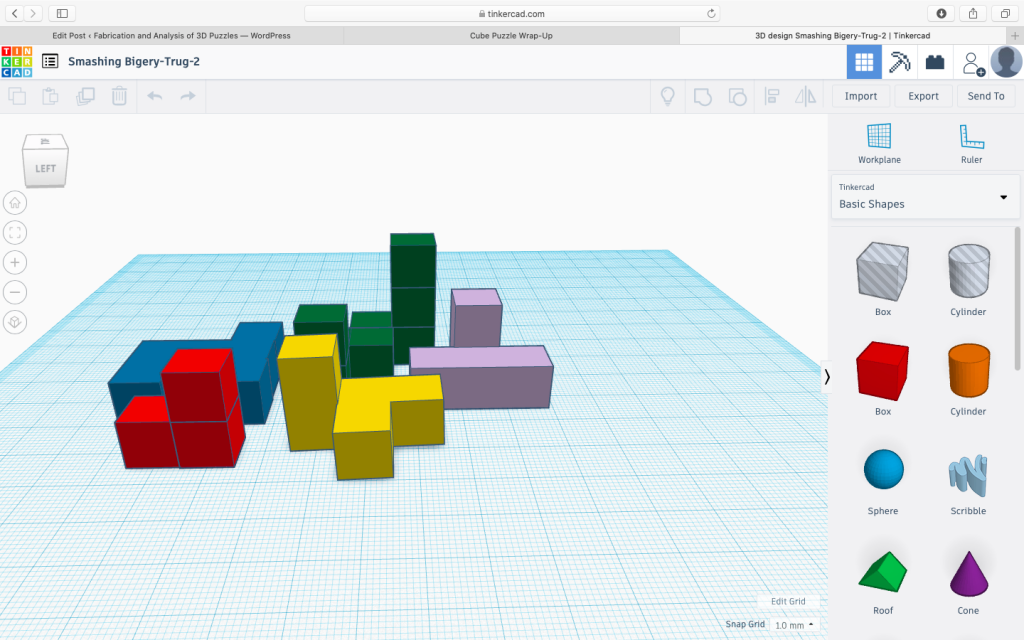

I have also uploaded the schematics for all of these designs to the original puzzle on Thingiverse, please feel free to print them off and if you have any ideas I’m all ears. https://www.thingiverse.com/thing:4128923
Ultimately, even if I may not be completely happy with the final designs (why won’t they fit together more snuggly…..grrrrr), and I am sure a created some very unique expletives between f-bombs, it was a definite learning experience. Having to deal with the misalignments that seemed to randomly appear out of nowhere, I became more proficient using the alignment tool and ruler. I learned that there is value in not just viewing the image from multiple angles, but zooming in as much as possible because two pieces may look like they are touching when in fact there is a small gap which will effect the final print. All the printing difficulties I encountered led me to experimenting with both the Ultimaker and Lutz on infill density and pattern, adhesions, and scaling. All of these may come in handy when it comes time to design and create a more complex project, and give me room to explore variations that could create a better final piece.
Personal Project Pitch
As you may have noticed from reading my postings I enjoy jigsaw puzzles, so I would like to attempt to make my own. Right now I have two different ideas that center around a Celtic design I found online that I am tossing back and forth
- The first one is to take the tessellation pieces and adapt the shapes so that they form a box.
- The other idea is to take the 2-D image and upload it so that the designs inside are 3-D. Each piece will be colored so that the key will be to put the pieces together in the right order so that you have a blended effect. I am thinking of doing a rainbow design across the shape so that the individual colors will actually be in more than one place, hopefully making it a little more difficult
Previous Knowledge
From what I have been able to figure out so far both options are going to require me to do some image editing before I can even get to the point of making it 3-D. For the first option, I need to alter the size to either make the sizes smaller or larger (not sure which yet) so that all of the pieces will actually fit together with no empty spots. For the second I need to isolate one individual shape so that I can then go in and determine the dimensions needed to allow the images to appear.
Either way, I go it is going to be a jigsaw style puzzle. While I have a hard time thinking in 3-D, I am fairly competent with picture recognition. So when I look at an image I can see what is missing, and how it should fit into the overall picture. I think this will help me to see how I need to adjust a piece for the box, or what colors need to be where on a 3-D puzzle piece.
While I don’t have much experience with it, I have used programs like Adobe in the past. I think starting in this or a similar program will help me to cut my large scale picture down to a single image that I can then use to start my manipulations.
Lessons Learned
The biggest lesson I learned from doing my Tetris Puzzle is to pay close attention to spacing. Two pieces may look like they are touching when in fact they are a fraction of a millimeter apart which will completely throw off your design. The other lesson I learned is the value of considering how you set up the printer to create your pieces. Some pieces due to their shape need more internal support in order to create the desired design, so you need to try different infill sizes and patterns. Having or not having supports and adhesions seems like a very minor thing but it can mean the difference between a print that stays together in the way you designed and the filament spooling .
The Unknown..
There are so many things that I am completely clueless about. What is the best way to create an image to isolate? Should I use a digital imaging program or cut it out and scan it into the computer? How do you create a piece for a corner? Is it better to have one piece that bends, or create it as to separate pieces that fit together? What is the best way to determine the correct heights and depths to allow for the images to show up within the individual pieces? And I guess the biggest unknown is whether I can actually pull either of these off. While I have resources I can utilize (I have already made the calls) this is not going to be a quick throw it together project and requires precision either way I go. While a failure is just as important as a success, I have to ask if I am setting myself up for one?
Fusion 360
Let me start off by saying that this is by far not my favorite program in the world. While I was able to create some designs that came out looking cool, this is definitely not the most user friendly for someone who doesn’t have a lot of skill with design. So without further ado…

To make it easier to discuss I used the appearance tool to change the colors for each object.
- The two coils were supposed to have a tornado effect, but as you can see I couldn’t get them to line up right to make that happen.
- On the top left you have a wood colored piece and on the top right is a slate gray colored piece. Both of these were made using the shell tool and a cylinder. In the case of the wooden piece I attached it to a smaller cylinder to create a candle stick holder (or at least that’s what it reminds me of) and the gray piece has a torus on top. I was never able to figure out how to divide the piece in half because it was supposed to have a bucket design.
- My red and black/green pieces are both sphere shaped. I again used a torus shape and created a planet.
- The brass colored and white blocks started out as cubes and I used a few different tools to manipulate their shapes. For the while one I fileted the edges and for the brass one I used the hole tool to create indents, after a while I noticed a pattern and well made it into a dice.
- The tan and green piece is kind of a mutt so to speak. I just kept clicking on this tool or that tool, so lets see if I can remember them all. Two cubes, lofted, with a hole cut out of the underside of the shape.
- Which just leaves the odd ball pieces that were made using the sketch tool. I just basically created random points that I connect back to the beginning. Although in the case of the marbled piece I am still not sure how exactly I created the curve.

With this group I managed to get a little more daring.
- I made another coil, but this time I worked on making it look a little more spring like and a little less chaotic.
- The red piece started out as just a cube but I pulled up one plane using the draft tool, which almost allowed me to create a triangle.
- The yellow piece is two torus shapes that were manipulated to face different directions and then combined to make a chain. My original plan was to try to create several pieces together but I had trouble figuring out how to make them the size I wanted, and getting them to line up right created some hiccups.
- The grey cylinder above it has threading attached, which actually has a cool design.
- Right above it I made two cube on top of each other, then used the loft to connect two sides and the filet tool to round the remaining sides. I want to try and print this one, but unfortunately once we created the 3-D image it would difficult without some serious supports added.
- The white piece on the far side is my test tube stopper. I used the sketch tool to create two overlapping circles. The top circle was then lifted off the plane and I used the loft to connect the two before adding a hole in the center.
- On the top right I used the sketch tool to draw out a star shape then extruded it to add depth.
- It’s hard to read but the bottom image was made using sketch and the text tool. The phrase says “Keep Being Curious” and has a reflection image beneath it.(this was done by creating an identical sketch below it and using the flip option) Unfortunately, it didn’t turn out the way I had hoped. For one I wanted the top image to be angled forward, and I was also never able to figure out exactly to attach the two images to each other.
- The blue piece was again made using sketch and then once I made the left side I used the mirror option to make a duplicate to right, which I then connected and extruded. It actually came out better than I expected.
- The last one in green was actually created before the blue piece and was where I made my mistakes. First I created a sketch with the fixed point spline. After closing the sketch window I extruded it and THEN tried to make a mirror image. (this was oh so very wrong and I would come to regret this decision) If I thought lining up the rings was hard, this was torture. Finally after much trial and error and many…many….undo’s my dear sweet wonderful brother was able to talk me through using the align tool (I hadn’t been clicking in the right spot before) and I was able to get everything to line up the way it was supposed to. Finally, after barely resisting the urge to start beating my head on the desk I had an image that could be converted to a 3-D imaged and emailed to my brother to print off. Please meet, my butterfly….thing.

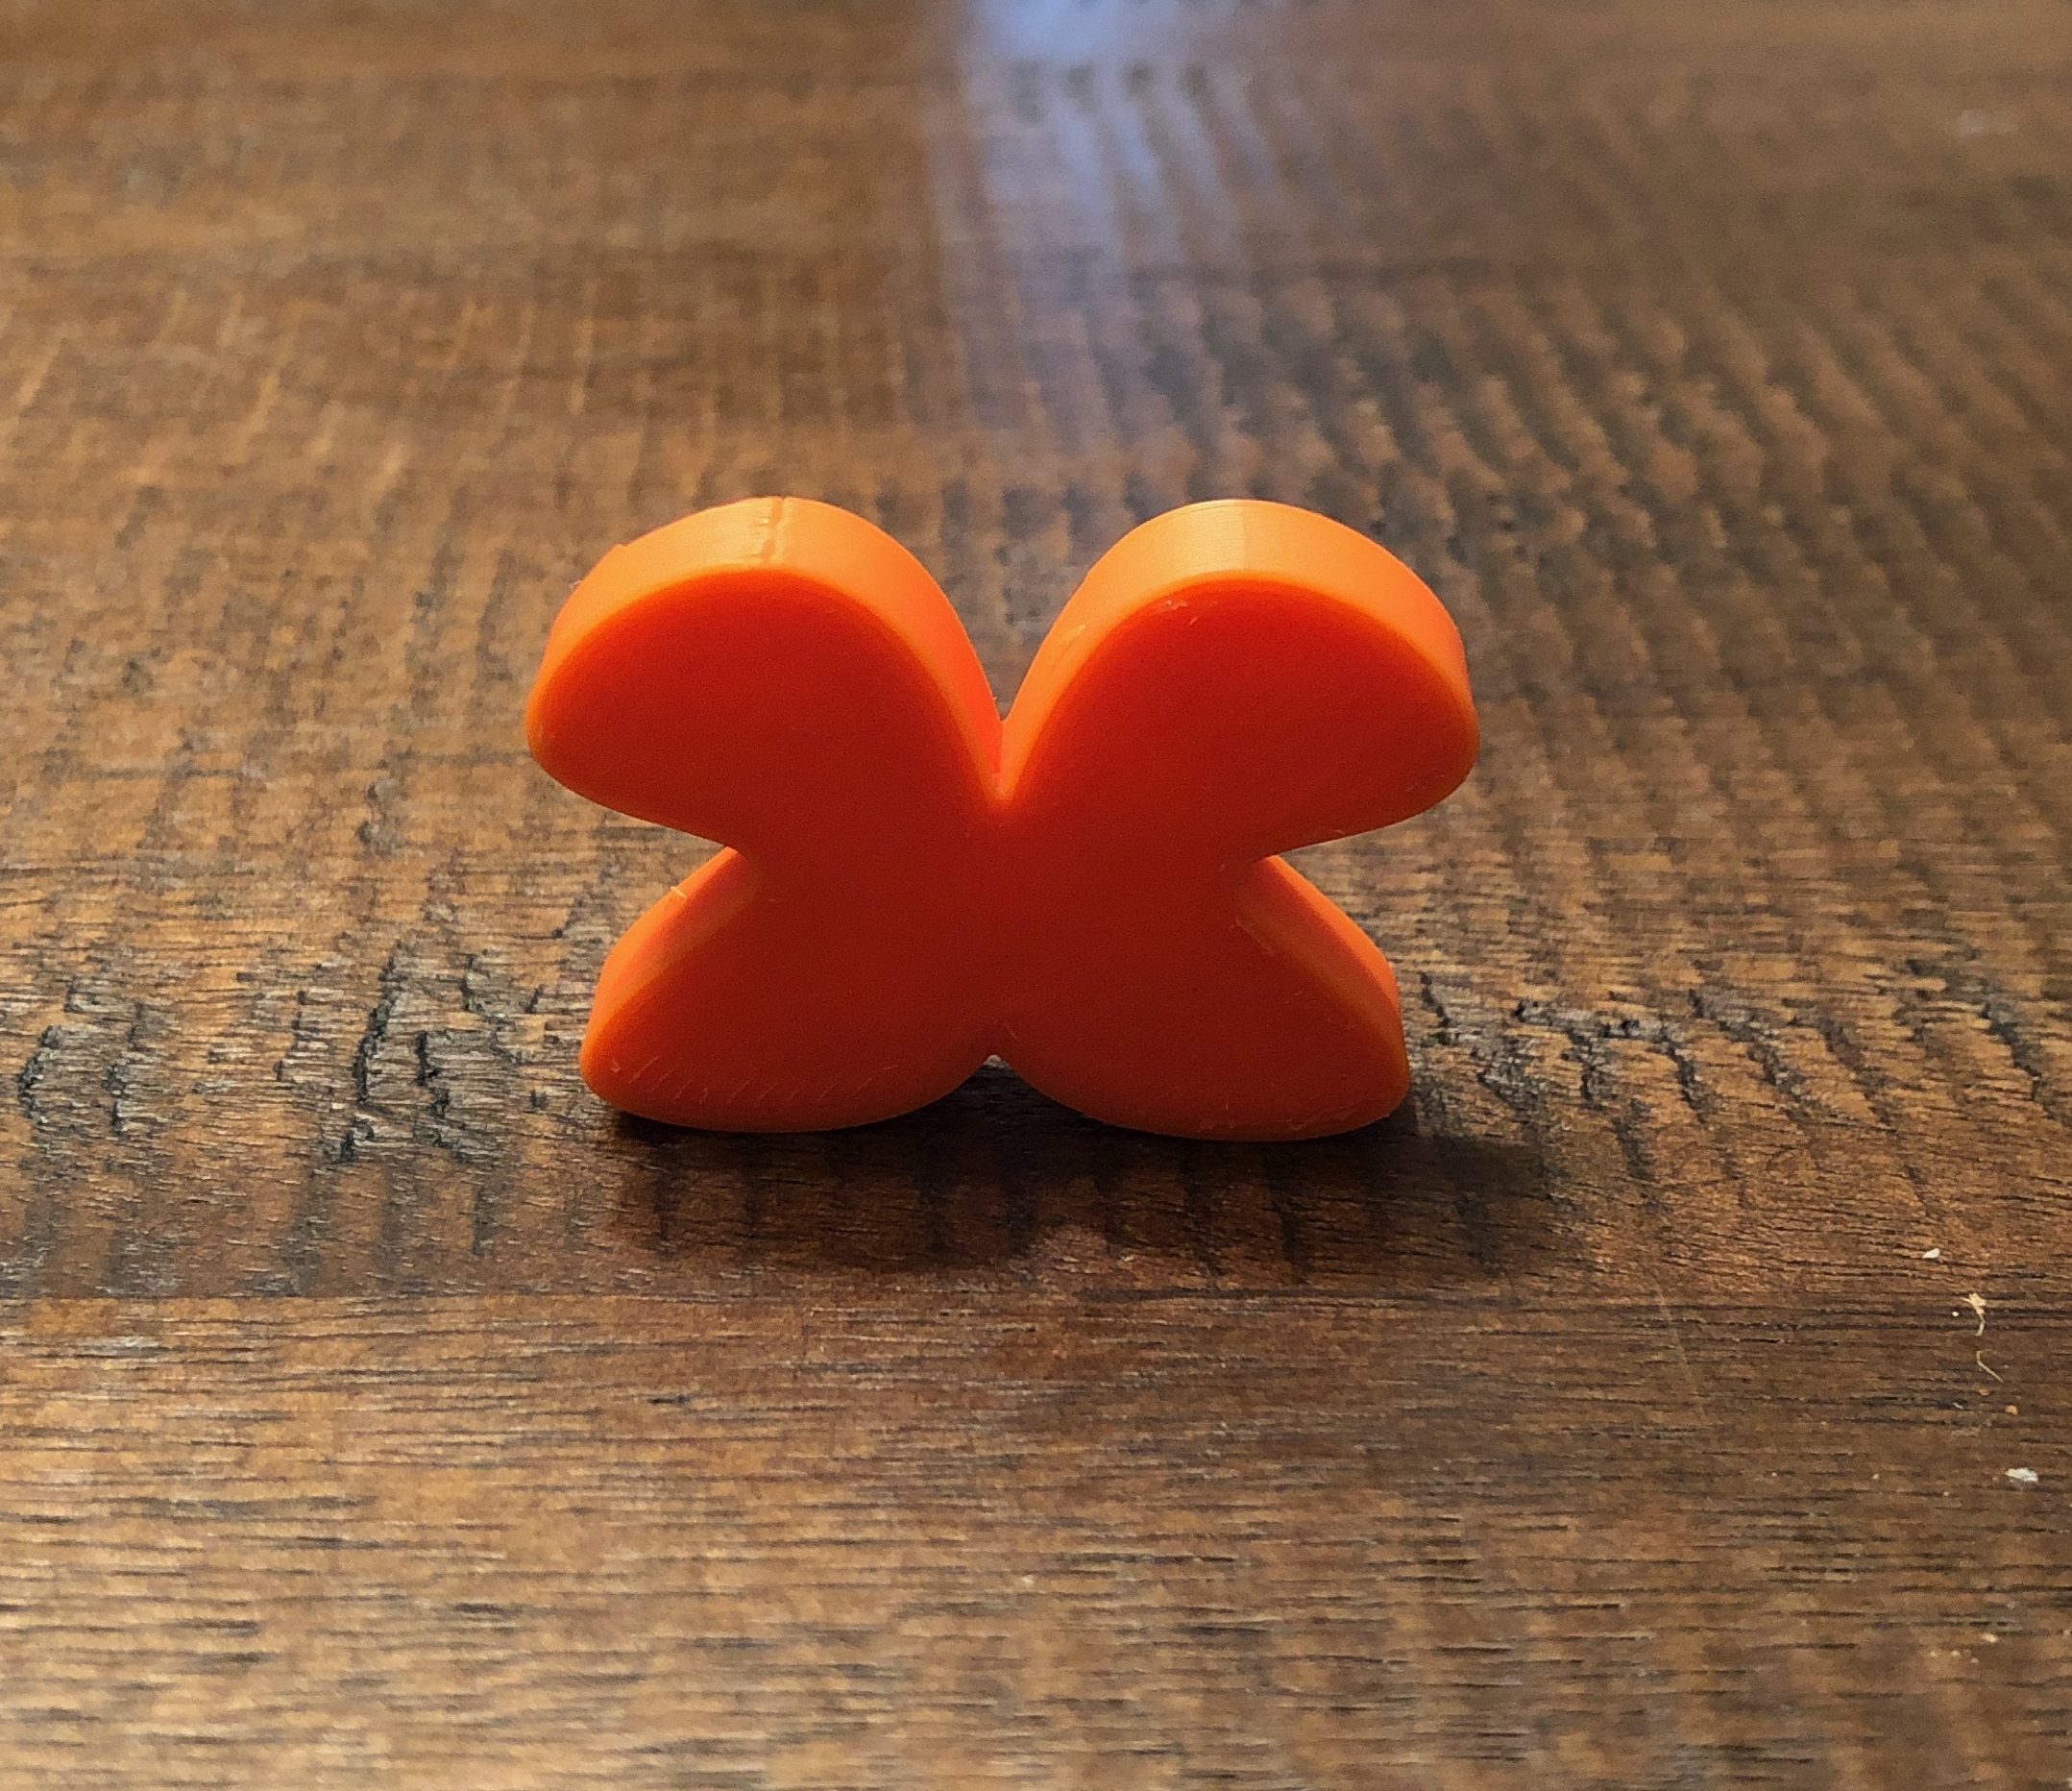
Ain’t it pretty?
As you may have noticed I used the sketch tool a lot. For me it made it so much easier to create the initial shape that I was looking for, which I could then manipulate to create something totally new. The solids selection was really limited, so it made the pieces I could create just as limited. It’s not a terrible program, and over time I did figure out how use several features such as sketch, mirror, align, extrude and connect. I did play around with filet, hole and press pull some but had a hard time figuring out exactly what do and most of the time it felt like I got lucky more than anything. My brother thinks it may be useful when I am working on my final project, so I might decide to come back and play around a little. For the moment though, I think I am going to close the book on Fusion.
Digital Fabrication in the Makery
My idea for the cube version of my puzzle is to have the outside of the pieces printed on the 3-D printer but to have the design created with some other medium. So what better time to start trying things out.
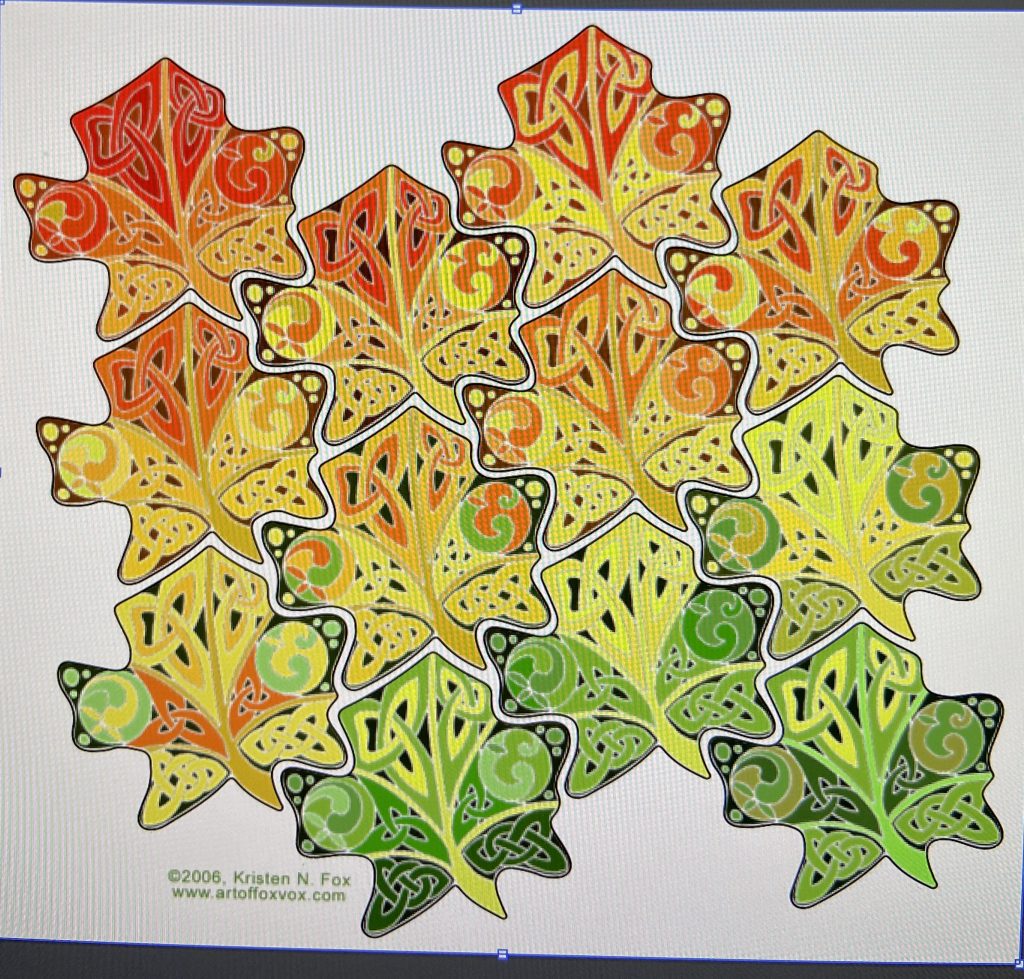
To start I uploaded my picture into Adobe Illustrator. Then, with the help of one of the lovely people working there, I created a silhouette of the leaves. We then uploaded a second colored image that was lined up over the silhouette. If you look closely you can see a little bit around the outline. Doing this allowed the laser to print out the design (the color image) as well as cutting out the leaves themself (the silhouette) Once we were finished we saved it as an .svg file and uploaded it to the web for the Glowforge to print off.
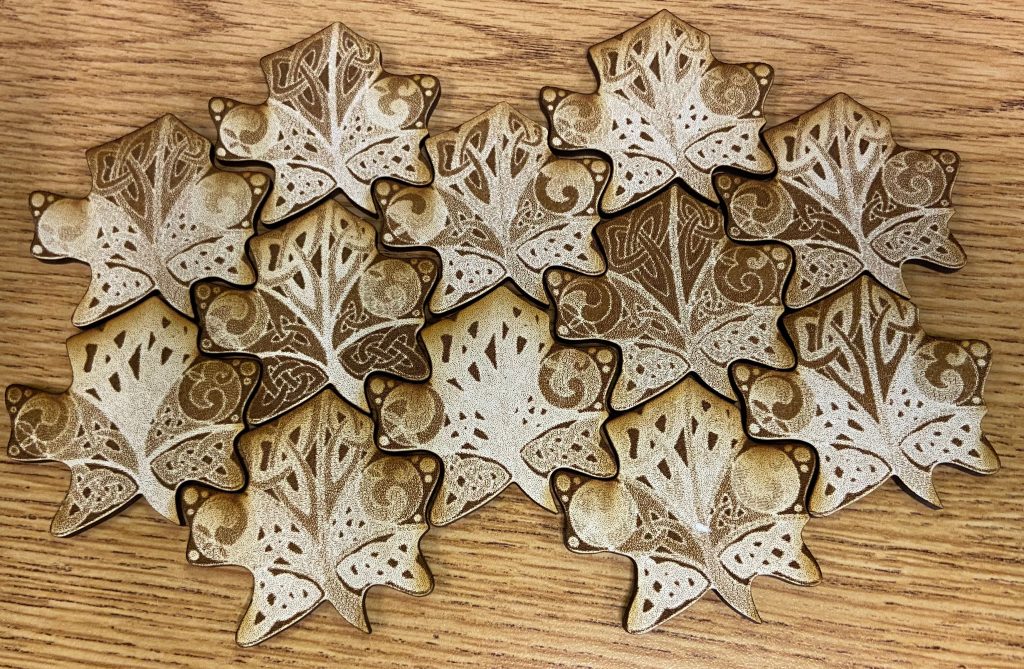
And this is how it turned out.
While it’s not as tight-fitting as I would like, this did actually help me with both puzzles. I had a better idea as to what sizing I want for both puzzles’ pieces, but I am also able to see that I don’t need the lines between the leaves in order to have a workable puzzle.
I haven’t decided though if this is the medium that I ultimately want to use. On the one hand, the “burned” effect is interesting, but on the other hand, I’m not sure if that’s the effect I want for this project.

