Hello!
You can find me online at the following links:
Thingiverse Puzzle Print
My first print via Thingiverse taught me a surprising amount about 3D printing. I first tried to print a cubic puzzle, which failed pretty miserably because of user error (me). My second attempt was a scaled down one-by-two-by-two Rubix-cube-esque puzzle, which also failed… twice.
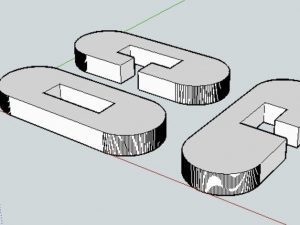
My fourth and only successful print was a small puzzle I found that was aptly named, “Simple 3D Puzzle – Printable!” by a designer from Ireland with the username cathalgarvey. This time around I made sure to use a Raft so that the printed object stayed in place, unlike my first failure. I also made the detail slightly more fine so that the pieces actually fit together, unlike my second and third failures.
I love the look of this small and simple puzzle, and I enjoyed the two or three minutes that I spent putting it together. It is about an inch tall and consists of three small pieces that only fit together in one correct figuration.


Credit:
“Simple Puzzle Design” by cathalgarvey. Found on Thingiverse.
Here is my “Make” of this puzzle.
Initial Puzzle Research
A few years ago I got really into “puzzle boxes”. I couldn’t afford (and still can’t) any of the fancy and rare ones, but I loved watching people solve them on YouTube. When I signed up for this class, I immediately thought back to my initial interest in puzzle boxes. I like the idea of there being a reward to a #d puzzle, aside from the sheer satisfaction of solving it, so puzzle boxes are a good match.
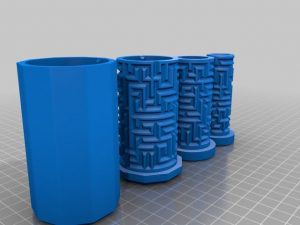
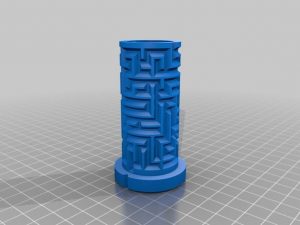
After a little research, I found two types of 3D-printed puzzles that are particularly interesting to me. The first is a type of puzzle box called a “Labyrinth” or “maze” puzzle box. I’ve attached a few images and a video below of an example I found that is akin to a Russian Doll. I like that in these particular models, you discover more of the puzzle as you twist and solve it (and that there could be something hidden inside it).
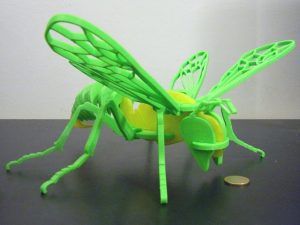
The second type of 3D puzzles that sparked my curiosity were more novelty/art. I really like the complex animals that I found one Thingiverse like this bee by user 3Dprintservisi. I particularly enjoy these kinds of puzzles, similarly to the boxes, because of the reward at the end. The final product is both pretty and fun, and I would love to make something like it.
Tinkercad Cube Puzzle
My first experience using Tinkercad as a 3D design tool could have been worse, and it taught me a great deal about how to improve my future designs. When I initially started brainstorming the cube puzzle, I wanted it to have a few elements that would set it apart from other cube puzzles, including pieces that would lock together, and a decent difficulty level. To make this puzzle work, I decided to use cones and “cone-hole” shapes attached to rectangular prisms. I hoped they would lock together and make for an interesting, tactile, and engaging puzzle.
Here are the ninepieces that made up my original design:
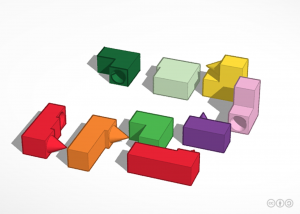
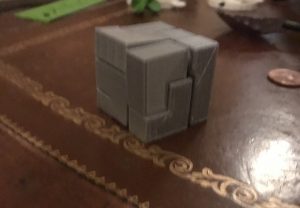
When I initially designed these pieces, I made them into a 3x3x3 cube, and then took them apart in Tinkercad. Notice that there are three identical L-shaped pieces with cutout cone-holes, and two identical stethoscope-looking pieces. Had I realized that there were so many identical pieces, I may have better understood how rough this puzzle design was. Here is a look at all of the pieces printed out.
 For my next iteration of this puzzle, I plan to make the pieces bigger and smoother. I also hope to fix the issue of the pieces not fitting snugly together. I noted earlier that when I made this puzzle, I first made a cube in Tinkercad, and then separated the pieces for printing. Funny enough, I was unable to put the cube back together after that. Here is a photo of the puzzle solved, which was done by my roommate Mānoa (he was the fifth person to attempt to piece together this rugged puzzle).
I am excited to continue working on this puzzle and making it more user-friendly and engaging.
Cube Puzzle Iteration
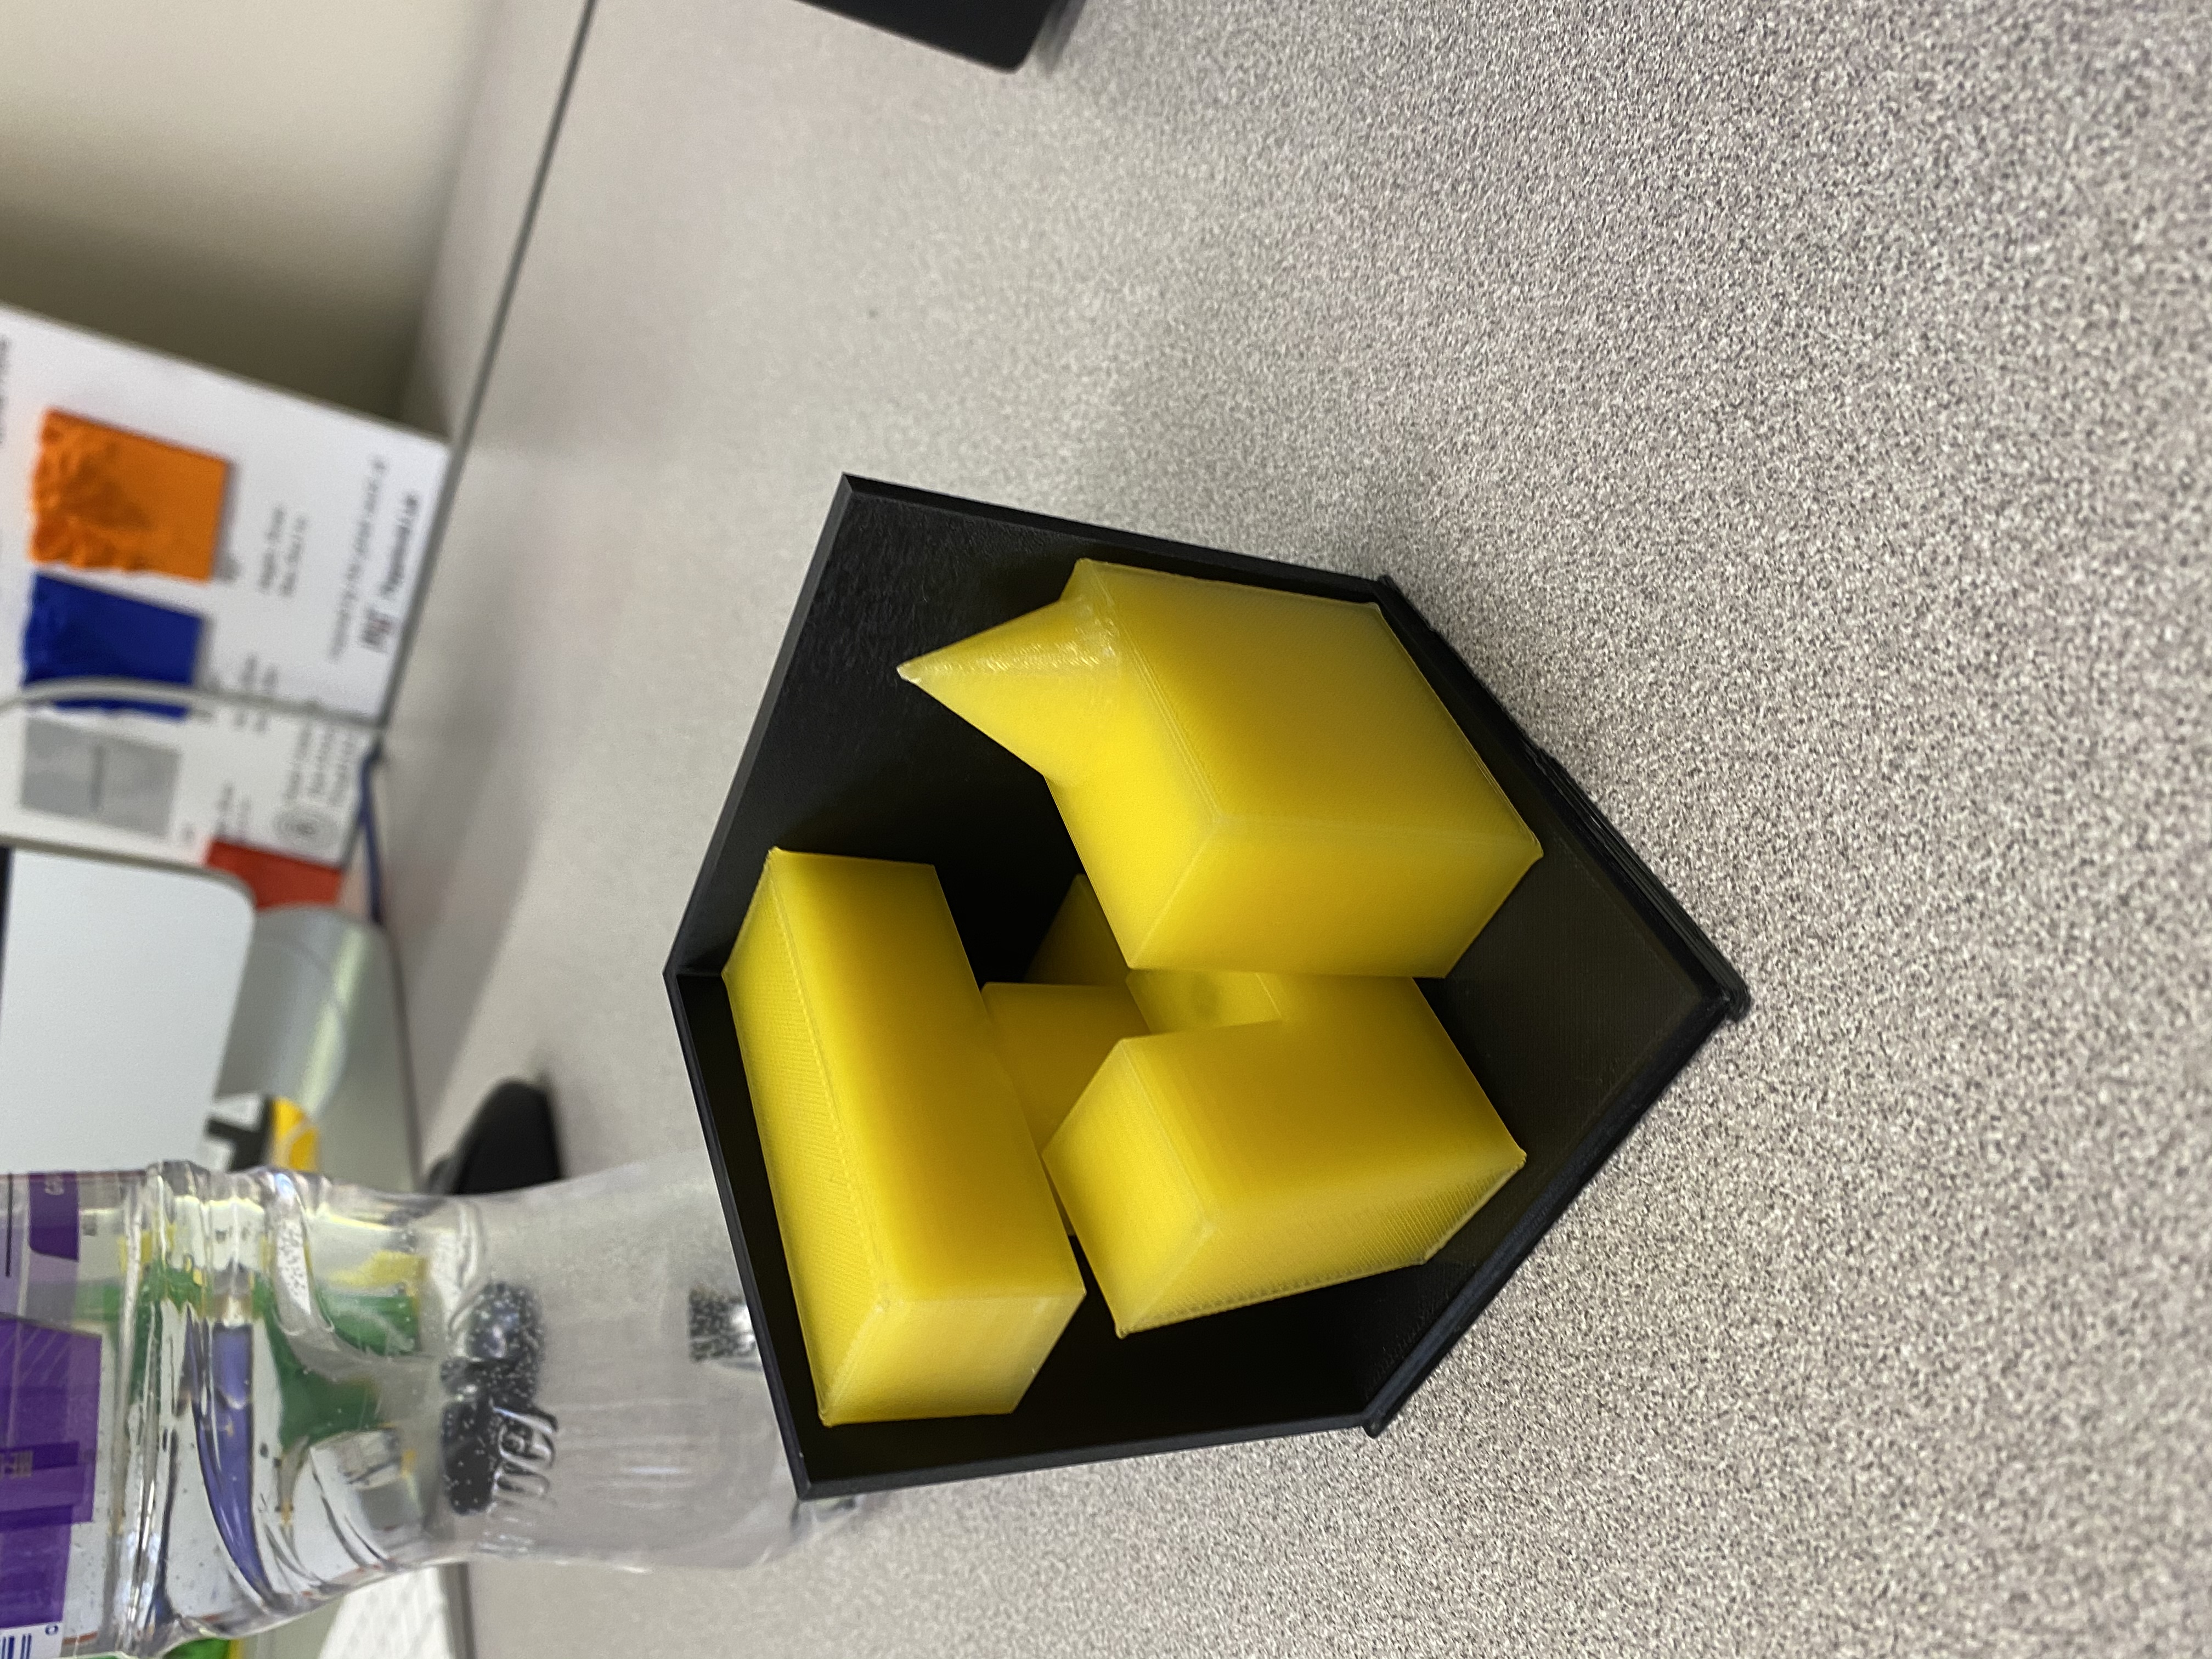
For my second take at this puzzle, I printed slightly bigger pieces with a different design. I kept the same general idea, but I hoped that these pieces would fit together better. Though I do not have a photo of the puzzle solved, I can say that it was much easier to solve than the first take at the puzzle, but it did not fit together as I hoped it would. I wanted this version to be easier to solve, more engaging and tactile, and actually hold together.

I let the printer take longer, and I used the ‘fine’ setting to ensure that the pieces would actually fit together. Unfortunately, I flubbed one of the pieces in Tinkercad, so it did not hold together the way I hoped it would. For my next iteration, I will use a stand with a central cone that will hold all of the pieces in place by holding on base piece still. I forgot to post the design to Tinkercad before finishing the wrap-up version, and I reworked the design before printing my final product, so I do not have a Thing to post. I plan on reworking this as well as the Wrap-Up later, even if I am not able to get points back. This project taught me a lot about time-management, especially my lack of smart planning.
Cube Puzzle Wrap-Up
I am planning on resubmitting this assignment at the end of the semester with the actual finished product. My final take at the Cube Puzzle fit together much better. I used larger pieces and printed a stand that held the pieces together. I waited too late to print this puzzle, and the printer failed over night, so I am missing half of the pieces.
Personal Project Pitch
For my personal project for this class, I would like to build a puzzle box that is shaped like a small piano keyboard. I have been fascinated by puzzle boxes for a long time, and would love to make my own. In my mind, the box would open either by 1) a series of notes played on the keyboard in succession, or 2) one chord made up of four or five notes played simultaneously.
I have a decent understanding of how 3D modeling software and printing works now. Other than a weak understanding of how puzzle boxes work, I know next to nothing about locks, which I look forward to learning about. I am a student in the School of Music, so my project is built around an instrument that I have a pretty strong understanding of. Luckily, I took a music technology course a few years ago that introduced me to the fundamentals of MIDI-control, which will be super important moving forward.
This class has already taught me a great deal about how to research and what resources to use. I am pretty sure that I will be able to solve many of the problems I run into using the resources available to me thanks to this course. The Cube Project also provided me with some trouble-shooting skills and tips that will surely come in handy.
To be able to to make this project, I will need to better understand how the basic mechanics of locks work. I have a loose idea at the moment, but I will need to learn how different kinds of locking mechanisms function to pick the best one for this project. I also need to research puzzle boxes more to understand what makes them appealing and engaging. I have a feeling that I will need to learn how to engrave, and will likely use other tools in The Makery that I haven’t yet worked with. This project will definitely be challenging, but I am excited to learn and create with new tools. I also don’t know much about electronics, and I am not sure how I will get the keys to make noise.
20 Things in Fusion 360
I enjoyed exploring the creation and modification tools in Fusion 360. Below are all of the shapes I created:
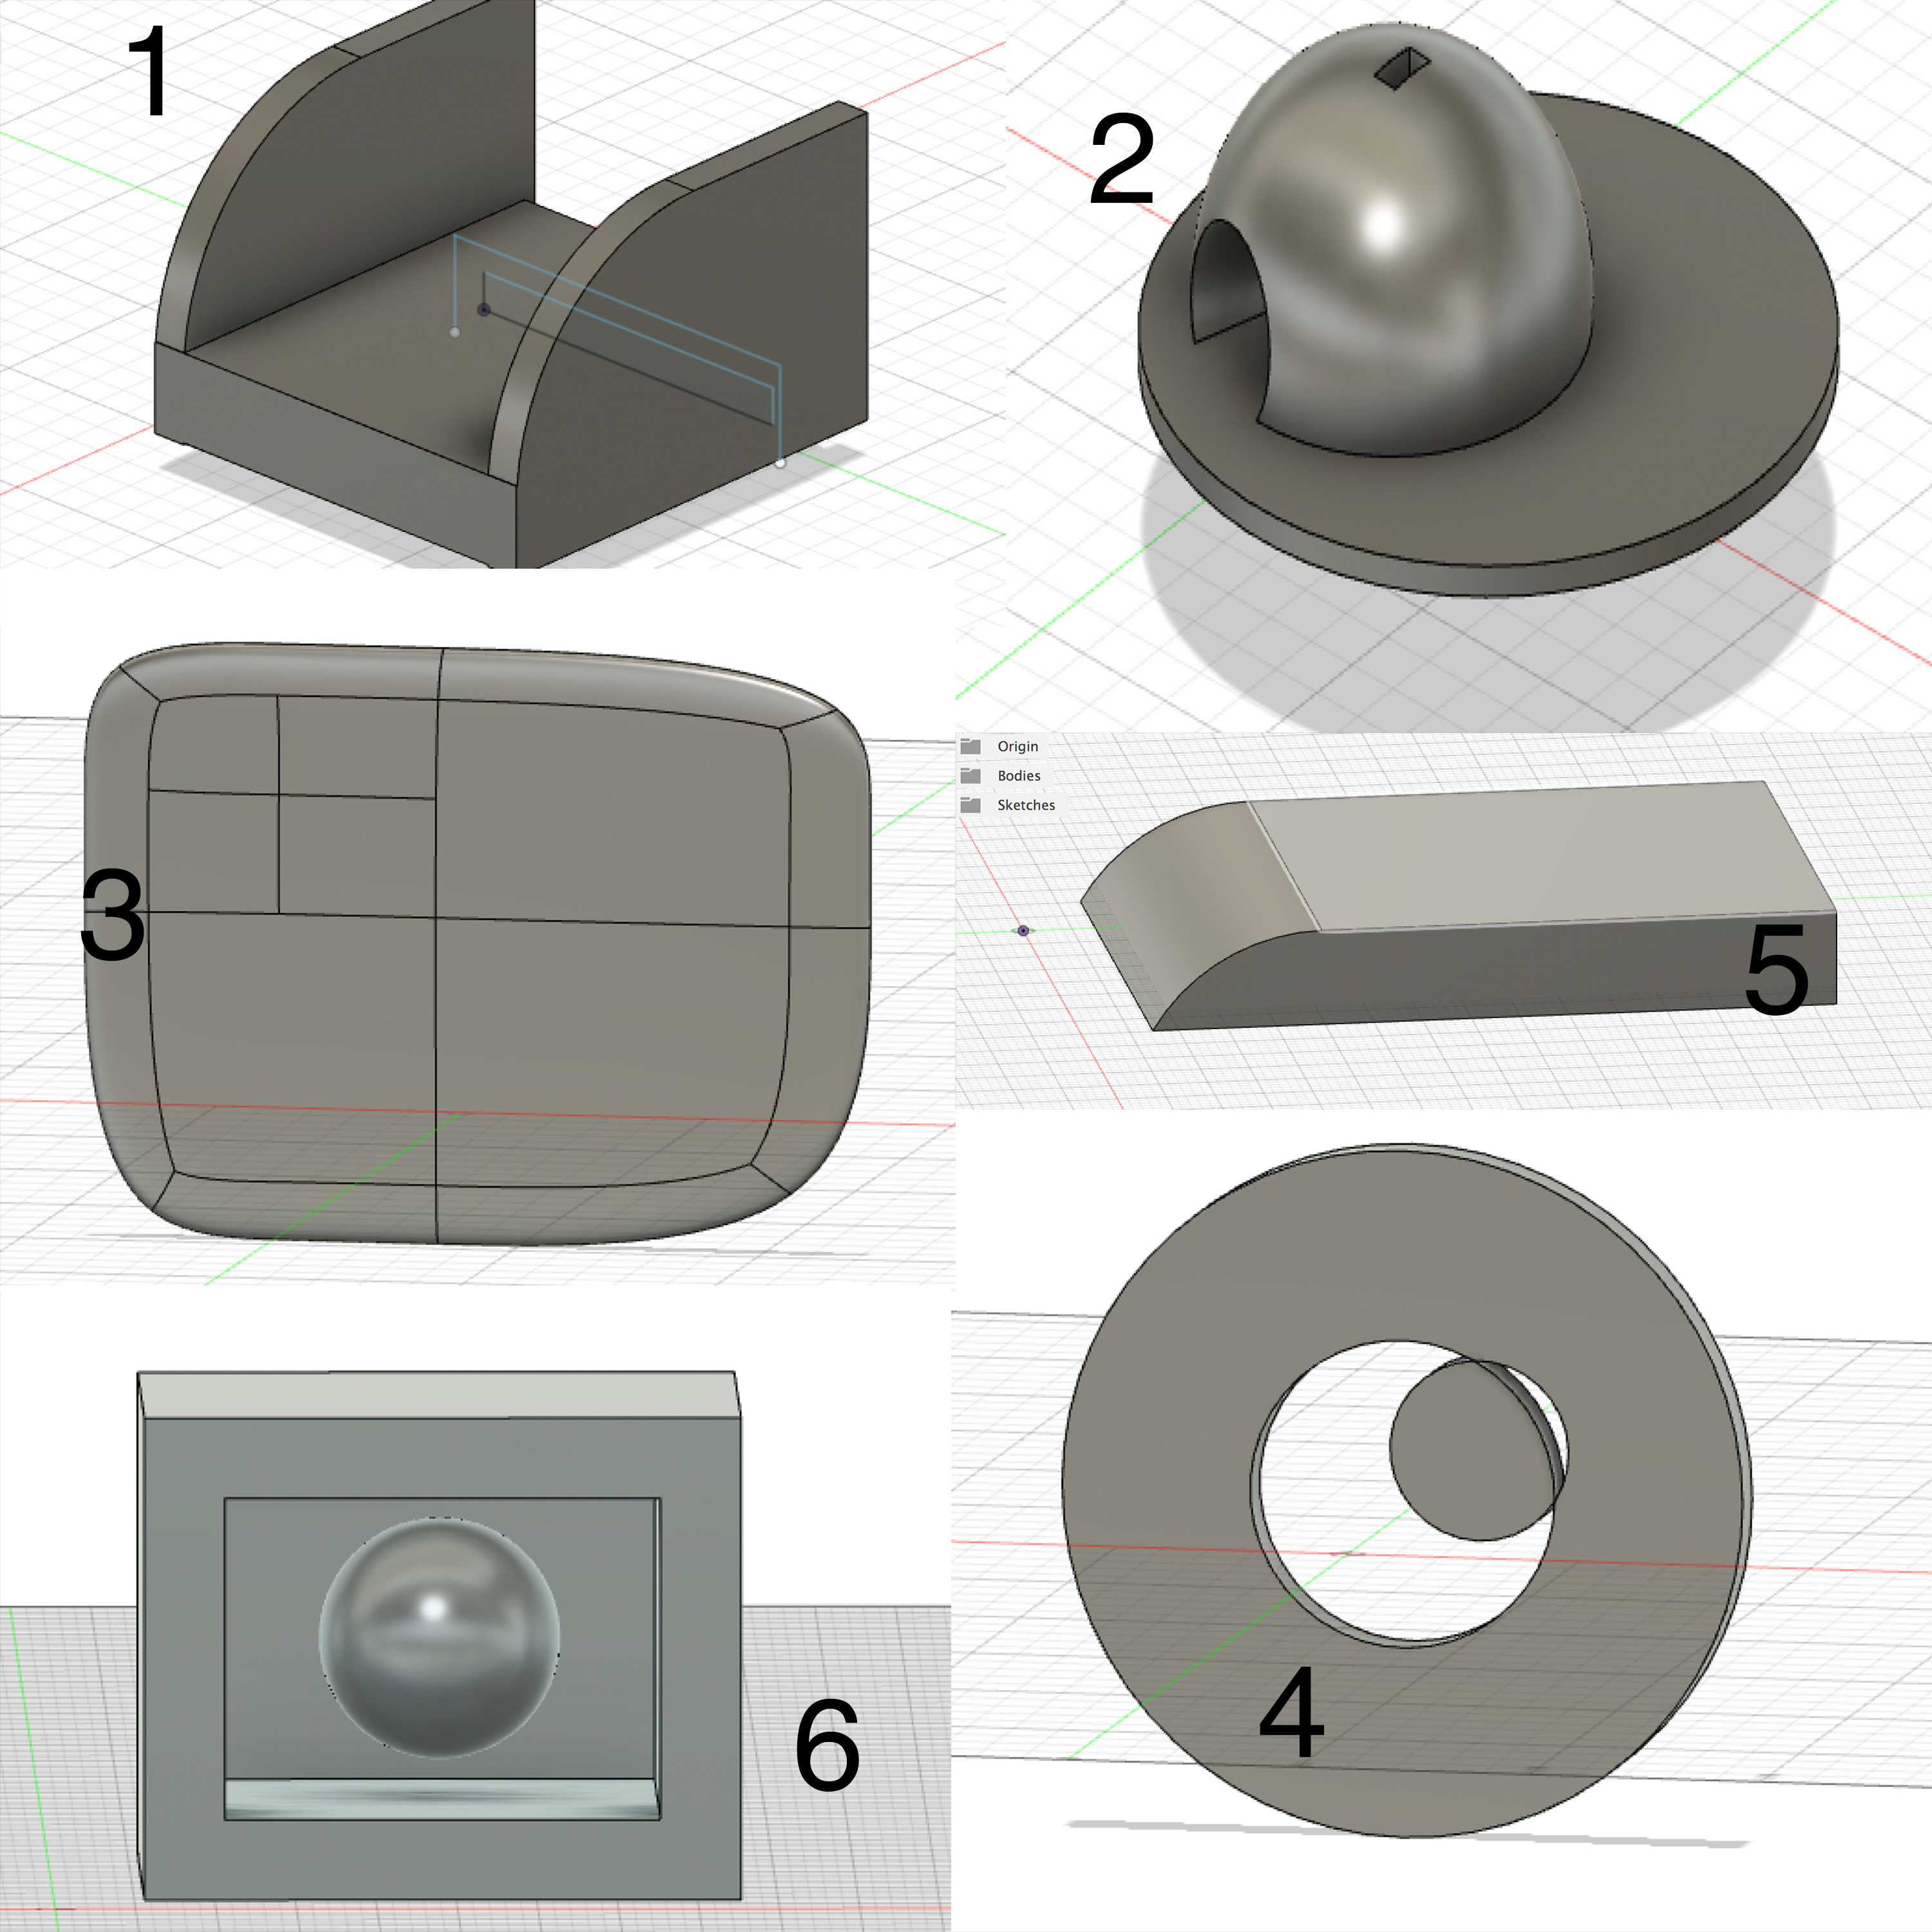
The first batch of shapes was created mostly using the general shapes that the software has in the ‘Create’ function: spheres, cylinders, cubes. Then I joined some of the shapes, using the ‘Free-move’ and ‘Cut’ tools. In Shape 5, you can see that I used the ‘Fillet’ modifier. On Shape 6, I used the ‘Hole’ creation tool to make space to fit the floating sphere inside.

The second patch of shapes required me to explore the ‘move’ and ‘extrude’ functions in Fusion, and I played around more with the ‘Loft’, and ‘Pipe’ tools. You can see the ‘pipe’ function around the cake-like Shape #11. In Shape #8, I used the ‘Thread’ creation tool to make the screw-like shape on top of the cylindrical base. I also played around with the Fillet and Chamfer tools to make the shapes either more rounded and angular, as seen in all of the above shapes but 11.
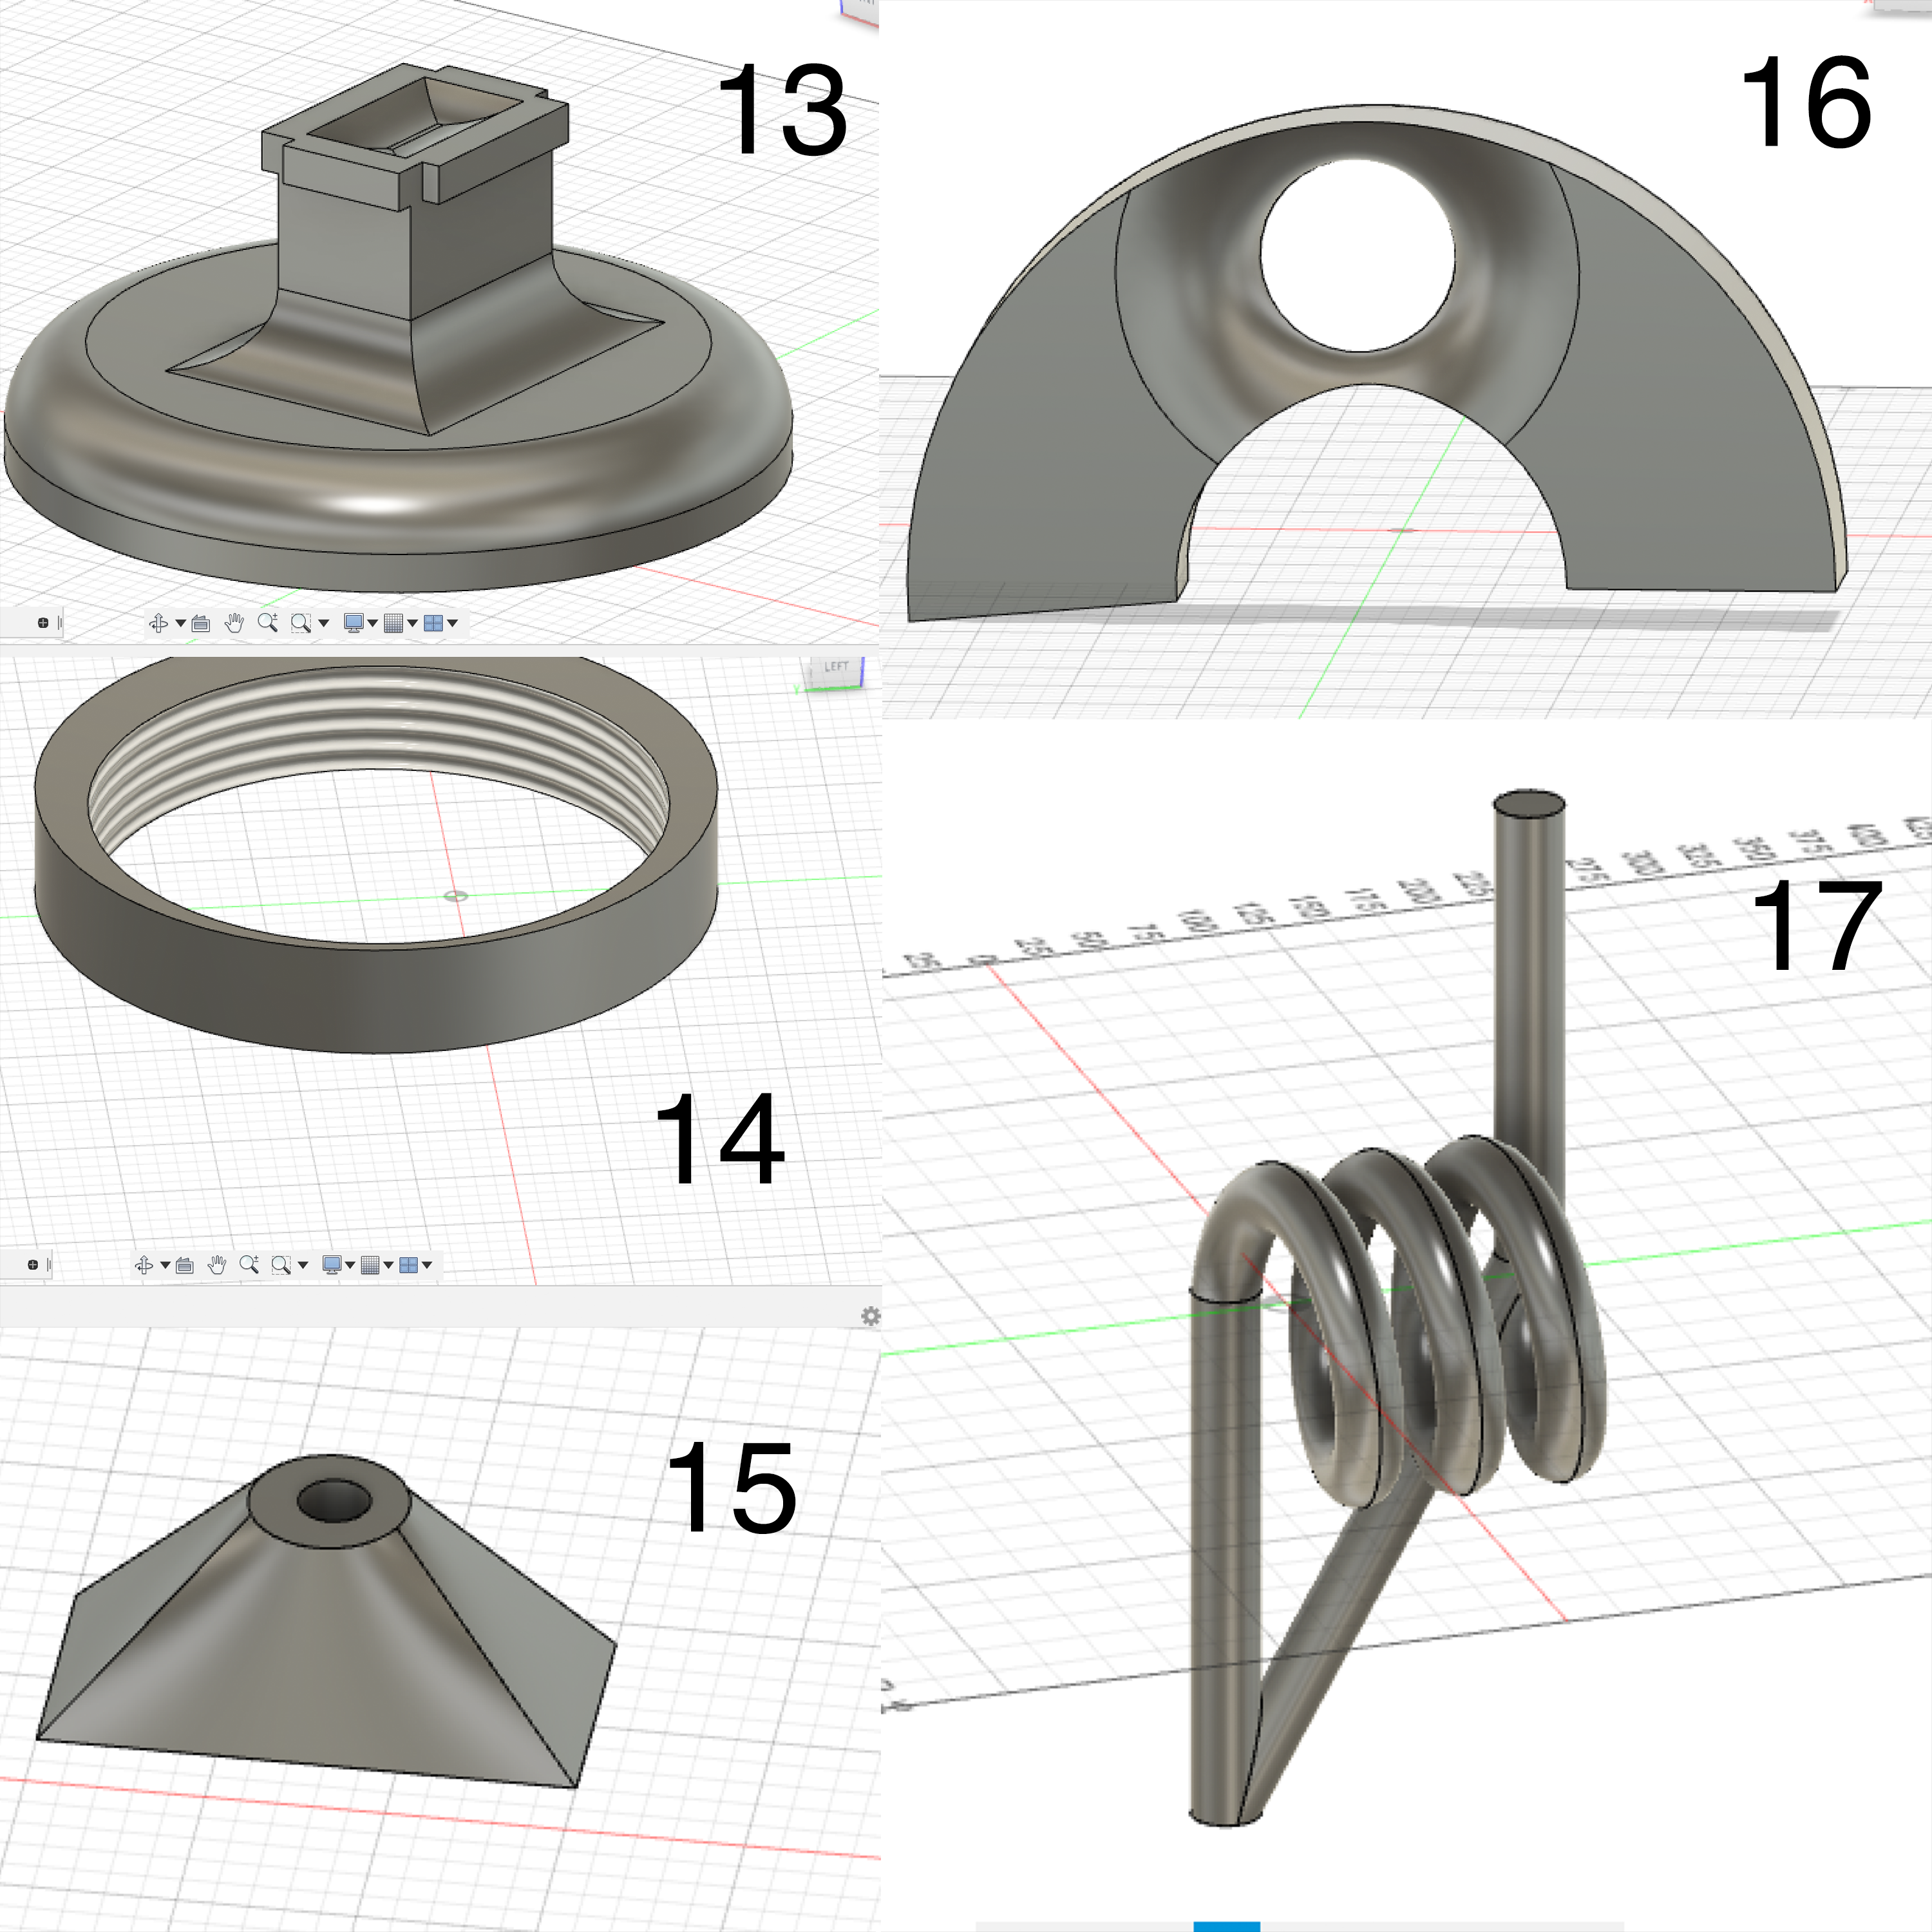
The third and fourth screenshots aren’t in the order that I made them, but they still show evidence of Fusion exploration. All of the shapes pictured above were made in an effort for me to recreate objects I already knew. 14 is threaded like a spacer/washer, 15 is meant to be a Volcano, 17 is a lightbulb coil, 13 was supposed to look like a rook but I kind of missed the mark.
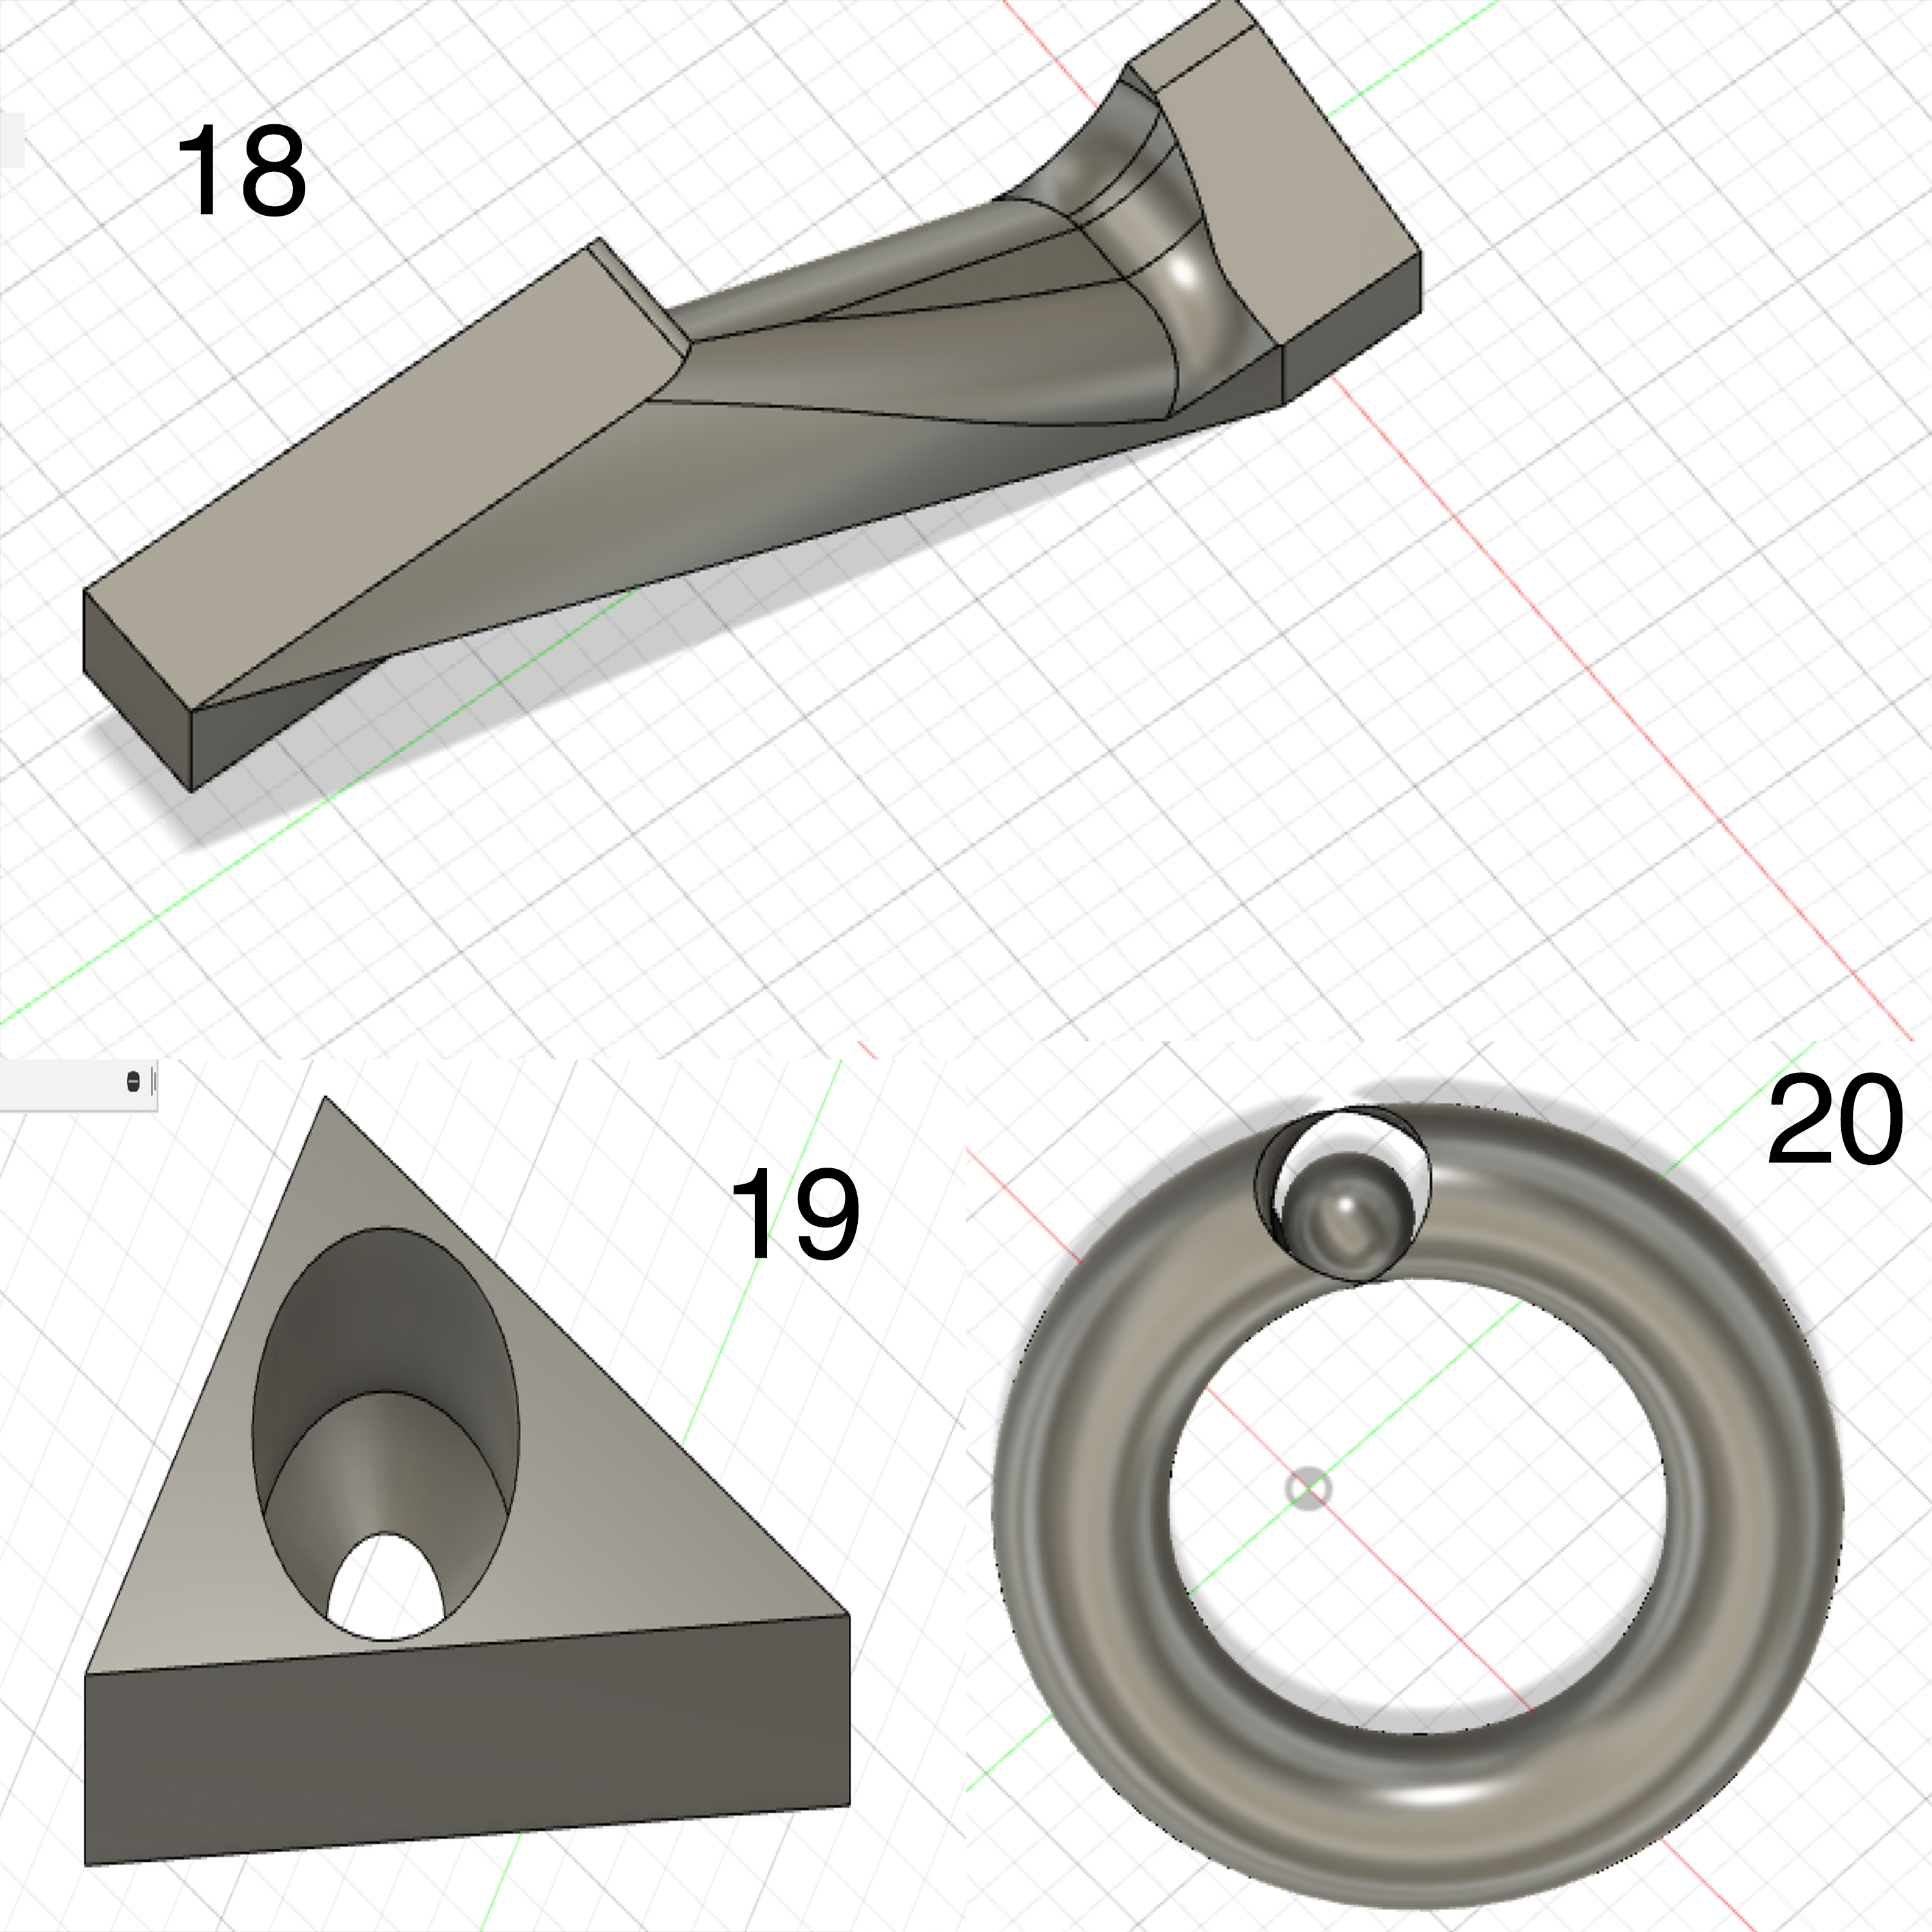
The bottom screenshot was a little bit of a mess of tool usage. I used the ‘Hole’ and ‘Draft’ tools to make Shape 19. Shape 18 started with some sketched shaped that Extruded and connected, then I went a little too far with the Chamfer, Fillet, and Draft tools.
Below is the only printed shape that I made, which I forgot to save as a fusion file after I exported the STL file and sliced it in Cura. I used the pipe tools for the edges, and a hole for the center.
Arduino & Raspberry Pi Research
In preparation for my now-doomed final project, I did a good bit of research into Arduino and Raspberry Pi to apply to the synthesizer unit in my own build. I never made it over to the Rose Makery to see what parts they had available, but I did figure out roughly what I needed for my final build. The Arduino website had a ton of useful resources and user builds.
My specific project needed to have keys that could send out midi signal for notes, and potentiometers (knobs) to adjust volume, attack, and decay. This video from MEGA DAS on YouTube was super helpful for understanding how to assemble a basic midi trigger using an Arduino Nano unit. I realized right after watching that video that I wanted my keyboard to be more than just a controller. If I built a similar model to MEGA DAS, I would have to run that controller through my computer for it to create sounds, instead of it being a standalone unit. At first, I looked at other options that would still use Arduino, like this synthesizer build from Audrey Obscura on Instructables. This model works as an interface that computes input samples/sounds into a synthesizer output using the Arduino Protoboard. If I did it right, I think I might have been able to use an Arduino Nano to send MIDI signals to the interface, which would act as the sound library instead of a computer.
In exploring other options, I stumbled upon a ton of Raspberry Pi builds that work as interfaces with MIDI Input. I thought about buying a pre-made Raspberry Pi synthesizer unit and wiring it to my keys using the Arduino Nano and some button triggers. This would give me the option to run multiple sounds/engines through the synthesizer without having to use a separate CPU unit. Though I may not have found the perfect Raspberry Pi unit for my Puzzle project, I did stumble upon Zynthian, an open-source synthesizer that might prove to be the coolest digital synth I’ve ever seen. Since I am about to graduate (or maybe COVID-19 means I already graduated?), I won’t have a chance to build CrypticSynth, but I might get myself a Zynthian build-kit so I can still build some sort of instrument.