Group Member Roles:
Writer: Haleigh Sink
Designer: Vasili Dallas
Math Consultant: Jennifer Marks
Project Idea
The chapter we chose for our project was chapter 9, which is all about graphs. For our project, we chose to do a 3D print of a Rhombicuboctahedron. We believed it would be easy to print because it is made up of triangles and squares. We would like to learn coding to make a wire frame version of the rhombicuboctahedron.
First Steps
Today, we began learning how to code in OpenSCAD in order to successfully make our 3D model. We began by attempting to create our beginning model in TinkerCad but Dr. Taalman suggested that making the 3D model first would be easier. We watched a video on how to code and attempted several times to make the first draft of our rhombicubctahedron.
Design Process
We did not know quite where to start with our rhombicuboctahedron. We attempted to search for models online that we could work with, but nothing came of it. We also didn’t exactly want to make a solid model. It was going to take way too much filament, and take 12+ hours, maybe several days to print. In order to speed up that process, we thought to make a wire frame model.
So simple enough, we’ll just make a wire frame model, at least that is what we thought; that was not the case. Our professor introduced us to a program called OpenSCAD, that allows us to go in and using code, diagram our points and create connections, or hulls, in between them. This process took me about a week to complete, as I had no experience with the application nor coding. I was learning as I went.
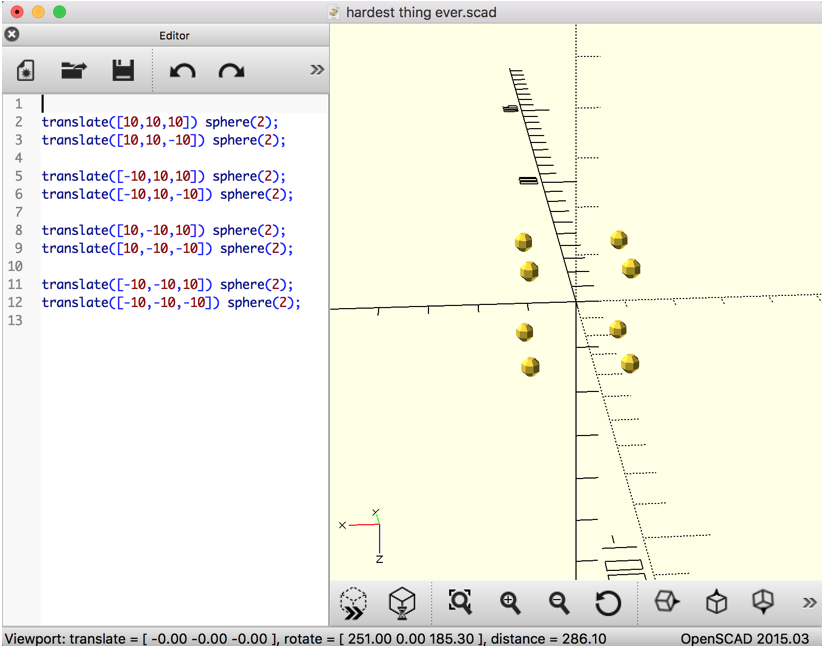
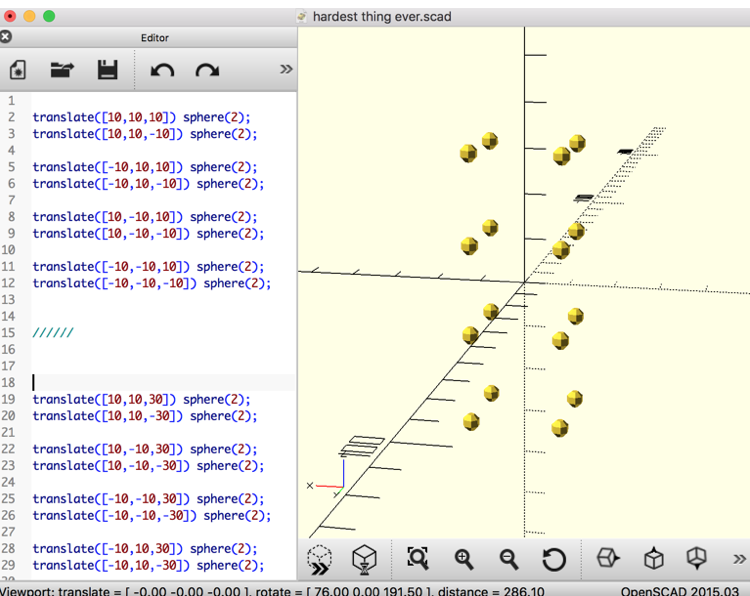
Our coordinates for the wire frame rhombicuboctahedron were (±1, ±1, ±(1+√2)). In order to simplify this, we just made our coordinates (±10, ±10, ±30) just for the time being, as the real coordinates would be something like (10, 10, 24.1). We would go back at the end of the project and input the correct coordinates for printing.
The first order of business was to create the cube that goes within the model, and then to create the rest of the points off of the cube.
Then I went in and made the top and bottom coordinates.
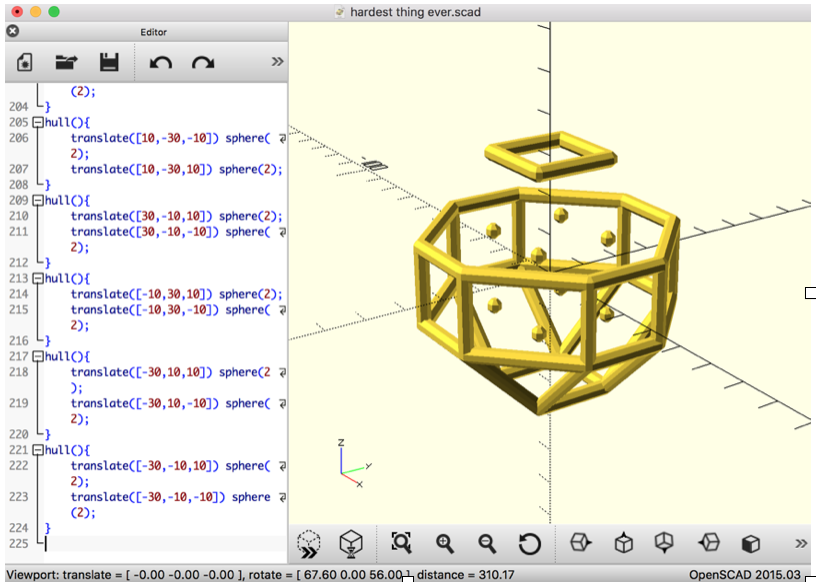
Then, I went in and added the hulls at the top and bottom, as those were the top and bottom most points.
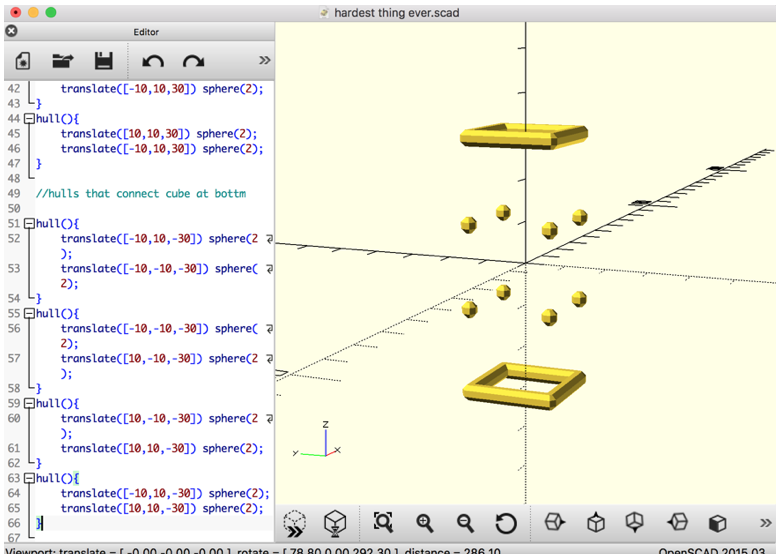
Next, I went in and built the points off of the center cube, and then added the hulls.

Now, I had to go in and finish those middle level hulls, to give our model its true shape.
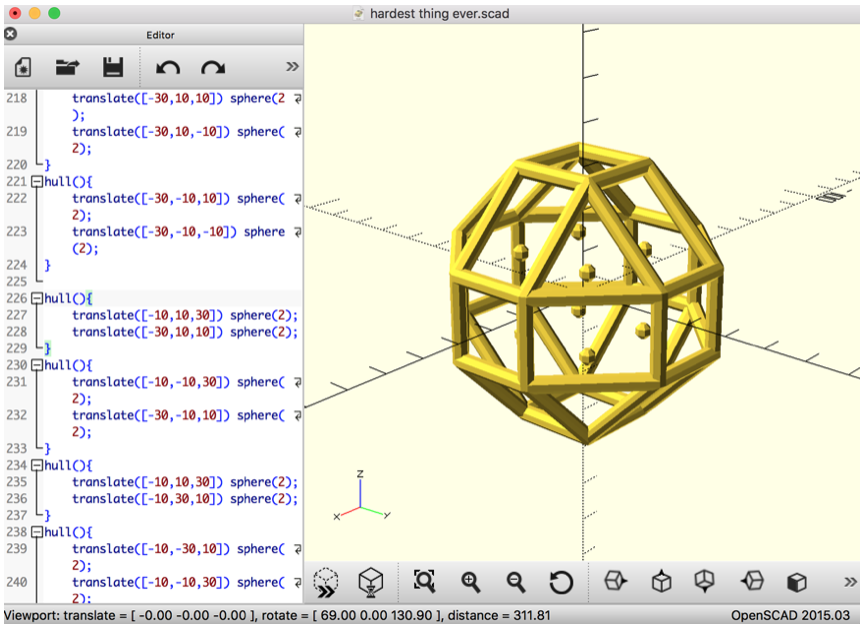
Next, I connected the lower ring to the bottom square, in order to start connecting our wire frame together.
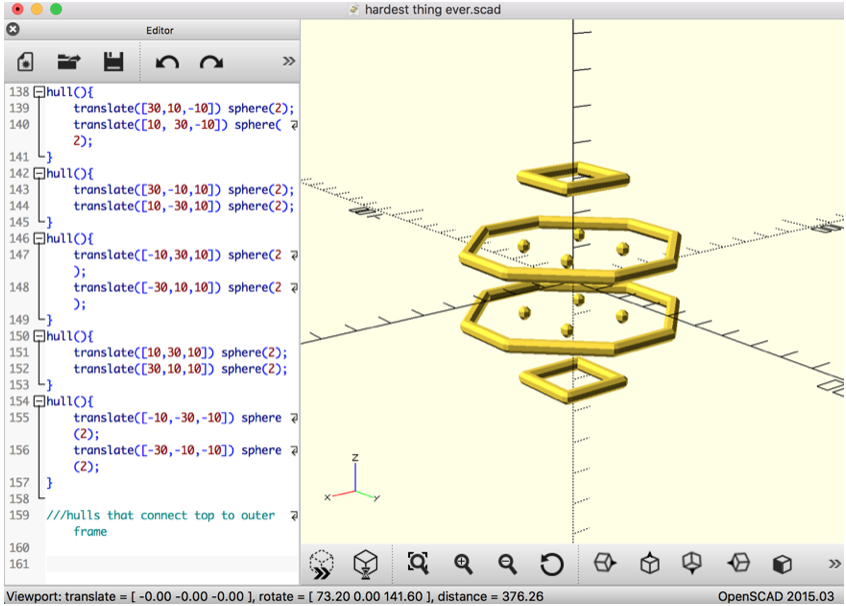
Then it was time to connect the upper ring to the lower ring.
Now, one of the final steps. Connecting the square at the top to the upper ring.
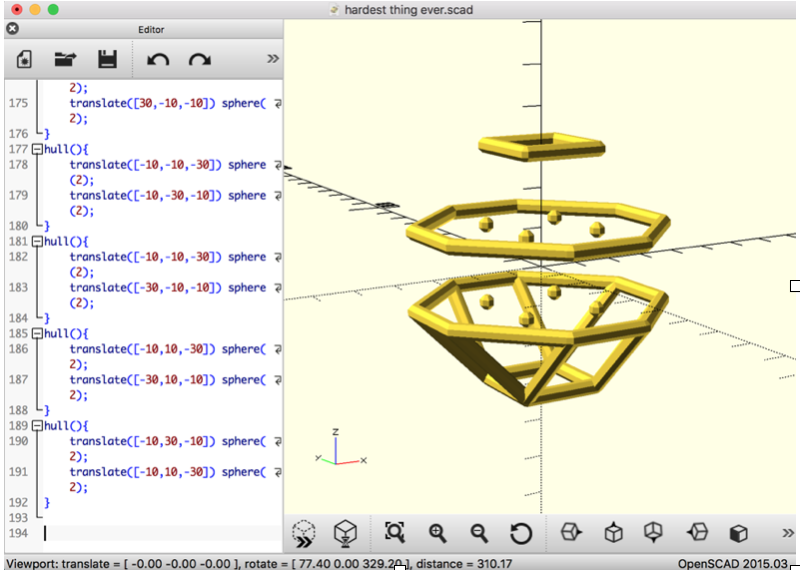
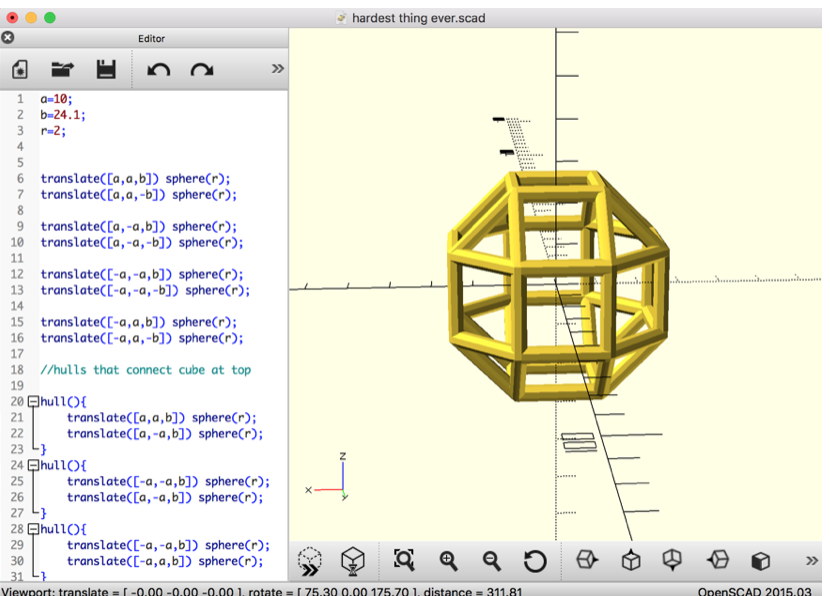
 Now that this was done, we had to delete the points for the inner cube that we based everything off of, and then had to go in and change our 10’s to a, and our 30’s to b. We then set the sphere size to r, so we could make r whatever we wanted, in order to make the structure larger or smaller. Now, it was exact. You can see this in the top right of the screenshot below.

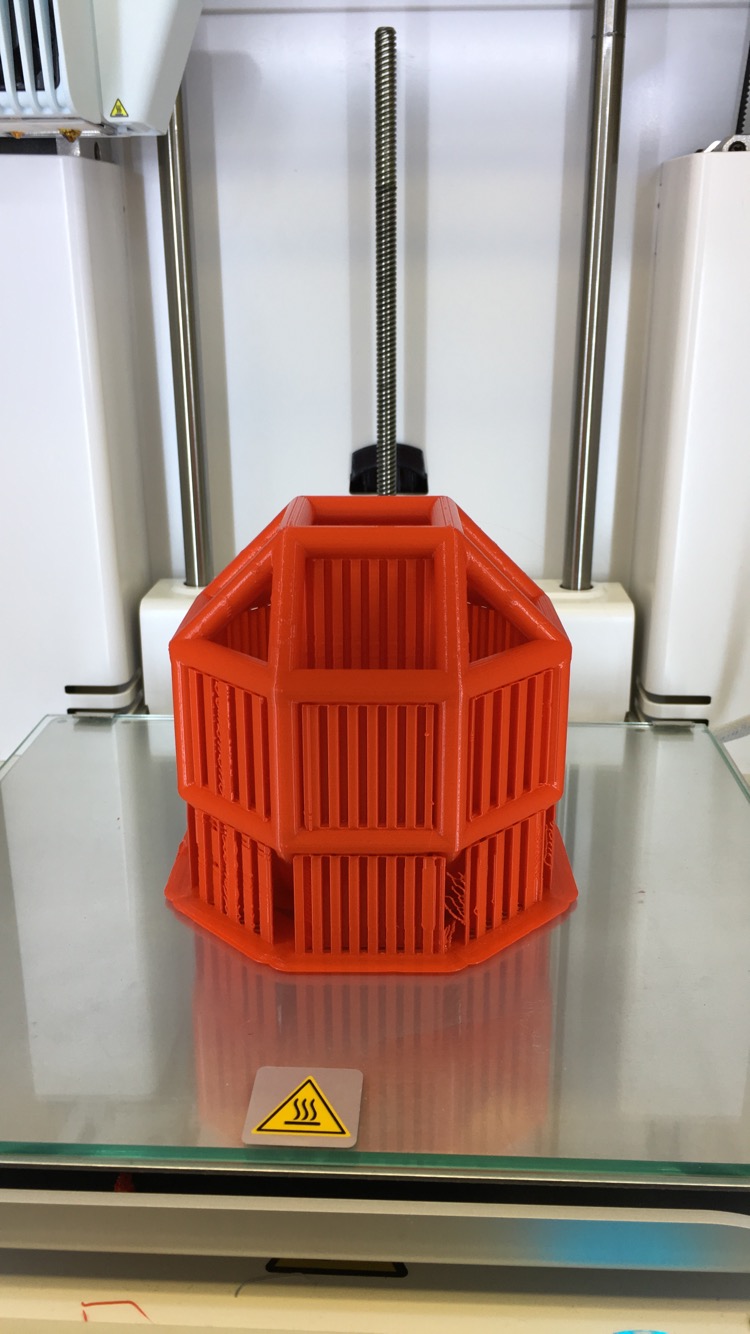
For our first print, we did not add supports because we did not believe that we needed them but, obviously, we do. So, we went back and added supports to our rhombicuboctahedron and tried it again.
Final Print of Rhombicuboctahedron
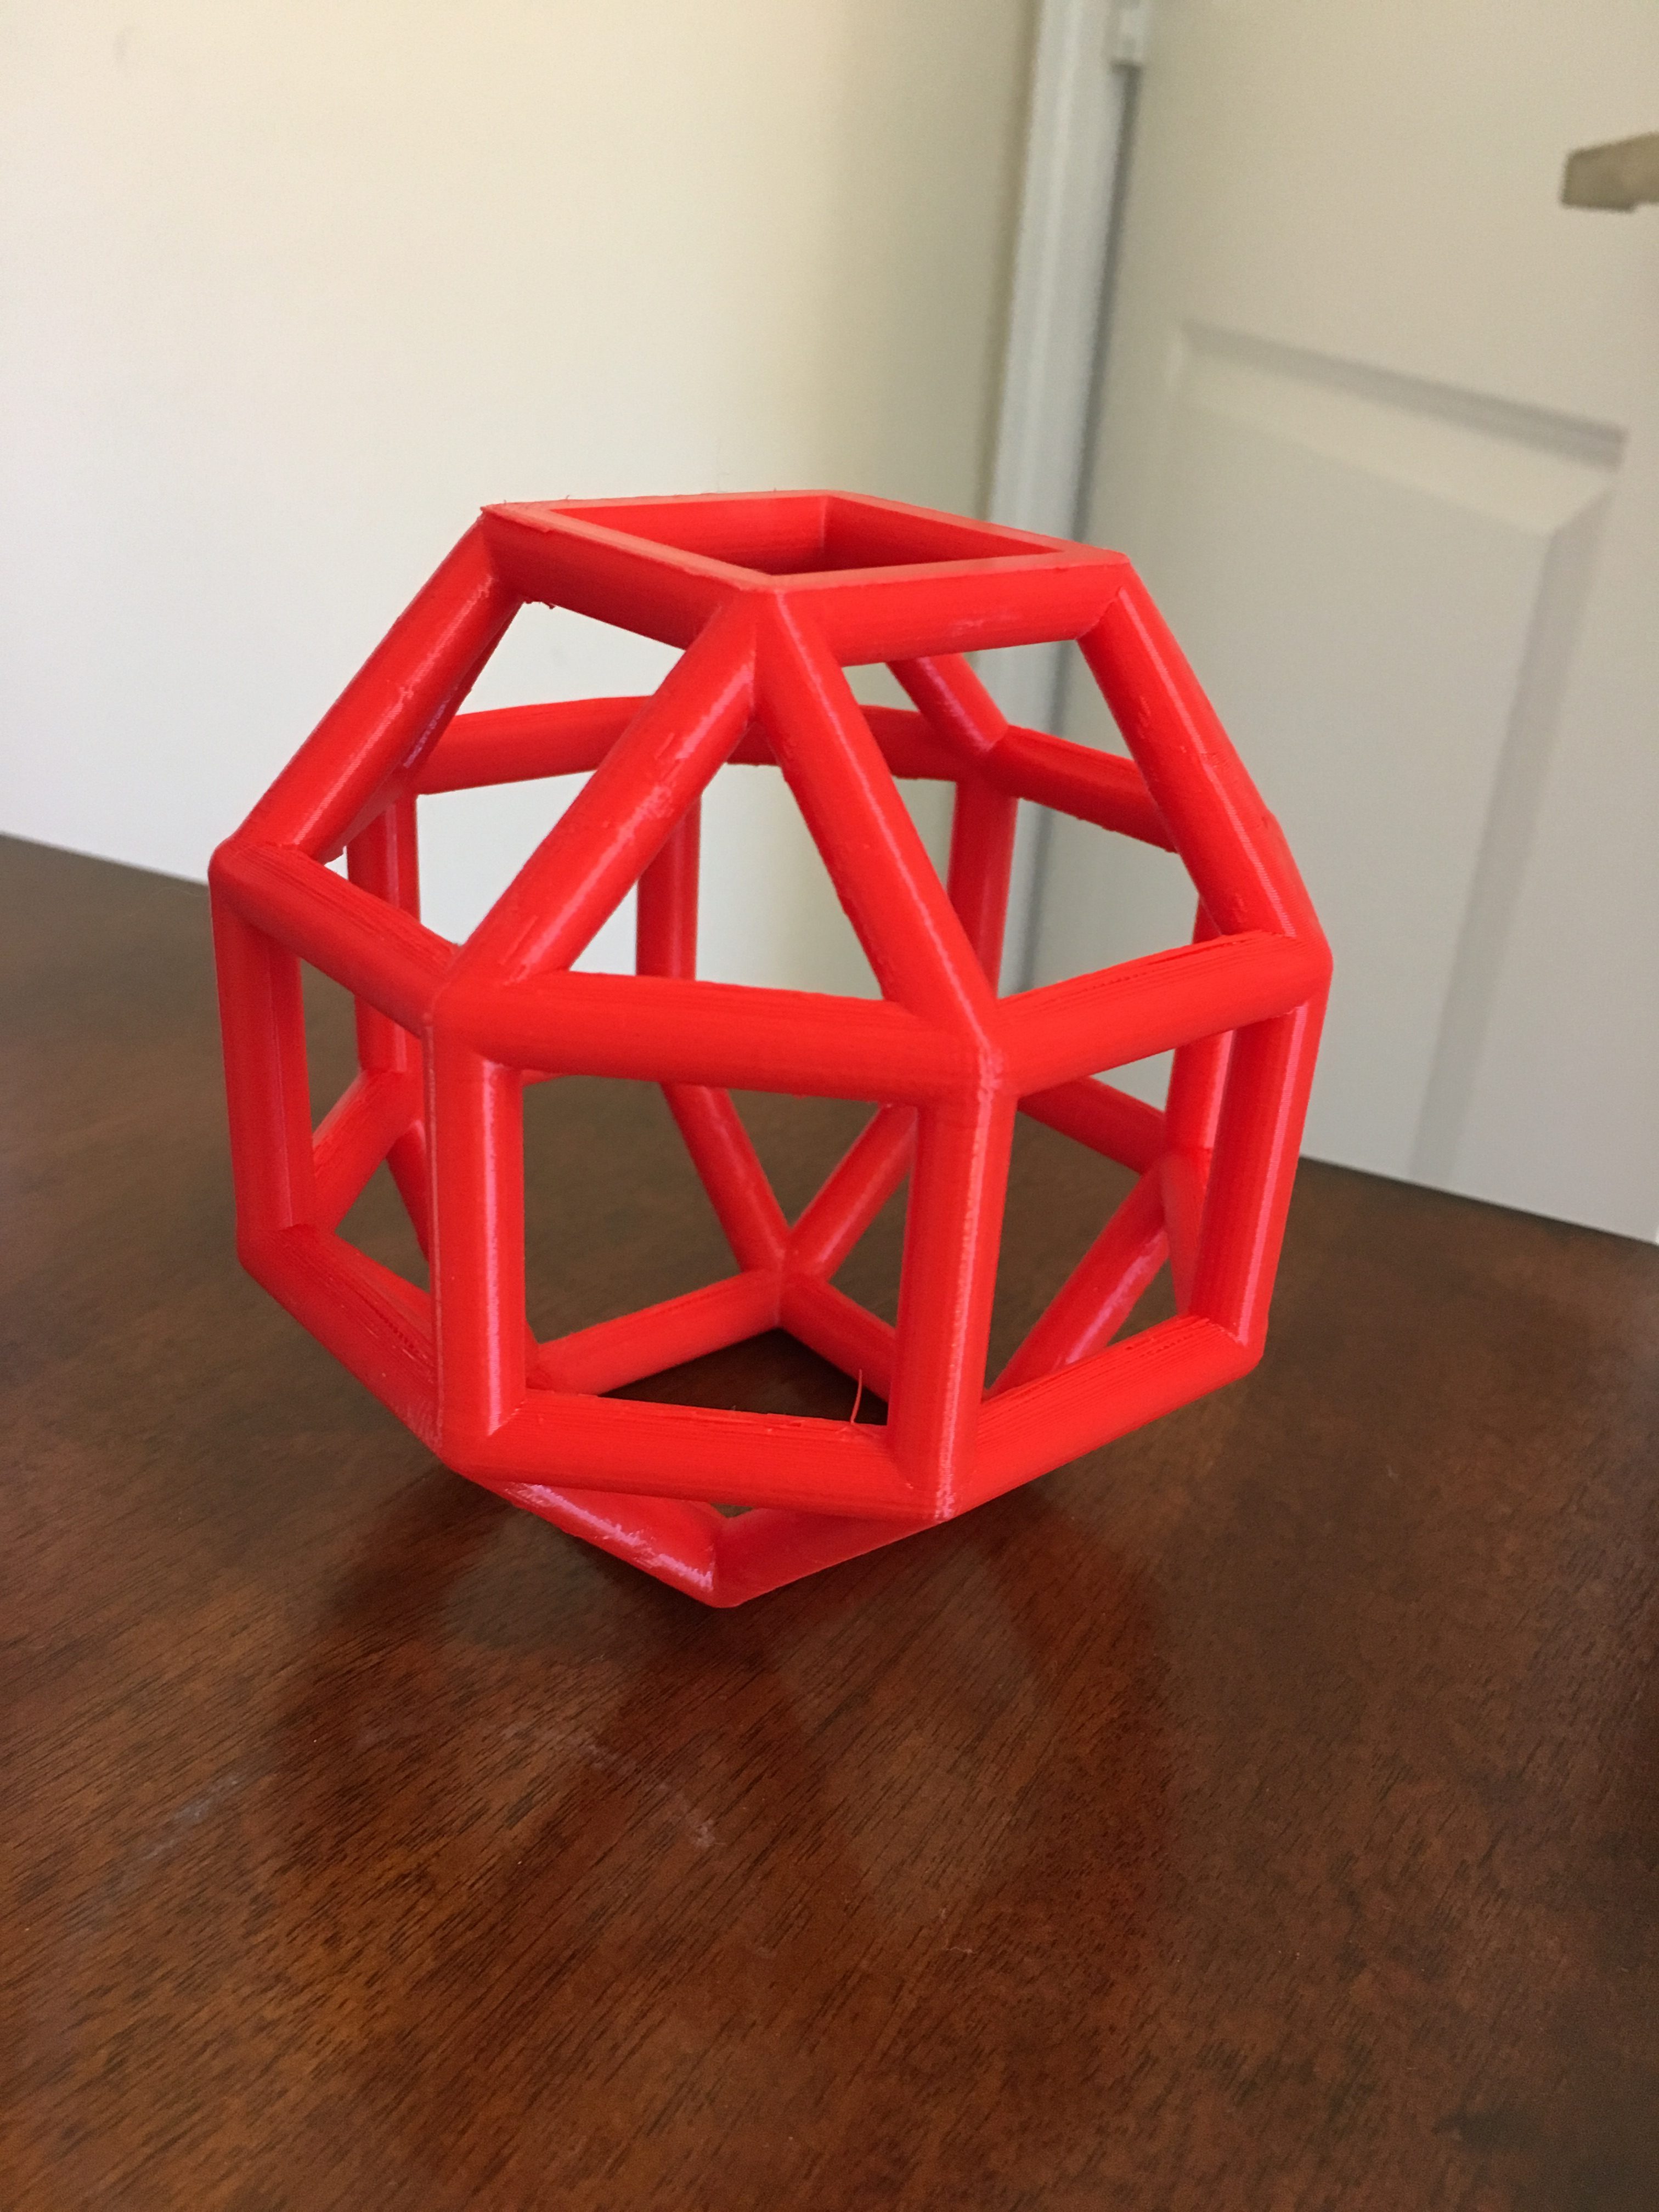
After we added supports, our rhombicuboctahedron came out perfectly.
You can also print this rhombicuboctahedron from Thingiverse.
The Mathematics of the Rhombicuboctahedron
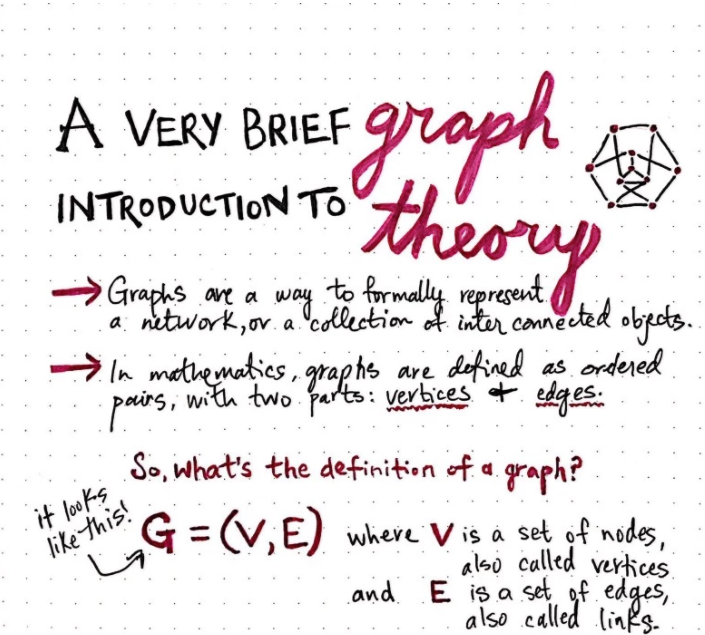
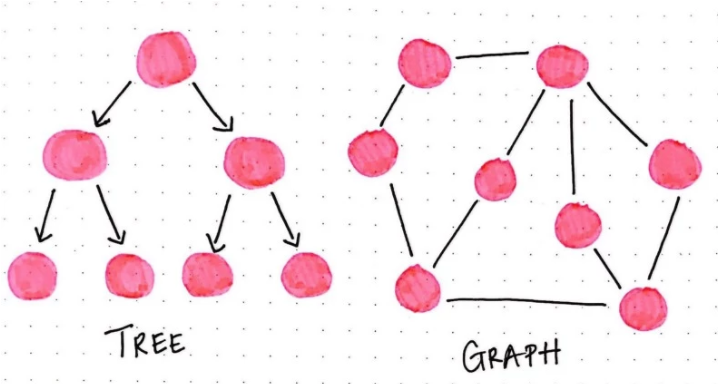
Graph theory is the study of graphs, which are mathematical structures used to model relations between objects. A graph is made up of vertices, nodes, or points which are connected by edges, arcs, or lines. Polyhedral Graphs are the undirected graph formed from the vertices and edges of a convex polyhedron. A Rhombicuboctahedron is Archimedean solid with eight triangular and eighteen square faces. There are 24 identical vertices, with one triangle and three squares meeting at each. A rhombicuboctahedral graph is the graph of vertices and edges of the rhombicuboctahedron.
If you wanted to create your own Rhombicuboctahedron you would start with these coordinates (∓1, ∓1, (∓1+√2)).From there you can change the variables to change the dimensions of the shape. In our graph, we made our 1’s equal to 10. So we had variations of (∓10, ∓10, (∓10+√2))
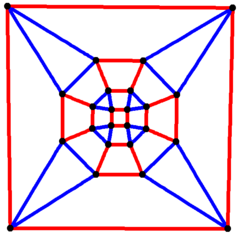
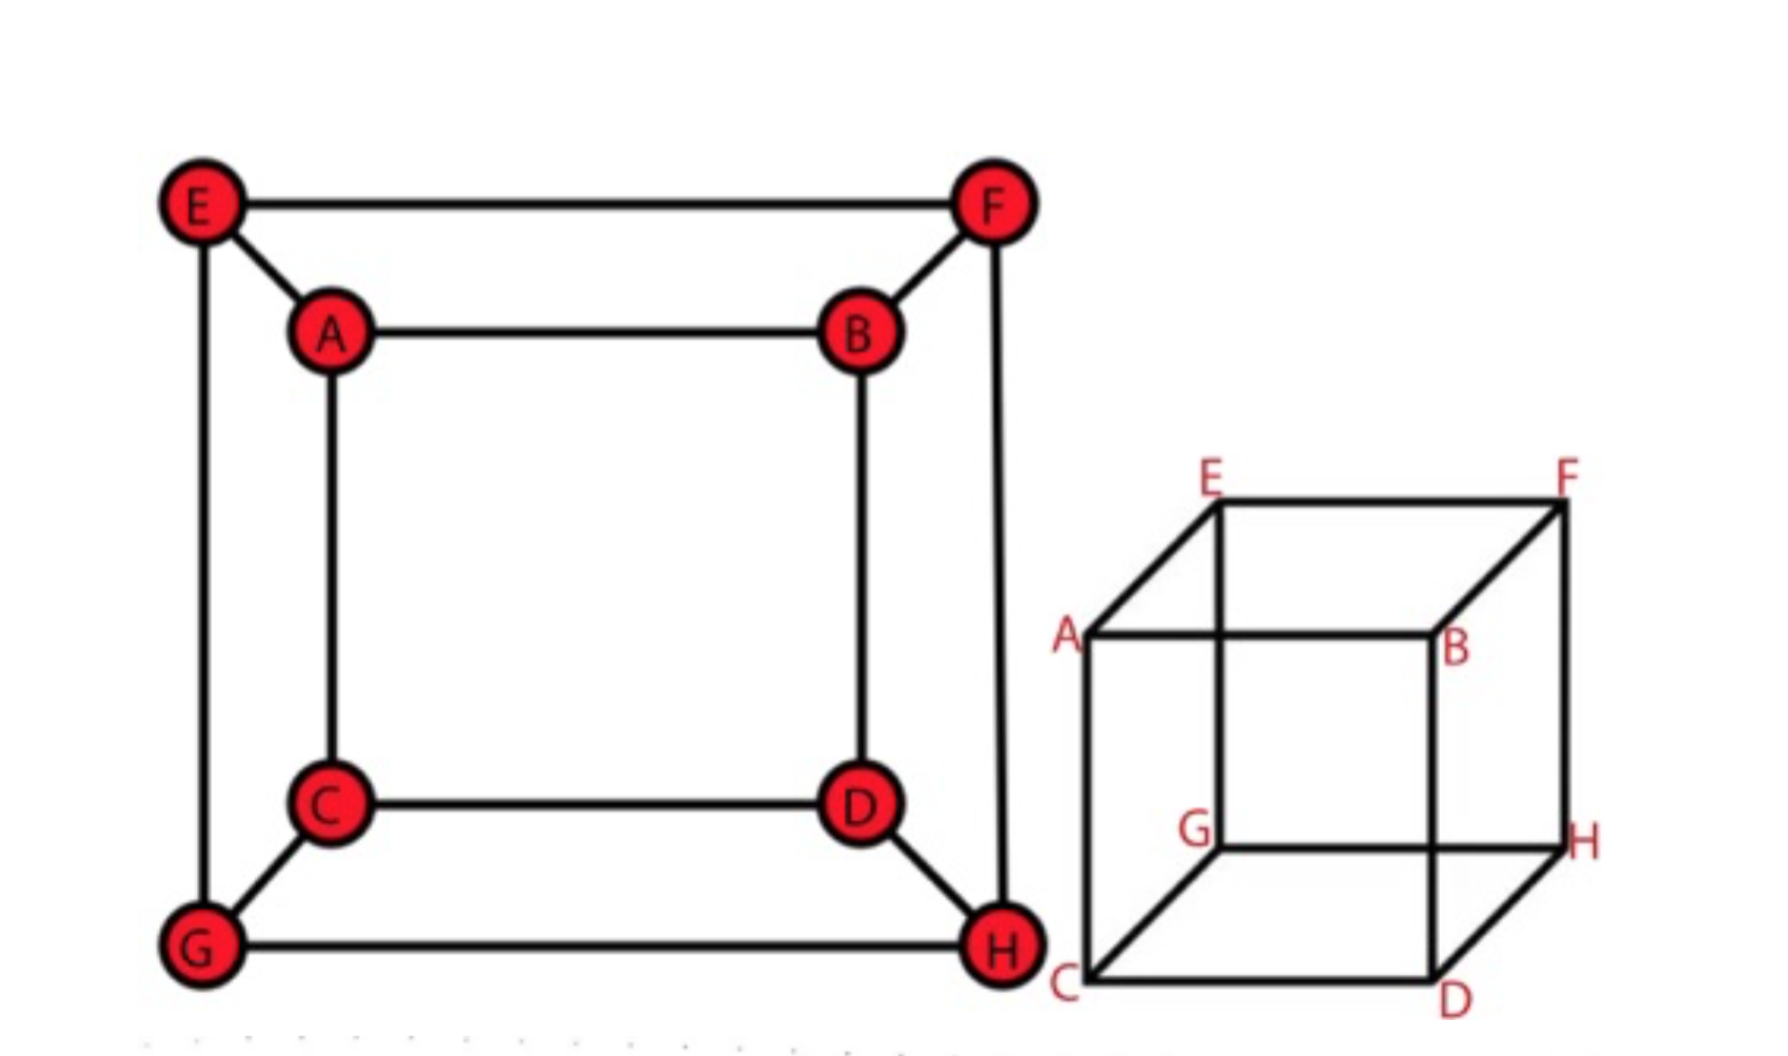
To turn a polyhedron into a graph you pick a face of the shape, expand it, and essentially squish it flat into 2D image and plot vertices and edges. This can be more simply displayed by using a cube which we have also printed. We decided to study the Rhombicuboctahedron because we thought it was an interesting shape and we thought since it was made up of only squares and triangles it wouldn’t be easy but it be possible to create in OpenSCAD.
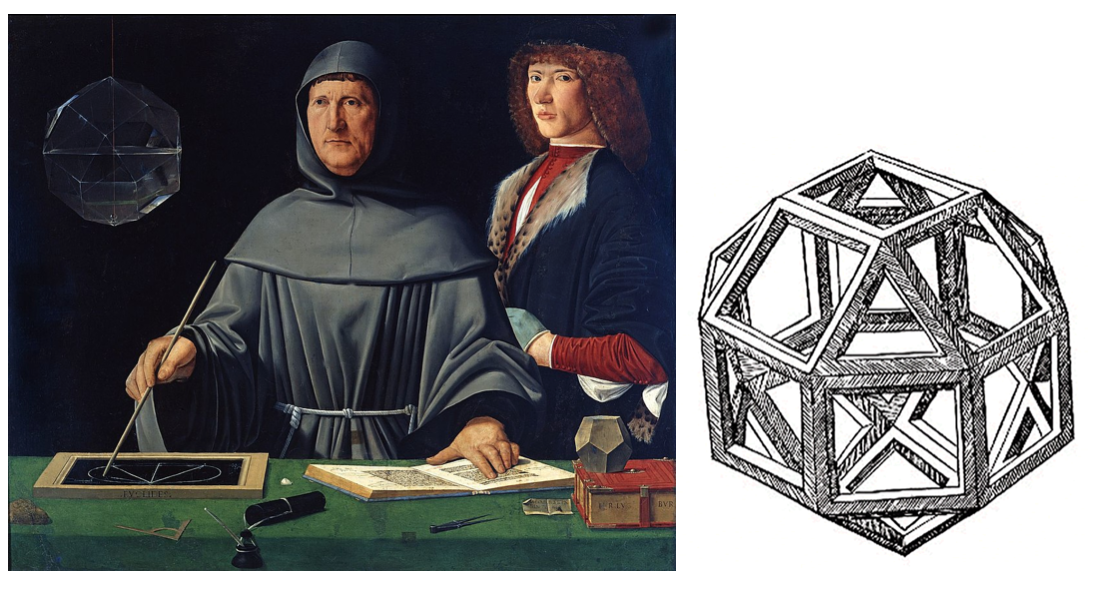
The Rhombicuboctahedron has been studied and created throughout history. Jacopo de’ Barbari’s portrait of Luca Pacioli in 1495 depicts a glass Rhombicuboctahedron in the top left corner. Leonardo Da Vinci also drew a Rhombicuboctahedron in his 1509 Divina Proportione. His drawing is similar to the wire frame Rhombicuboctahedron that we created.