Initial Design Idea
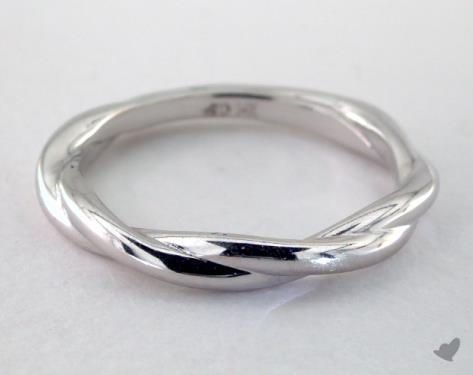
We are designing a twisted ring. It will be customizable in both the ring size as well as how many twists the ring will have. We both wear a lot of rings and thought it would be really cool to be able to wear one that we designed ourselves.
Neither of us know anything about coding besides what we’ve learned in the tutorials. Besides that, we both know from personal experience what makes a comfortable and aesthetically pleasing ring so we hope to be able to incorporate that into our design.
Our team will have to learn more about the OpenSCAD codes so we can find out how to manipulate it to have multiple ring size options. We will learn this by doing research on different ways people use openSCAD to create rings as well as tools to manipulate our codes to allows us to create the model we are hoping for.
Design Iteration
amplitude = 1;

periods = 3;

minDetail = 1;

ringDiameter = 14 + amplitude + minDetail/2;

numTheta = PI*(ringDiameter+4*amplitude+4*minDetail)/minDetail;

$fn = 16;

for(t = [0:numTheta], k = [0:periods-1])

{

hull()

{
//first slice

rotate(t*360/numTheta, [0, 0, 1])

translate([ringDiameter/2, 0, 0])

rotate(-360/numTheta*periods*amplitude*cos(t*360/numTheta*periods-k*360/periods),
[0, 0, 1])

translate([0, 0, amplitude*cos(t*360/numTheta*periods-k*360/periods)])

rotate(90-360/numTheta*periods*amplitude*sin(t*360/numTheta*periods-k*360/periods),
[1, 0, 0])

translate([amplitude*sin(t*360/numTheta*periods-k*360/periods), 0, 0])

cylinder(d=minDetail, h = 0.1, center = true);

//second slice

rotate((t+1)*360/numTheta, [0, 0, 1])

translate([ringDiameter/2, 0, 0])

rotate(-360/numTheta*periods*amplitude*cos((t+1)*360/numTheta*periods-k*360/periods),
[0, 0, 1])

translate([0, 0, amplitude*cos((t+1)*360/numTheta*periods-k*360/periods)])

rotate(90-360/numTheta*periods*amplitude*sin((t+1)*360/numTheta*periods-k*360/periods),
[1, 0, 0])

translate([amplitude*sin((t+1)*360/numTheta*periods-k*360/periods), 0, 0])

cylinder(d=minDetail, h = 0.1, center = true);

}

}
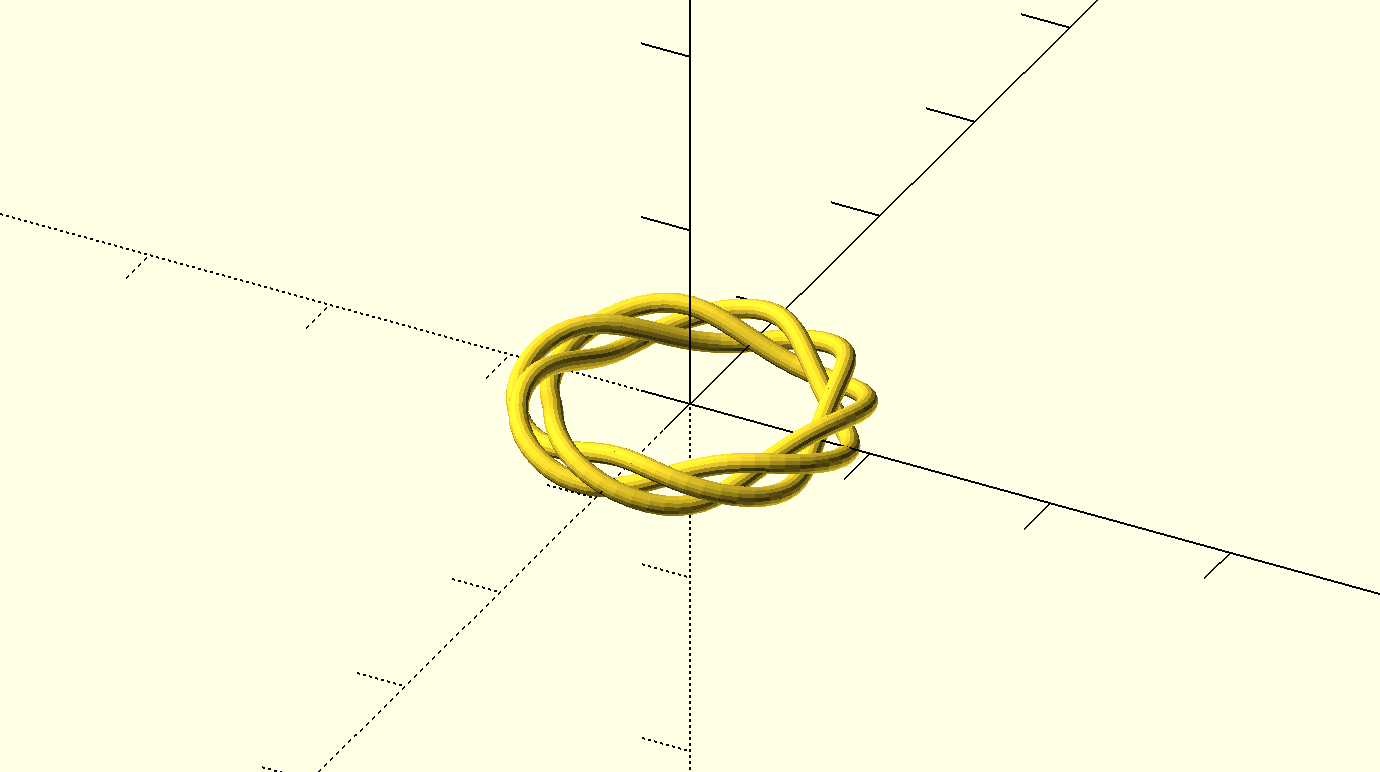
The initial code we found online was very complex so we altered it by renaming the parameters to be easier for the user to understand while customizing. In addition, we added a US ring size conversion chart as a comment in the code to allow users to personalize their ring to fit exactly as needed. After some experimentation we were able to discover how the first section of the code relates to the overall design and what numbers needed to be changed for our specific altercations.
periods = 3; ——> Renamed this to “number_of_rings”
minDetail = 1; ——> Renamed as the thickness_of_the ring band
ringDiameter = 14 + amplitude + minDetail/2; ——> we kept the name of this one the same but identified it as the overall size of the ring, which is the customizable part.
First Draft Print
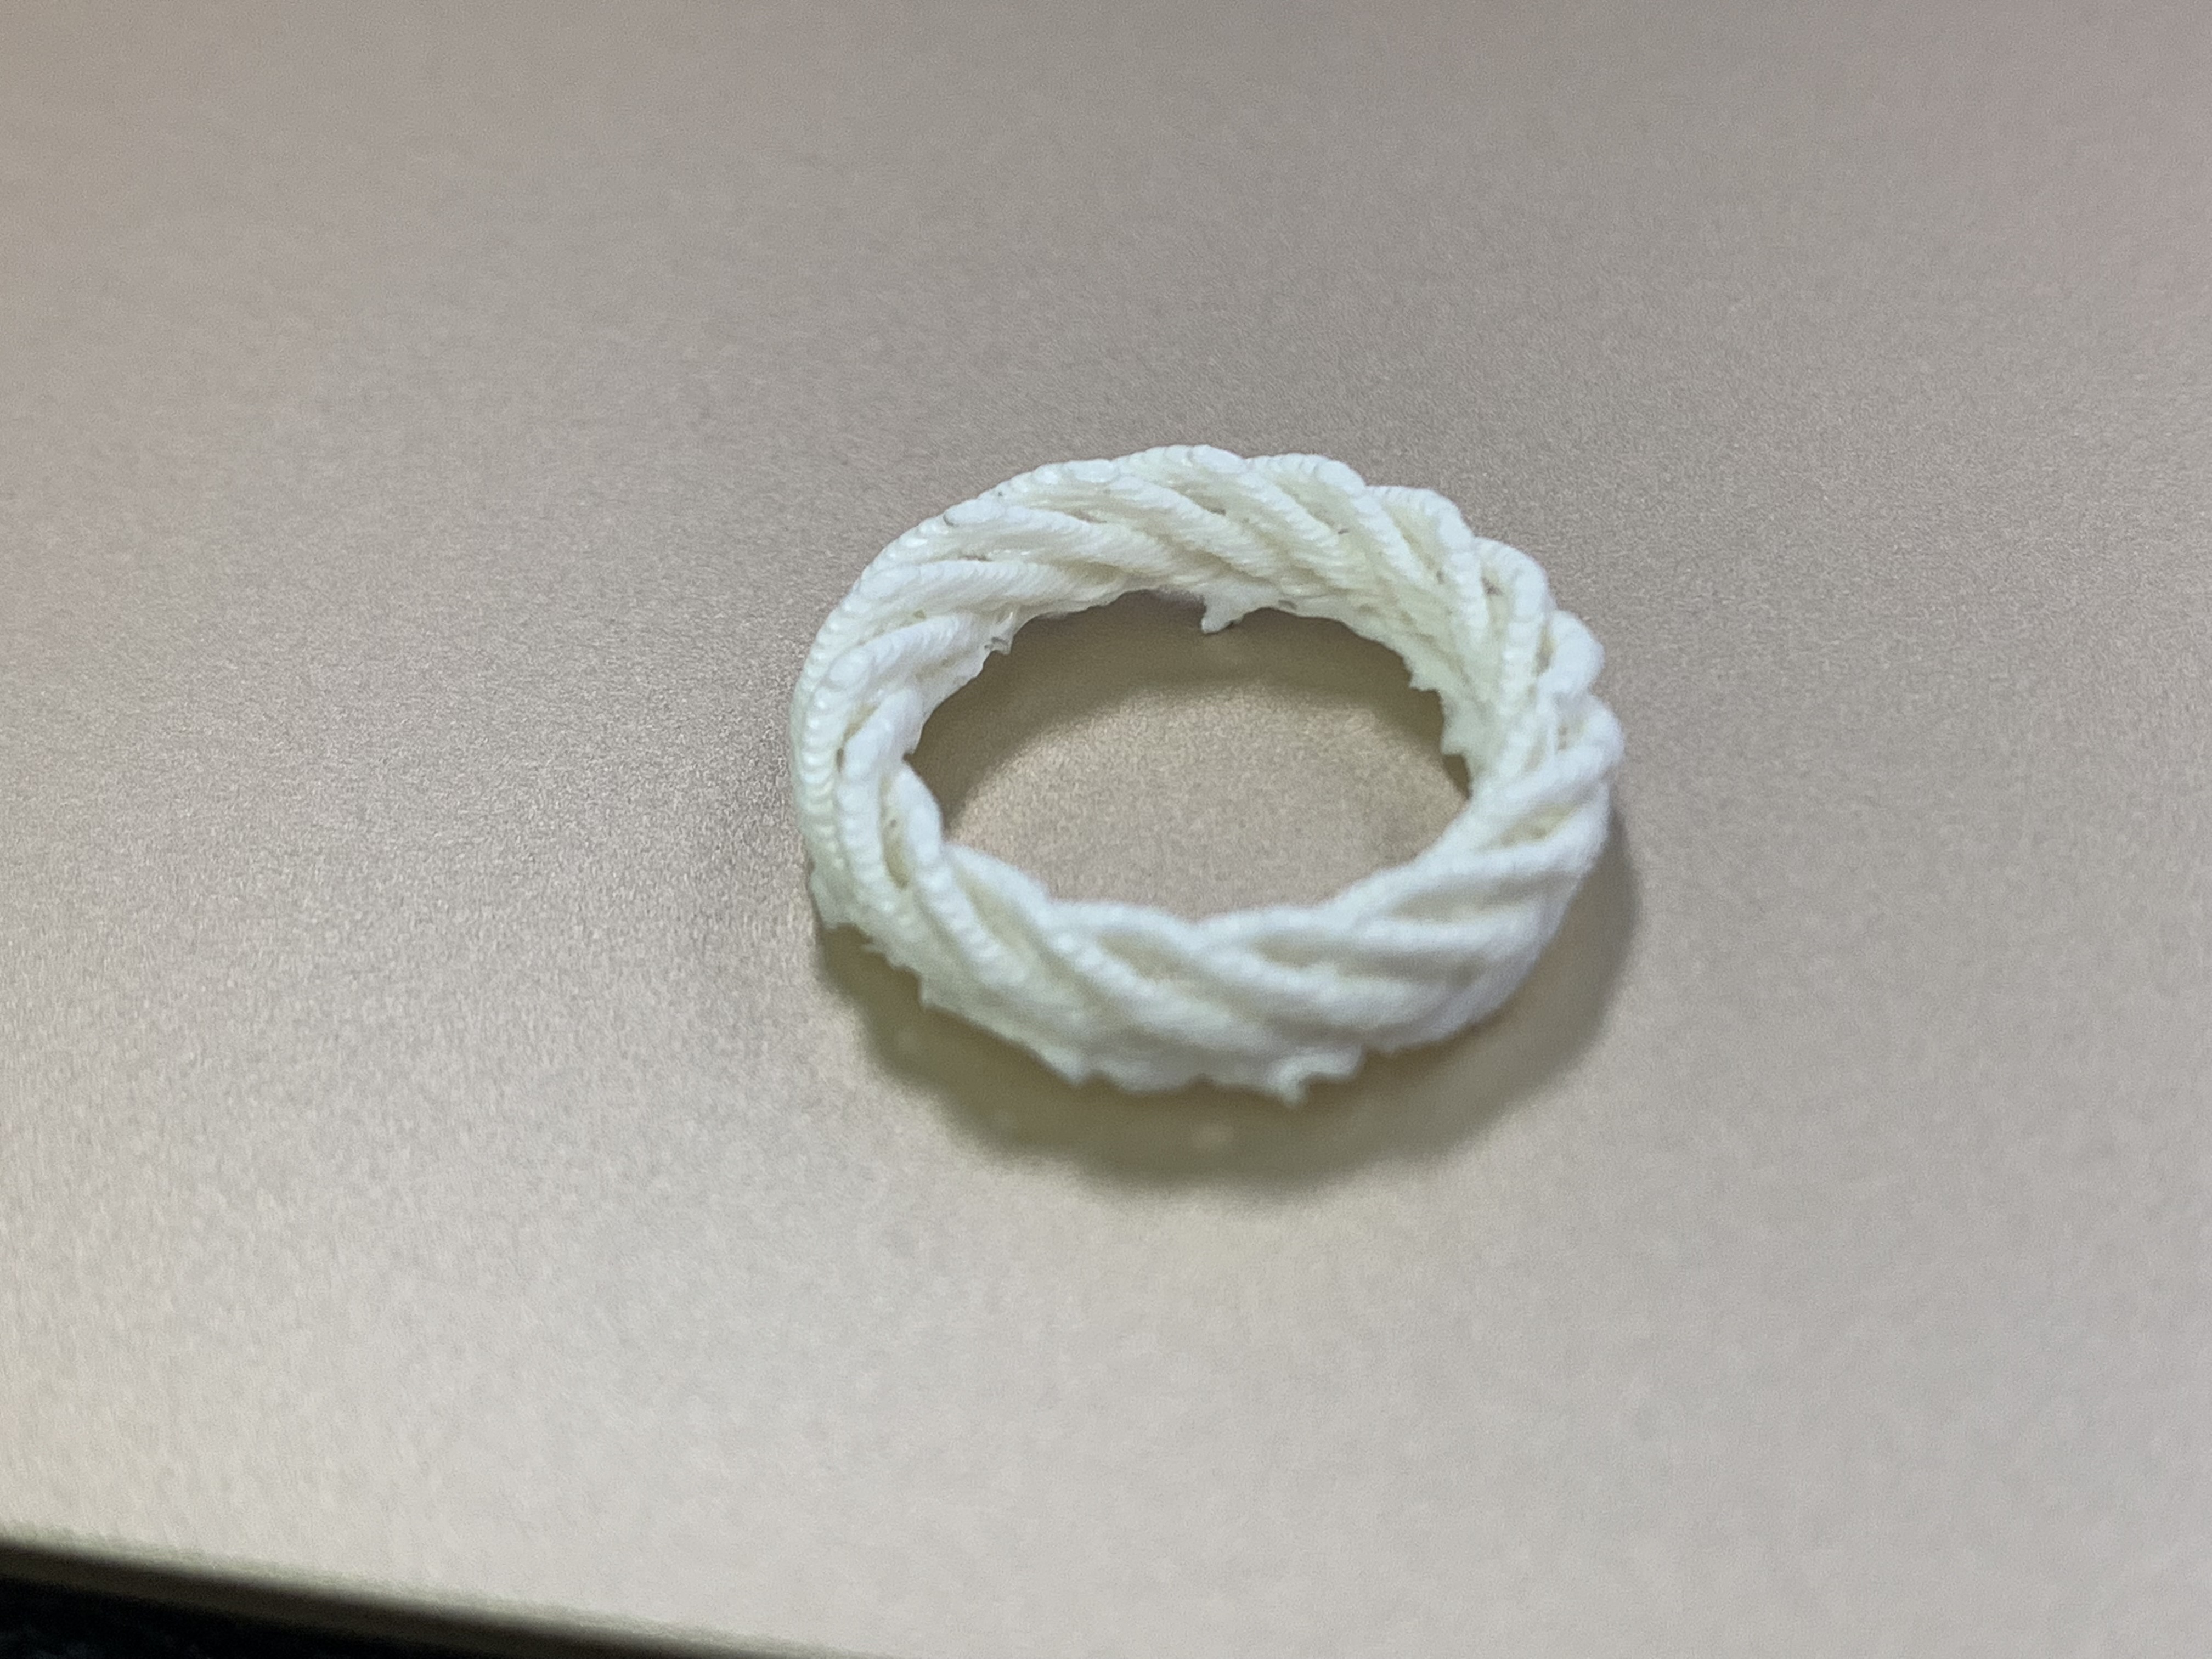
This draft was a success however, it was difficult to remove the adhesion plate so for our final print we will print it without a plate and hope it sticks to the glass just as well. Other than that, the print worked out just as we had hoped. We will print another test ring without the adhesion plate and with a different customization before finalizing our model to make sure it prints well.
Thingiverse Customizer
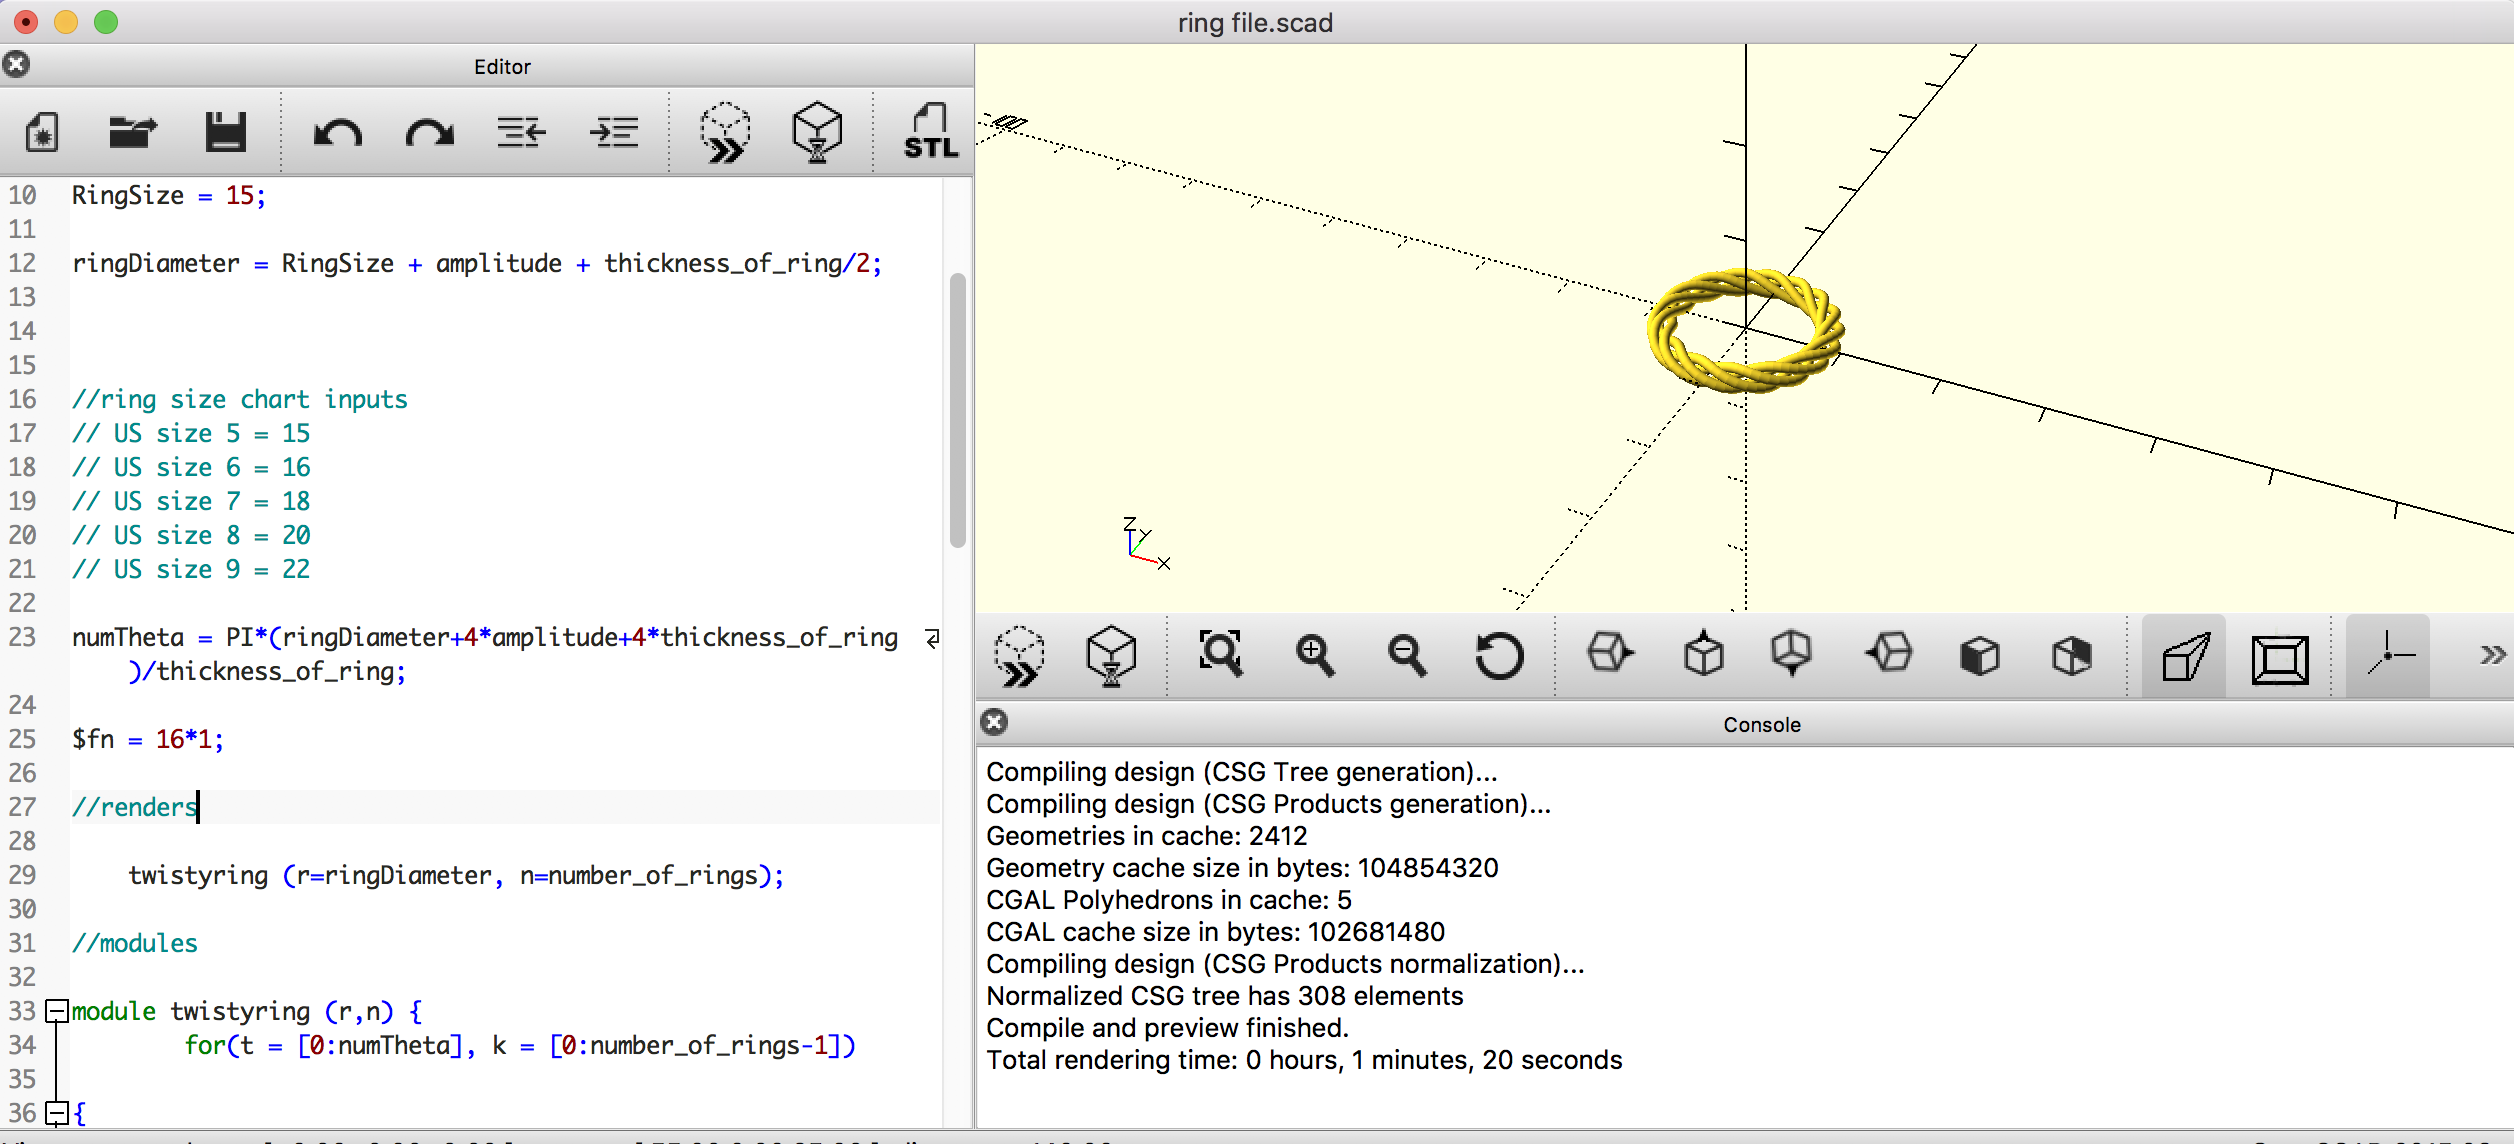
Code Edits: Shown above are the main edits we made to the code. By making a module, we were able to condense all the parts of the found code. We designated renders that could be easily referenced and separated out the parameters so users could play with them. We also added a ring size chart as a comment below ring diameter so users know what number to input for their ring size.
One of the parameters we had to add at the end of our design process (so it would be compatible with Customizer) was RingSize so this would be customizable. This is because formulas in the code cannot be used as a customizable parameter. We also made amplitude=1*1 and $fn=16*1 so that these parameters would be formulas and, thus not customizable.
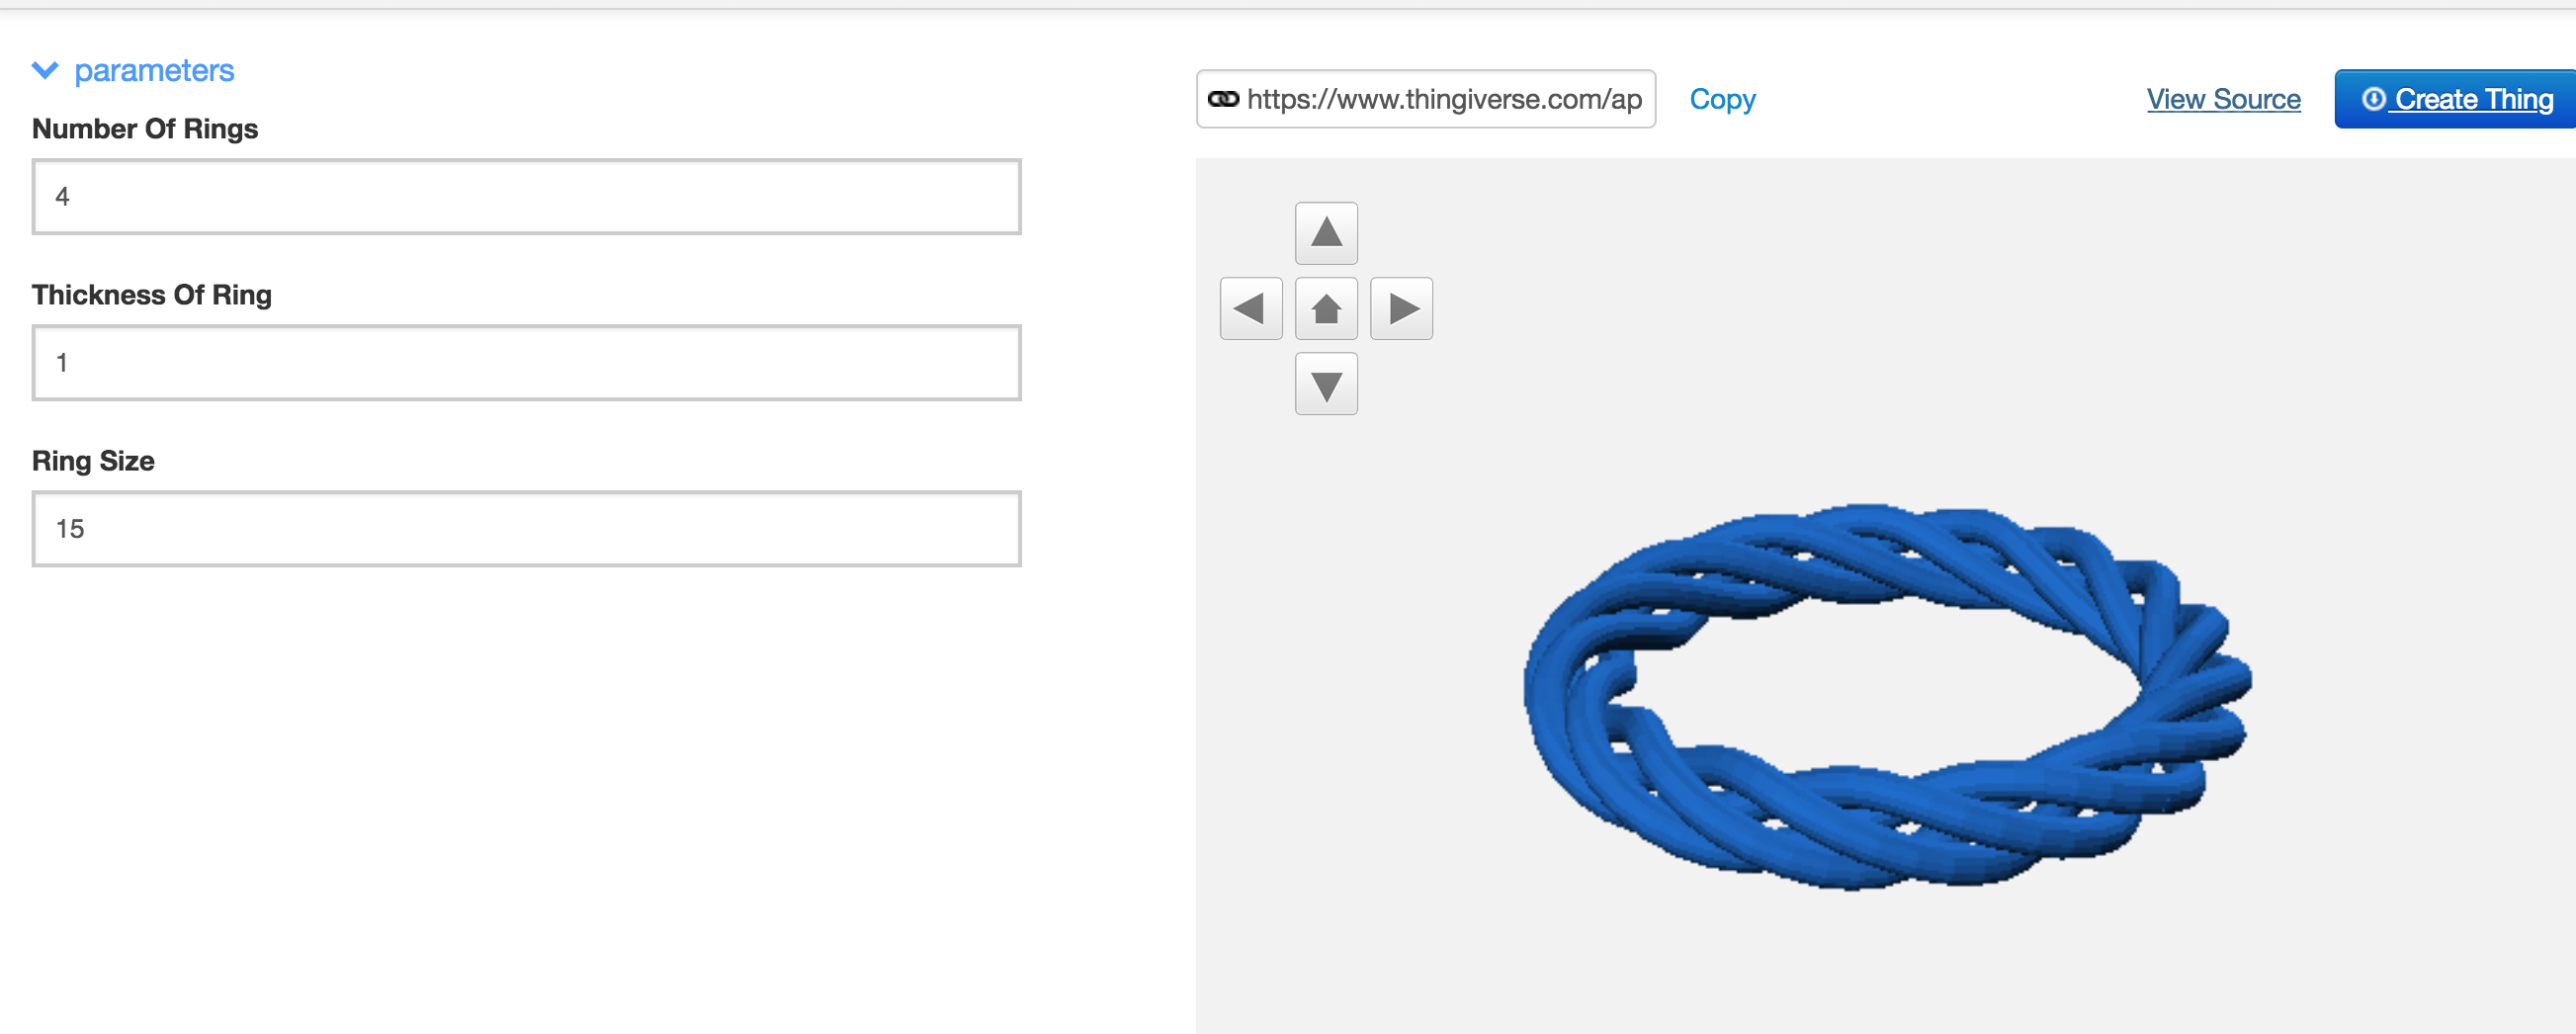
Model in Thingiverse Customizer: Thingiverse pulled the parameters (that did not have formulas) from our code. Users will only be allowed to modify thickness of ring, ring size, and number of rings. The inputs for ring size have been converted from the standard US ring sizes to fit the code. The number of rings allows the user to customize the design.
Full Code:
//parameters

amplitude = 1*1;

number_of_rings = 4;

thickness_of_ring = 1;

RingSize = 15;

ringDiameter = RingSize + amplitude + thickness_of_ring/2;

//ring size chart inputs
// US size 5 = 15
// US size 6 = 16
// US size 7 = 18
// US size 8 = 20
// US size 9 = 22

numTheta = PI*(ringDiameter+4*amplitude+4*thickness_of_ring)/thickness_of_ring;

$fn = 16*1;

//renders

twistyring (r=ringDiameter, n=number_of_rings);

//modules

module twistyring (r,n) {
for(t = [0:numTheta], k = [0:number_of_rings-1])

{

hull()

{
//first slice

rotate(t*360/numTheta, [0, 0, 1])

translate([ringDiameter/2, 0, 0])

rotate(-360/numTheta*number_of_rings*amplitude*cos(t*360/numTheta*number_of_rings-k*360/number_of_rings),
[0, 0, 1])

translate([0, 0, amplitude*cos(t*360/numTheta*number_of_rings-k*360/number_of_rings)])

rotate(90-360/numTheta*number_of_rings*amplitude*sin(t*360/numTheta*number_of_rings-k*360/number_of_rings),
[1, 0, 0])

translate([amplitude*sin(t*360/numTheta*number_of_rings-k*360/number_of_rings), 0, 0])

cylinder(d=thickness_of_ring, h = 0.1, center = true);


//second slice

rotate((t+1)*360/numTheta, [0, 0, 1])

translate([ringDiameter/2, 0, 0])

rotate(-360/numTheta*number_of_rings*amplitude*cos((t+1)*360/numTheta*number_of_rings-k*360/number_of_rings),
[0, 0, 1])

translate([0, 0, amplitude*cos((t+1)*360/numTheta*number_of_rings-k*360/number_of_rings)])

rotate(90-360/numTheta*number_of_rings*amplitude*sin((t+1)*360/numTheta*number_of_rings-k*360/number_of_rings),
[1, 0, 0])

translate([amplitude*sin((t+1)*360/numTheta*number_of_rings-k*360/number_of_rings), 0, 0])

cylinder(d=thickness_of_ring, h = 0.1, center = true);

}

}

}
Final Prints
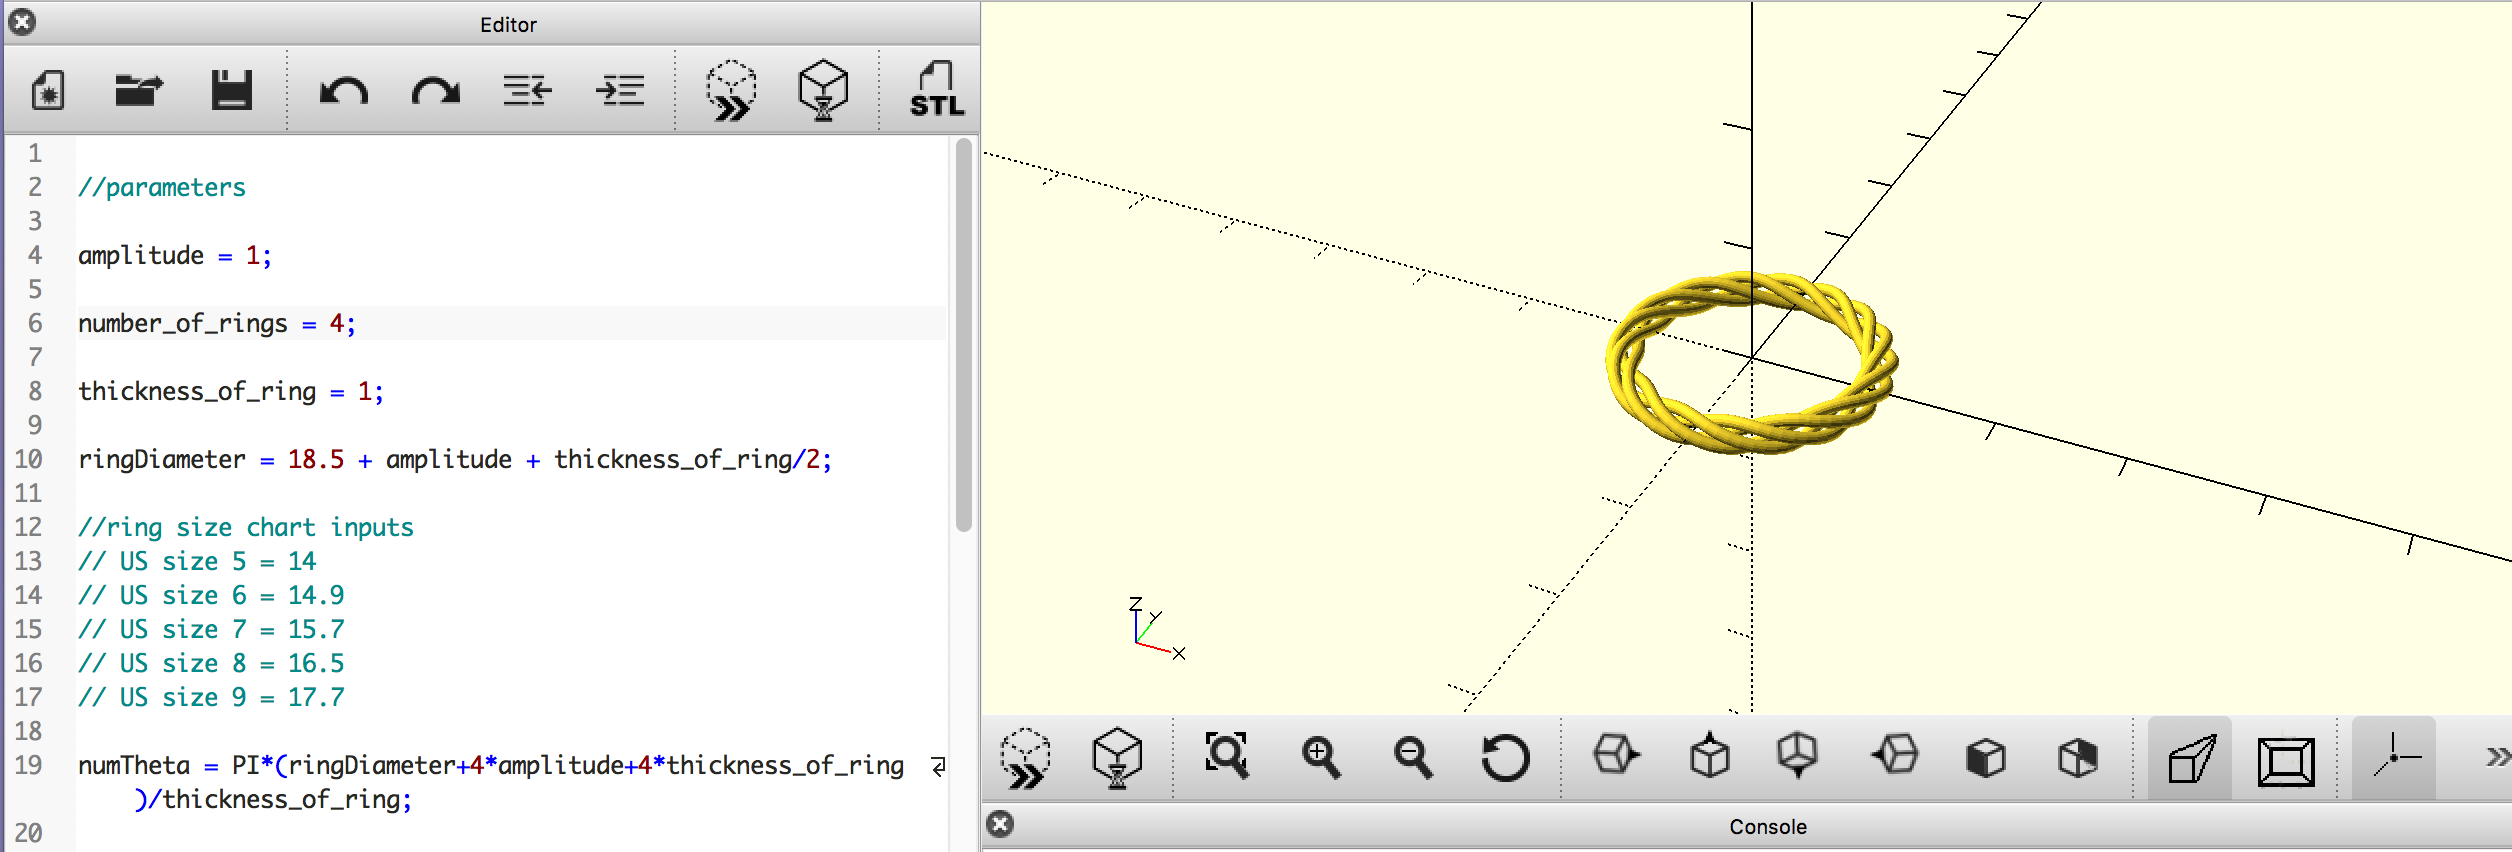
Print 1: (white)
Changed the ring size from the original code, ringDiameter= 14 to 16; printed with ‘raft’ adhesion plate
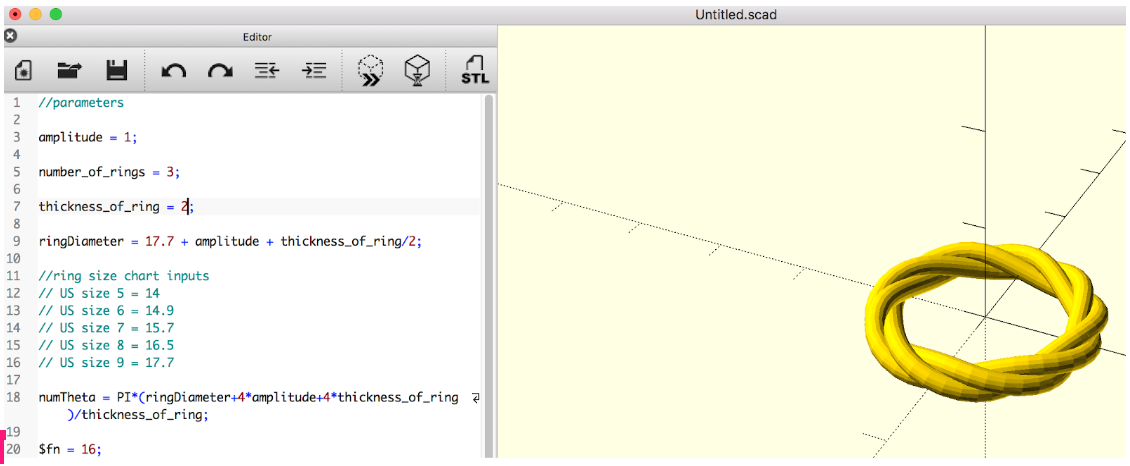
Print 2: (red)
Changed the number of rings from 4 to 3, the thickness of the ring from 1 to 2 and the ringDiameter from 14 to 17.7; printed with ‘brim’ adhesion plate
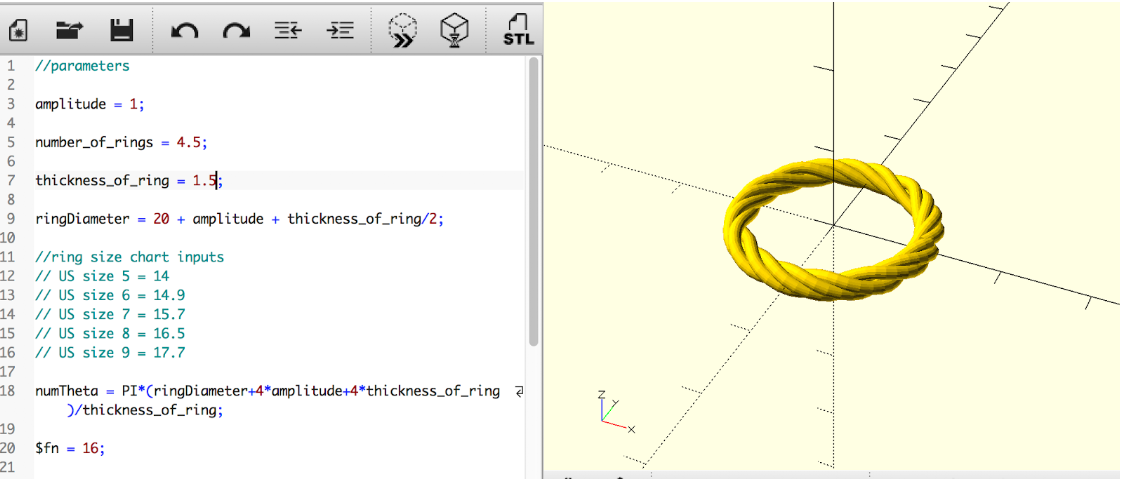
Print 3: (purple)
Changed the number of rings from 1 to 4.5, the thickness of ring from 1 to 1.5 and the ringDiameter from 14 to 20; printed with ‘brim’ adhesion plate
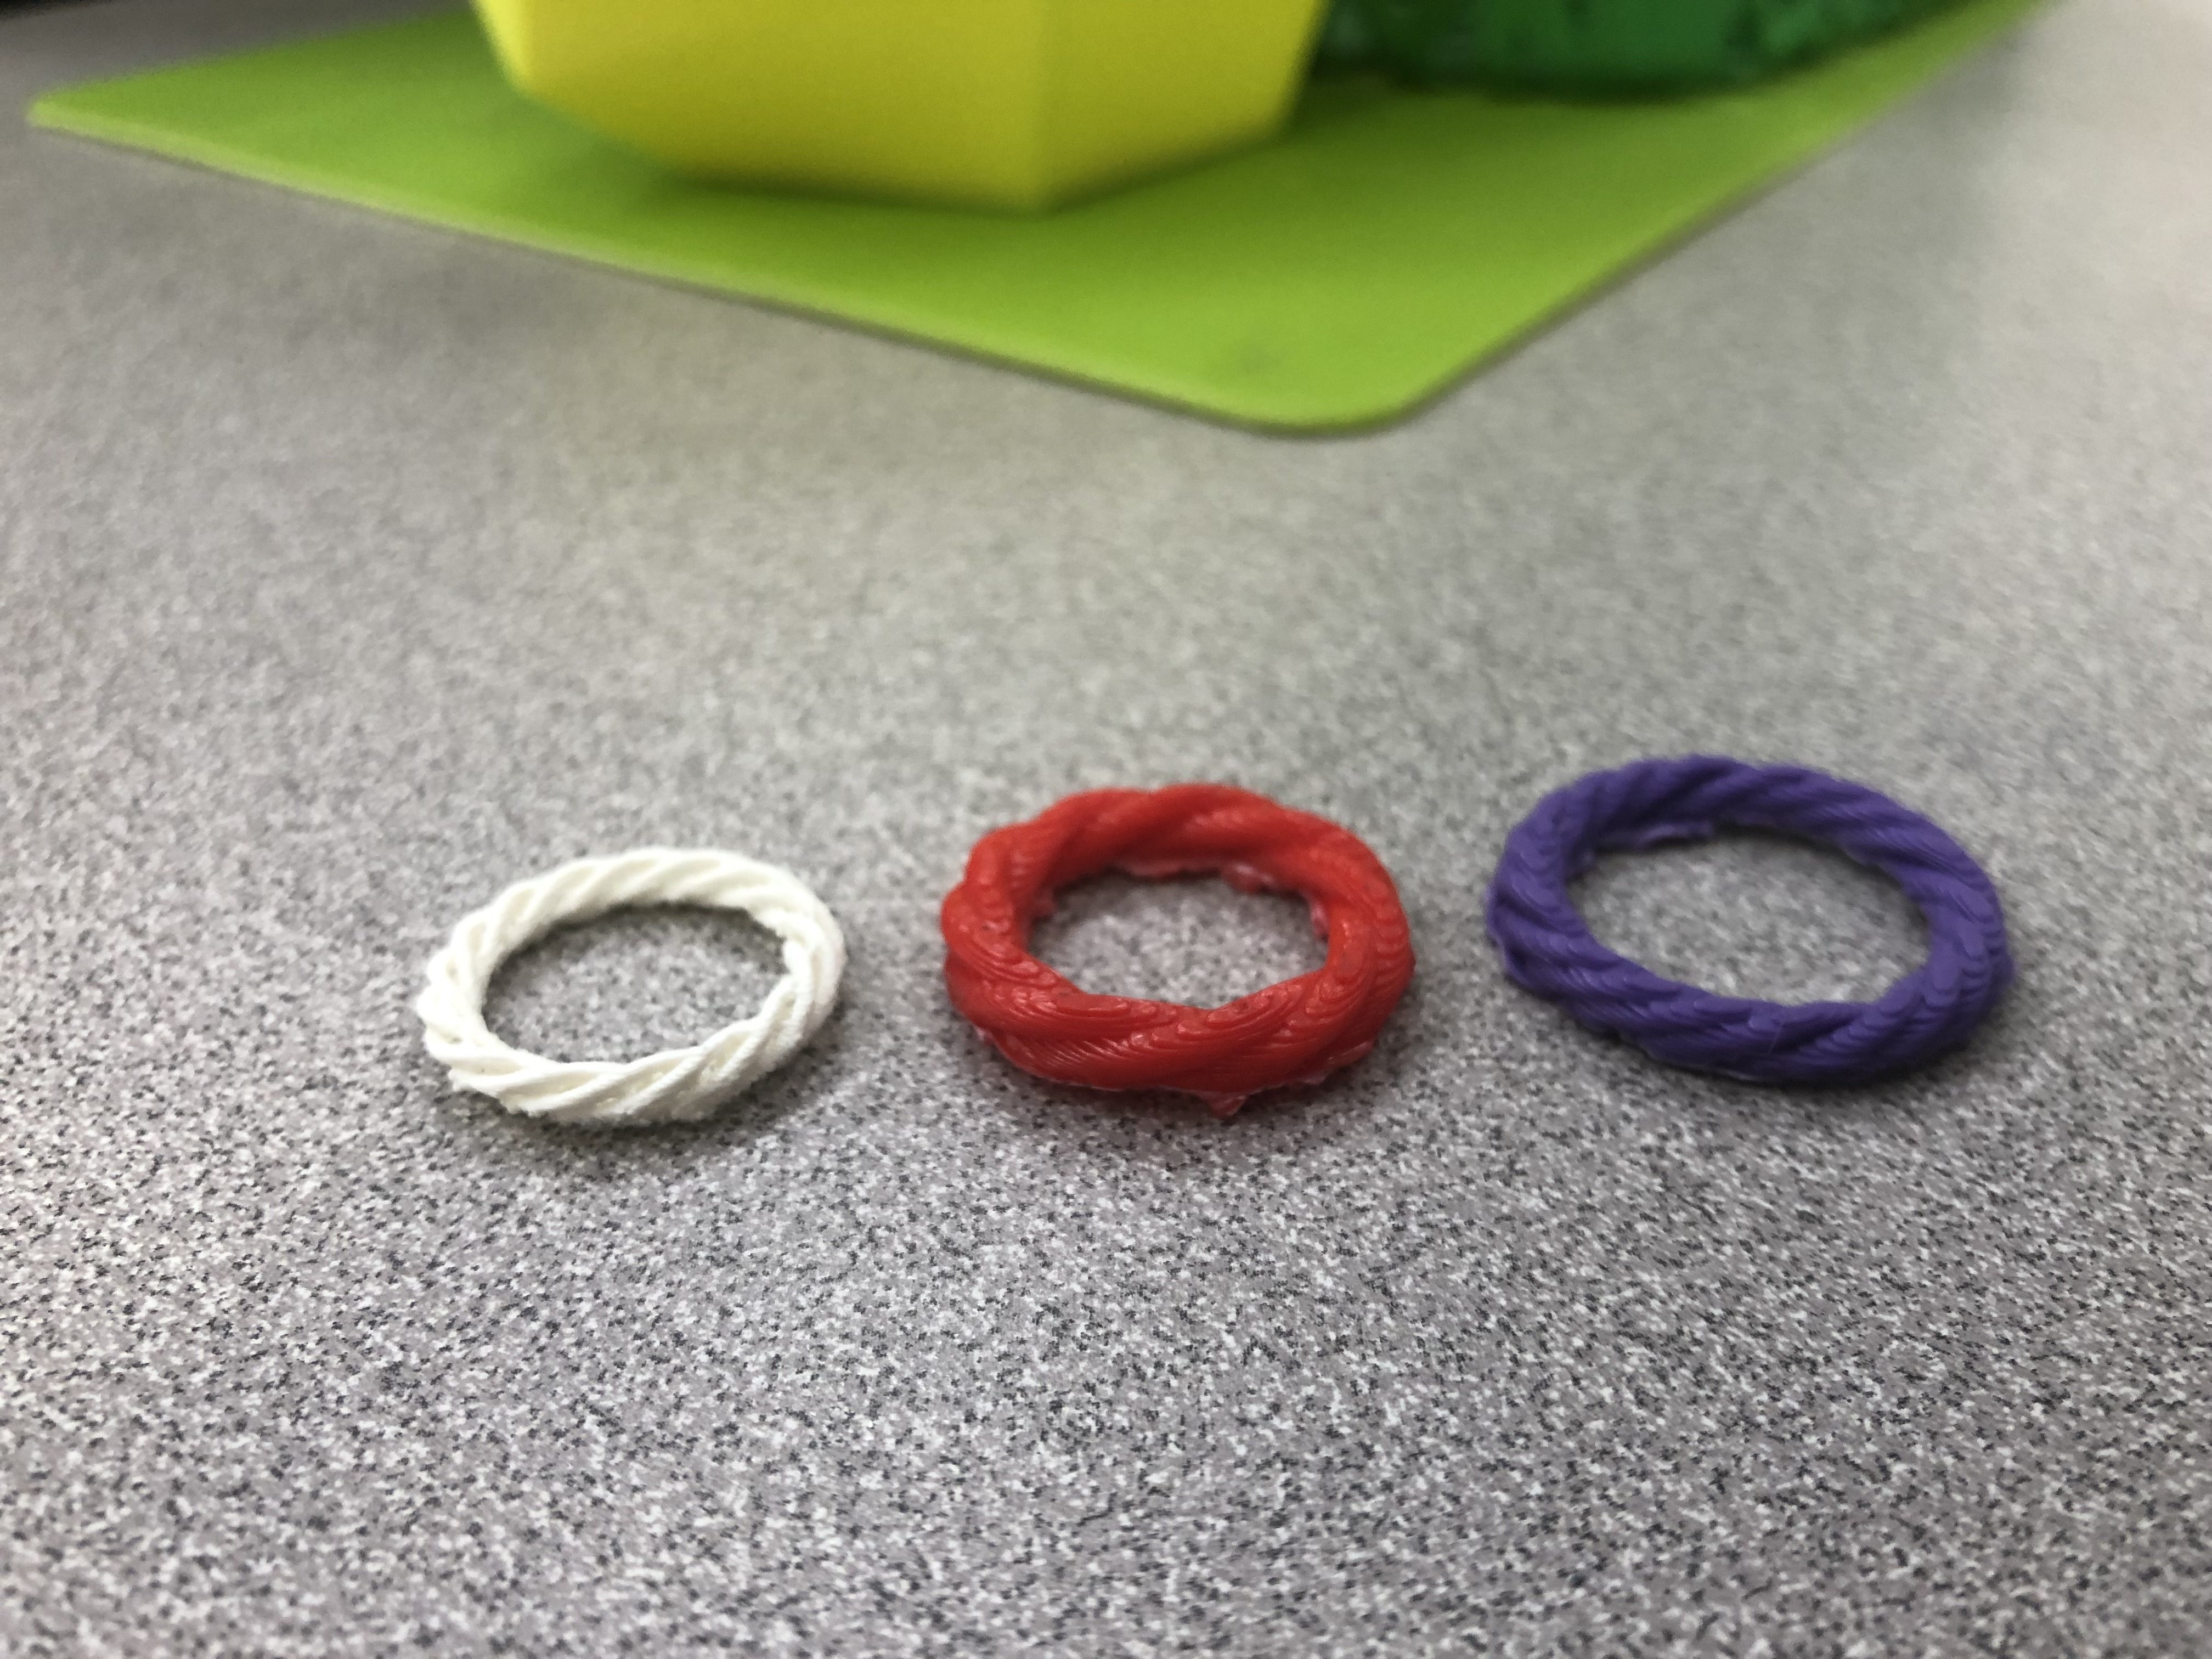
Printing these models took a bit of trial and error specifically with choosing an adhesion plate that is the easiest to remove with the design. We are a little disappointed with the texture of the prints and that they are not as smooth as we had hoped they would be. At this stage, they might not be wearable because they are so scratchy on the inside. The last two customized prints (the red one and the purple one) printed the best in that the texture was smooth and the overall form matched their codes the closest. The first customized print (white) was a little bit rougher, we assume this is partly a result of the spaces between each coil that the printer just did not produce as clearly. We learned that the raft adhesion plate was the easiest to remove, however it produces a very rough texture at the bottom of the ring where it was attached.