Initial Design Idea
For our openSCAD project, we are going to create a customizable soap tray. We want to design this because it is very practical and can be used everyday in homes everywhere. As we start this project, we have the basic knowledge that we need to navigate around the openSCAD software and create the basic shapes that we need for our tray. In order to complete this design, we will have to learn how to completely customize shapes and designs in openSCAD. In order to learn this, we can rewatch tutorials, do some more background research on writing code, and just mess around on the software to see what we can figure out.
Design Iteration
portion of code, adapter from polybowls
module polyShape(solid){
for ( i = [1: 3] ){
translate(i * [13,0,0])
for ( i = [1: 7] ){
translate(i * [0,11,0])
difference(){
// start with outer shape
offset( r=5, $fn=48 )
circle( r=radius, $fn=sides );
// take away inner shape
if (solid==”no”){
offset( r=5-thickness, $fn=48 )
circle( r=radius, $fn=sides );
}
}
}
}
}
- We had to add a lot of translations to make the for code work.
- Also had to change how big the polyshapes are allowed to get, so that they don’t take over the make.
First Draft Print
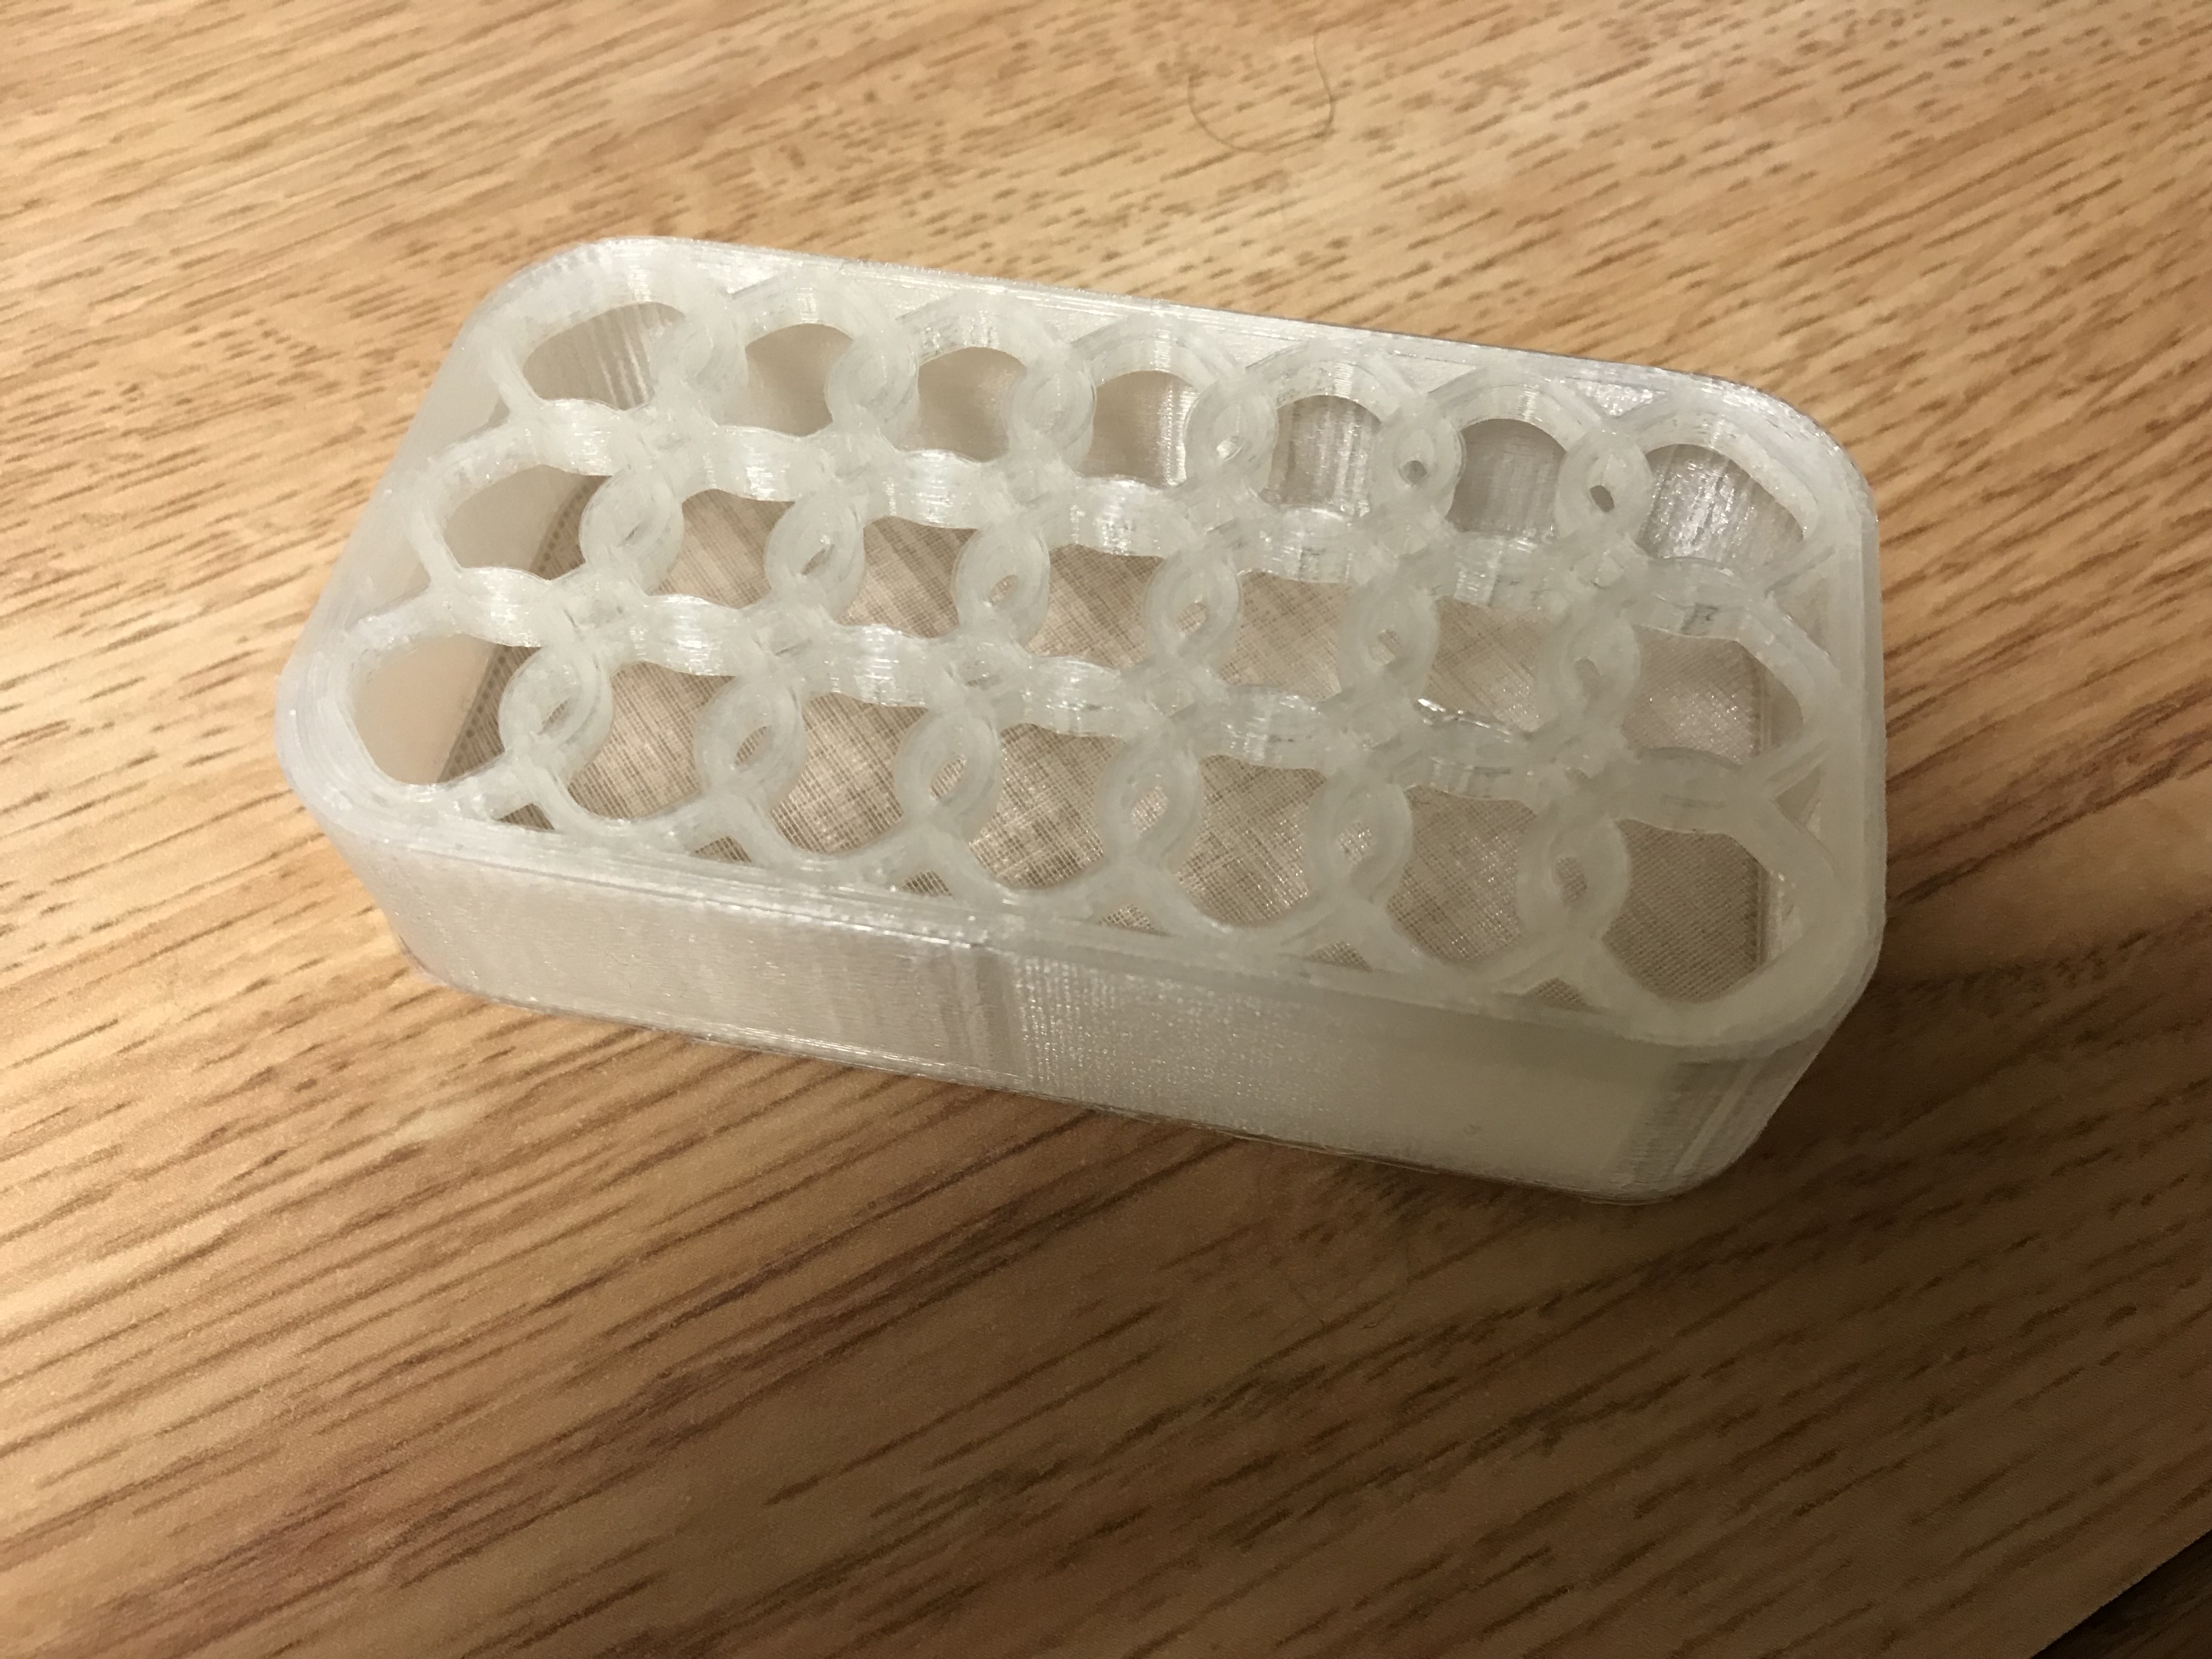
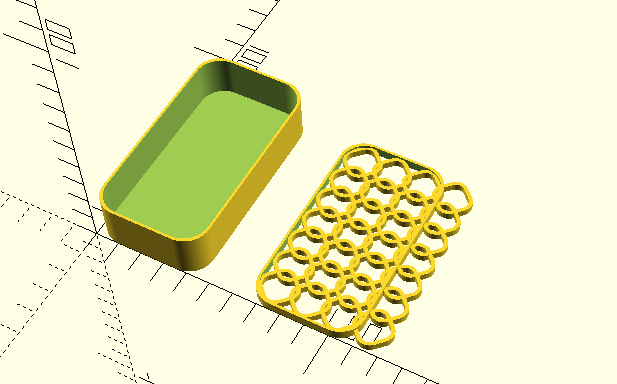
- The draft print worked out well, however we messed up the dimensions. Instead of making the soap dish the size of a soap dish… it’s the size of a soap bar. The grate fits perfectly within the box portion, which will be really good later. I learned how to make a for loop which was very difficult to figure out.
Thingiverse Customizer

- The customizable parameters include diameter, number of sides, and thickness of shape. The other parameters are not changeable.
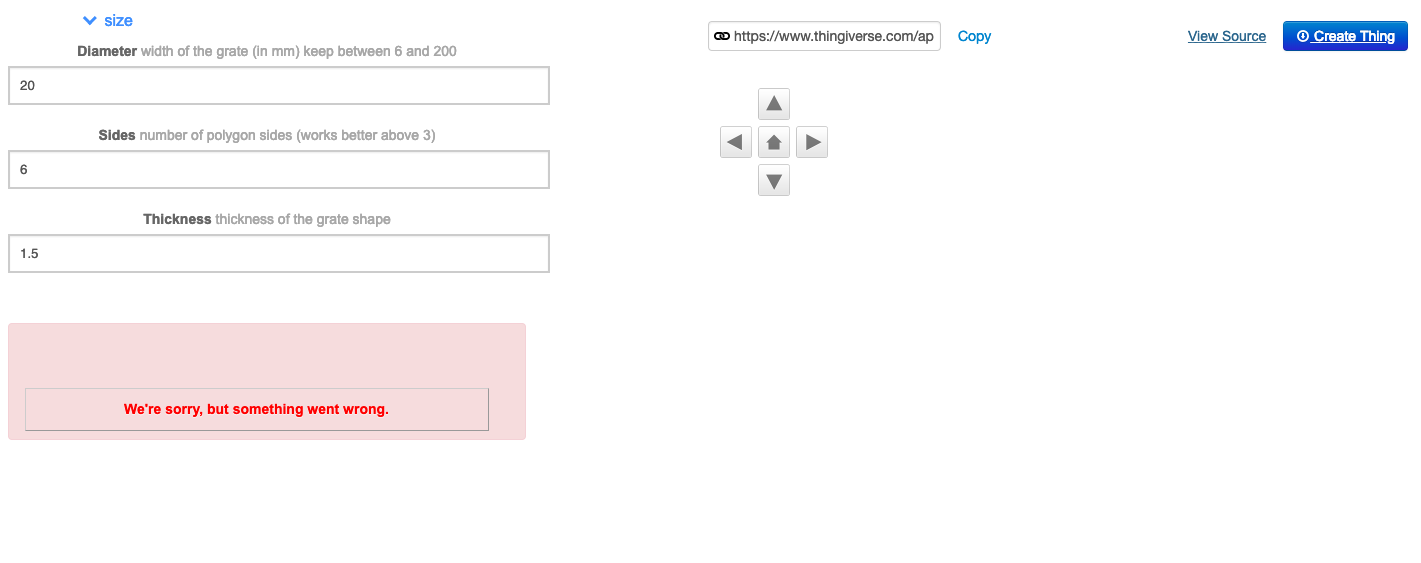
- Customizer is enabled, but for some reason went wrong every time.
- ThingiverseLink
Final Prints
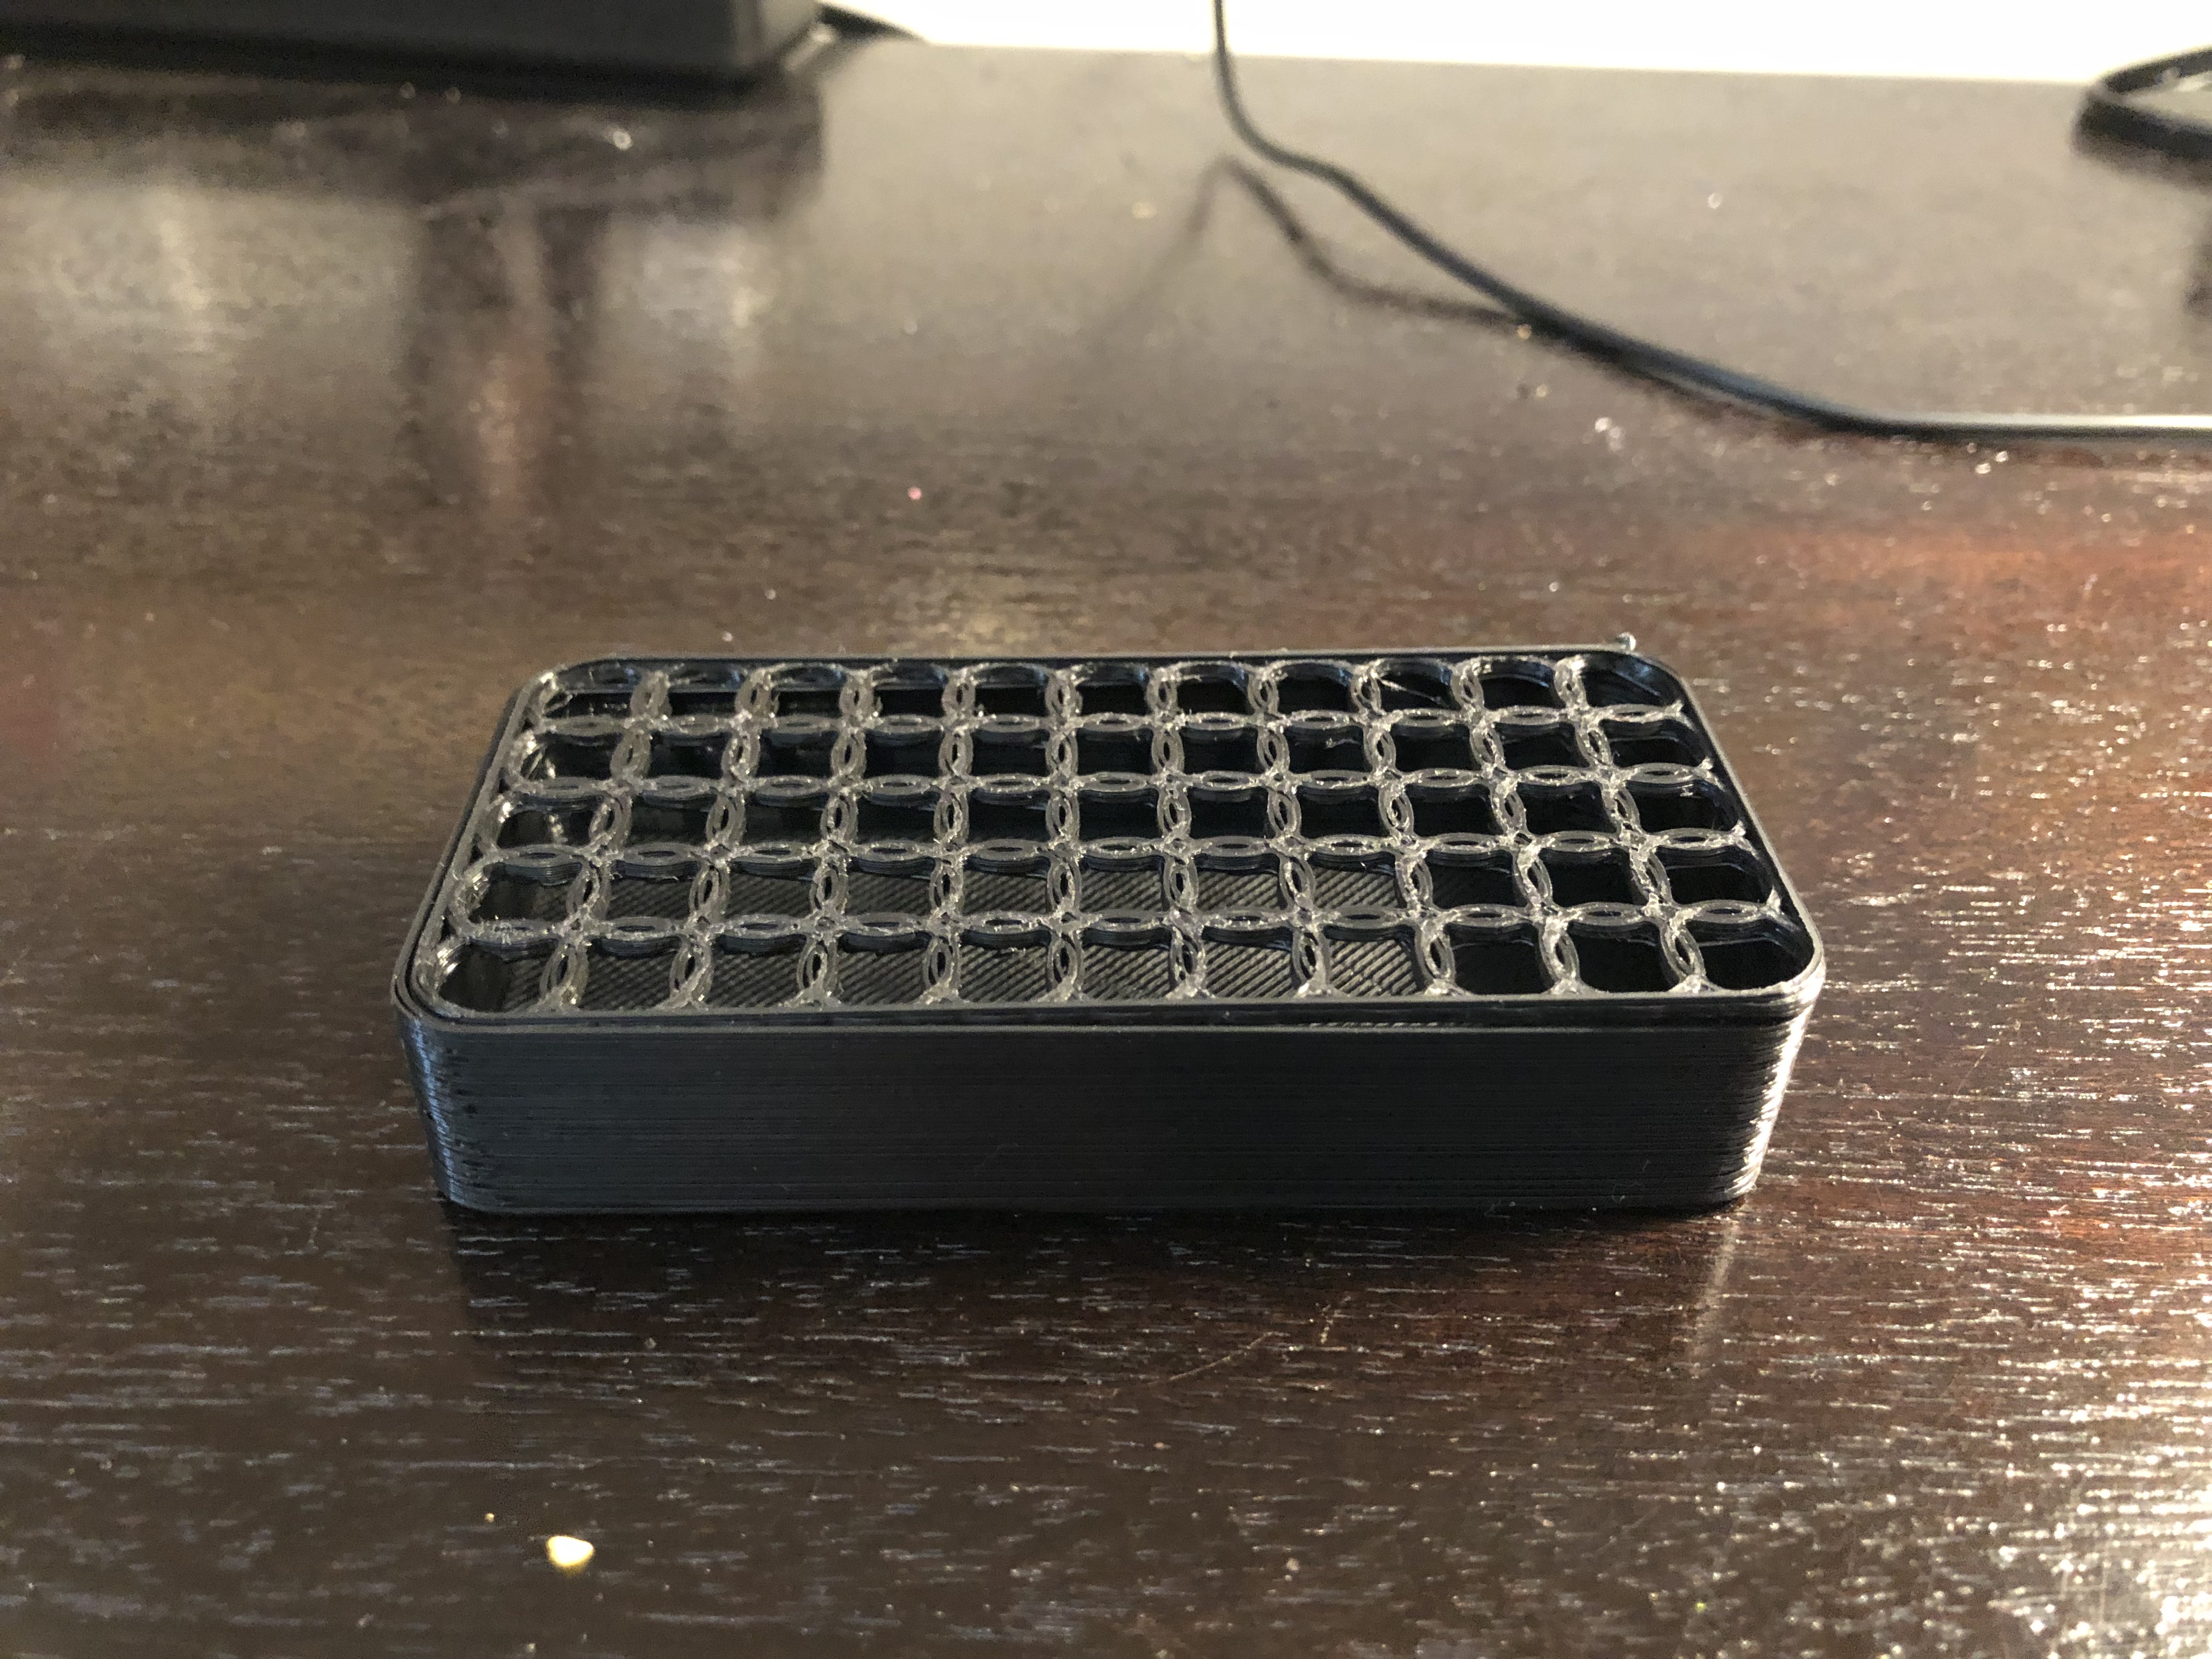
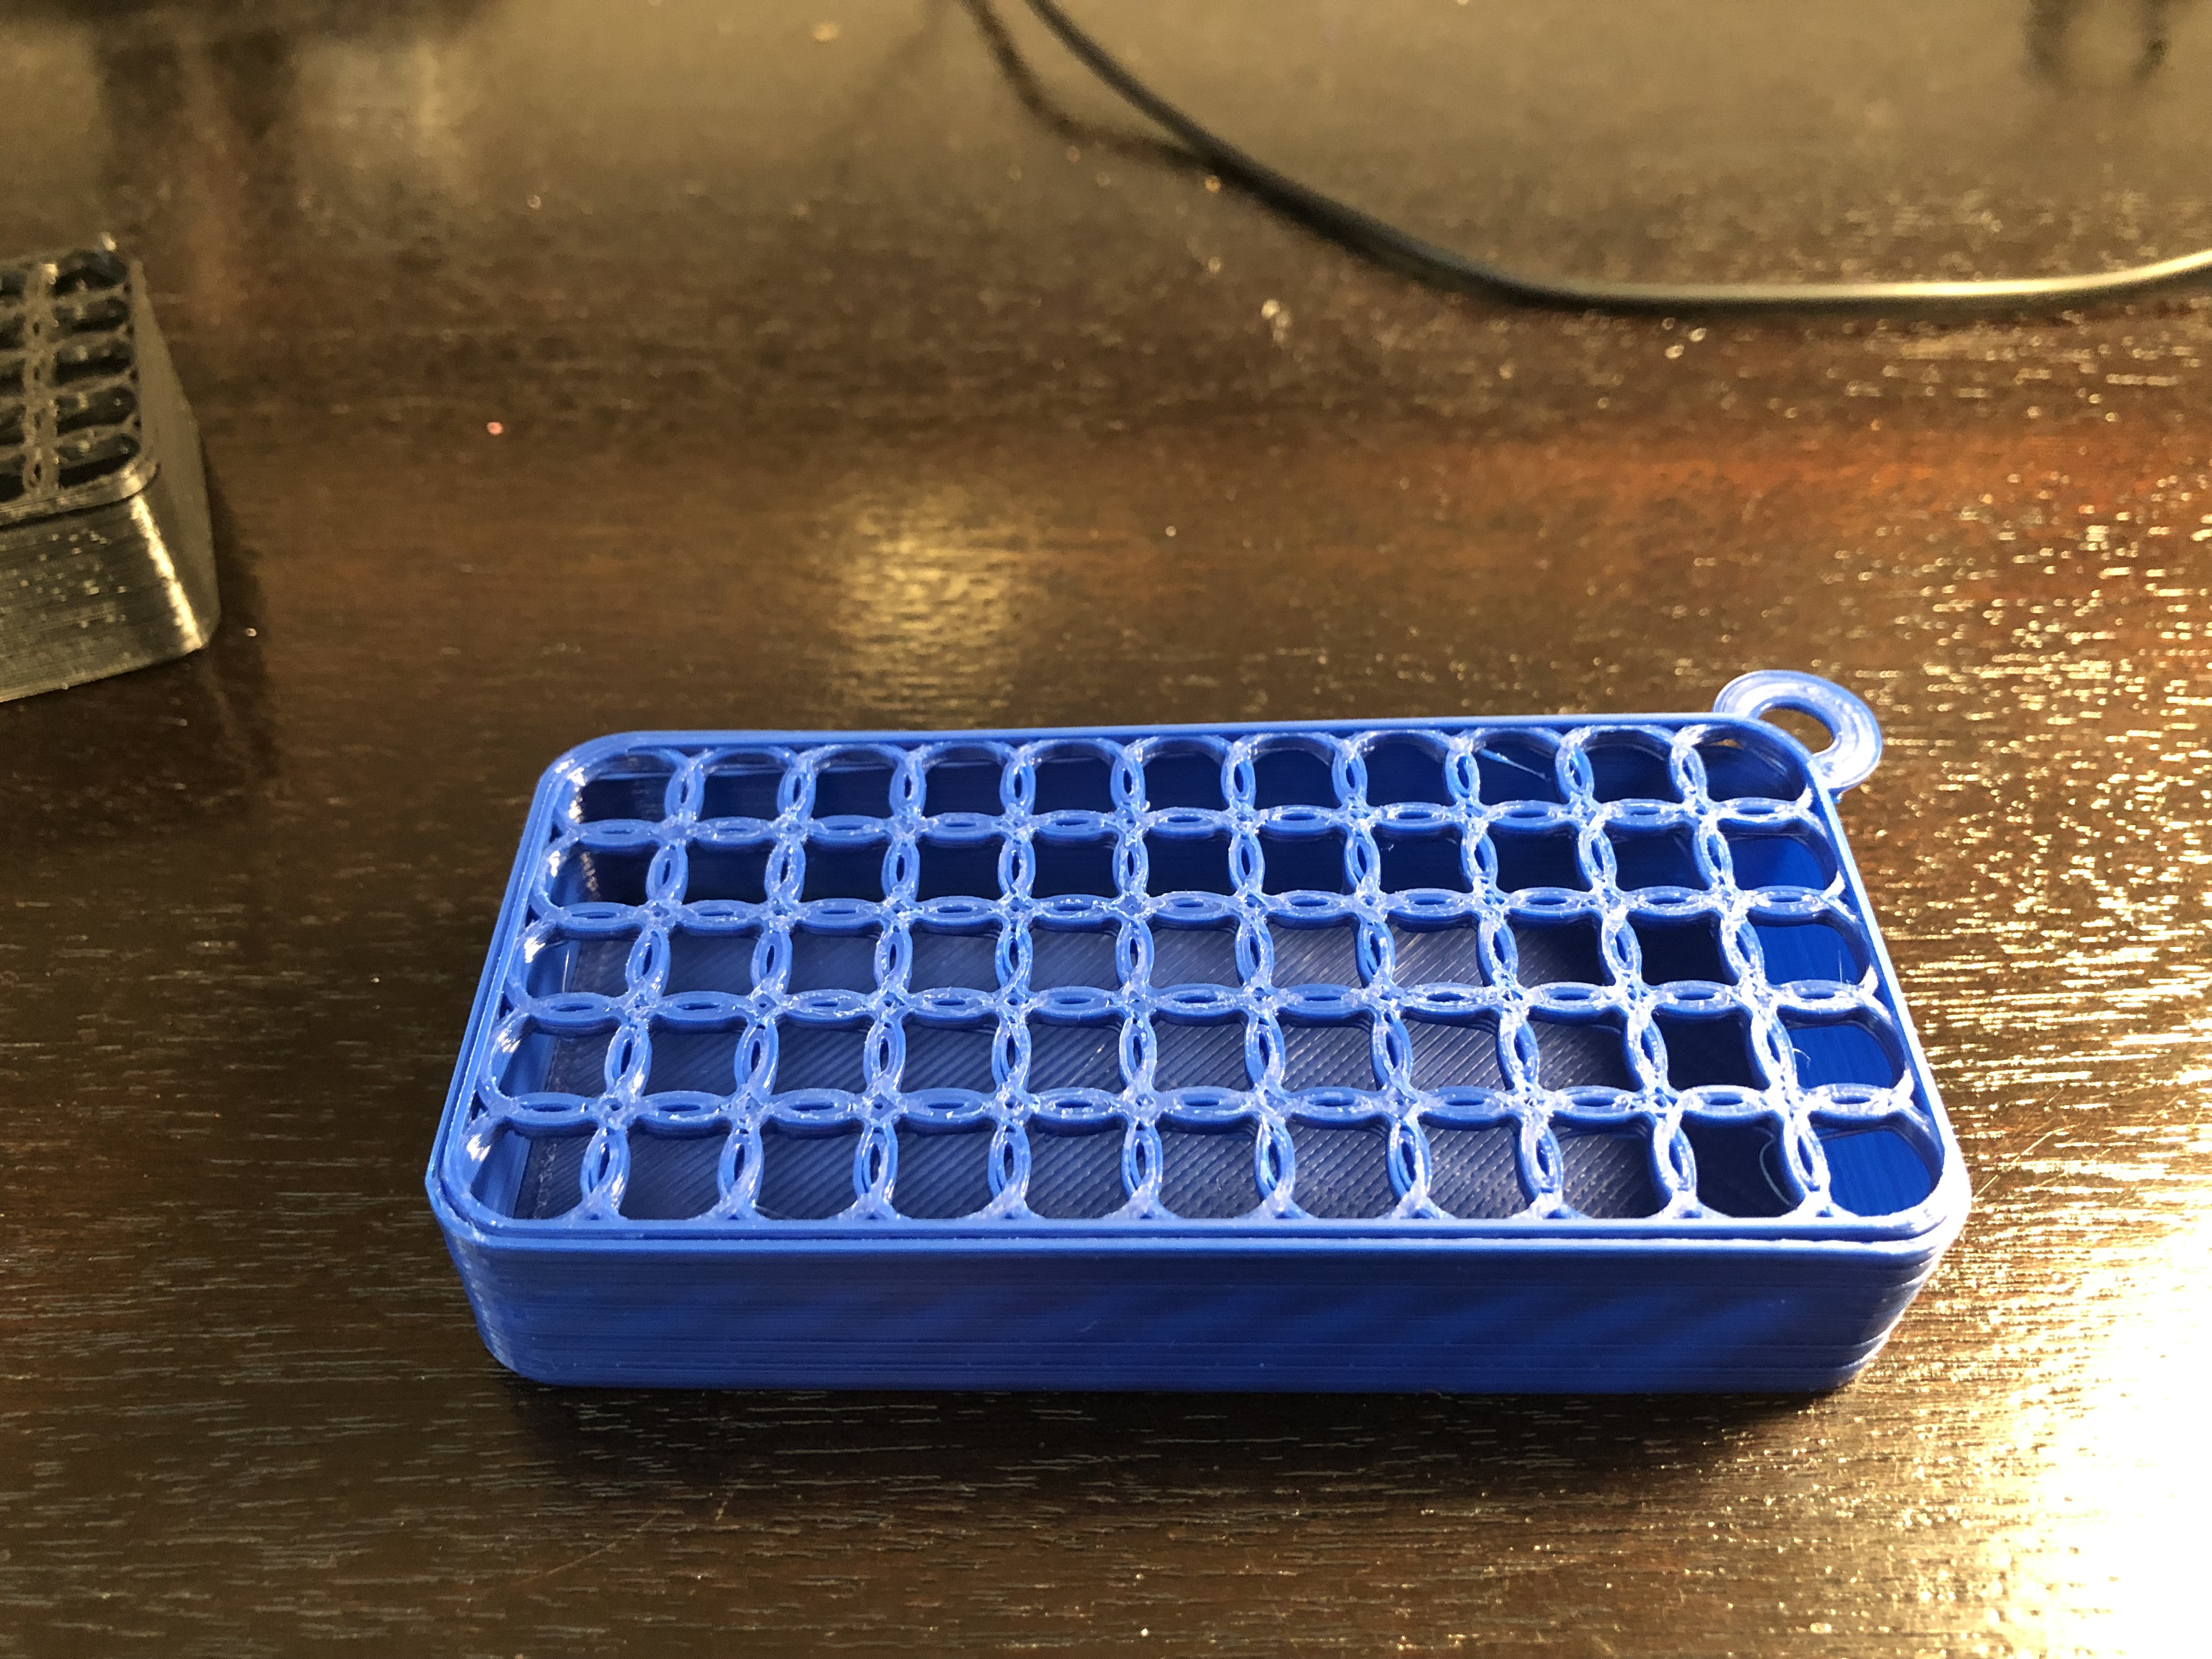
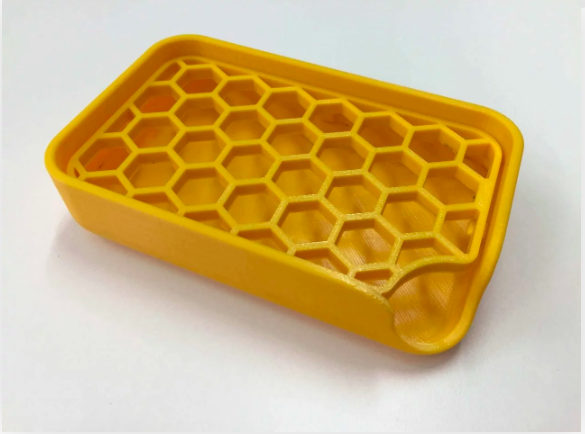
The black tray that we printed as one of our final prints is basically just a larger version of our first print, which was too small to actually function as a real soap tray. We made it bigger, with a larger area to place the soap so that it could act as a soap tray in real life. This was the same code that we used in our original print, we just scaled it up to so it would be bigger. The second tray, the black is slightly different in that we added a little ring on the corner to act as a handle. This is meant to make it easier to remove the tray portion of the print. Our first print did not have the handle, and this makes it much easier to remove the tray without getting old soap and grime on yourself when taking apart the tray. The handle is its own code, and it can be added or removed very easily depending on whether or not you want the handle in the print. Overall, both prints came out successfully, and one weakness that we faced was that there was no handle on our first prints. I think that handle is a key part to our trays, and it certainly makes the final print much better and easier to use than the ones without it.