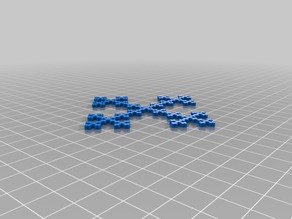
My first Fractal that I would like to print is called the Vicsek Fractal. This fractal actually arose from the Sierpinski Carpet while also using the Hausdorff dimension. One reason as to why it is based off of the Sierpinski Carpet is because the initial 1st iteration for both fractals are derived from a basic square.

However in the Vicsek Fractal, each new iteration involves adding multiple squares to the first picture which I am not quite sure how, but it all works off of a formula, 


Shown above are the 2D and 3D images created by Donald Plante of the Vicsek Fractal. When it comes to 3d printing the Vicsek Fractal, the first image of the fractal in 2D I believe would be a very simple print. I’m sure the size of this print could change very easily, and there is minimal if any overhang that would give the printers much of a fit while printing. However, the other image of the Vicsek Fractal in 3D would probably be an impossible or extremely hard print with the printers that we have access too. The 3D version has a ton of overhanging parts making the print extremely hard with lots of room for failure. I don’t think the print would be to large to do, just very hard with the resources we have access too.
3D Printing Results
The initial print for my Vicsek Fractal in which I attempted to print the 3D model didn’t turn out well. When I tried to remove the supports, pieces of the actual print started to break off as well. So I then had to resort back to the flat 2D print, which was a much faster and simple print. I thought that once the print was done, that everything else would be easy, but actually removing the figure from the bottom base without breaking any of the end pieces again was very hard and took close to an hour of prying and peeling. However, the print did work and I am happy with the end results. The only additional things that I have learned about this fractal is a more detail explanation of what the 

I made this:
Don’t forget to post a Make on Thingiverse, and link to it here