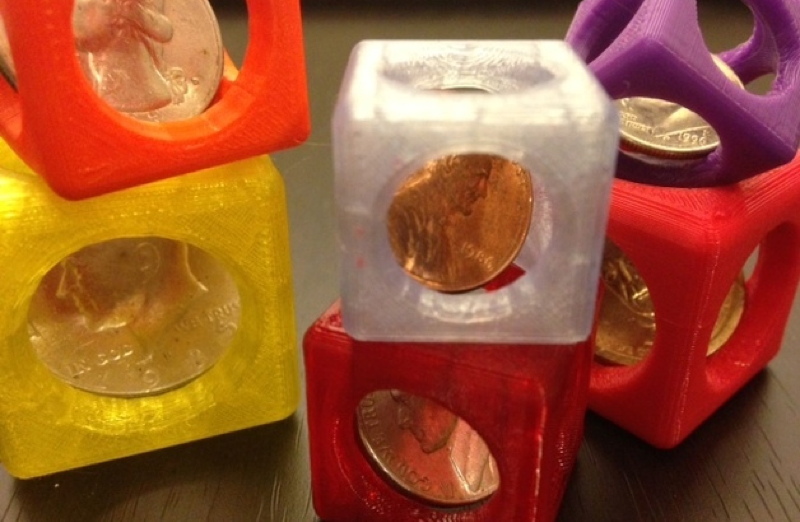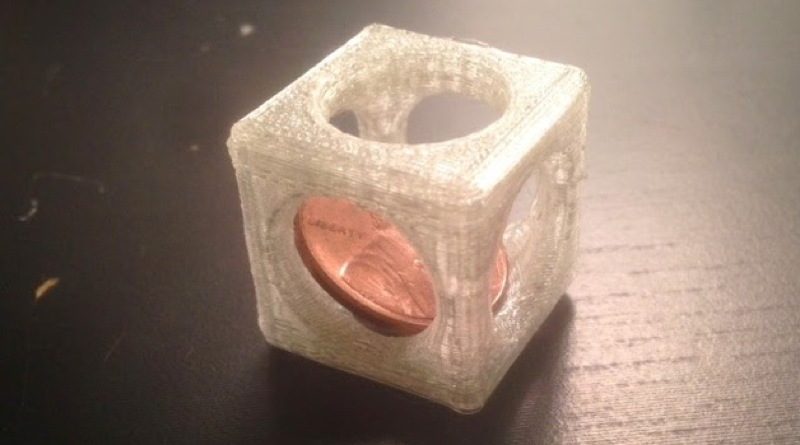
3D Printing – Penny Traps
Our first-day 3D print will be a Penny Trap. This model is a good illustration of a design that is possible with 3D-printing but would be impossible with standard subtractive manufacturing methods such as milling. How does the penny get inside?
The answer is that we’ll pause the prints at the right time and drop the penny in, then let the 3D printer continue printing above and around the penny. The “right time” is when the model is about 60% or 70% printed; this ensures that the penny will sit below the printing height of the nozzle, which will help us not damage the machines!
Start your prints!
We have three different types of 3D printers in JMU 3SPACE, and each one operates a little differently. The Afinias are operated from the computer with the “3D” software. This software opens STL files, slices them, and sends them directly to the printer. The Ultimaker printers are operated from their own screen an jog wheel, with files on an SD or USB card that were previously sliced the the software “Cura”. We’ll learn more about this later on; right now we just want to print something!
To start a Penny Trap print on an Ultimaker:
- The model should already be sliced and ready on an SD card or USB drive inserted into the front of the printer.
- Move the jog wheel on the front of the machine to select Print, and press the jog wheel like a button.
- Use the jog wheel to select the file UM2E_pennytrap or UM3_pennytrap, depending on the model of your machine, and press the button when that file is highlighted.
To start a Penny Trap print on an Afinia:
- The “3D” software should already be open on your computer. The model may already be loaded and proper settings already in place. If not then look in the 3SPACE Share folder for the corrent file, load and “place” it, and then modify settings as needed; I’ll walk through it at the front of the room with everyone at once.
- When everything is set, choose the 3D Print drop-down menu from the very top of the screen (*not* the button icon labeled 3D print), and select Table Heat 15 mins.
- Now press the 3D Print button, which inexplicably looks like a 2D paper printer, then press “OK”.
Pausing your print
The different models of printers in the classroom will be ready at different times. When you think it’s time to pause and insert the penny, let me know so we can stop class and do the pause routine for all of the printers of that type. Here’s how to pause, insert, and restart:
To pause an Afinia printer:
- From the Afinia “3D” software on the computer, choose the 3D Print drop-down menu from the very top of the screen (*not* the button icon labeled 3D print), and select Maintenance.
- From the Maintenance pop-up window, click Pause. Close the Maintenance window immediately by pressing Quit (trust me).
- Insert the penny, being careful not to accidentally touch the hot end of the printing nozzle.
- When you’re ready to continue, open the Maintenance window again and click Resume.
To pause an Ultimaker printer:
- Move the jog wheel on the front of the machine so that Pause is highlighted, then press the jog wheel like a button.
- Insert the penny, being careful not to accidentally touch the hot end of the printing nozzle.
- When you’re ready to continue, move the jog wheel to Resume and press the button.
But how did this Penny Trap get MADE?
In this class we’ll sometimes print other peoples’ models for practice, or start with other peoples’ designs for inspiration, but most of the time we’ll be creating the 3D models ourselves from scratch. So how do you do that??
The Penny Trap is a very simple model, and you could make it in lots of different design programs. We’ll talk more about this in the coming weeks, but as a preview, here are two walkthroughs of how the Penny Trap could be created.
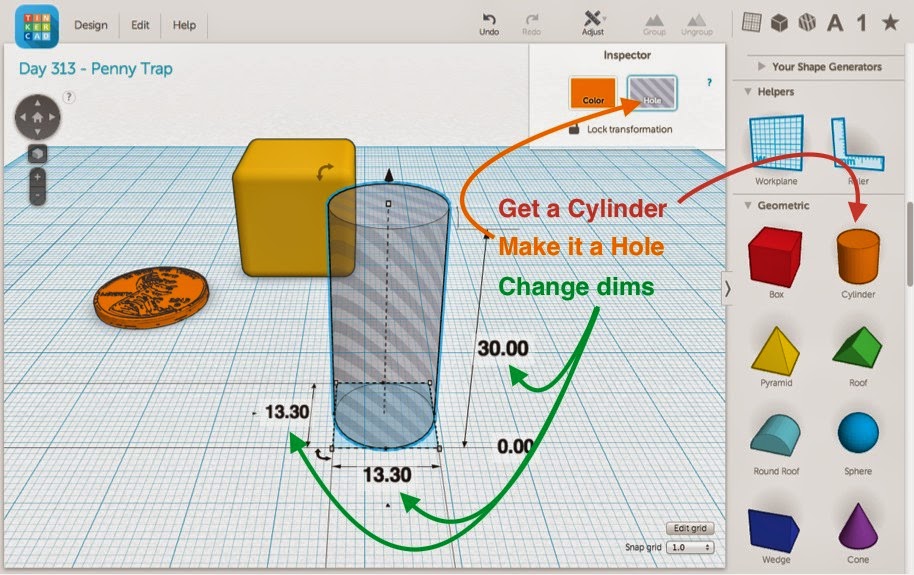
First, with Tinkercad, you can drag and drop shapes and cut out “holes” from some shapes using other shapes. You can read about this at the MakerHome tutorial Designing a Penny Trap with Tinkercad, and tinker with the model itself in Tinkercad.
Second, with OpenSCAD, you can use simple code to place, rotate, and take “differences” of objects to make the Penny Trap design. You can read about this at the MakerHome tutorial Designing a Penny Trap with OpenSCAD, and take a look at the actual OpenSCAD code.
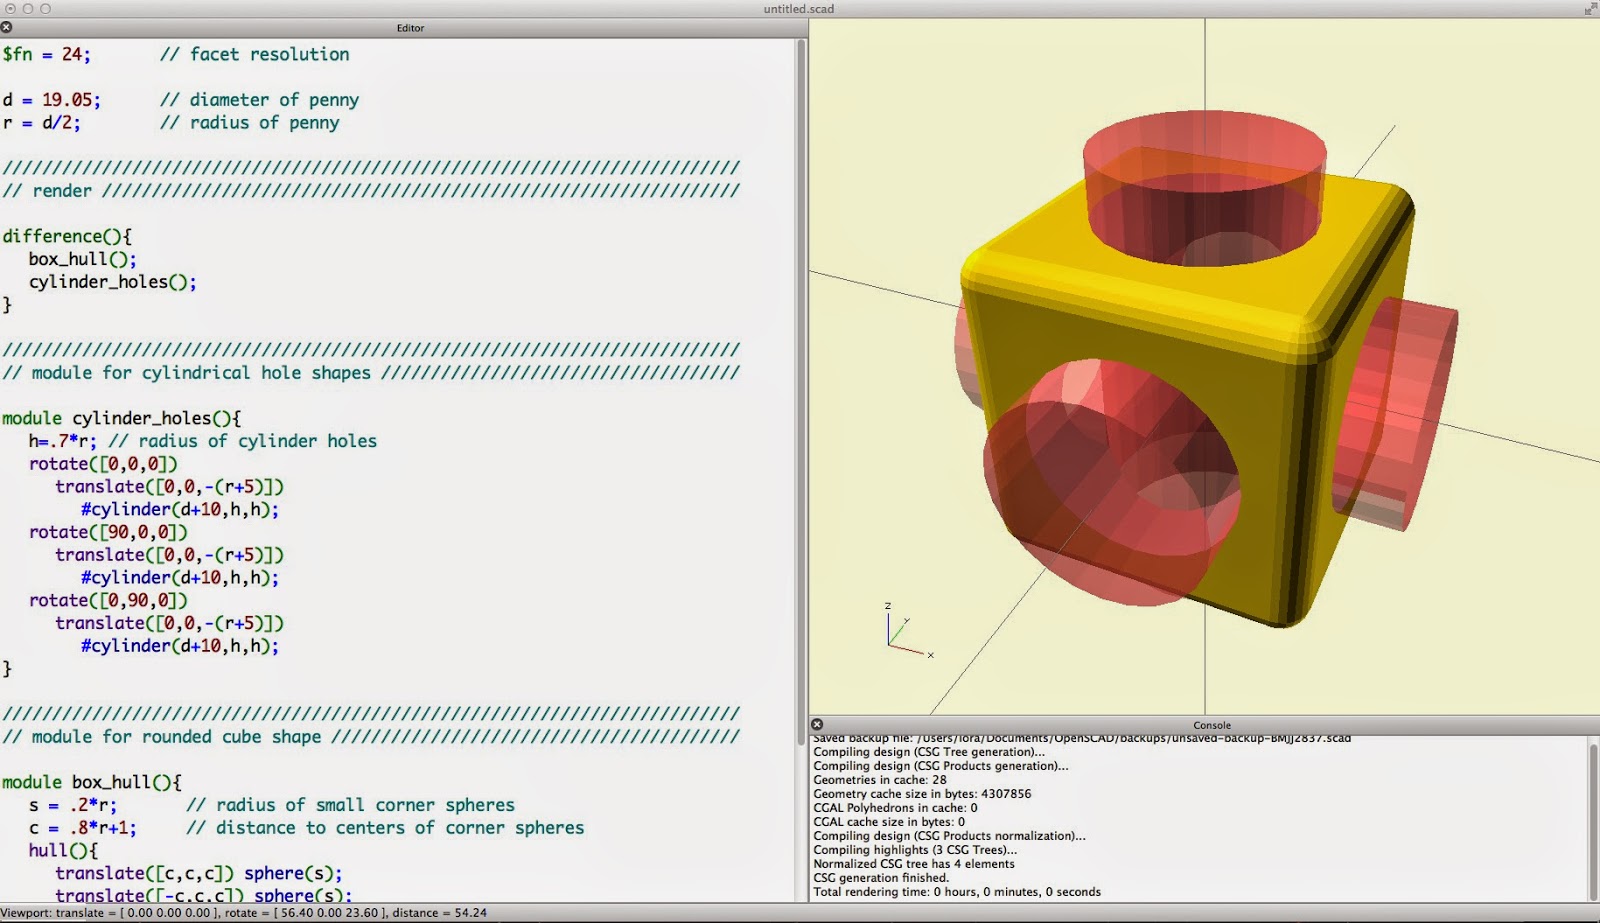
One of the great things about designing models in OpenSCAD is that they are parametric, which means that you can change features of the model very easily by modifying the values of its input variables. In the case of the Penny Trap, this means that we could write code that creates “traps” for any type or size of coin. Here is that very thing: the model Customizable Coin Traps on Thingiverse. Using the Customizer interface you can choose traps for coins from all around the world, or select your own unique coin size.