
Hello
My name is Bailey Callahan and I am a junior at James Madison University from Winchester, VA. I am majoring in Justice Studies with a concentration in Crime and Criminology and I am minoring in History. I want to go to law school after I graduate from JMU. Some things I am involved in at JMU are that I am a Resident Adviser in the village, the secretary of the academic pre-law fraternity Phi Alpha Delta, and the outreach chair of the 3-D Printing Club. Some fun facts about me are that I love Game of Thrones and Always Sunny and that I have a pet bunny named Luna.
My experience with 3-D printing is that I have a solid foundation of how the machines work and how to print and remix things from online as well as minor experience creating models. My goals in this course are to get better at creating 3-D models, gain a better understanding of the machines, and to learn how to navigate the more complicated software.
Thingiverse Model
10 points, due by noon on Thursday 1/10
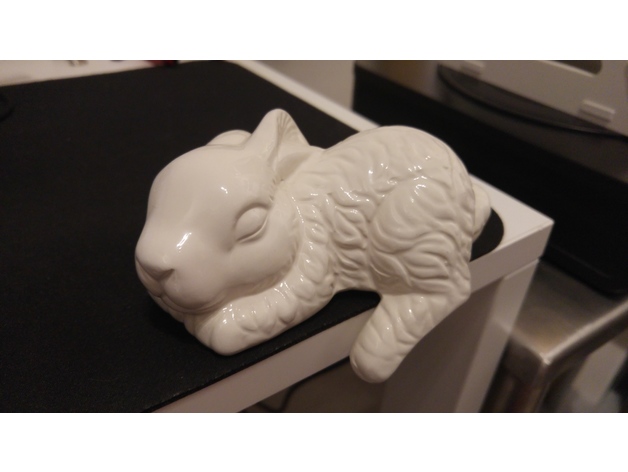
- “Sleeping Bunny” by FinalMadness found here.
- I chose this model because I have a pet bunny and this model is super cute and reminds me of her. I also think it will be a cute addition to my 3-D print collection.
Thingiverse Print
 The print was successful and took around three and a half hours on the Lulzbot. I am very happy with how it came out, I think it is super cute! Here is my make on Thingiverse.
20 Forms in Tinkercad

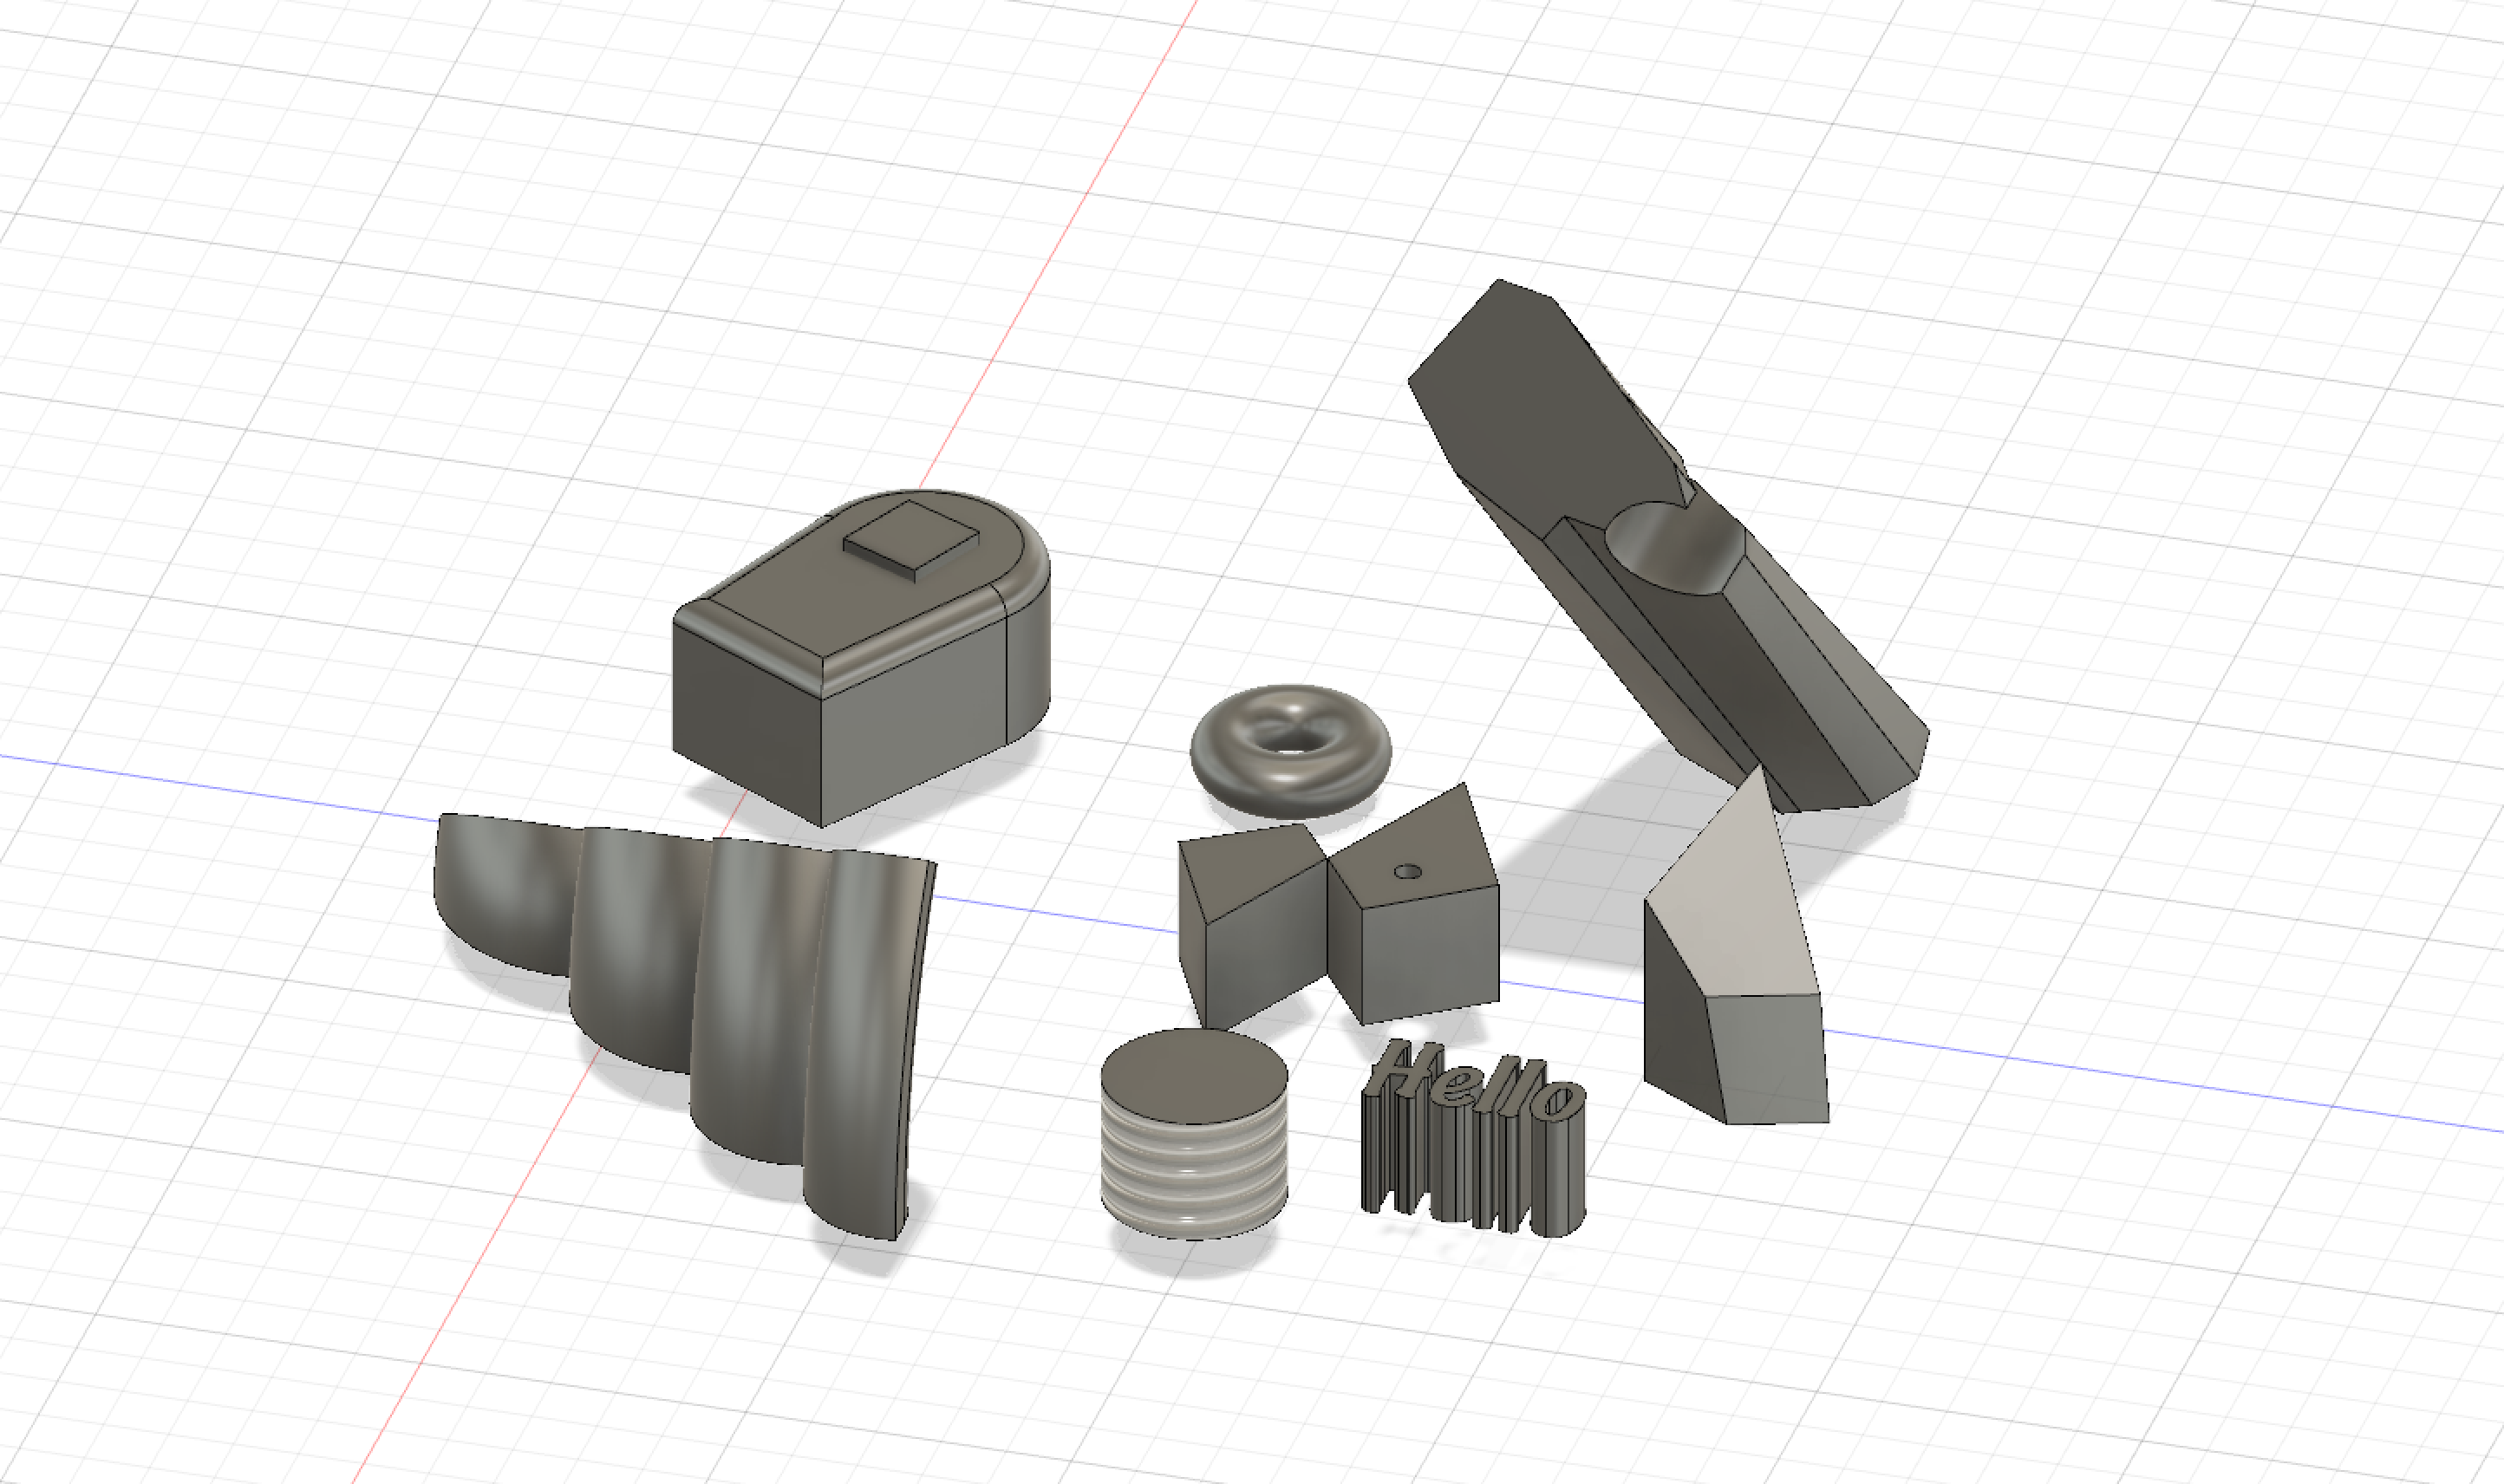
On the first image I have a bunny I made with the scribble tool, which could be a cool keychain since I left the ears open. I made a cute little mug with the cylinder and torvus shapes and I utilized the hole feature. I ungrouped the objects so that the different shapes were visible. I changed the torvus shape with the sliders to make it thinner. I also made an ice cream cone shape with an added cherry on top and a harry potter shape by using glasses and the scribble tool to make a lightning bolt. I found a shape that changes into different symbols which made the wheat and witch hat shapes. I found a speech bubble and cursive text tool as well to make the jmu shape.
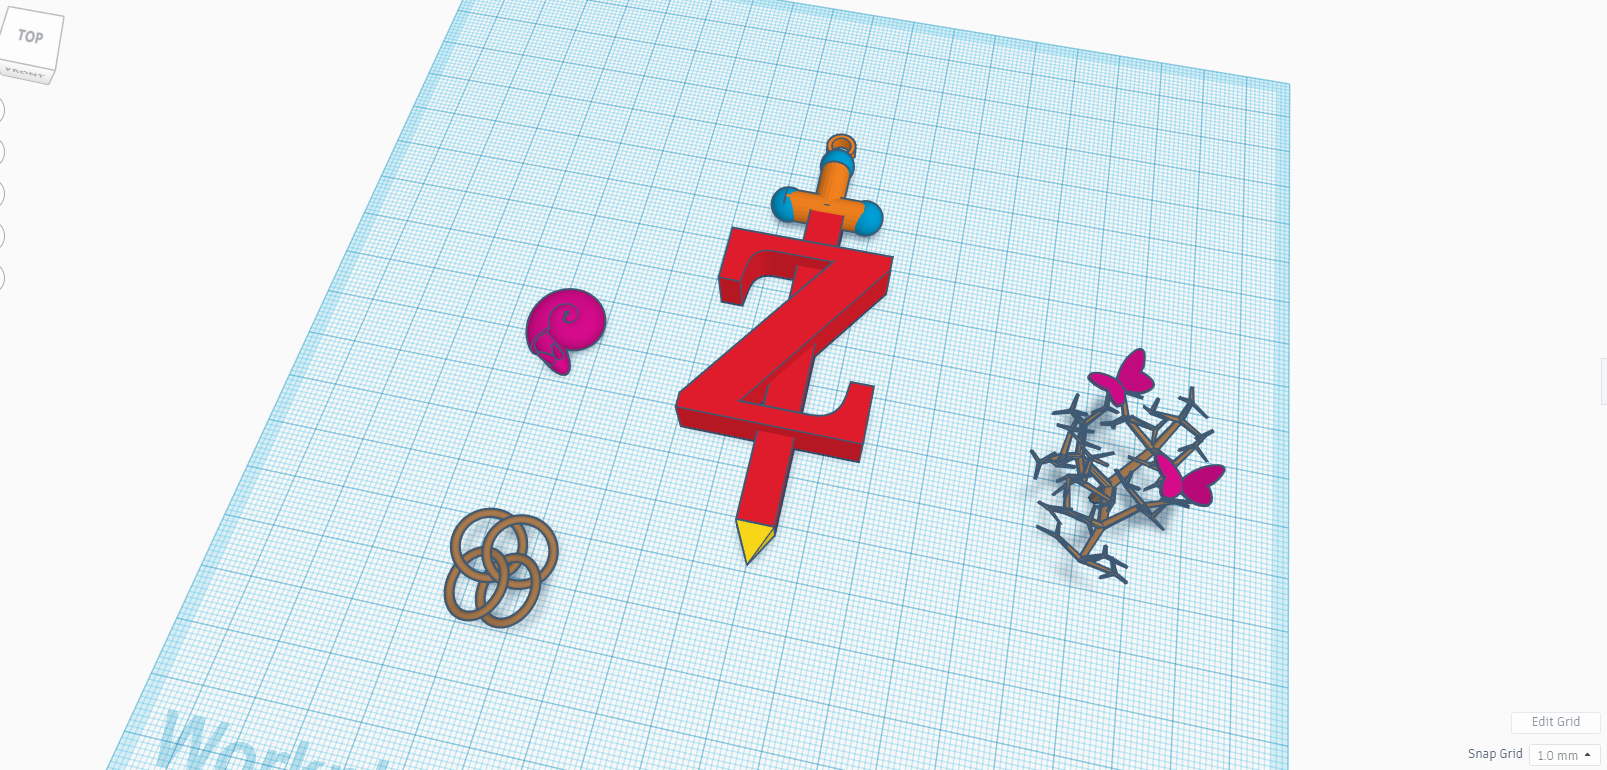
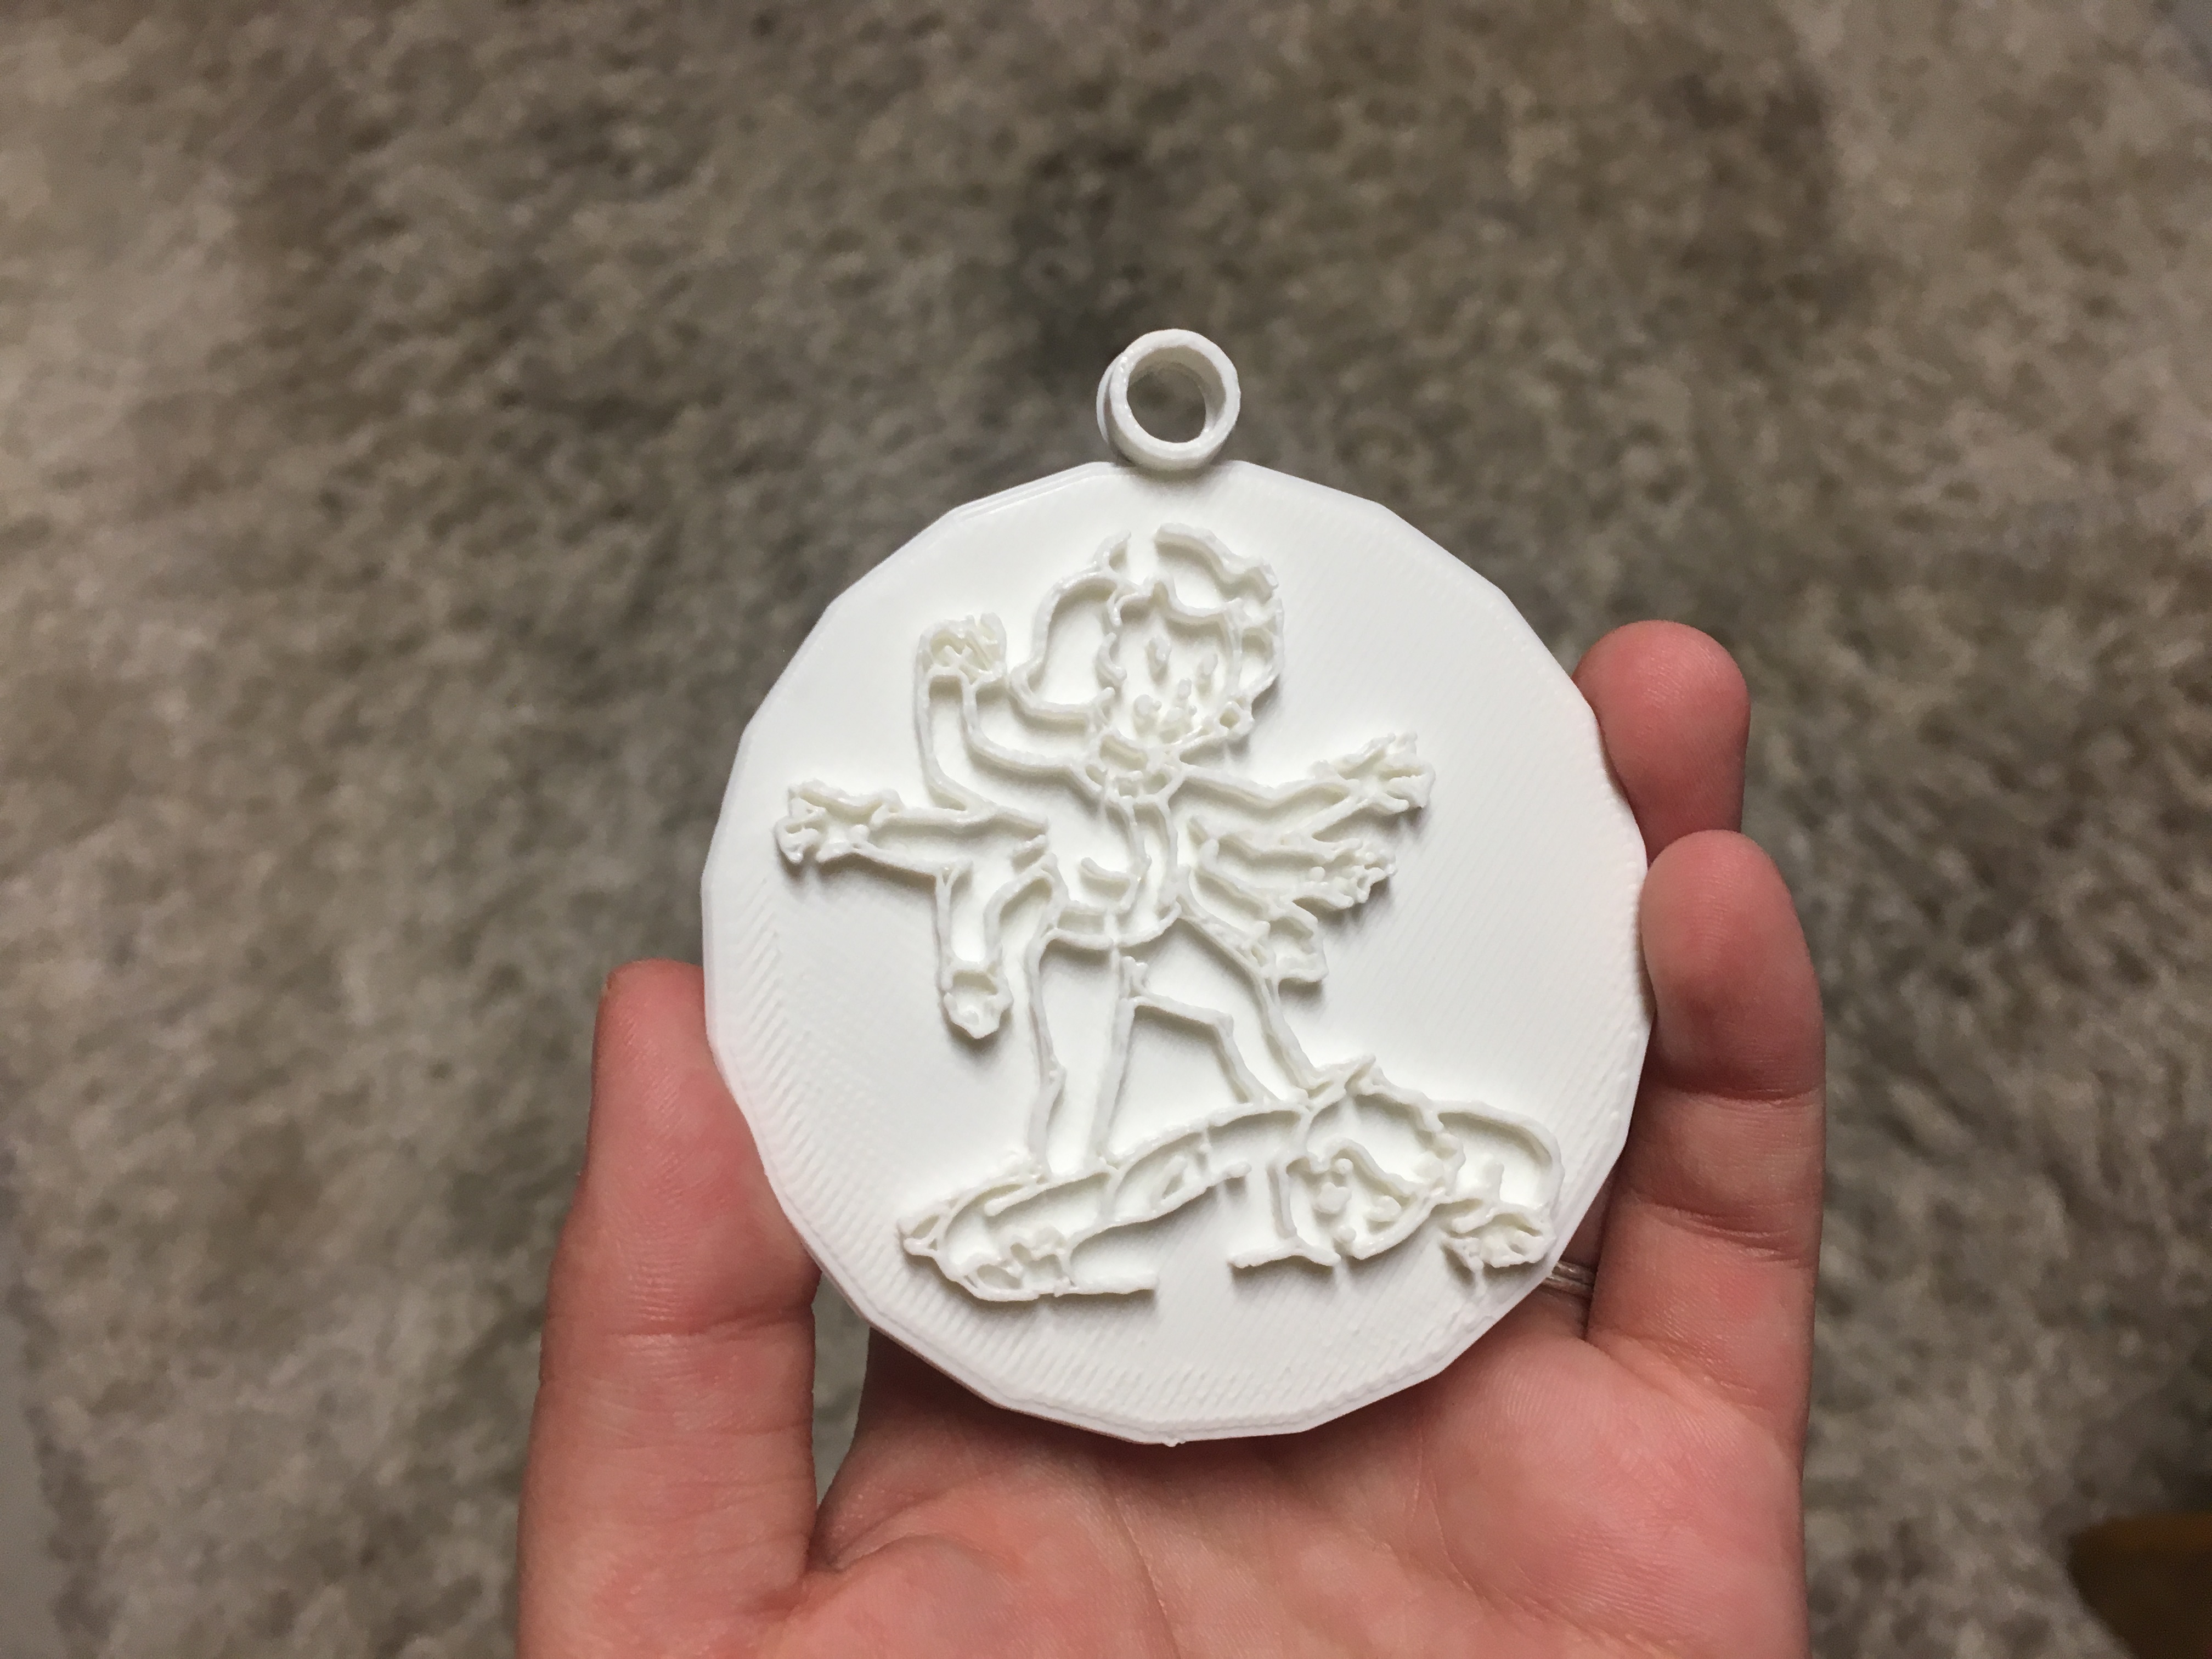
On the second image I tried to recreate the symbol from Breath of The Wild. I did this with the shapes ring, pyramid, roof, square, cylinder, and sphere. I also used the letter generator for the Z. This design took the longest because it was difficult to align so many shapes at once with the align tool, as well as making sure each shape was the same size. I utilized the ruler tool for this design as well. I found a customizable shell shape that had many different sliders to change it, I used the egg shape to add a little snail into the shell. There was a chainmail tool which would be an interesting print. I found a customizable tree tool as well and I put little butterflies on it.
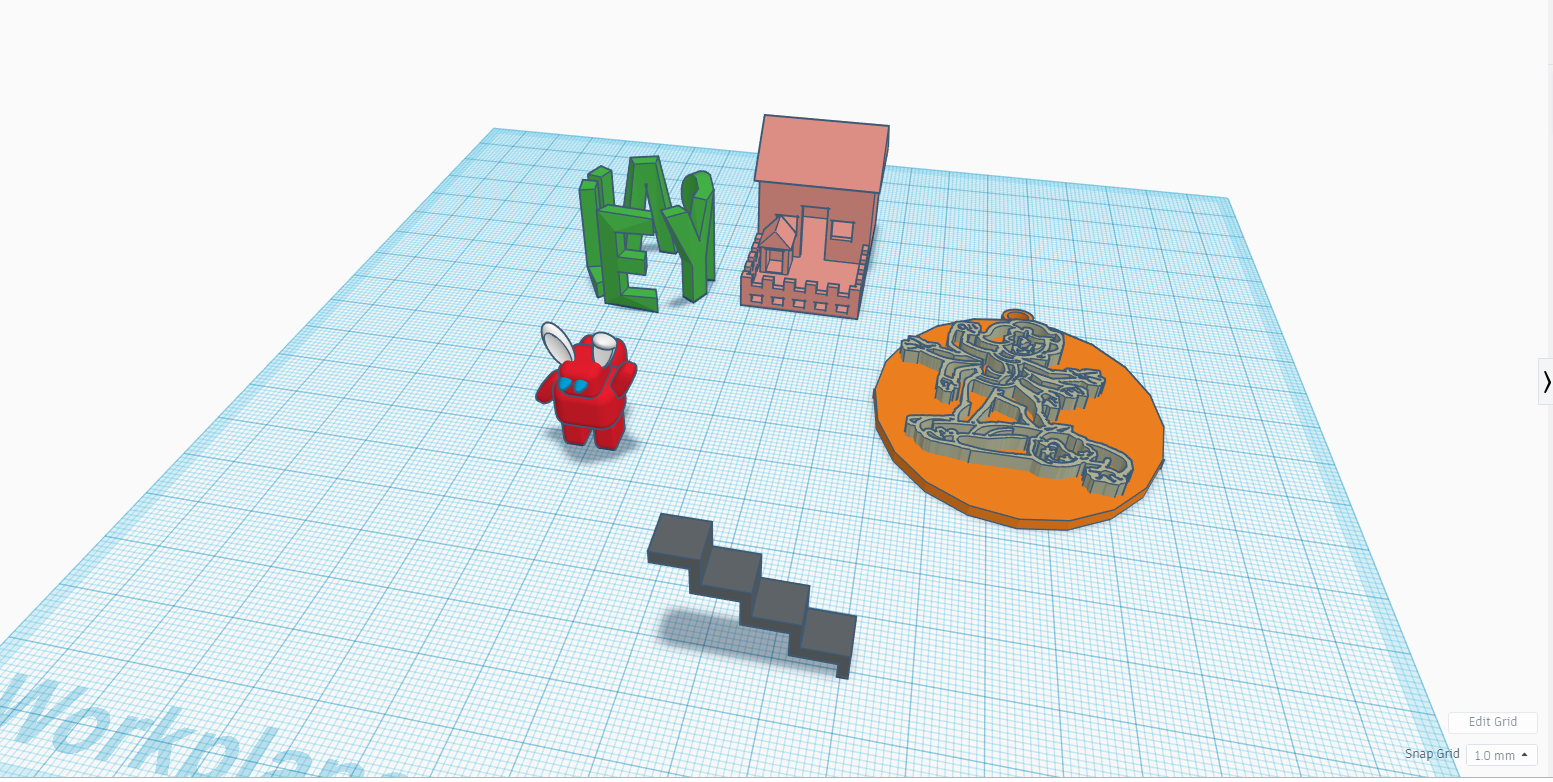
On the third image, I changed an image from Fallout to a SVG file and imported it into Tinkercad. It came out pretty good, but the lines were wonky in certain detailed areas. I made it into an ornament. I also made a jetpack man and put different shaped bunny ears from the character shapes tab, and little spheres for eyes to make him more cute. I left the harry potter shape from the first image on the build plate. I added a customizable stair shape and a customizable house which had sliders to change the size and layers. Lastly I made my name ina tool that curved text into a circle.
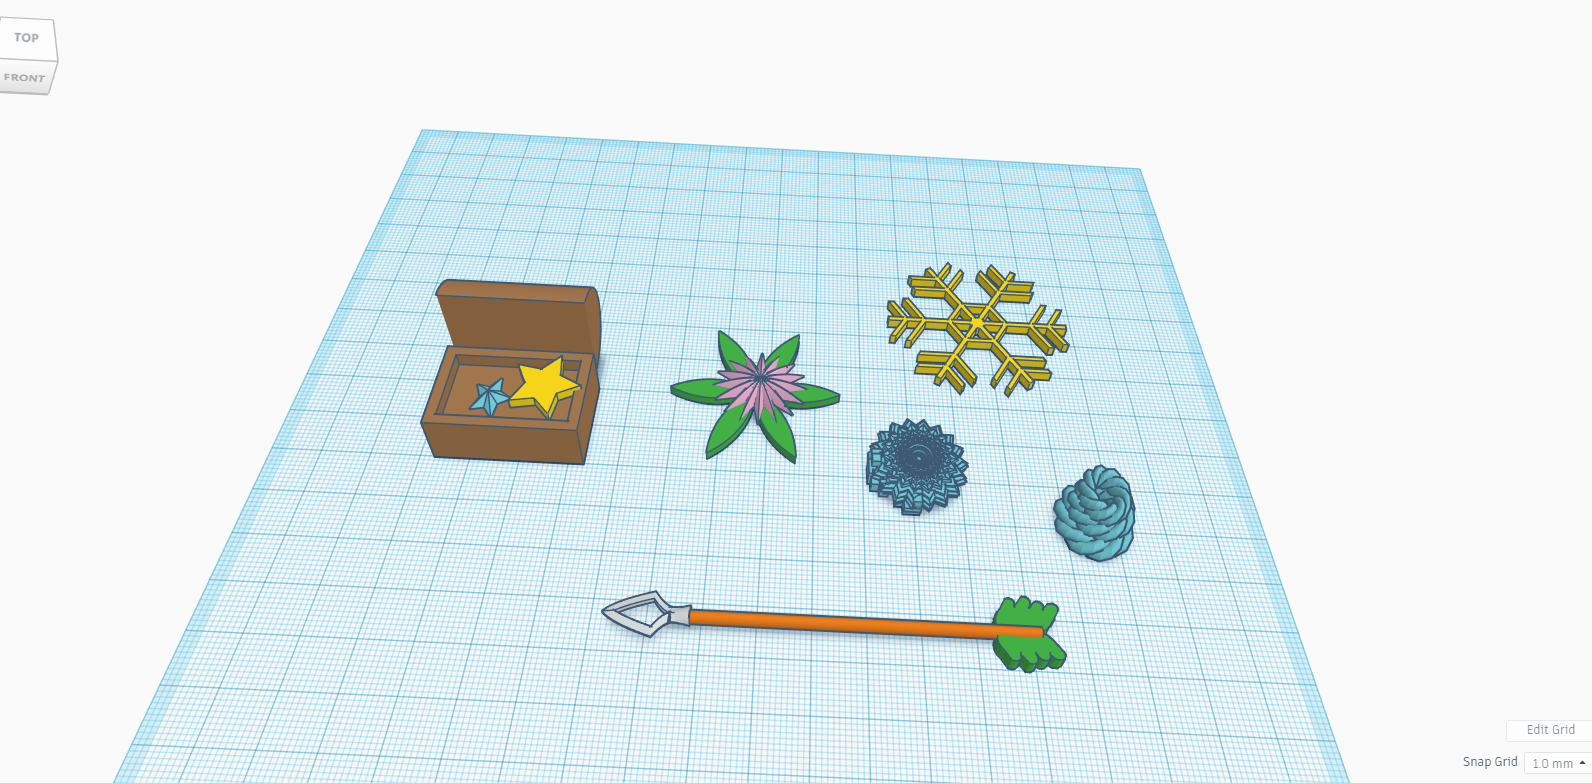
I found some star shapes that looked like gems so I made a treasure chest with the square and cylinder shapes. I found some really unique shapes like the flower ones and the snowflake. My favorite was the customizable mandala which is really neat. I stacked some twisty rings because they remind me of some kind of cake or pastry. Lastly I found an open arrowhead shape so I used cylinder and scribble to make an arrow.
Tinkercad Print
 The print was successful and took around an hour. I am overall happy with how it came out but not all of the lines of the design came out.
Summary of Group Tinkercad Project
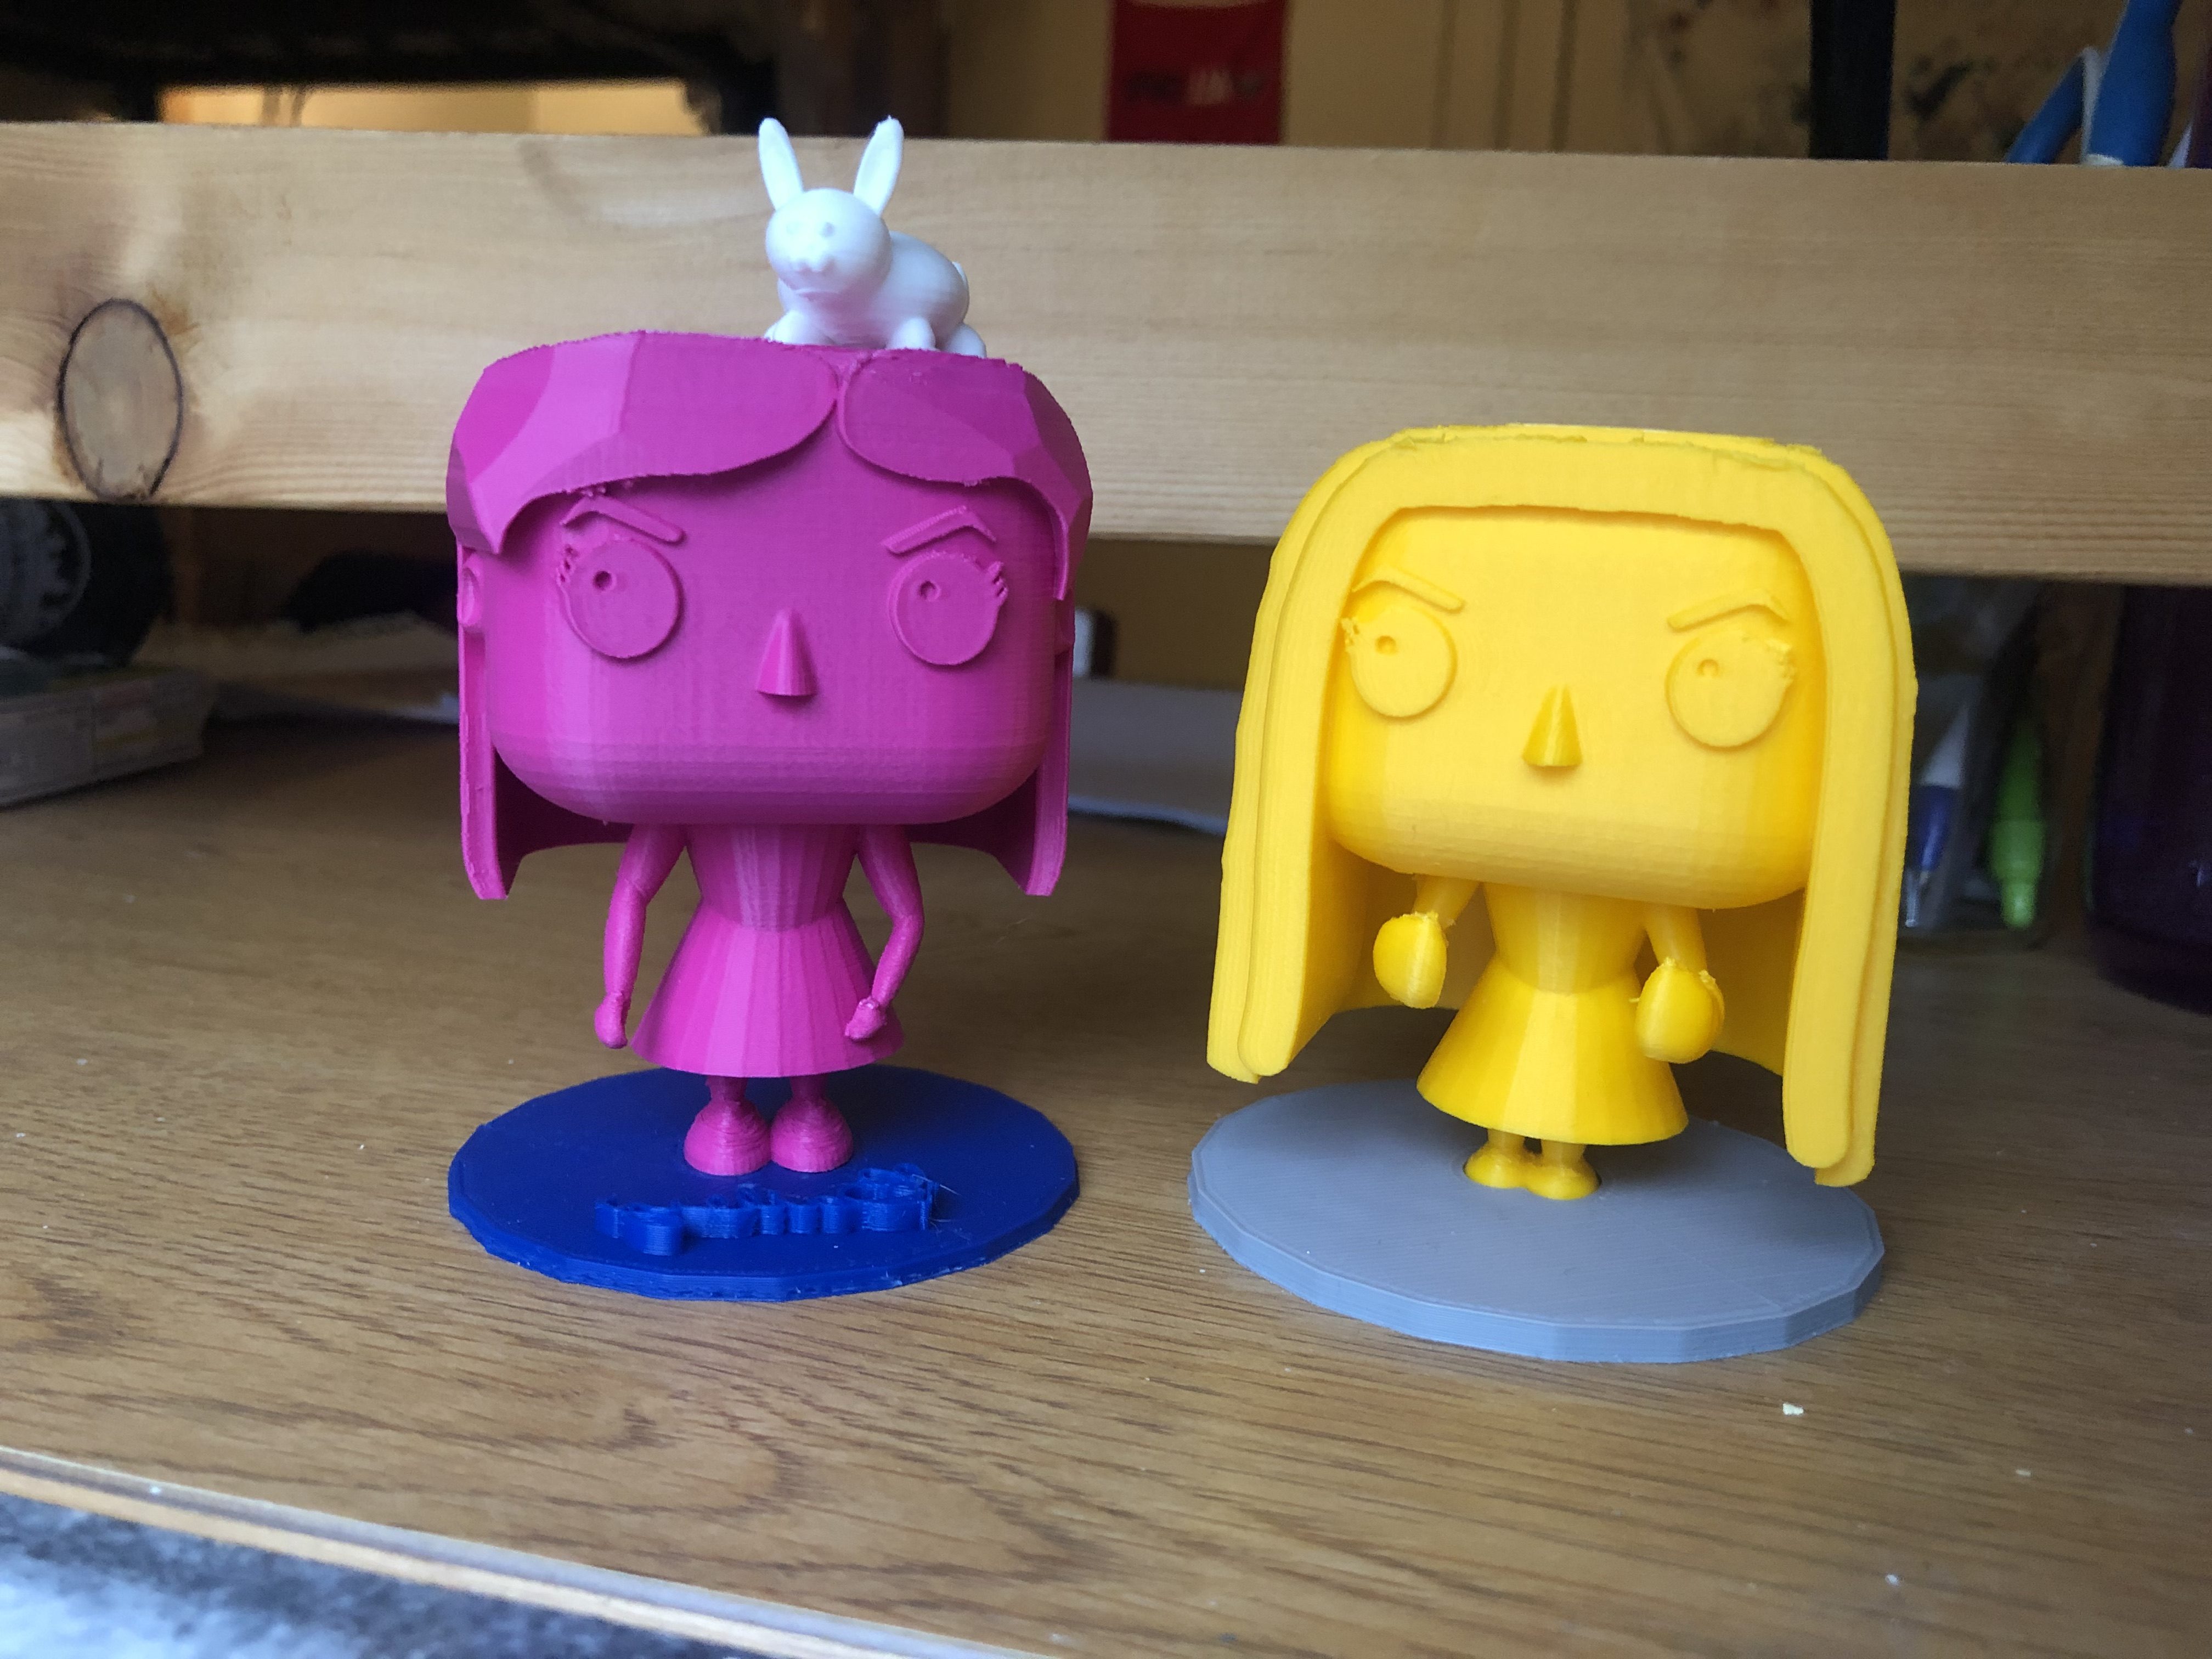
Customized Pop Figures with Maggie Ricciardelli
see Group Portfolio here and see Thingiverse post here
This project was honestly a huge challenge. Getting the general base shape from our first draft was time consuming but relatively easy. The most difficult part was aligning everything, and modifying the first draft to make it stand better and look like us. The hair was the most difficult part because there was no way to make it super smooth even though that was my goal. Overall I am very happy with how it came out. It is recognizable as a pop figure and the details, like my bunny and signature, make each figure unique.
20 Forms in Fusion 360
10 points, due by noon on Thurdsay 1/31
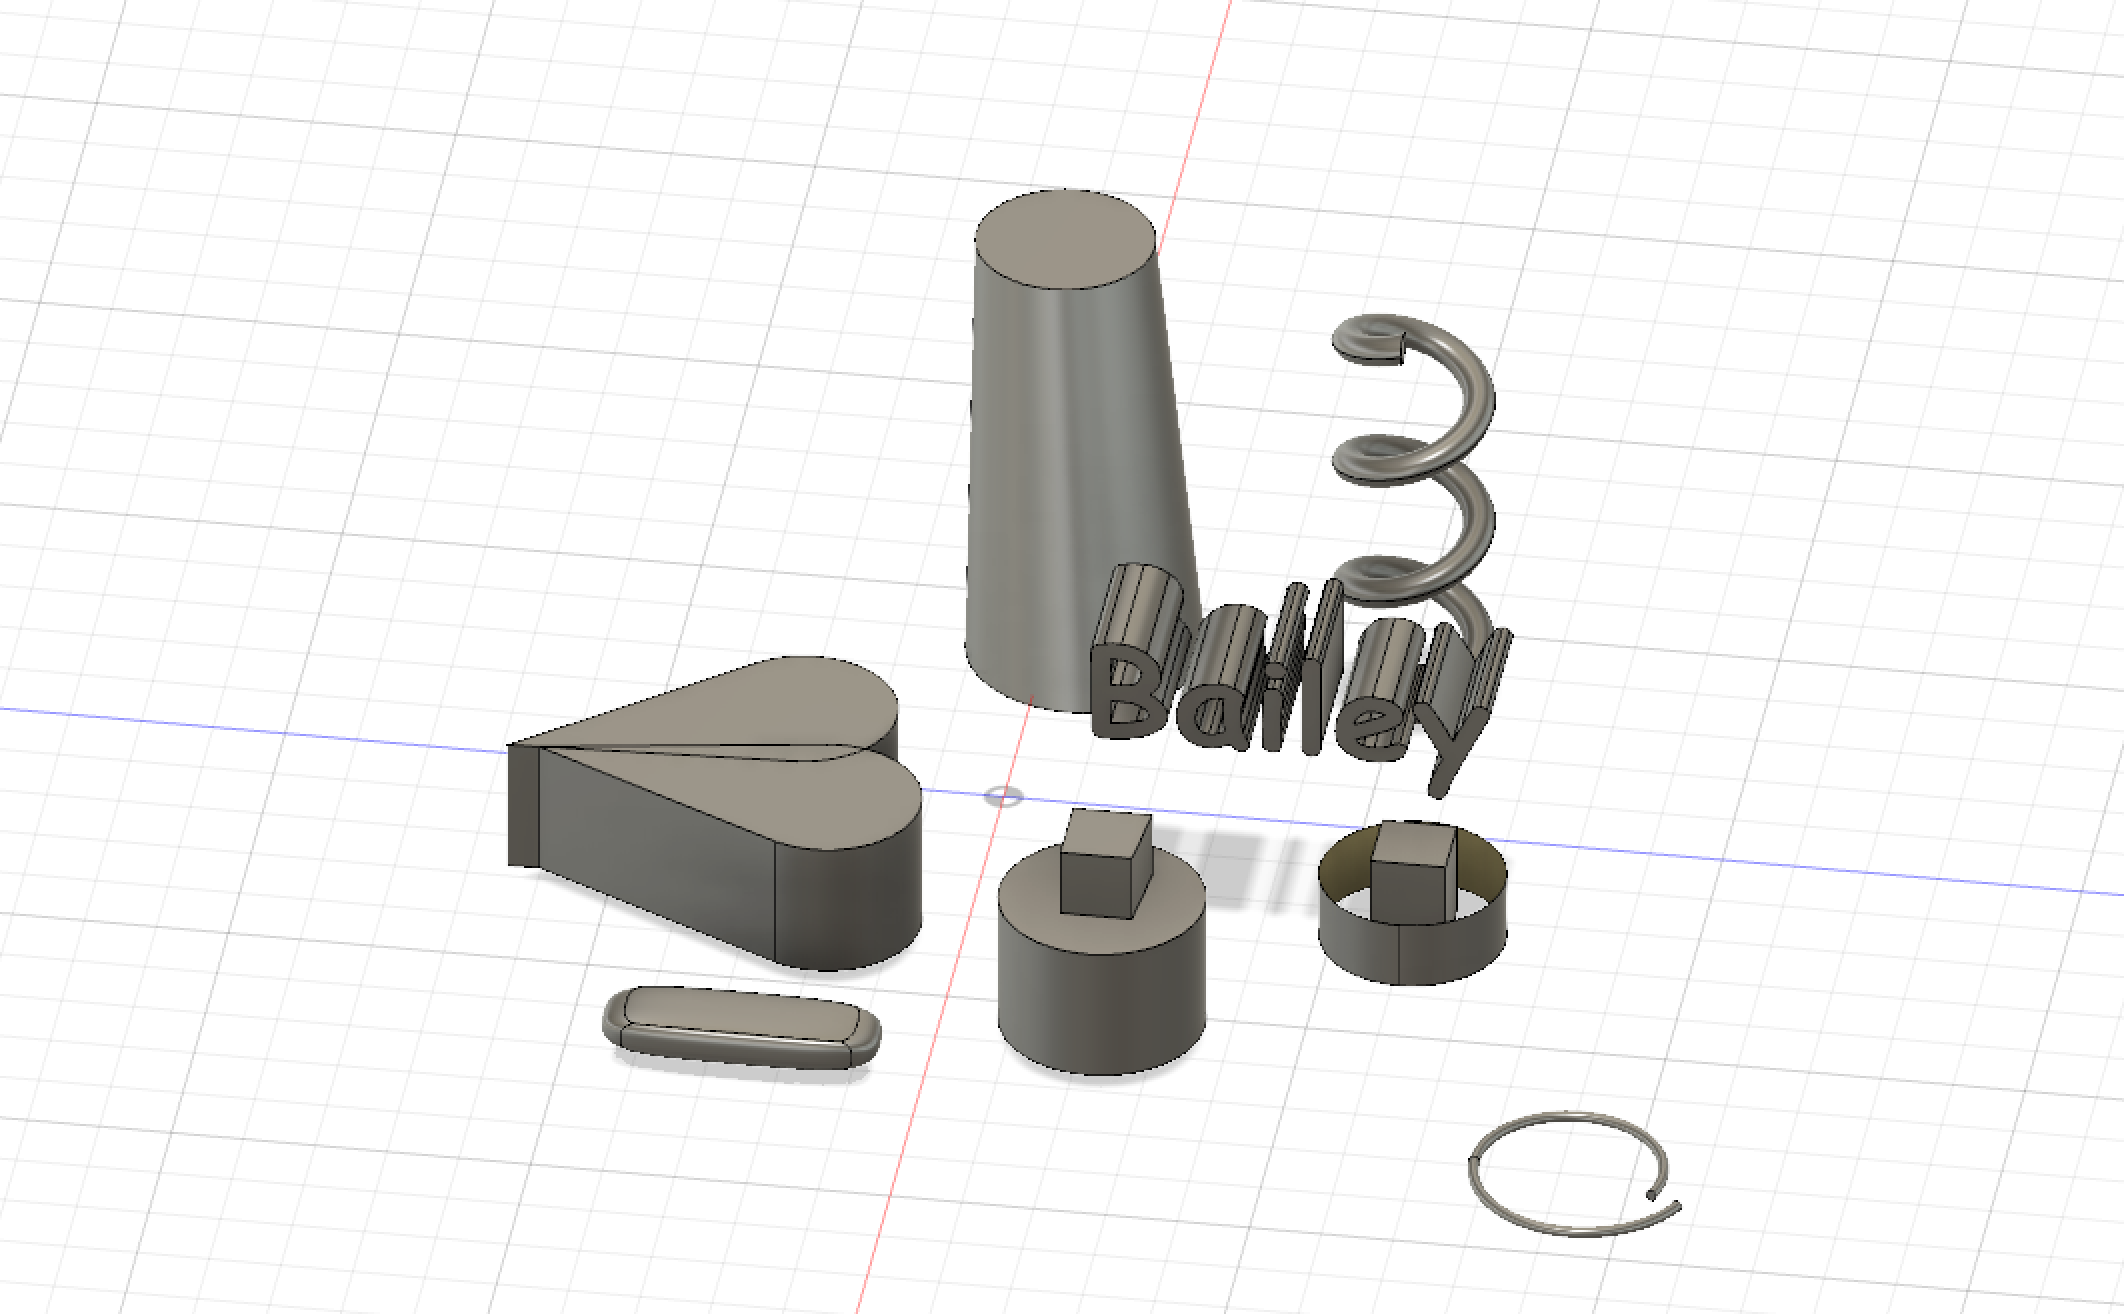
For this group, I inserted text then changed the font to comic sans and extruded the text. I created a coil shape and pulled the spiral up so it was spread out. I used sculpt to make the flat smooth rectangle, as well as the cylinder border around the square. I sketched half of the heart then extruded it and copied it to make the full shape. I also made a pipe and used the loft tool to made the leaning cylindrical shape.
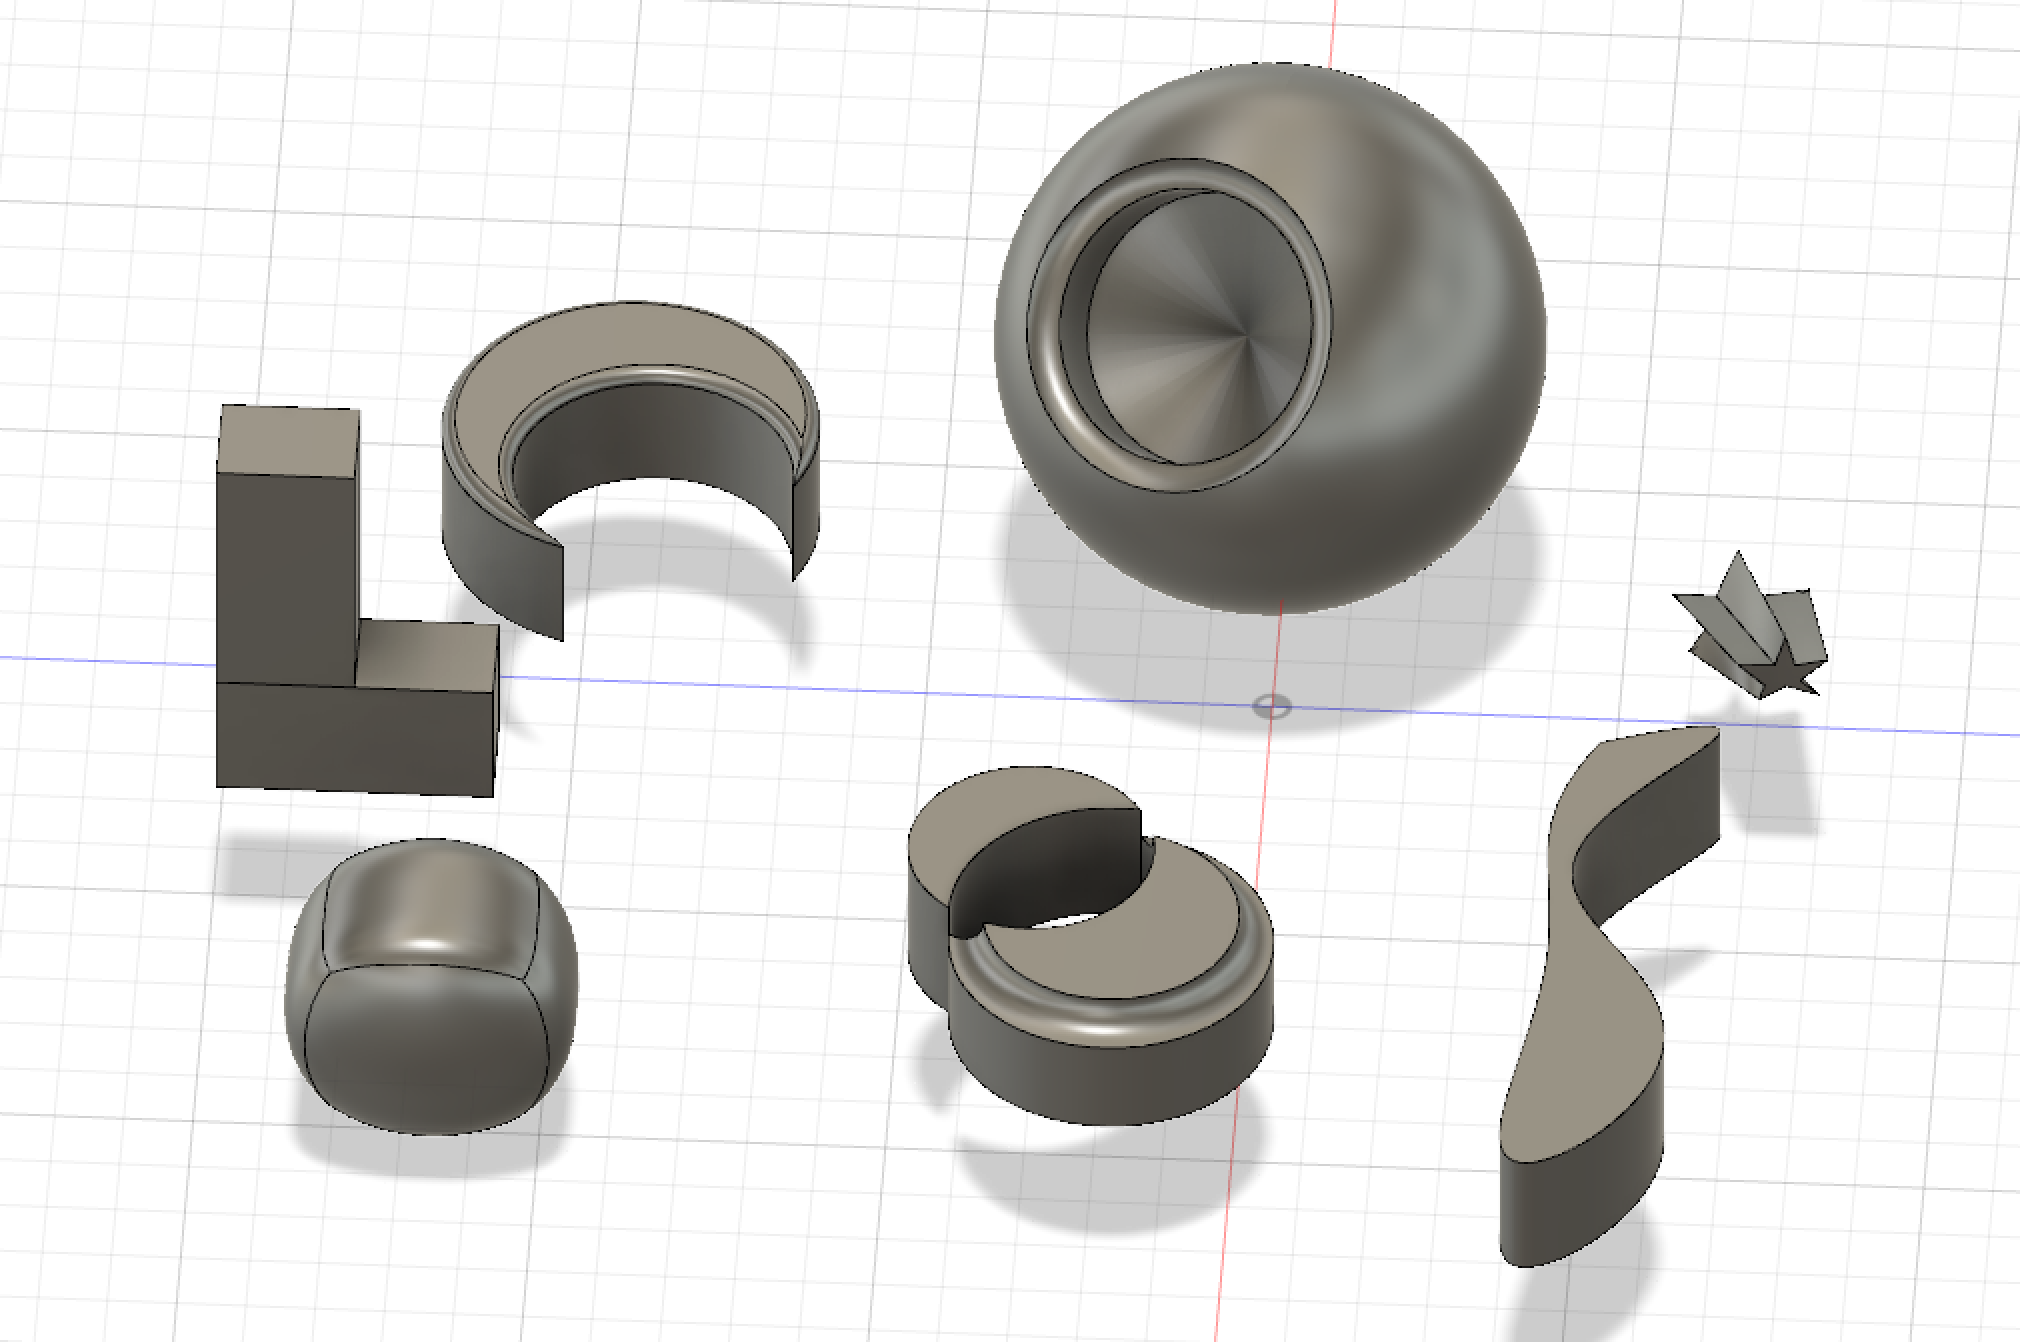
For this group I used an assortment of shapes. I used sketch and loft to make the star. I used sketch and extrude to make the shape under the star, as well as the object to the left of that. On that same object to the left I used a pipe shape to make a hole on the border. I used sculpt to make the soccer ball shape. To make the L I split a square with the split shape tool and repositioned it. I make the moon I made a hole in a cylinder and then rounded the edges. The sphere shape was supposed to look like an eye ball. I made a hole in the center and put a pipe hole around that hole.
For this group I used sketch to make the base shape for all of them except for the torus, cylinder, and letters. I extruded most of the shapes after testing different sketch tools. For the one on the bottom left I used the curvature. I shifted different faces, such as with the shape on the lower right. I used the hole feature to cut holes in the center shape and the lofted sketched on the upper right. The shape on the top left was supposed to be a jukebox, which I completely sketched and filleted the edges of. Lastly, I added threading to the outside of the shape to the left of the extruded lettering. I tried to thicken the torus shape to make it look like a donut.
Fusion 360 Print
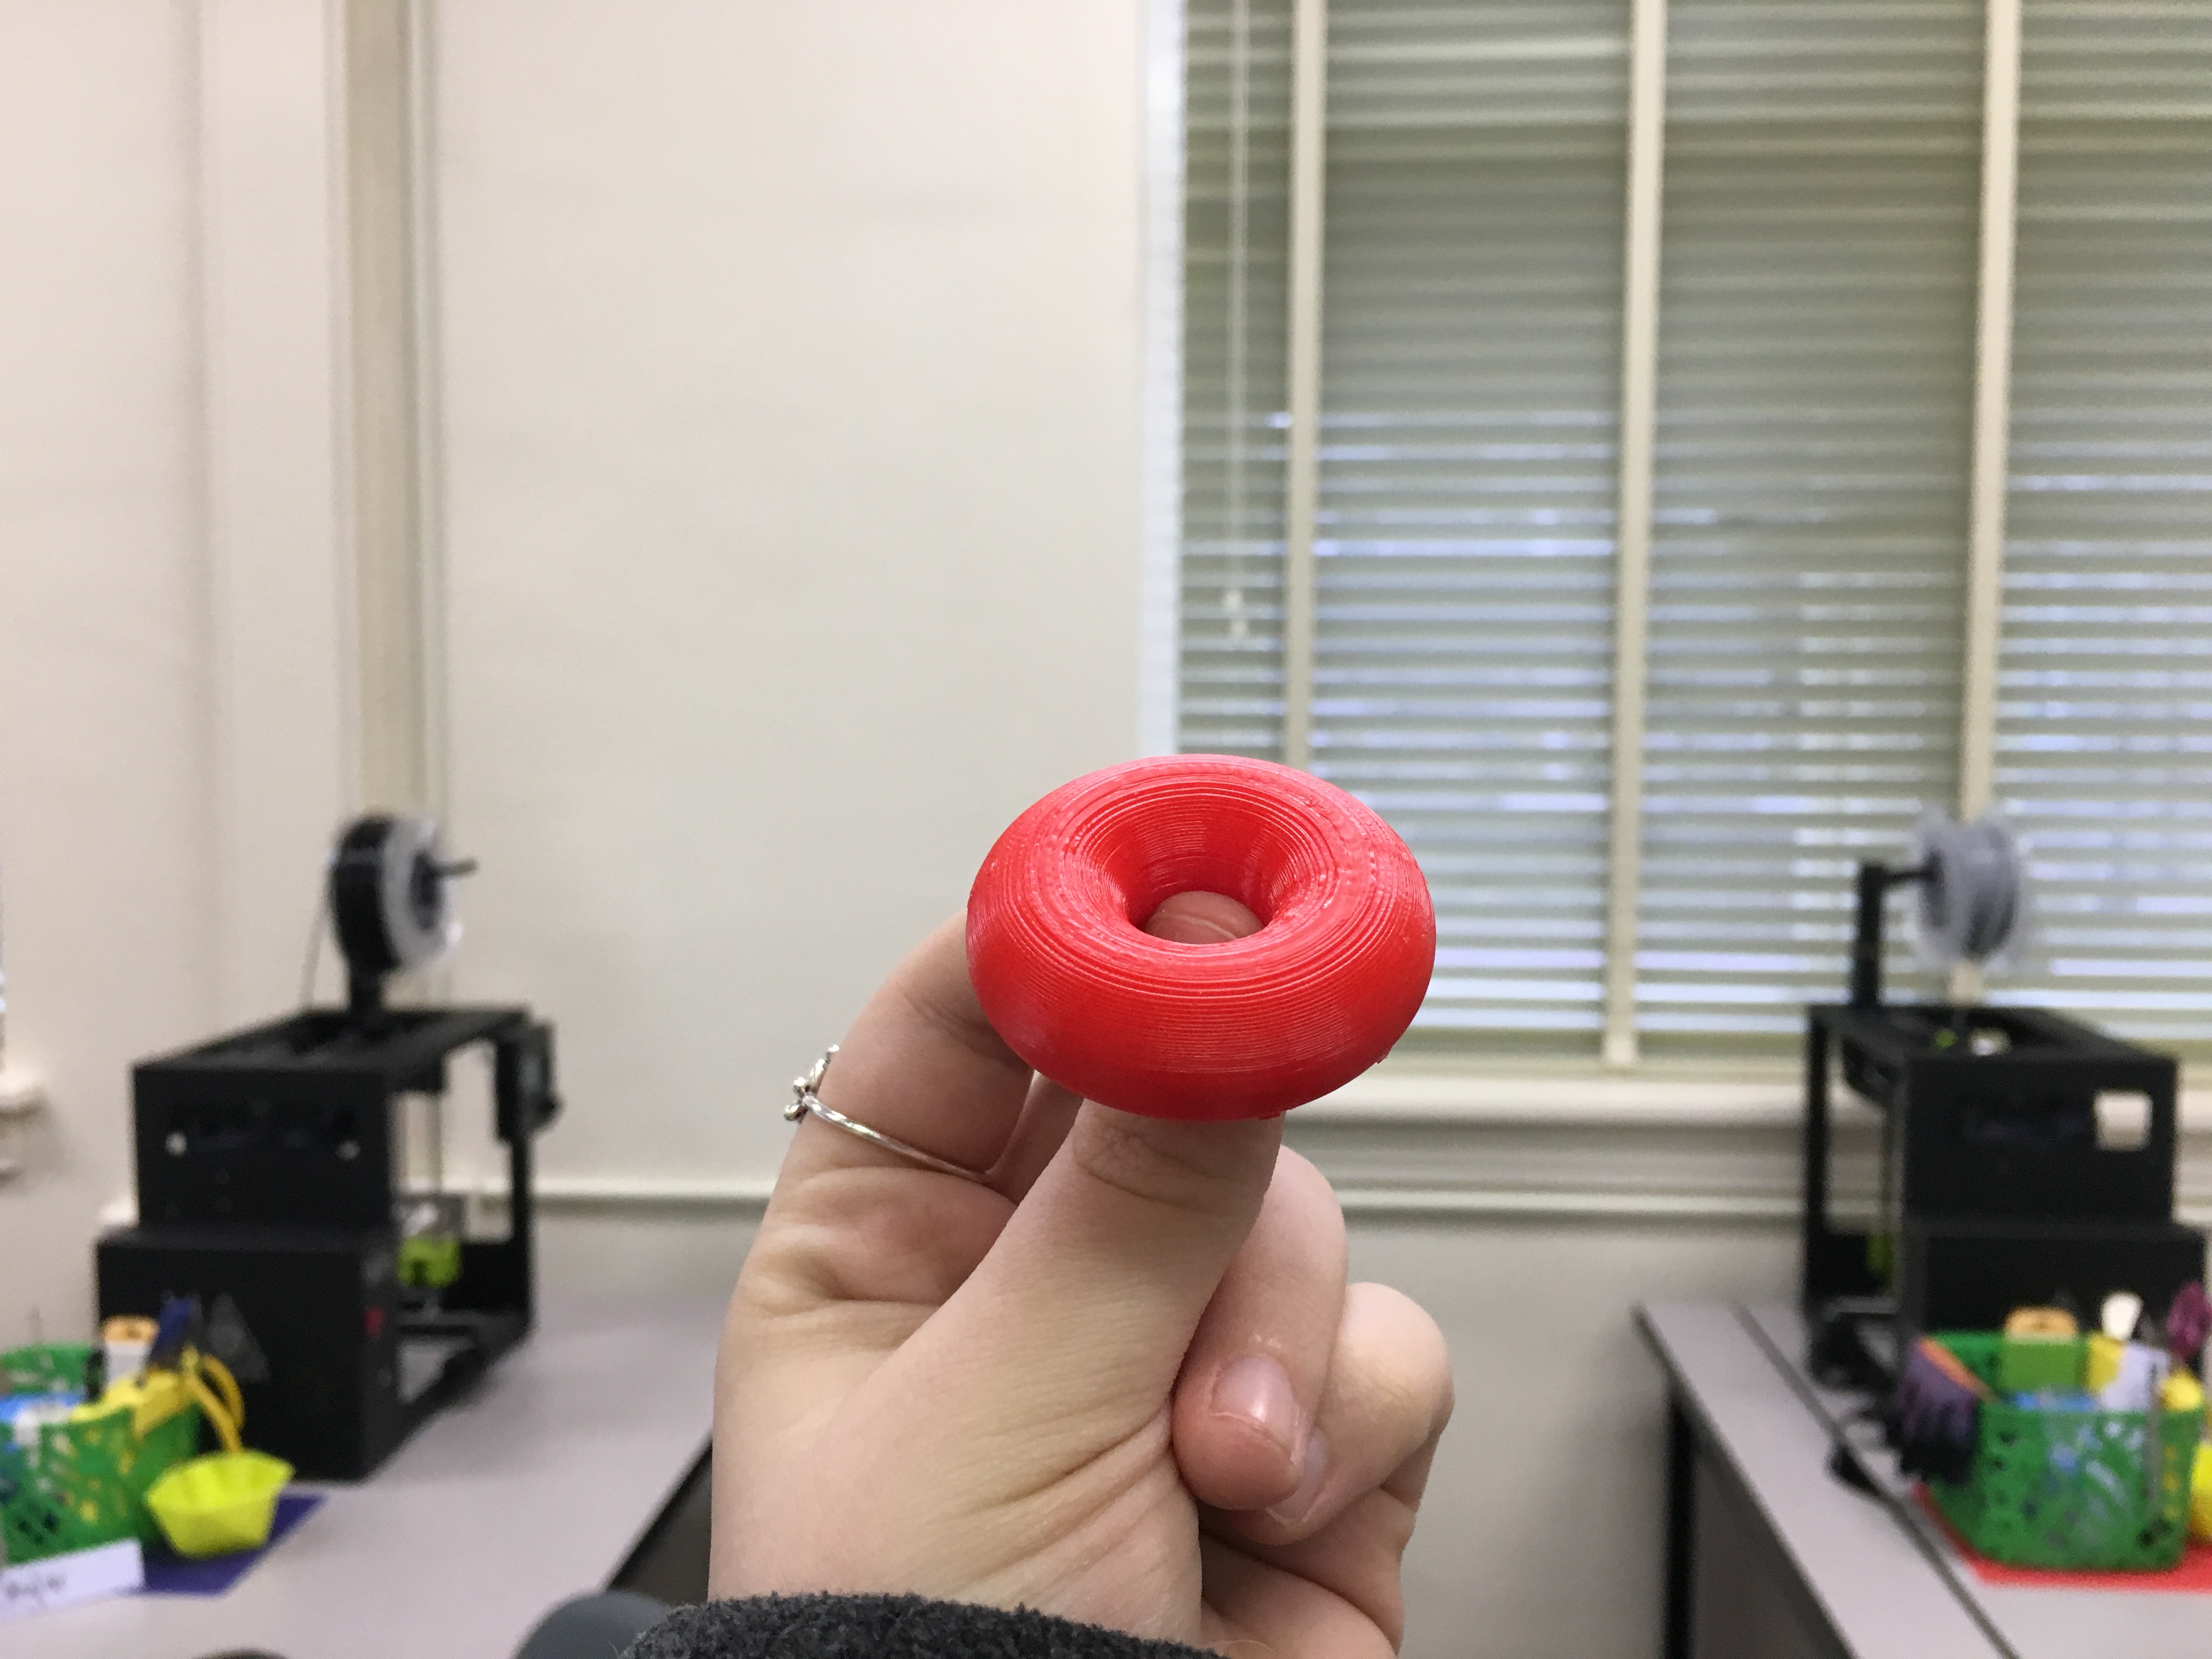
This was my donut torus shape I designed. The print was a success and it was relatively short. The only issue was that it created support so when I pulled it off it looked weird.
Fusion 360 Vase Design
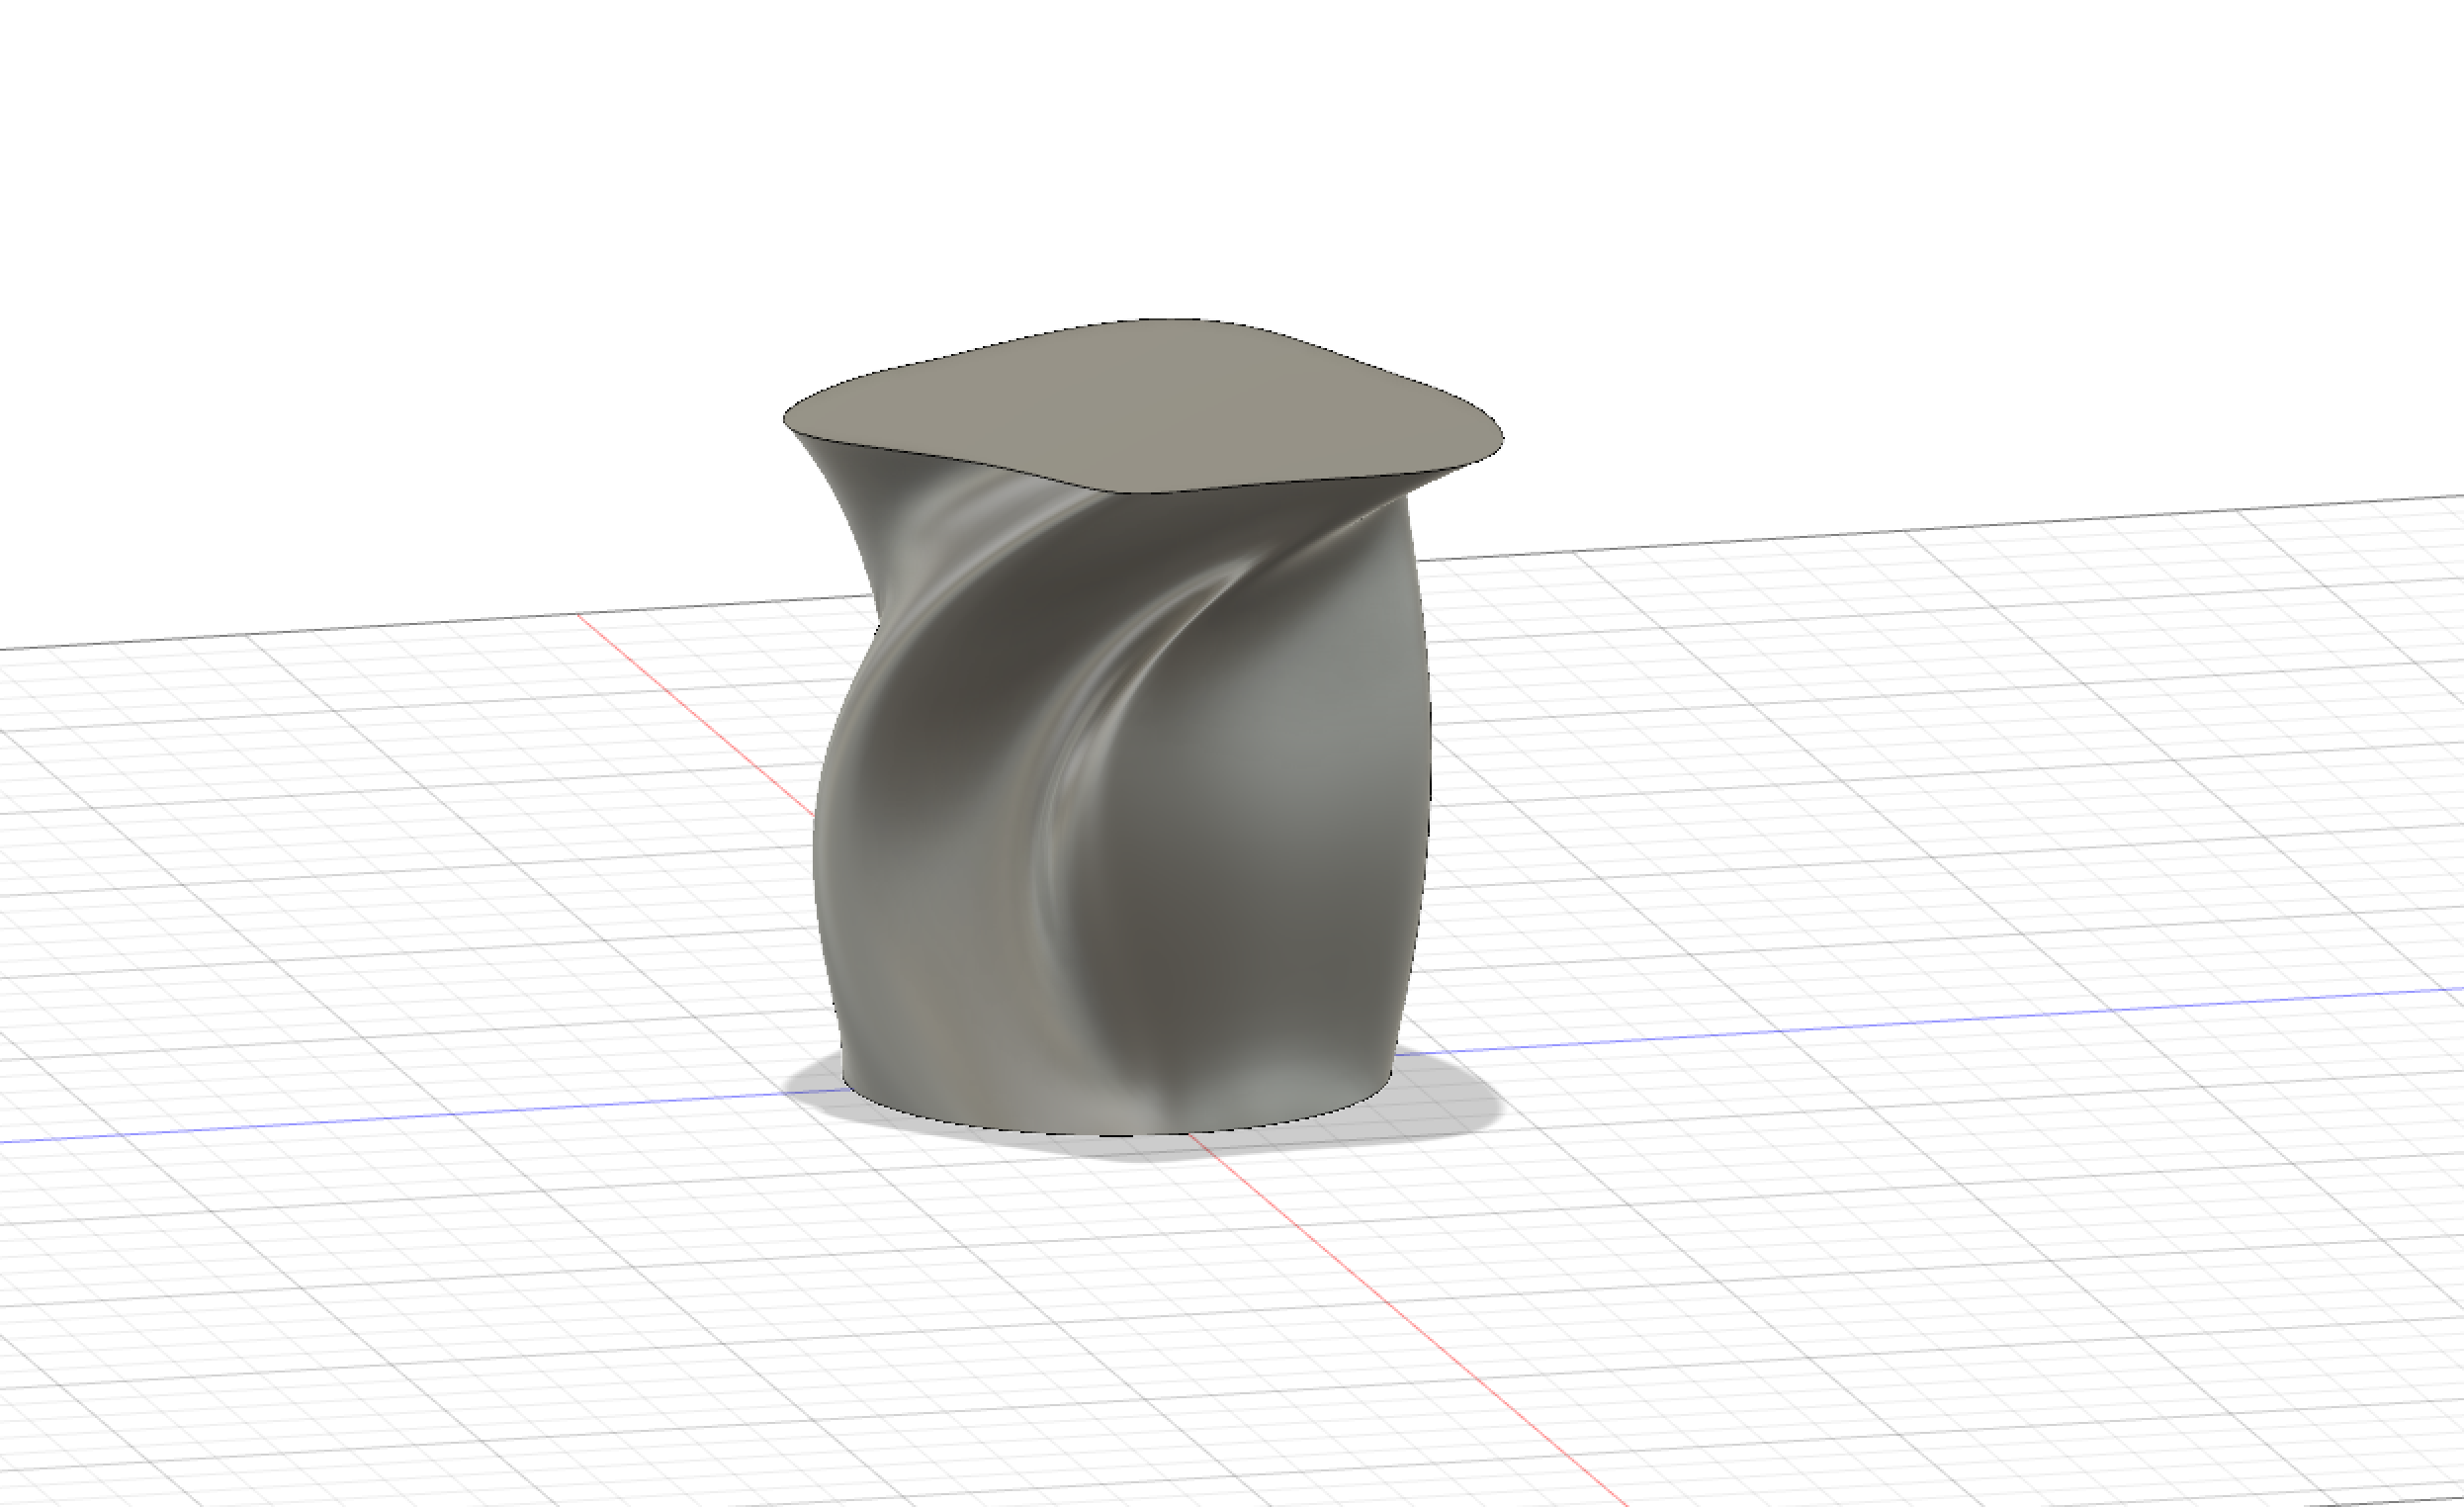
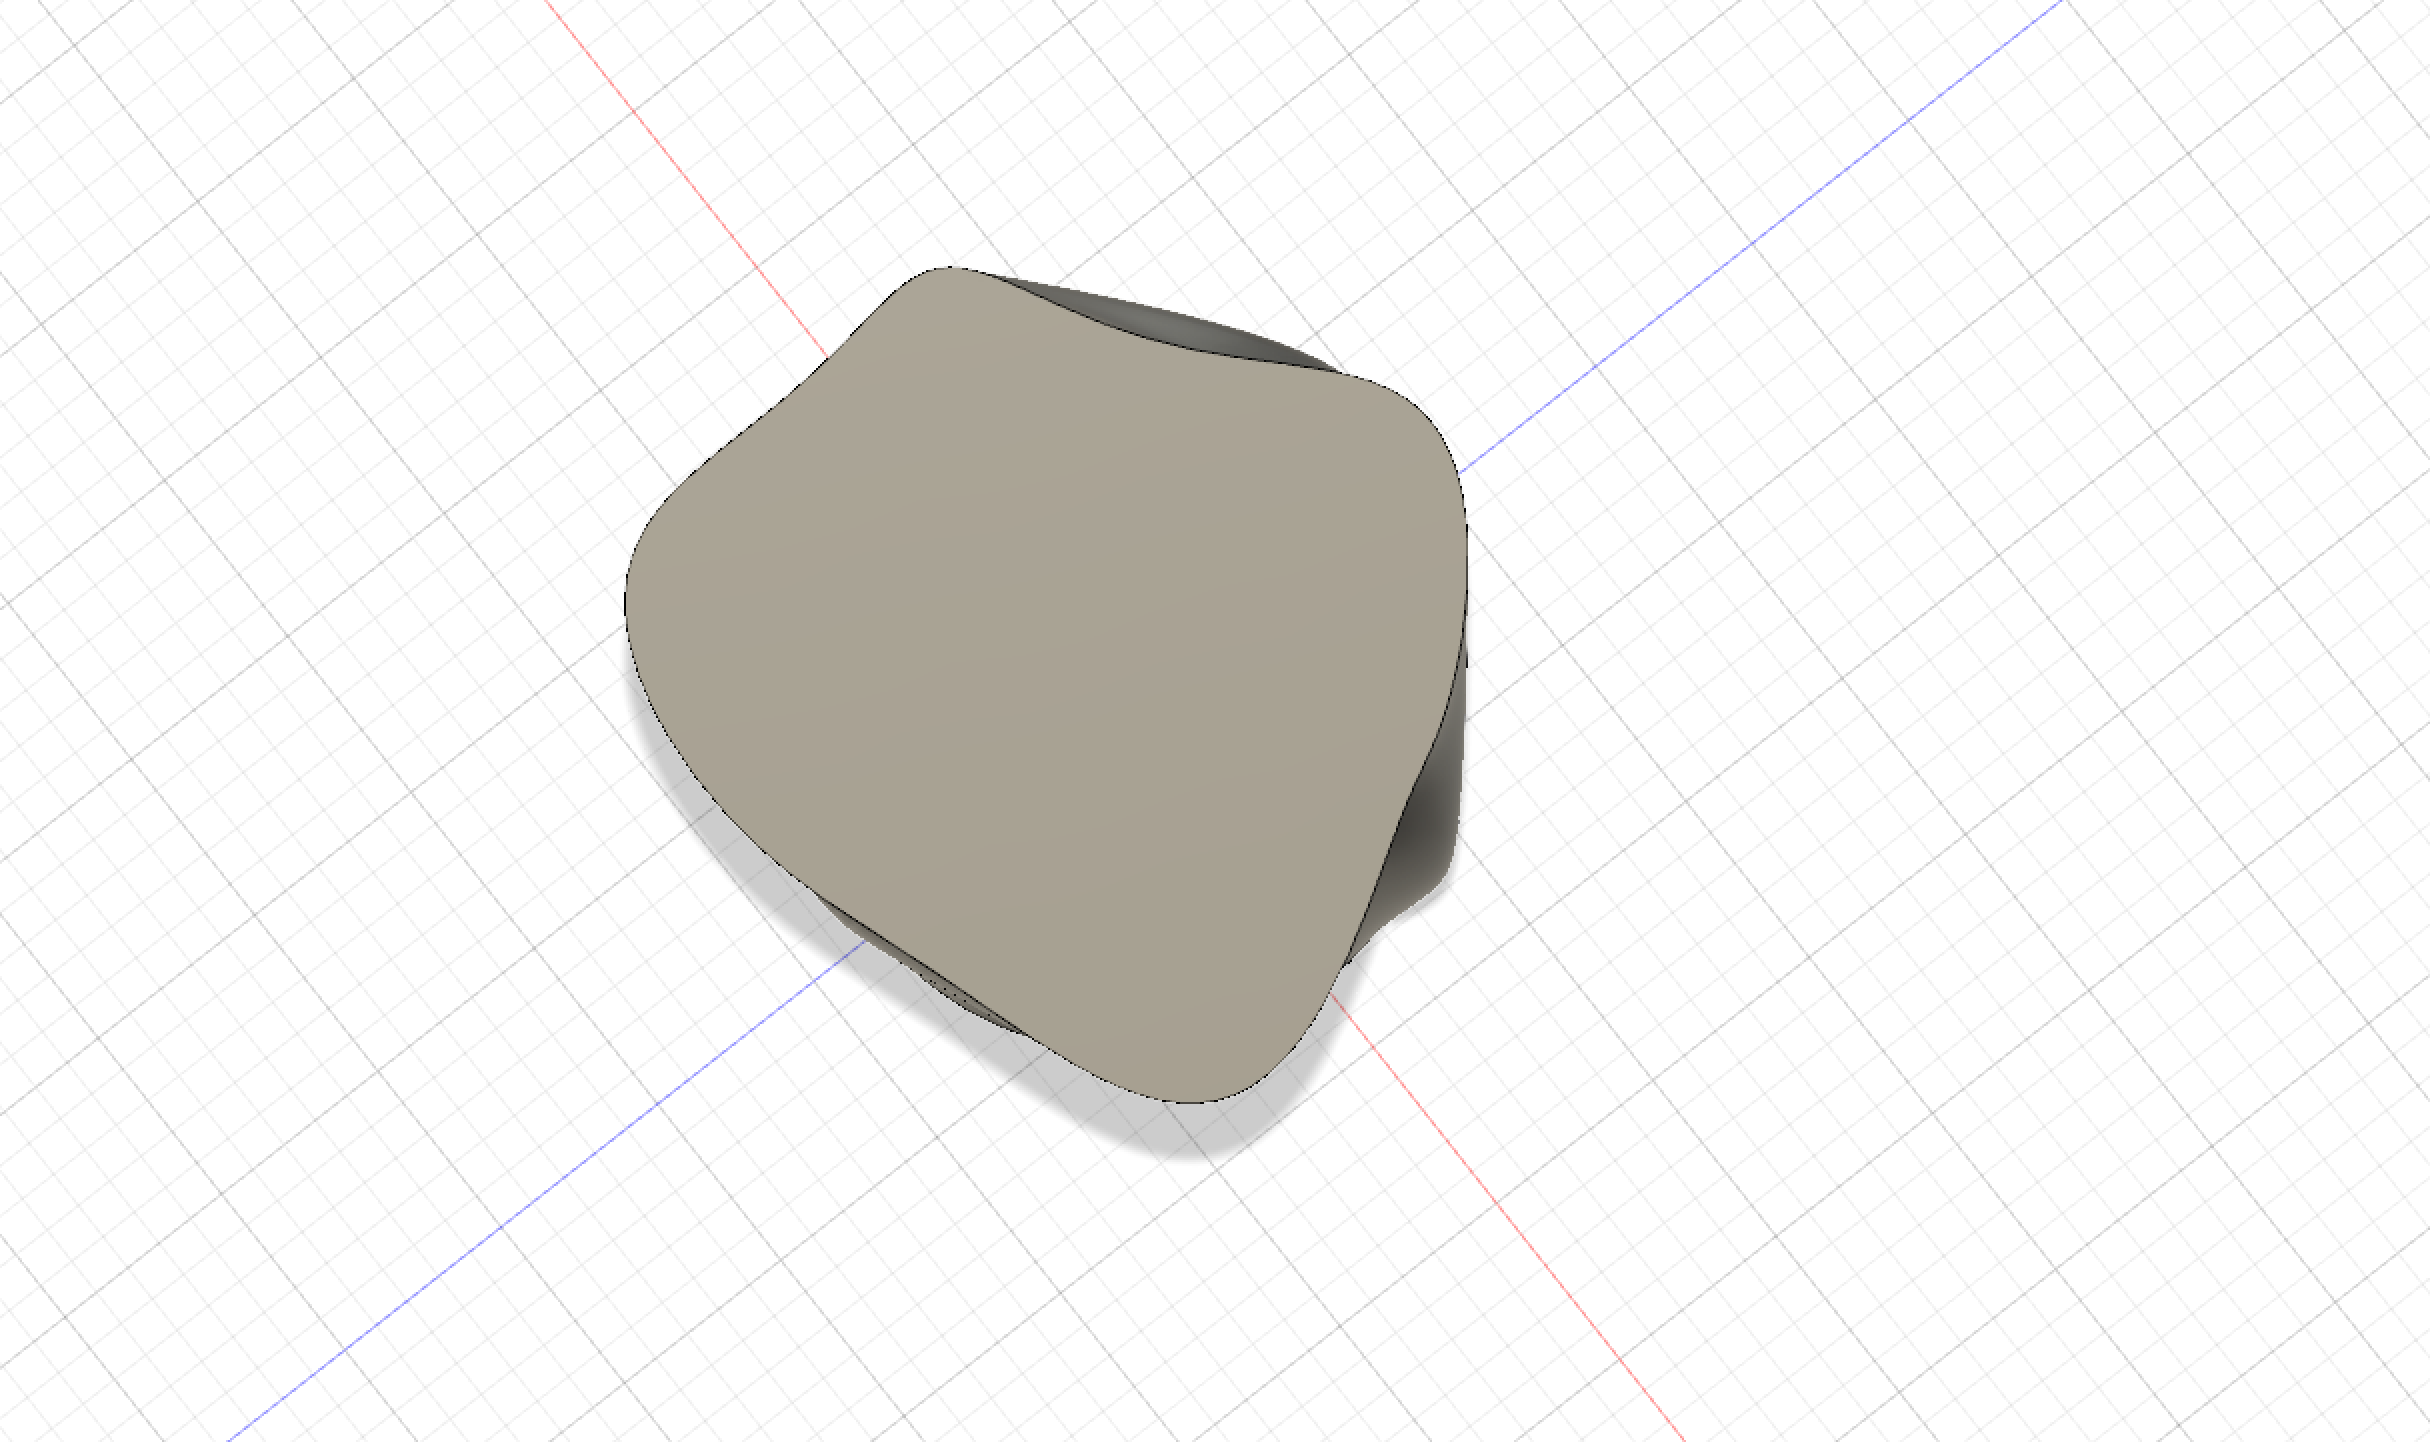
For this design, I sketched three different abstract objects each at different heights. The designs were initially very pointy and stuck out so I had to round them a bit more. The first screenshot shows the technique I used to twist the middle to make it appear more twisted and abstract. I wanted to spiralize it as much as I could. This goes beyond the videos because my shapes are obscure and beyond the basic demonstrative shapes and I did distinctly different shapes on each level.
Fusion 360 Vase Prints
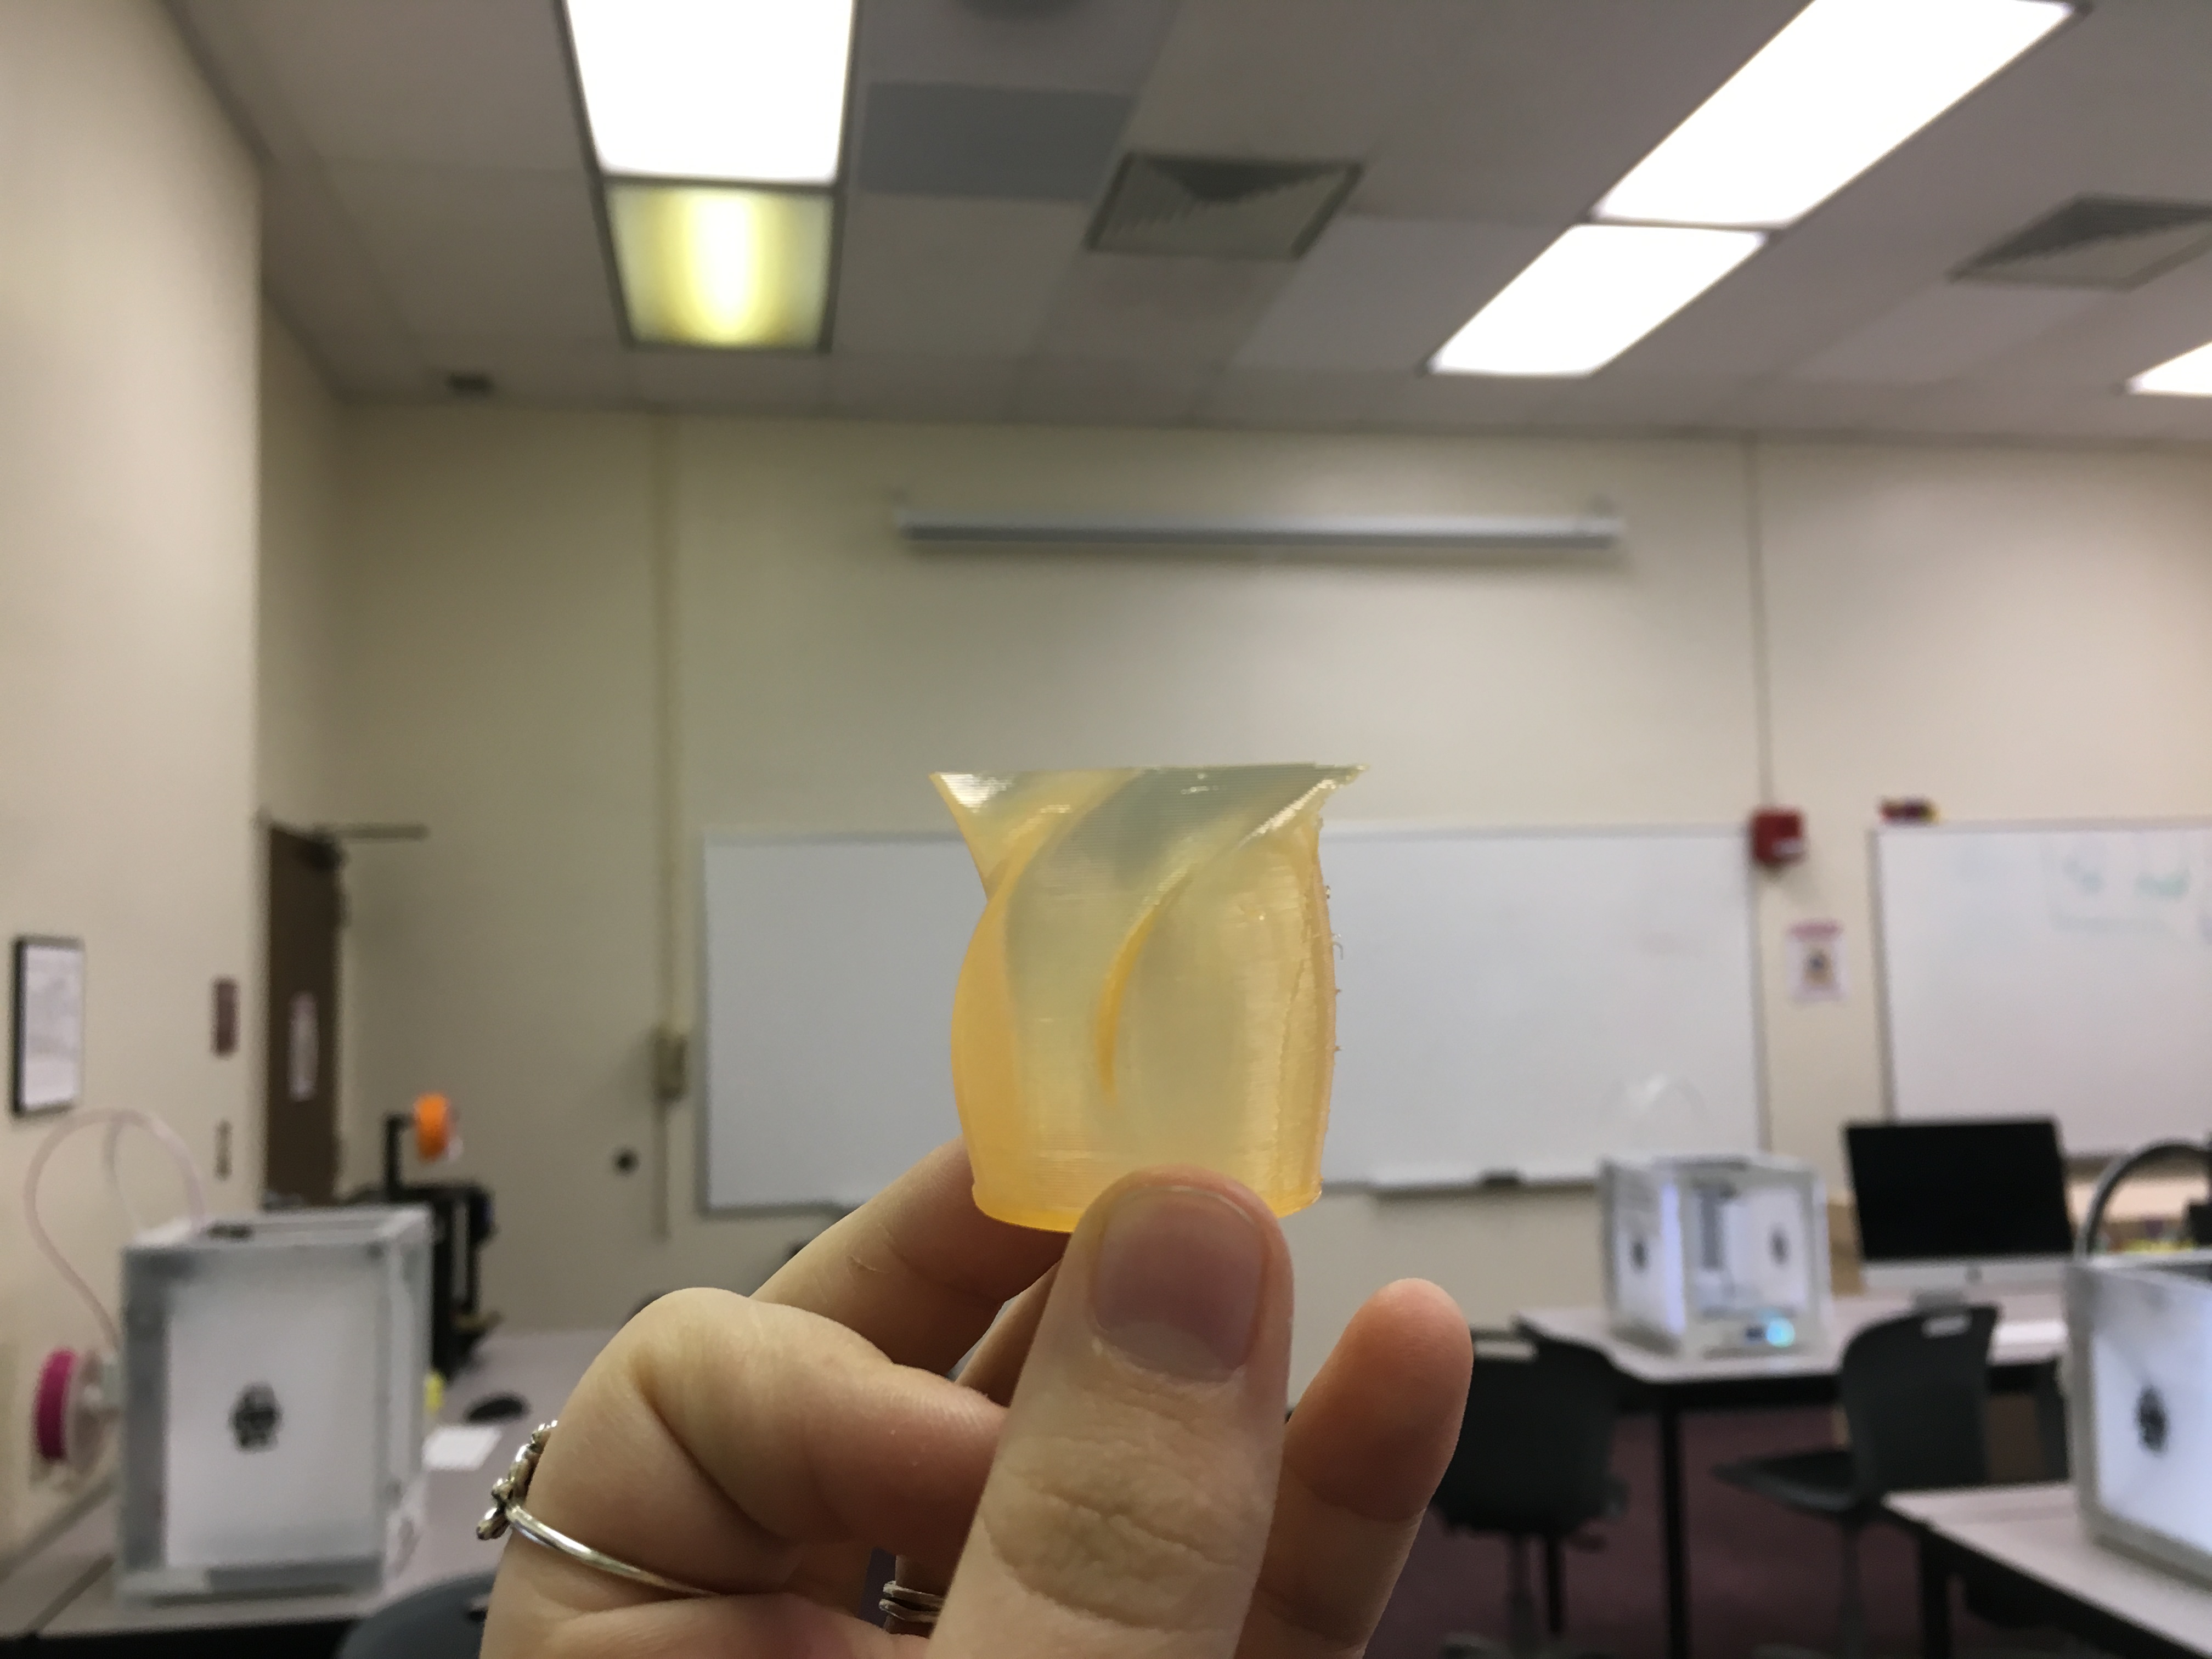
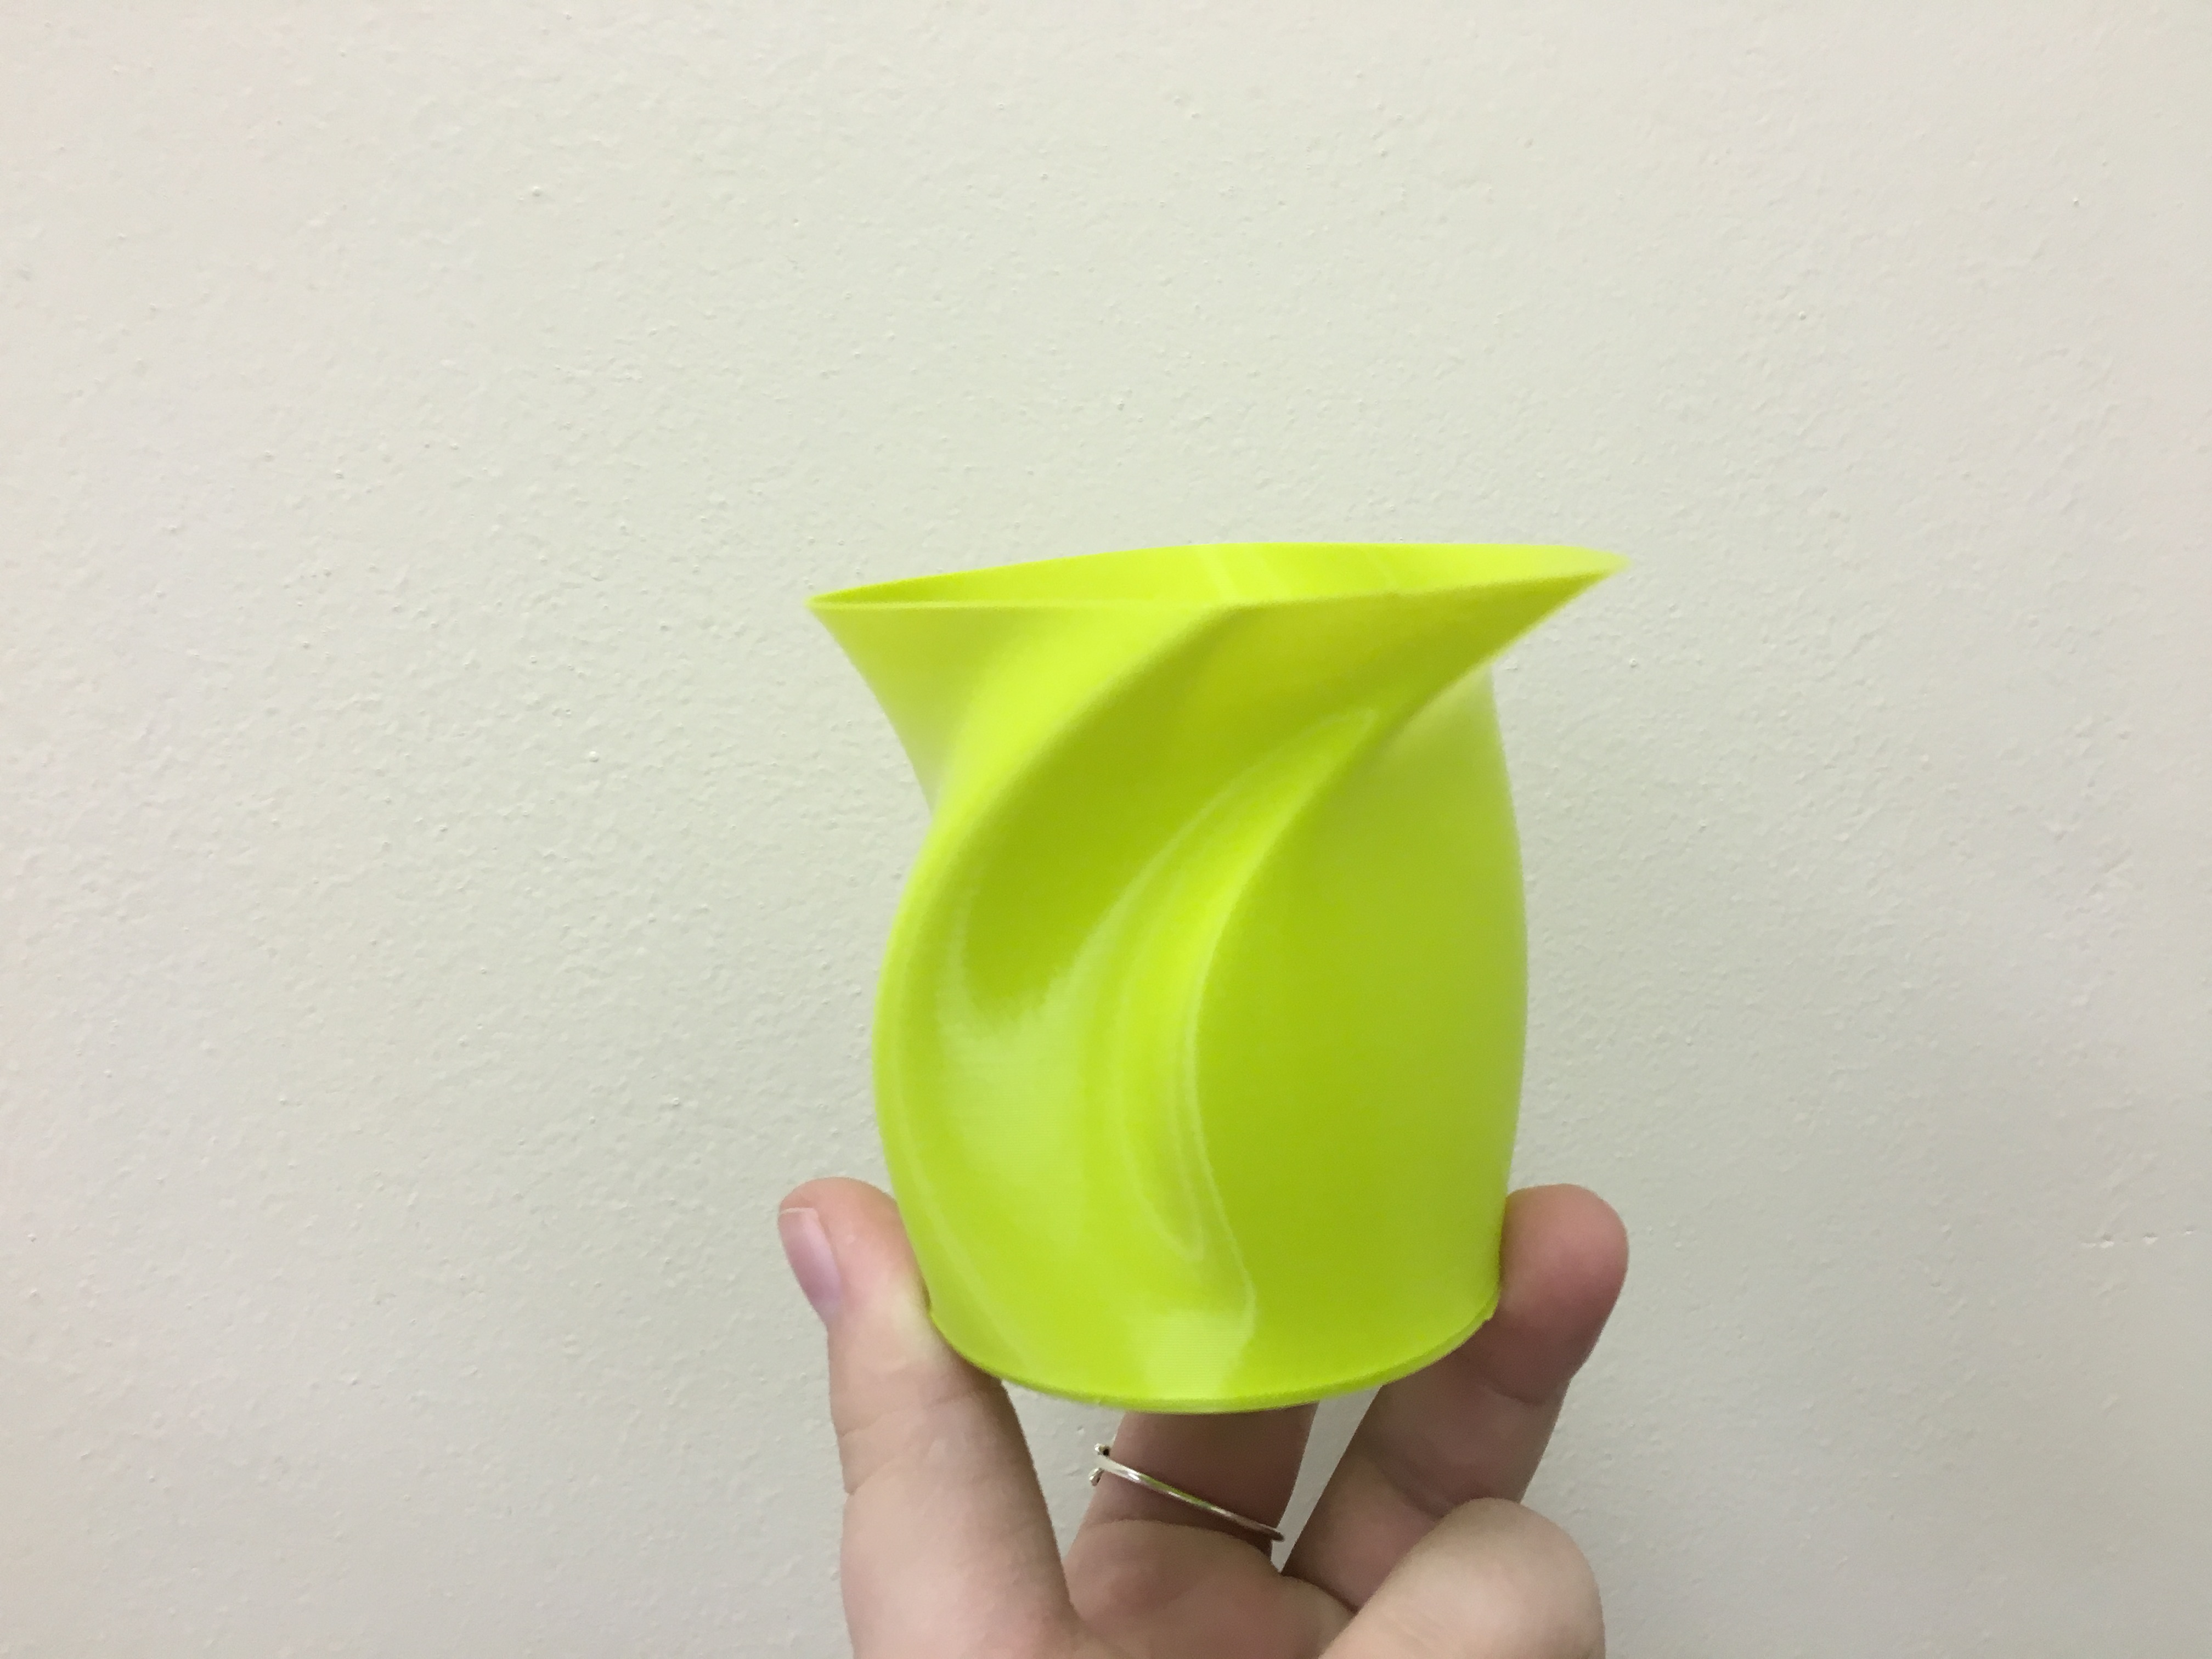 My first mini vase was mostly a success, but the print has support generated and was so thin that it was very hard to remove and cracked a little bit. The bigger vase design worked out perfectly because I did not put support and it held together well and did not need it. I am very happy with how it came out there are no flaws in the print it was a success. Here it is on Thingiverse.
20 Forms in OpenSCAD

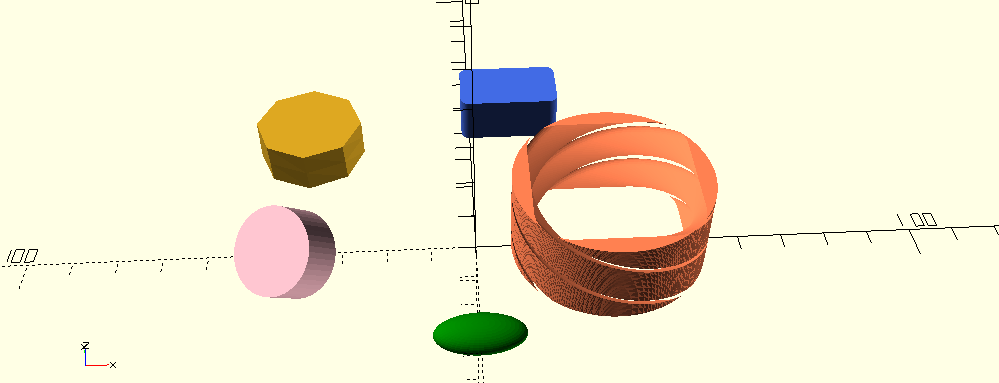
For my first group of shapes I was getting the hang of using openSCAD. I used rotate on the sphere and purple square. I used resize on the cyan cylinder to stretch it. For the purple square I rotated and scaled it. I translated all of the objects. The yellow shapes is a circle I used linear extrude on. I put a cylinder hole in the pink square but left it so it was visible. The blue shape is a cube I was testing different commands on. I messed around with sin and cos as well as “for” and translate. The colors I used on these shapes are “mistyrose”, “darkorchid”, “lime”, “blue”, and “cyan”.

For this design I changed the coding on this object created by JustinSDK on Thingiverse. I changed the size of the internal bowl and text.
For this design I used rotate on the pink cylinder shape. For the yellow octagon I created it using the $fn command and a circle, then using linear extrude. I used minkowski on the blue cube to round the corners. For the green sphere shape I resized it to make it long. On the coral shape I used a circle and square with linear extrude, and the commands “difference”, “twist”, “offset”, and “slices”. The colors I used in this design are “coral”, “pink”, “royalblue”, “green”, and “goldenrod”.
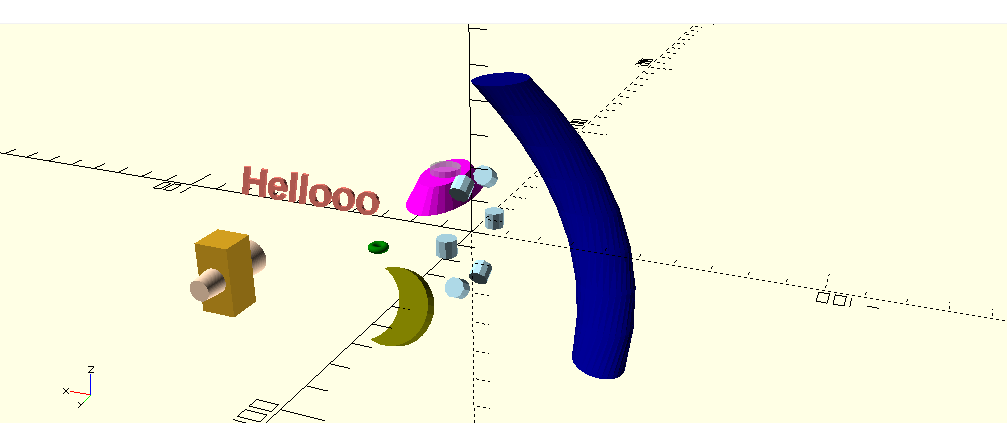
For this design I started using obscure commands. I used the cylinder for the pink shape but used resize on it and added “r2” to make the top smaller, as well as using the cylinder to make a hole in the middle. I messed around with linear extrude on a circle to create the blue shape. The commands I used in linear extrude are “twist” and “convexity”, and I also used rotate. The green shape that looks like a little donut was made with rotate extrude and $fn on a circle. I rotated text in the font Liberation Sans, and added bold and italics to the text. The light blue cylinders are looped with “for” and rotate. The orange cube was merged with the pink rotated cylinder using “union”. The moon shape was made with two circles, linear extrude, and difference. The colors I used were “navy”, “magenta”, “olive”, “green”, “peachpuff”, “orange”, “coral”, and “lightblue”.
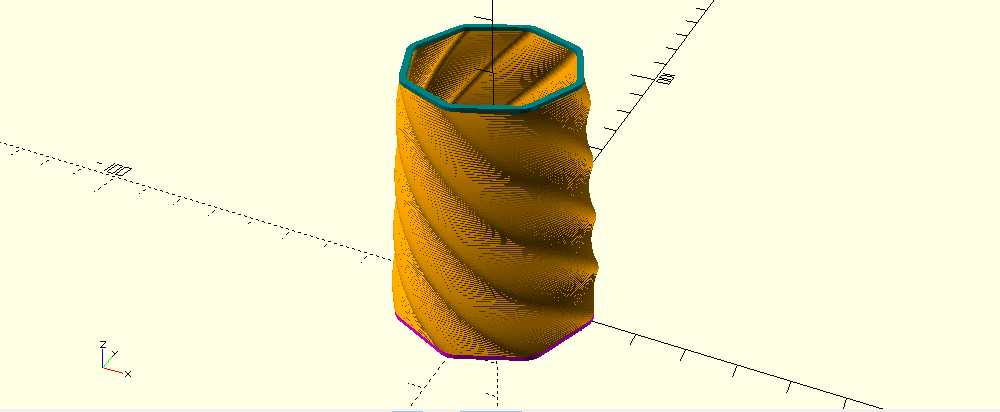
For this design I remixed the polybowl from here. I added the colors “orange”, “teal”, and “fuchsia”. I changed the shape to an octagon by making the number of sides 8. I made the twist angle 180 degrees. I also changed the height and made the hole at the top smaller than the base.
OpenSCAD Print

This is the polybowl design I made. I love the purple filament color and I think it is really cute and would fit a tiny succulent. My only negative thought was that the print was so tiny that there were little spiderwebs on the inside of the print and it made the outside look patchy.
Summary of Group OpenSCAD Project
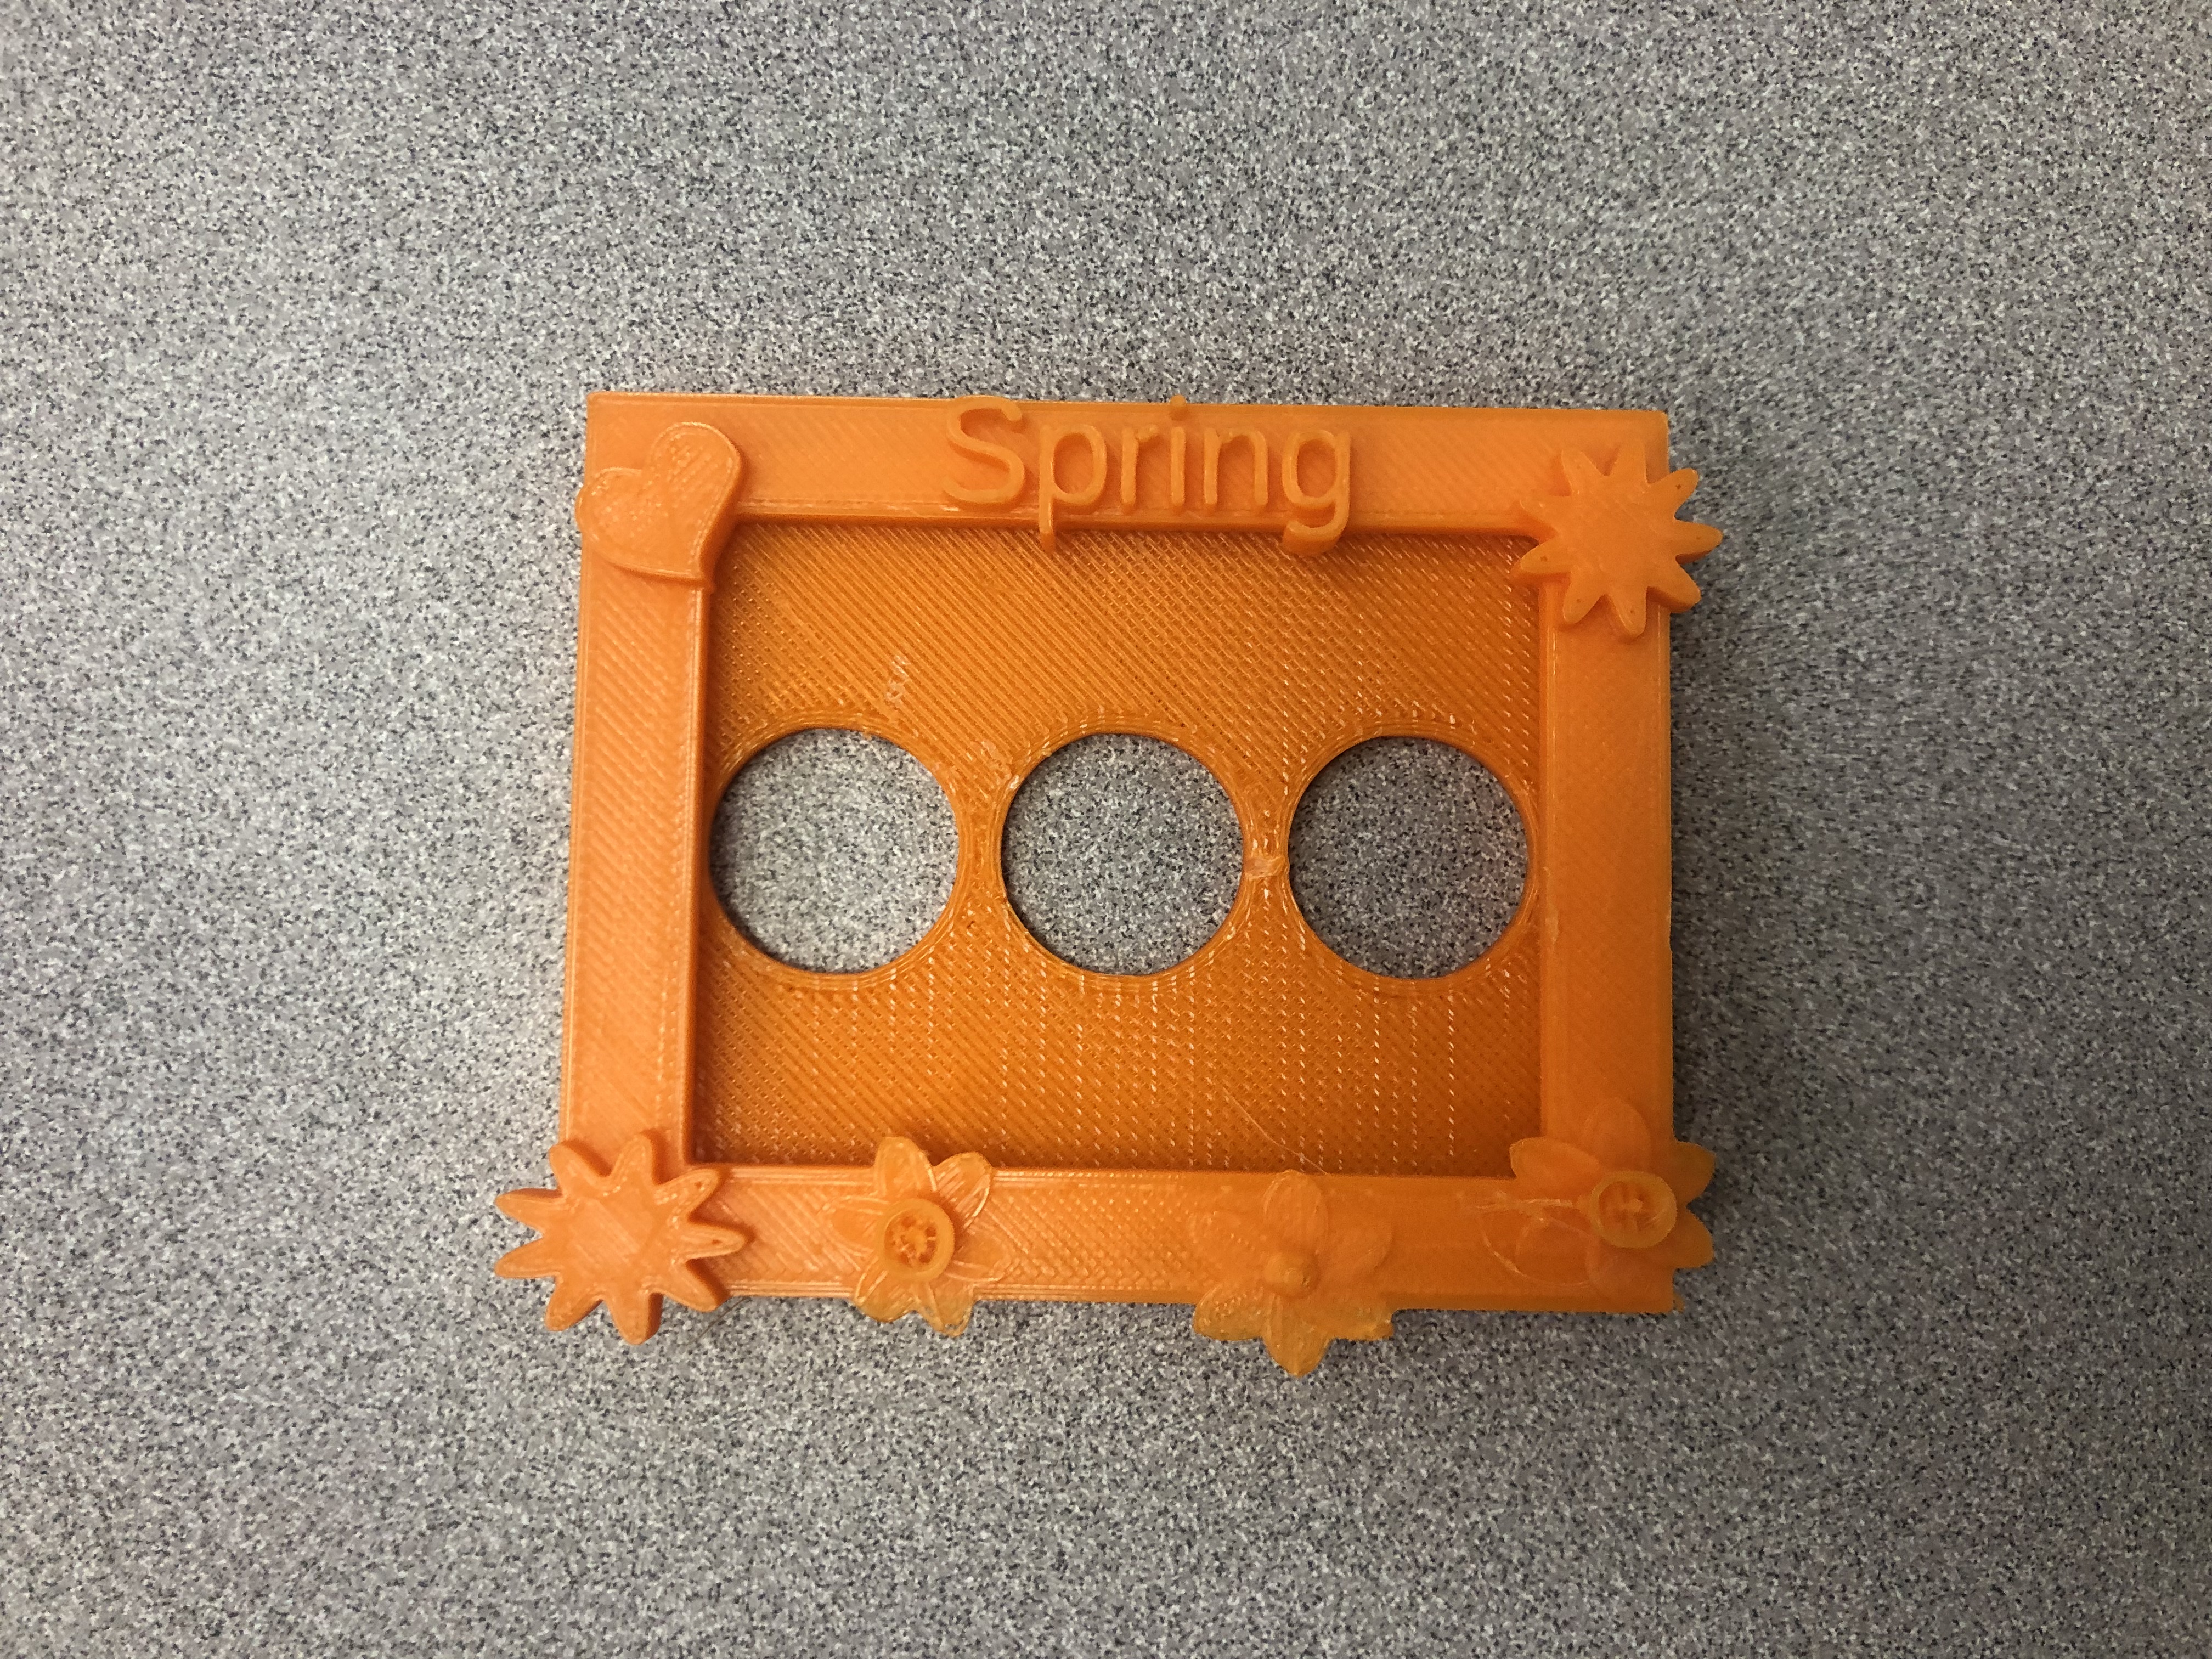
My project for OpenSCAD was the customizable picture frame that I designed with my partner Maggie Ricciardelli.
Here is our group project post & Here is our project on Thingiverse.
Our project idea was to make a picture frame that could be customized in terms of size to fit any size picture, as well as having design elements like decorations be customizable to the user. The sizing was extremely difficult to figure out so we found a frame that already had the basic shape of a picture frame and modified it from there. We created a bunch of decorations and used blender to put the shapes into openscad and made the shapes able to be turned off and on, as well as rotated. This project was difficult to create and our finale prints had some issues, but I am going to continue to edit our code after the class is over. I am overall very happy with how our frame came out and I am going to print one for my family.
Reflections and Future Projects
I learned so much in this course. I entered this course as an executive board member of the 3D Printing Club and I knew how to work the computers and make things on tinkercad, but beyond that I did not have a ton of knowledge of designing and working with the other programs in the lab. During the course I learned how to use tinkercad more effectively, as well as learning a lot about fusion 360, and even some coding in OpenSCAD. I loved fusion 360 the most, even though it was the most difficult for me to understand. I am very proud of all of my creations in this course, especially my pop figure since that was something I wanted to create for a long time and through this class I was finally able to learn how!
I have already decided a few future projects that I want to do. I used to look on thingiverse for content I wanted to see and get frustrated that I could not find things. Some future projects I want to do are recreate statues from my favorite video game Dragon Age, as well as design a working litter box for my rabbit, and design useful home decor and household objects. I also love making planters for fun and I have already designed one during the course after getting to know Tinkercad better, which I have included a link to HERE. Another future project I want to do is learn how to extract meshes or recreate exact 3D files from video games where they are already made. I will definitely be utilizing this knowledge in the future and teach it to other people in the 3D printing club!