Hello
Hello my name is Maggie Ricciardelli and I am a sophomore here at James Madison University from Leesburg, VA. I am studying CIS in the College of Business and I plan to pick up a minor in either Italian or music industry. I am a Resident Advisor here on campus and I am also the treasurer of the 3D Printing Club. My favorite activities include sleeping and watching hockey (go Caps). My plans for after school are up in the air right now, but I am hoping to either go to grad school or travel.
Being part of the 3D Printing club gave me experience using Thingiverse, Tinkercad, and how to create and customize models. I understand how to work the machines and basic skills for creating an original print. My goal for this class are to have a better grasp on software used in 3D printing besides Tinkercad. I want to push myself further and challenge my creative side to create my own 3D models.
https://www.thingiverse.com/maggier0/about
Thingiverse Model
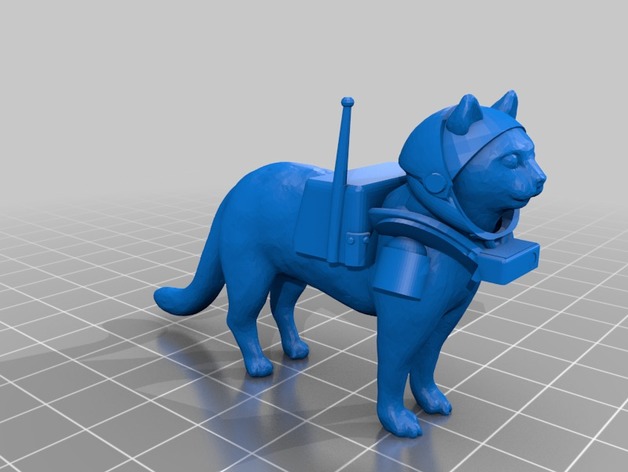
“Space Cat” by navalevenson from https://www.thingiverse.com/thing:2260233
I chose this model because I love cats and found this while browsing Thingiverse. I thought the space suit added a fun twist to the cat and it can be a cool trinket to add to my 3D print collection.
Thingiverse Print
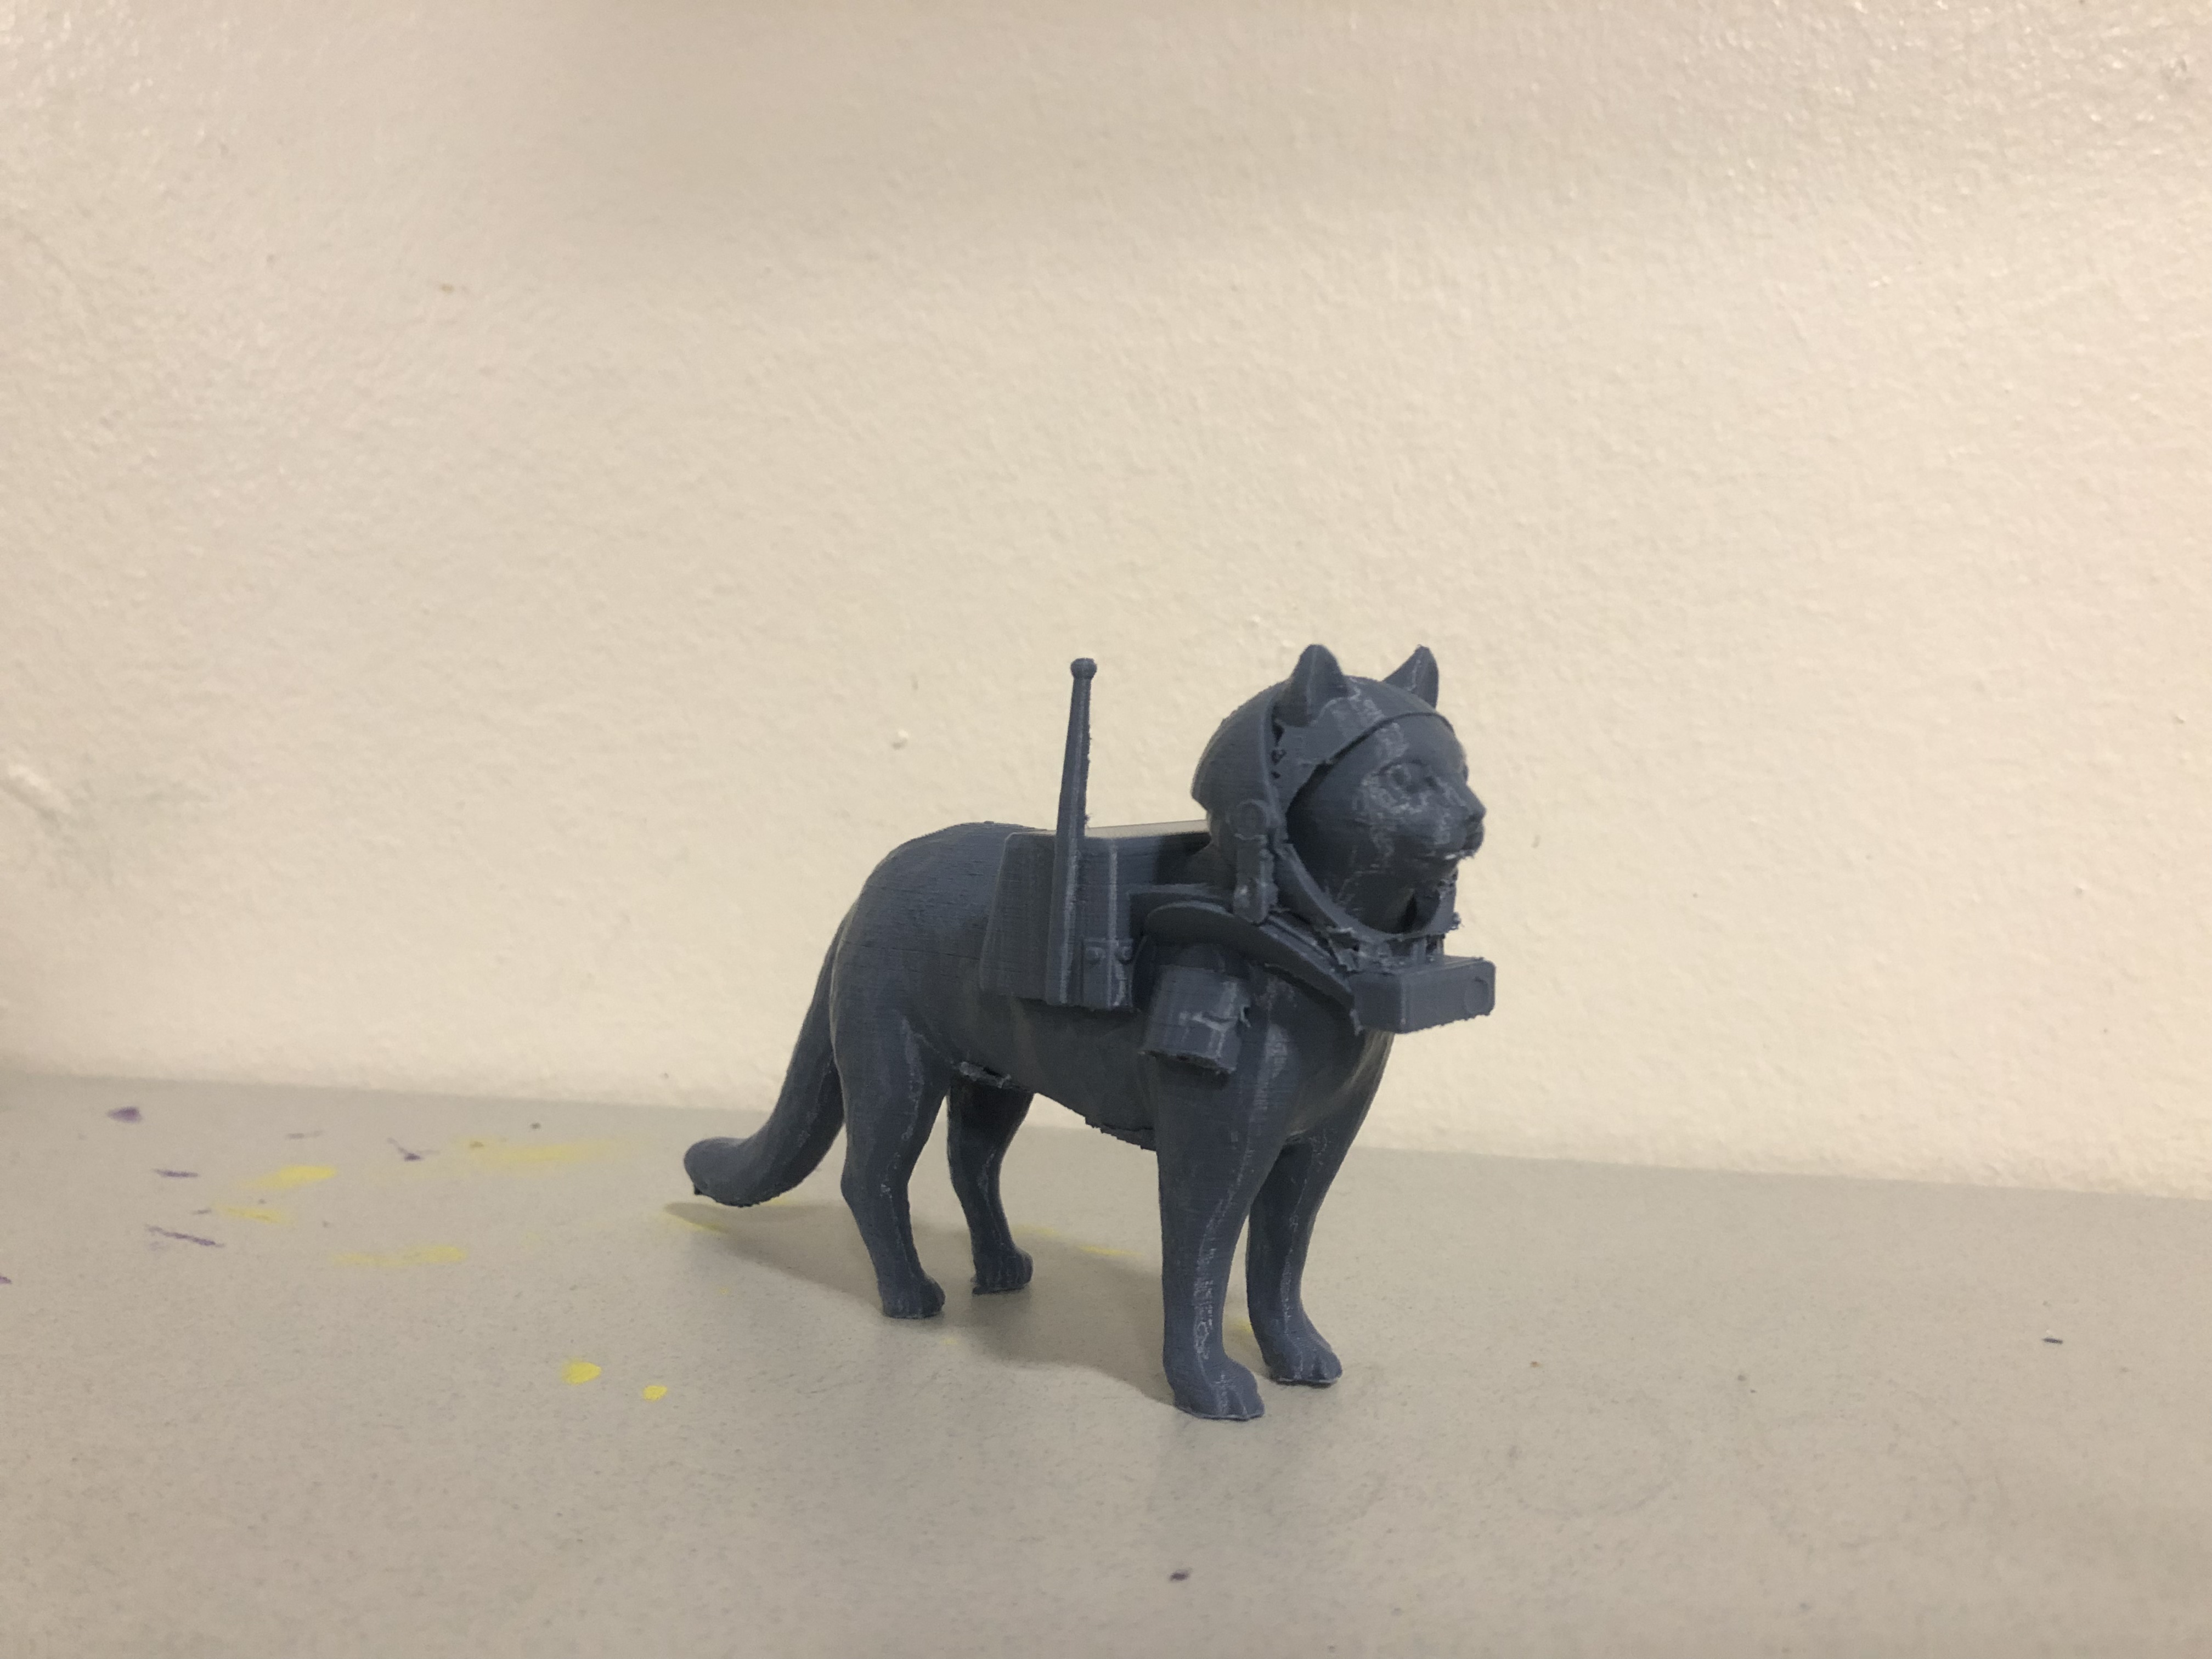
The first time I printed space cat turned into complete spaghetti so I felt compelled to reprint it. The first one was very small which I think why it failed in the first place. I generated support for it, but even with the added support the legs were very thin and thats where it began to mess up. I decided to reprint it but scale it larger to see how it would turn out. I think making it larger worked out because space cat printed with no problem.
https://www.thingiverse.com/make:594716
20 Forms in Tinkercad
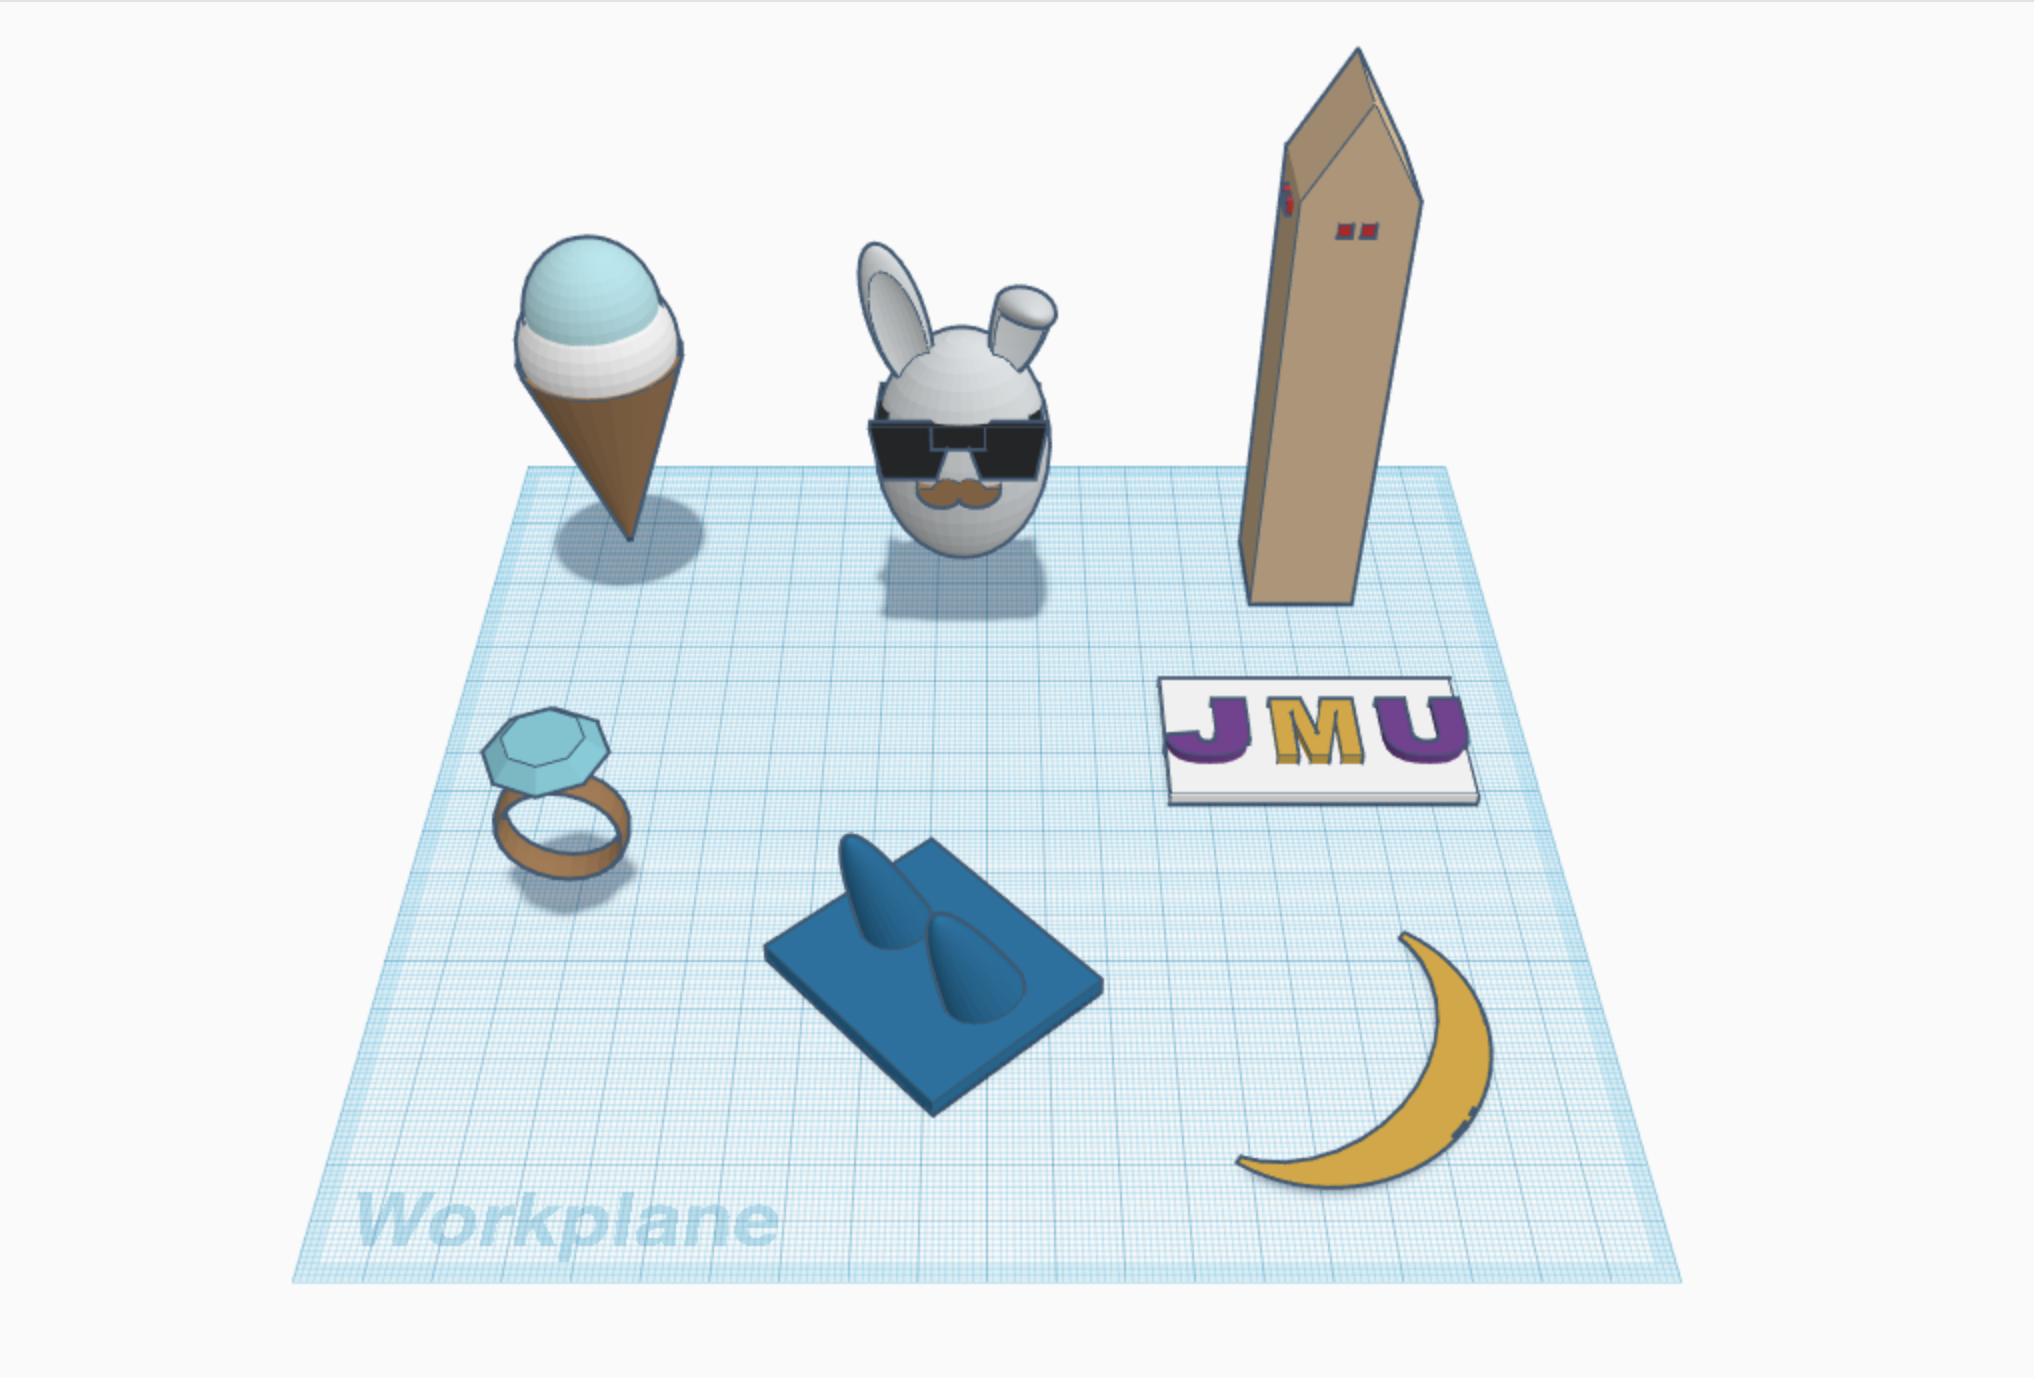
Here, I made an ice cream cone, a hipster bunny, the Washington Monument, a ring, a ring holder, a JMU plate, and a crescent moon. For the ice cream cone I used the cone and two spheres and combined them together. For the bunny I used a sphere and stretched it into an oval and put the sunglasses and a mustache on it. For the Washington Monument, I stretched the cube into a rectangular prism and put a pyramid on top of it. I added small red cubes as the indicator lights that flash on it in real life. For the ring I simple combined the ring shape with the diamond shape and rotated it so it was sitting upright. Every ring needs a ring holder, so I used a flat square and added a rotated paraboloid. For the JMU plate a changed a cube into a flat rectangle and placed the letters on top of it. For the crescent moon, I took a sphere, resized it, and rotated it on to the work plane. Then, I duplicated the same circle, made a hole, and grouped the two shapes together.
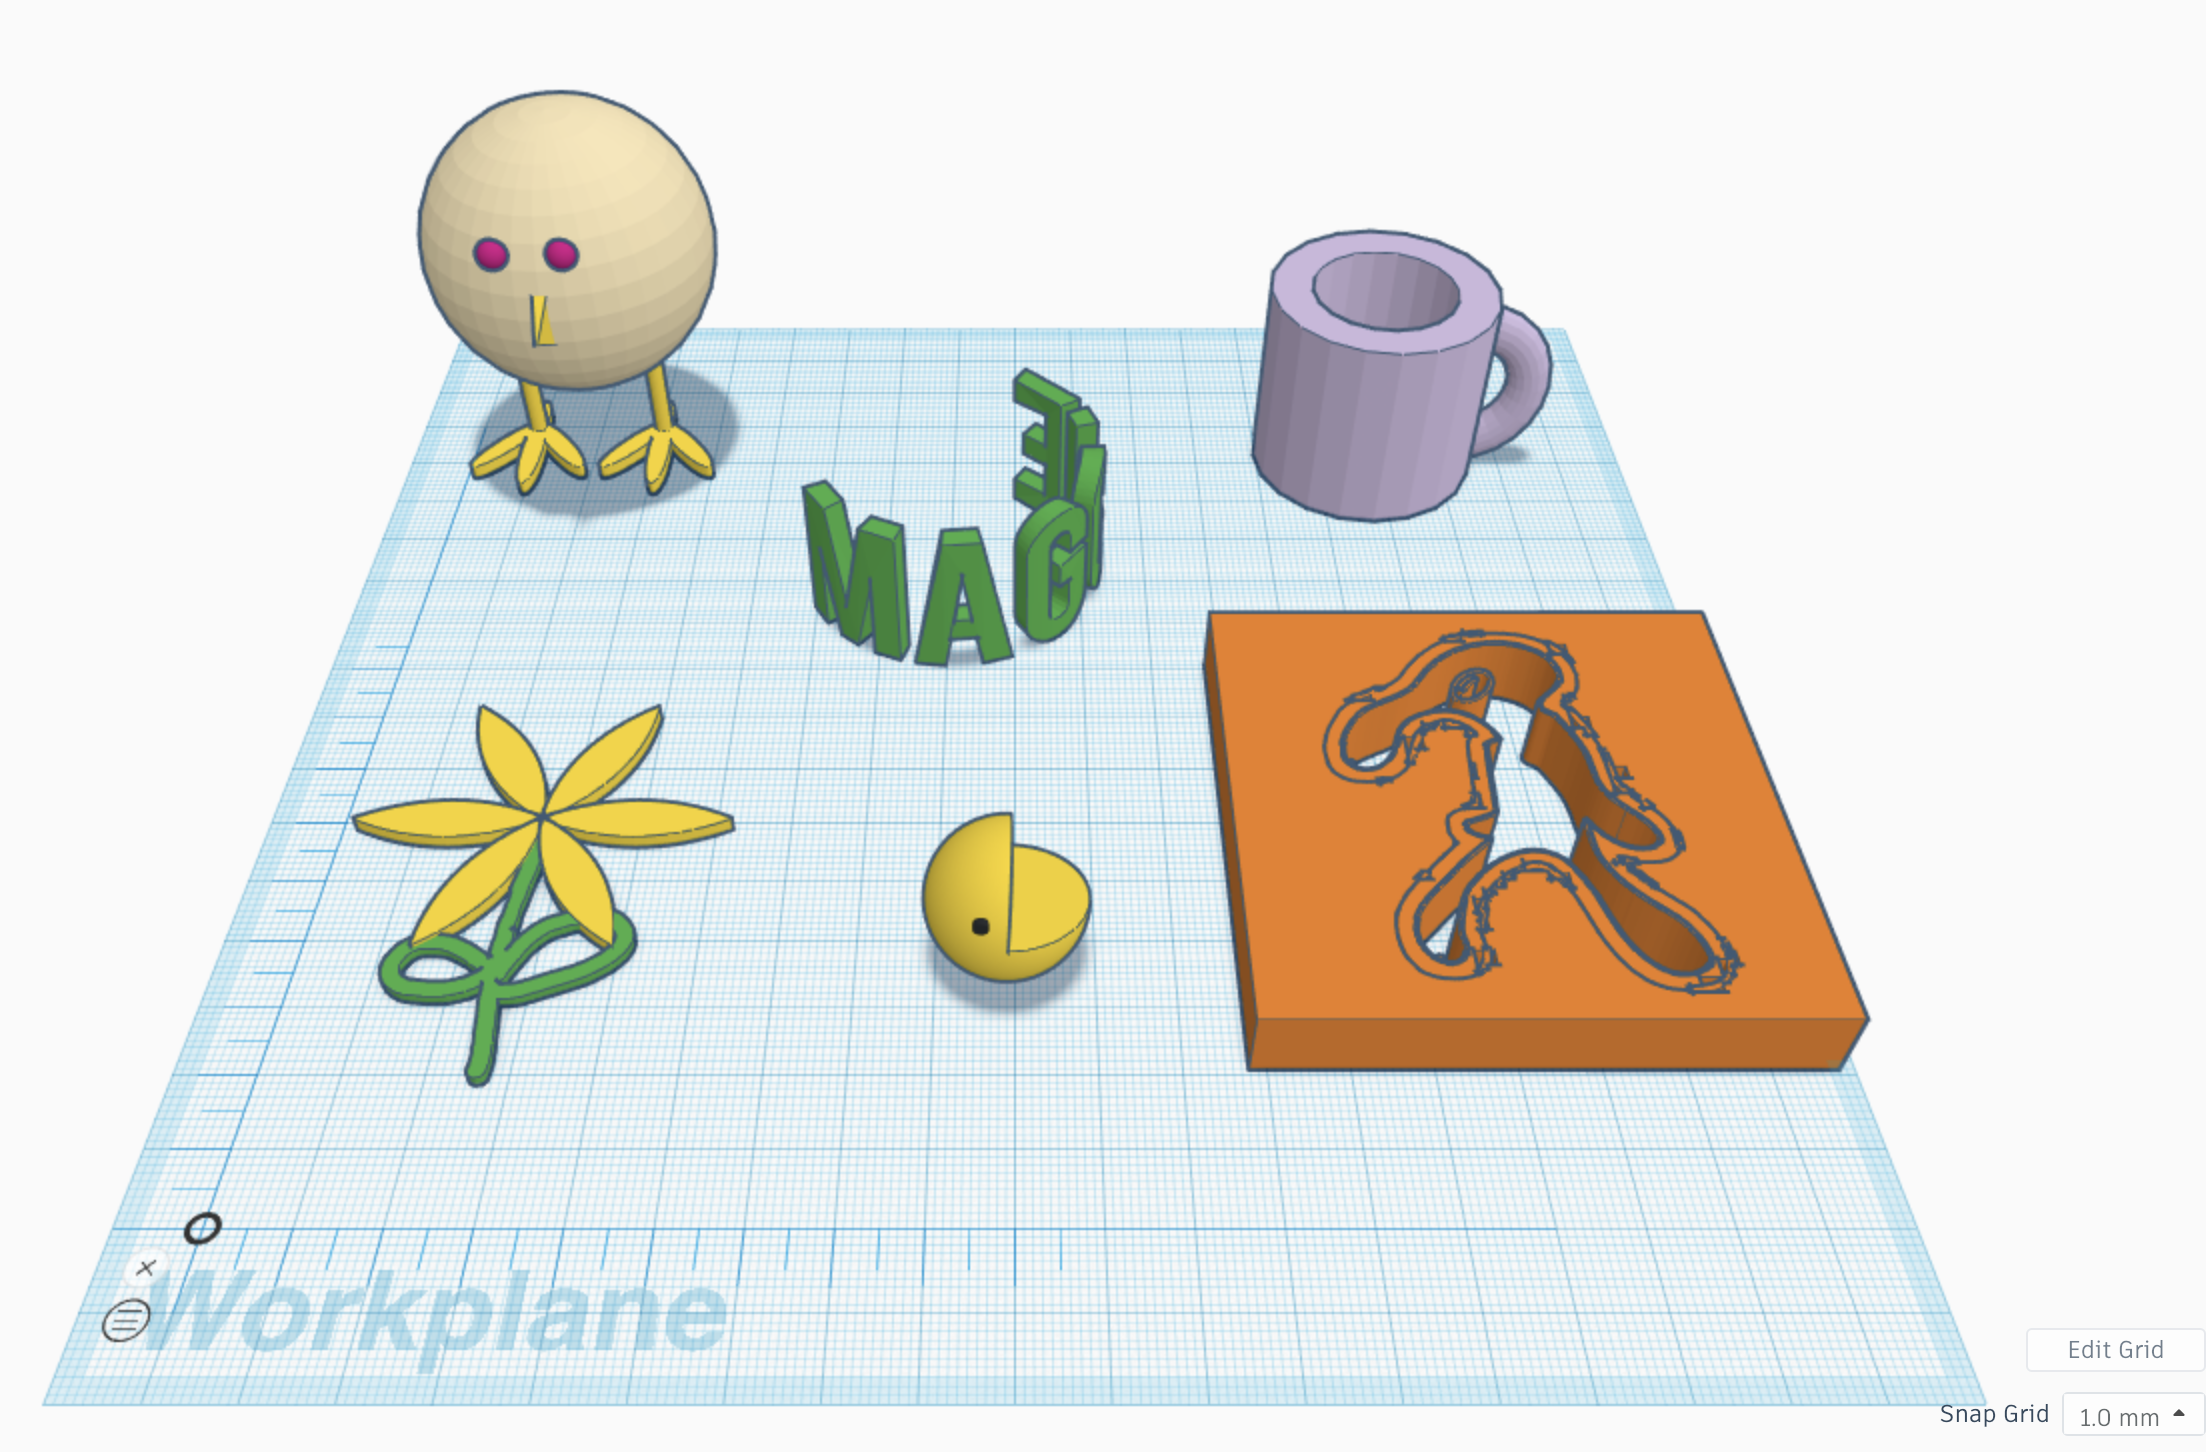
In this image, I made a chicken, mug, pac-man, a text ring, sunflower, and an outline of bold n brash. For the (poorly designed) chicken, I used a sphere for the body, two half-spheres for the eyes, a pyramid for the nose, and the chicken legs for the feet. For the mug, I used a cylinder and used a smaller cylinder to make a hole in it. Then, I used a torus shape and holed out half of it to create the handle. I put my name in the text ring design and I really like it because it gives it a cool 3 dimensional effect. I made the sunflower by using the sunflower shape in the featured category and then scribbling the stem and leaf. For pac-man, I used the given pac-man shape and a small cylinder for the eye. I found a simple picture on google for the bold n brash picture and converted it into an SVG file and imported it into Tinkercad. The edges are a little choppy which I think occurred because the image was a little bit blurry. If I find a higher quality picture I think it will come out a little better.

For this image I have a half-skeleton, sailboat, a bowl, a house with a chimney, keychain, children’s dice, and pickle rick if he was a wizard. For the skeleton I grouped together the given skull, chest, and pelvic bone and gave him a hat as well. With the sail boat I used a sphere and morphed it into an oval shape. Then, I duplicated it and used the other shape as a hole to make the boat part. I used a cylinder as the mass and a pyramid for the sail. For the bowl, I simply used a sphere, duplicated the sphere, made the second sphere into a hole, and grouped the two together. For the house, I grouped together the cube and roof shape and added the cylinder for the chimney. For the keychain, I made a flat plane, and used a cylinder and a cylinder hole to make the ring. Then, I used the text feature to add my name on top. With the children’s dice I used the dice shape given and grouped the other shapes together. I also used the align function to make sure the shapes were centered on the dice. For the very inaccurate representation of pickle rick, I made an oval and scribbled his mouth on. I added small cylinders for the eyes and put a cone on top of his head as his wizard hat.
Tinkercad Print
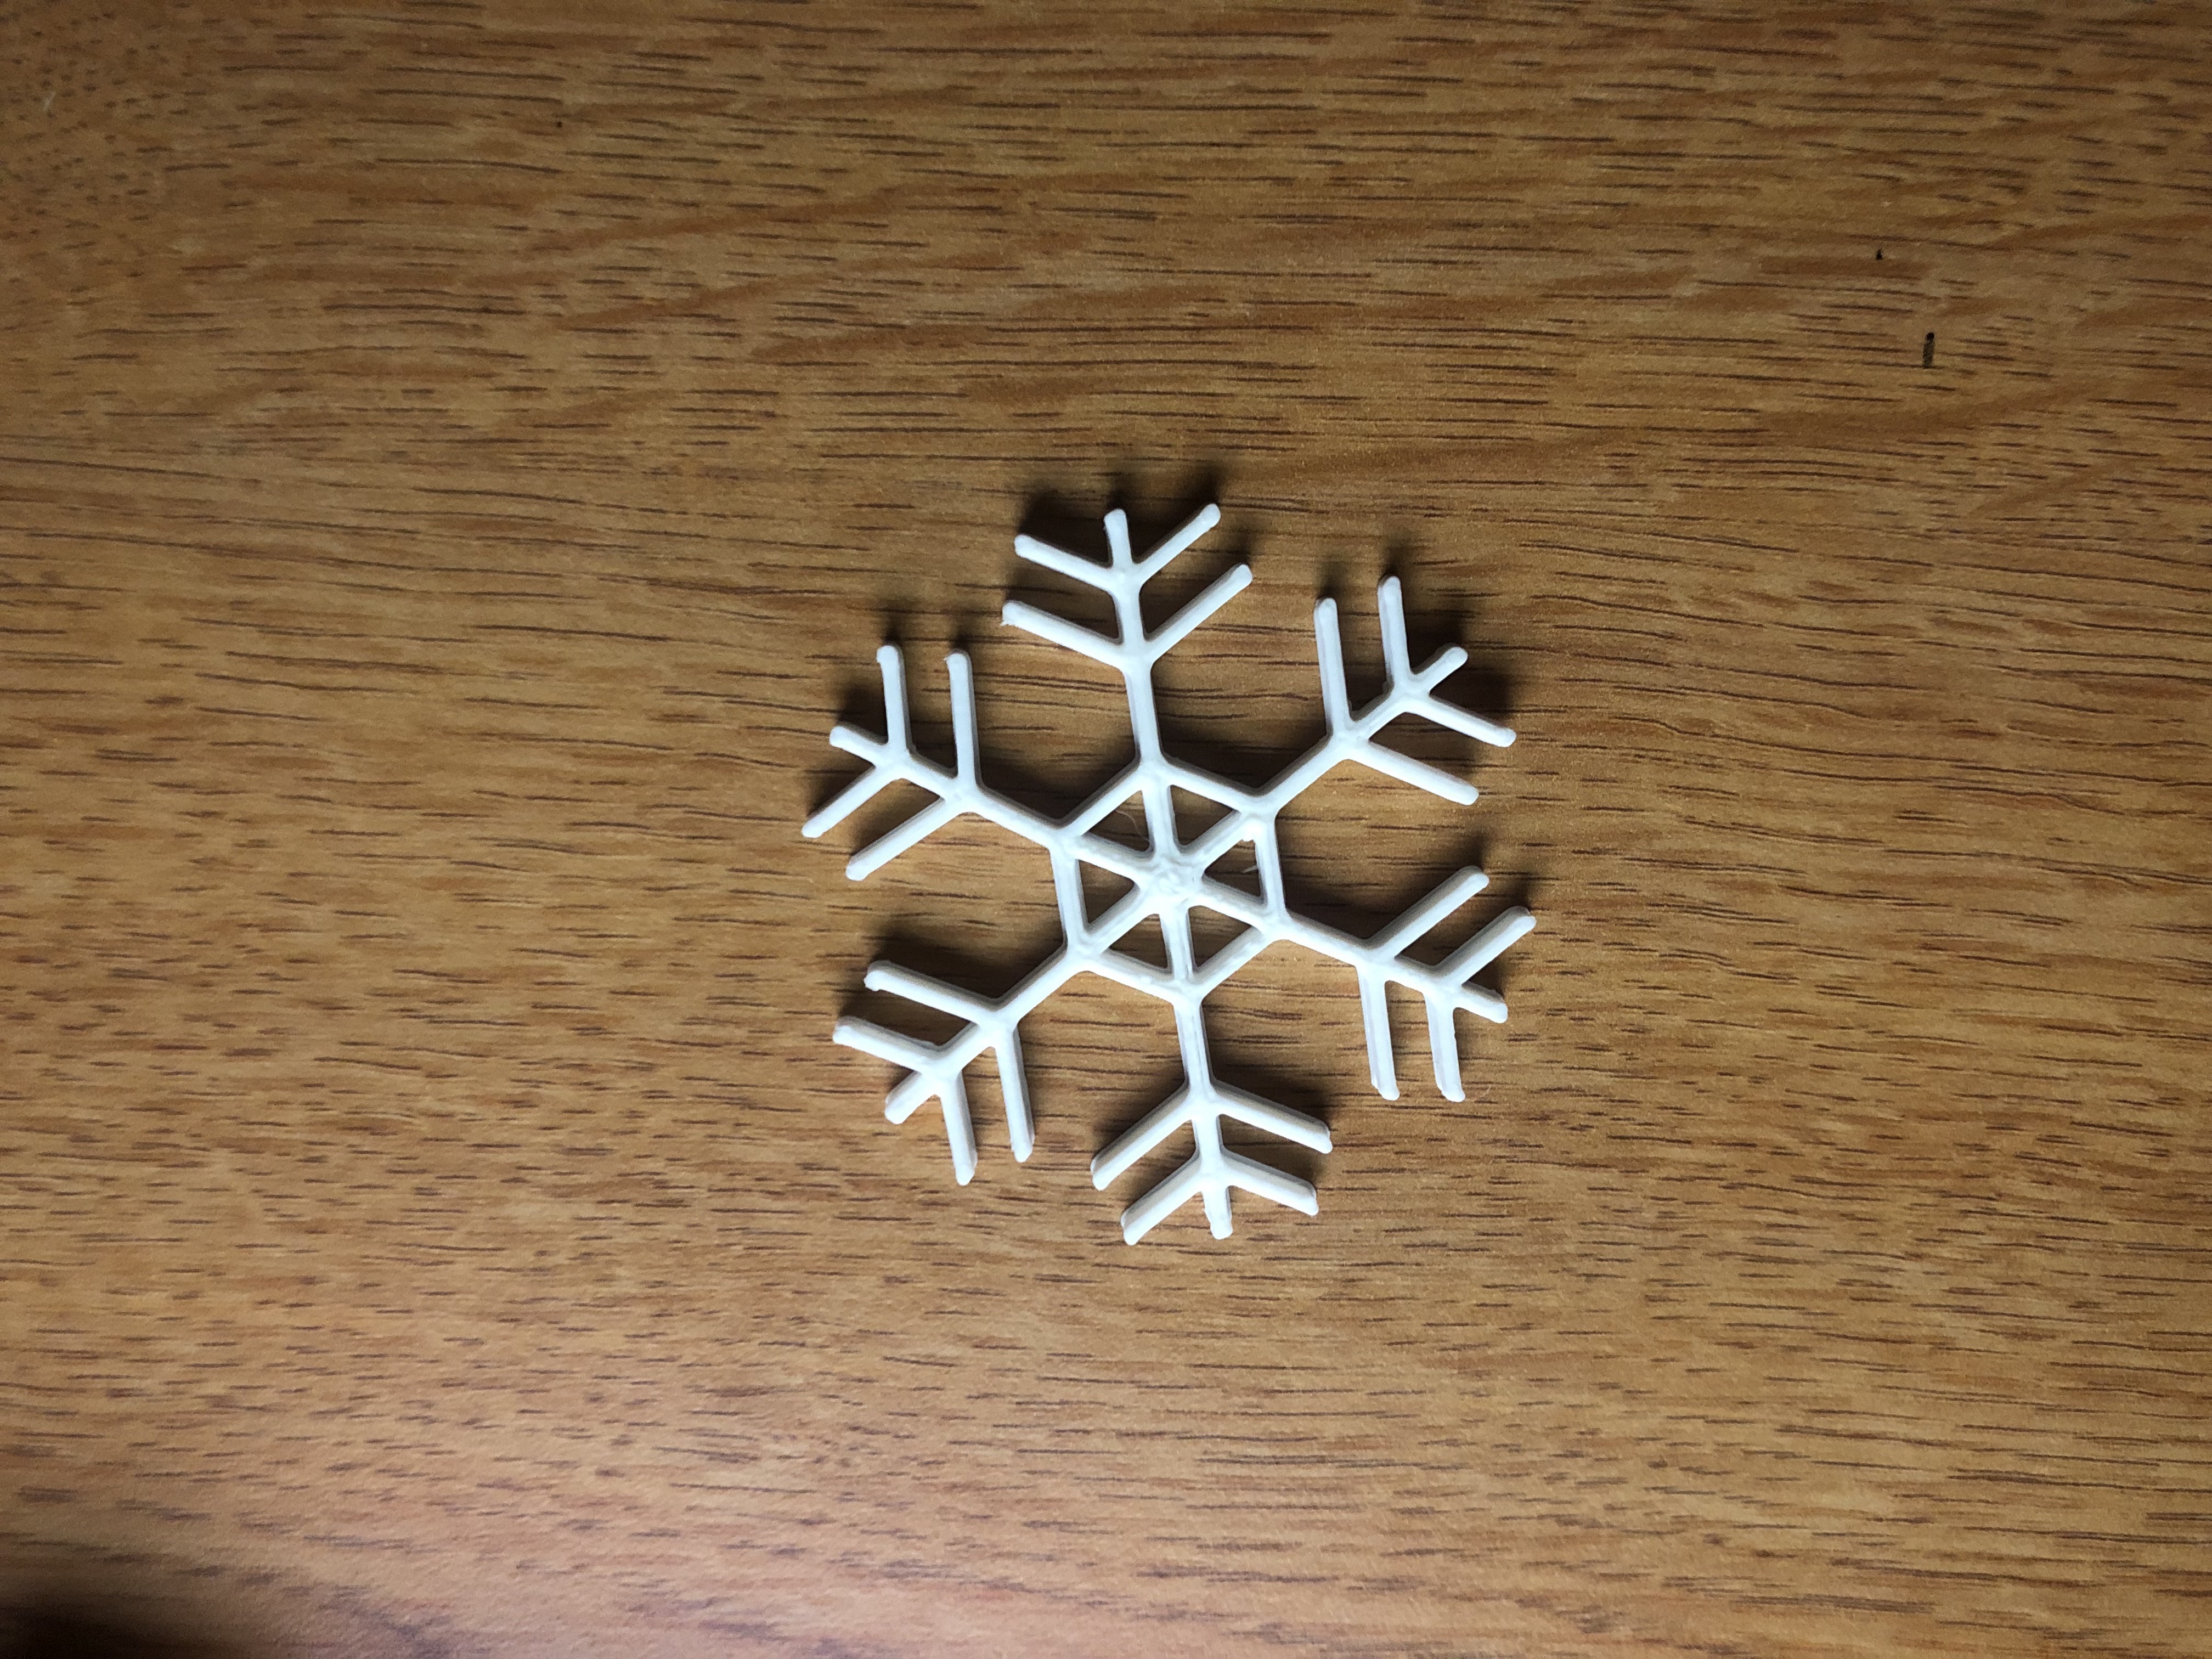
This snowflake successfully printed I think because it was layer based with no complicated designs to it. I like this snowflake a lot because it fits in with the season of winter. In the future, I can challenge myself to adding my own design and making it more complex.
Summary of Group Tinkercad Project
Customizable Pop Figures with Bailey Callahan
Overall, this project was fun but challenging. We realized quickly that pop figures were slightly difficult to create especially in Tinkercad, but we wanted to do it because there weren’t any female models on Thingiverse. Creating the base of the model was the most difficult as well as scribbling the hair. Once we had finished, personalizing them was simple and I enjoyed creating myself as a pop figure because it is a cute trinket to add to my 3D print collection. 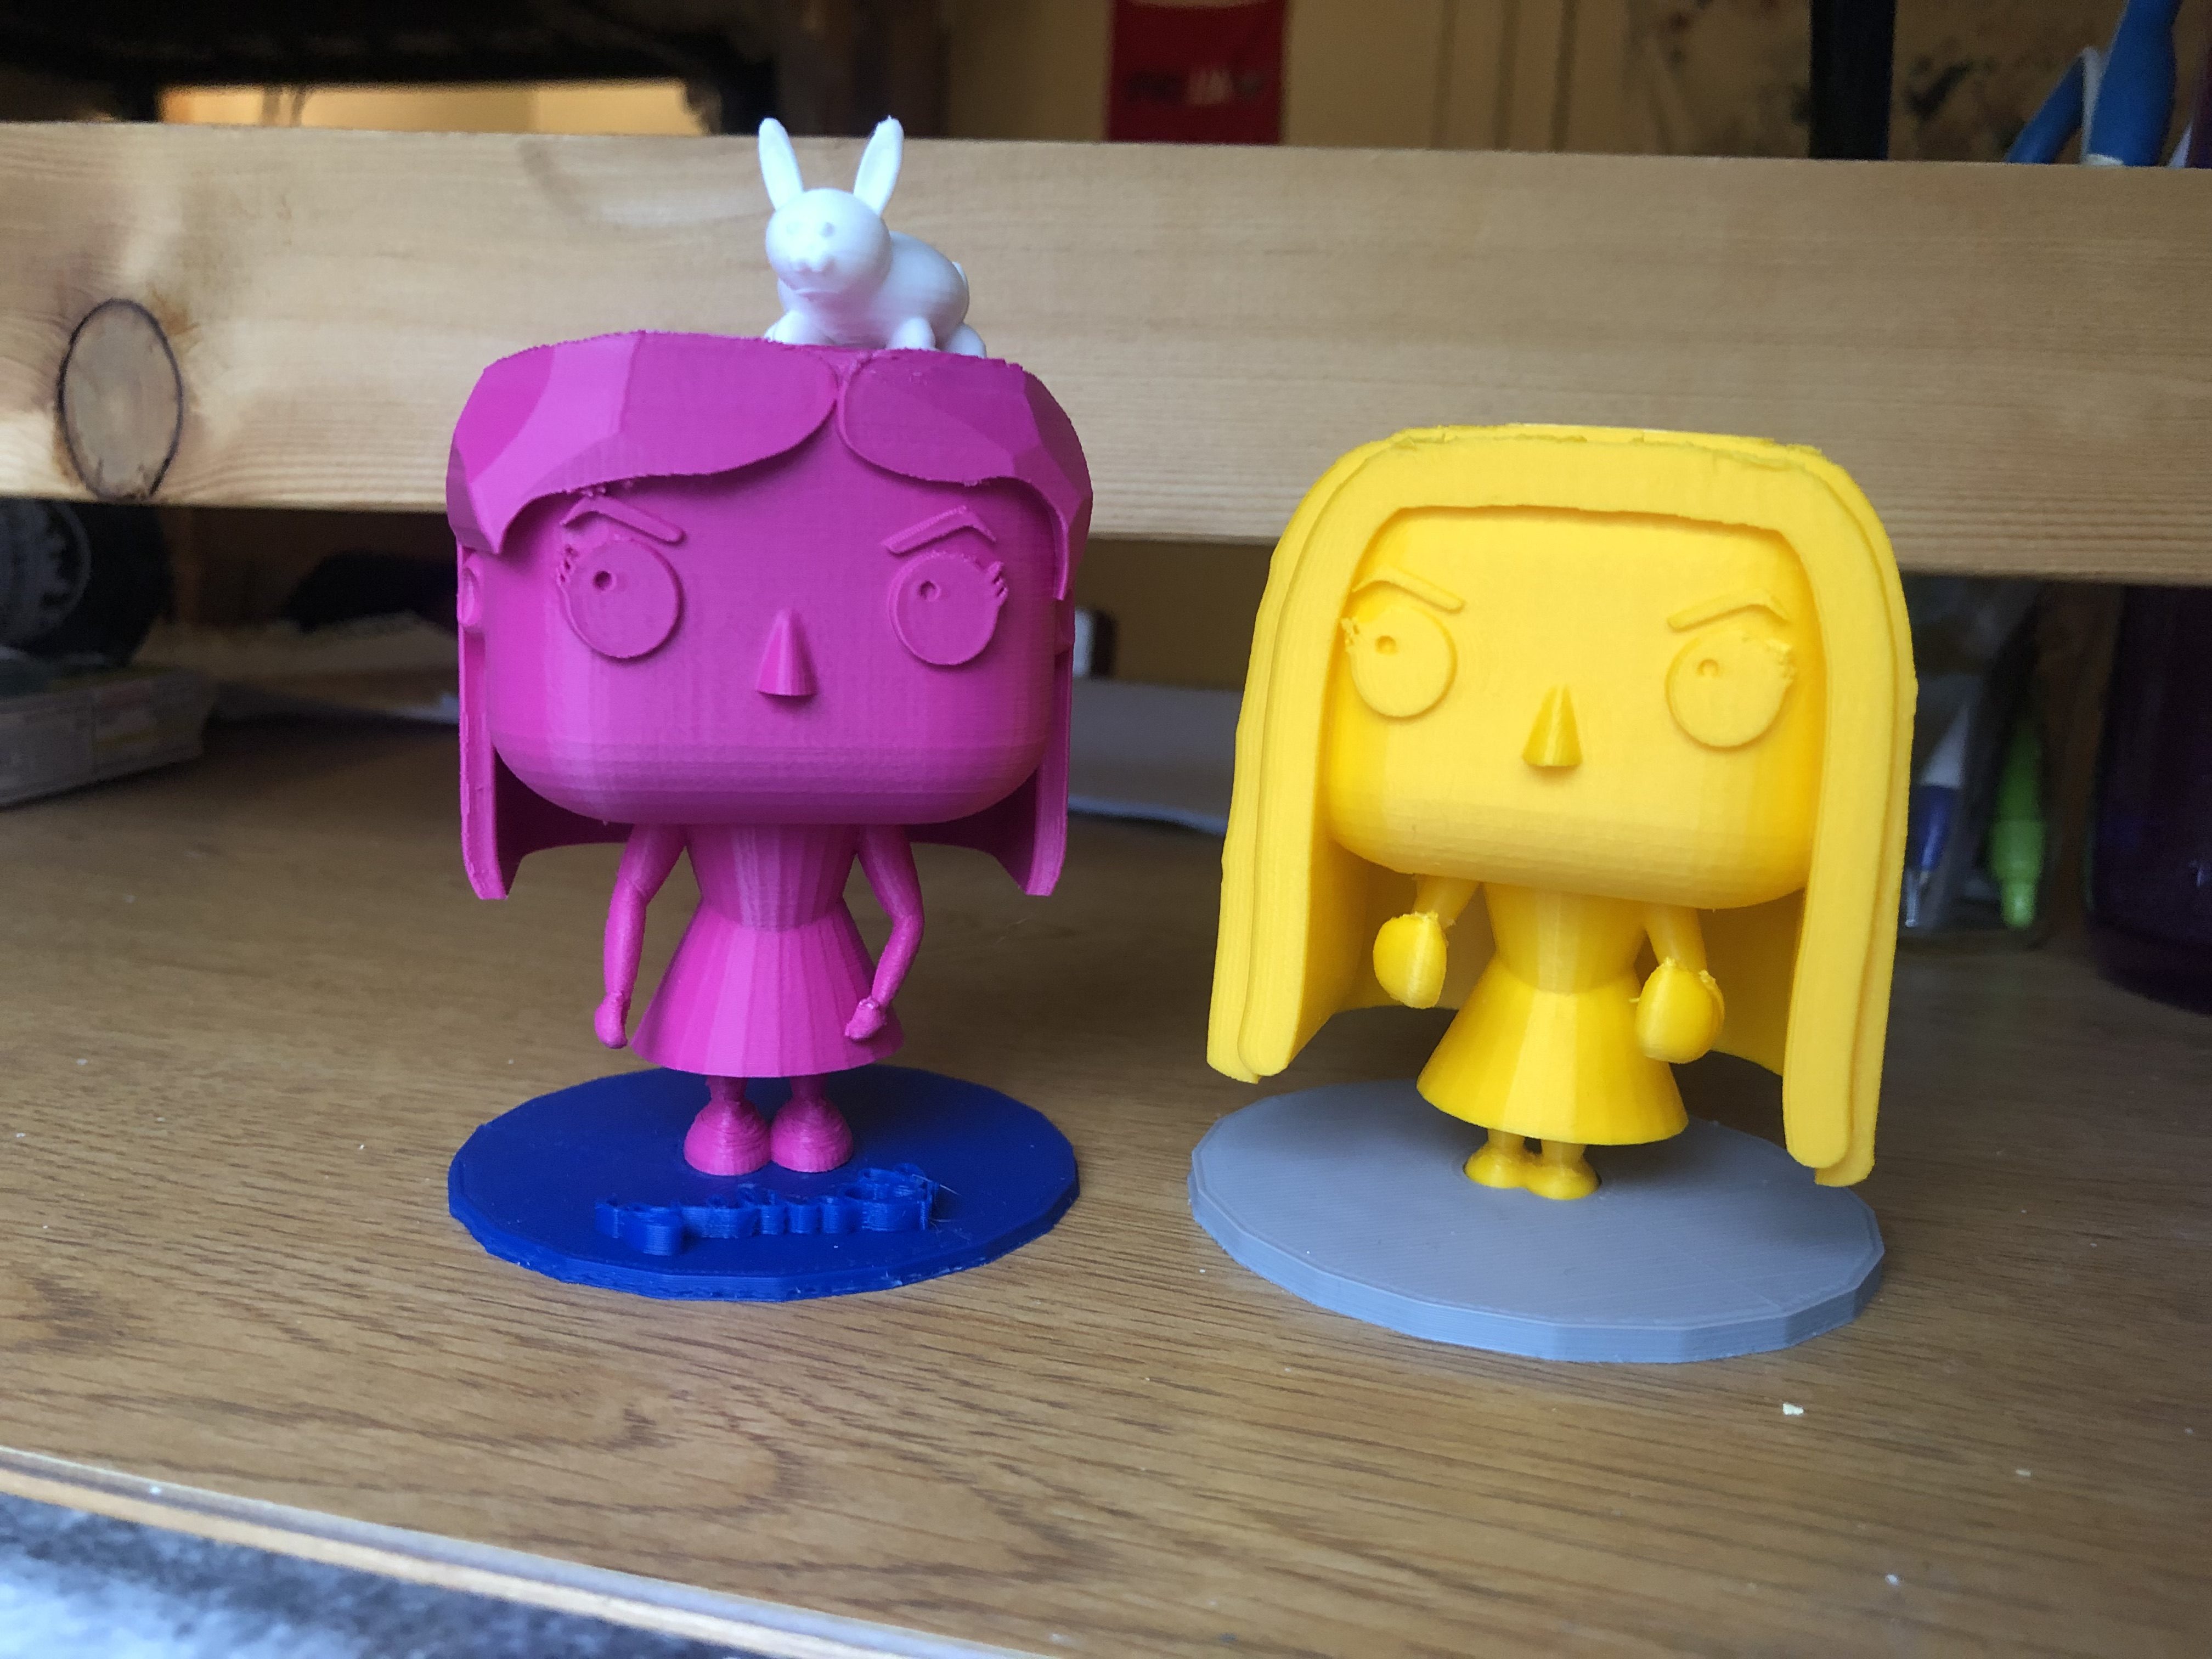
20 Forms in Fusion 360
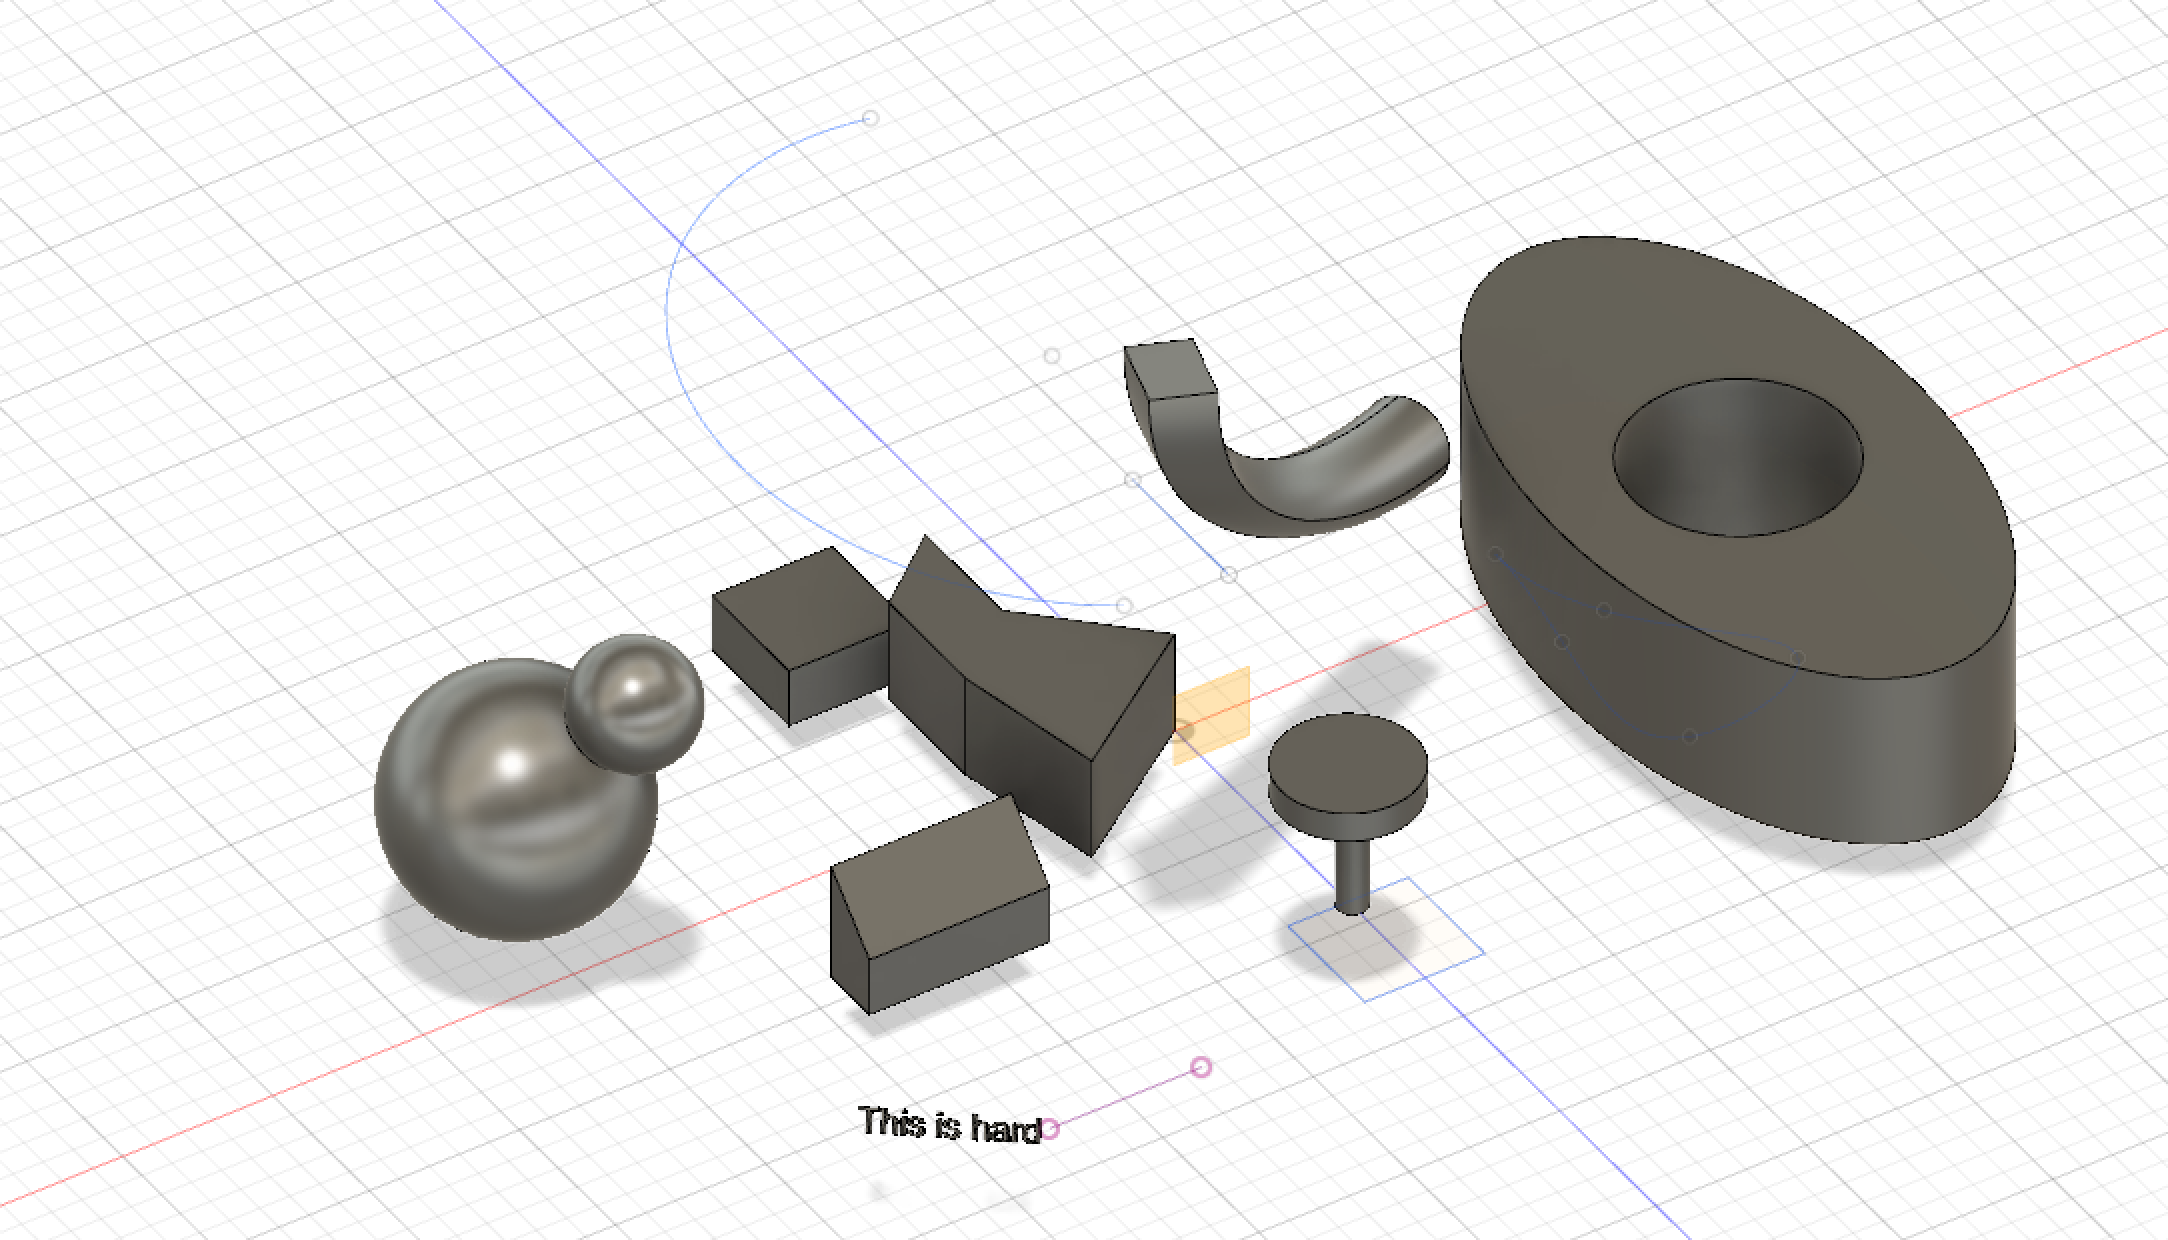
The two spheres on the left I created in attempt of making a snowman, but I was short on time so I placed the smaller sphere at an angle and used the combine feature to make them a single object. The slanted rectangle thing I used the rectangle sketch, extruded it, and used the chamfer tool to make the one slide slant downward. For the double object above that, I originally sketched a rectangle, and then used the sweep feature to make it an irregular shape. I added the square in to do something else but it just became attached to the first object. The text below I created using the text feature and then extruded it to make it 3D. For the object to the right of the text I imagine to be spinning plates as I used the circle and cylinder to attach them to one another. The curved shape above that I made a flat square and circle on different planes and then lofted them together directionally. The large object on the right I used the ellipse shape and extruded it and then used a cylinder to make a hole.
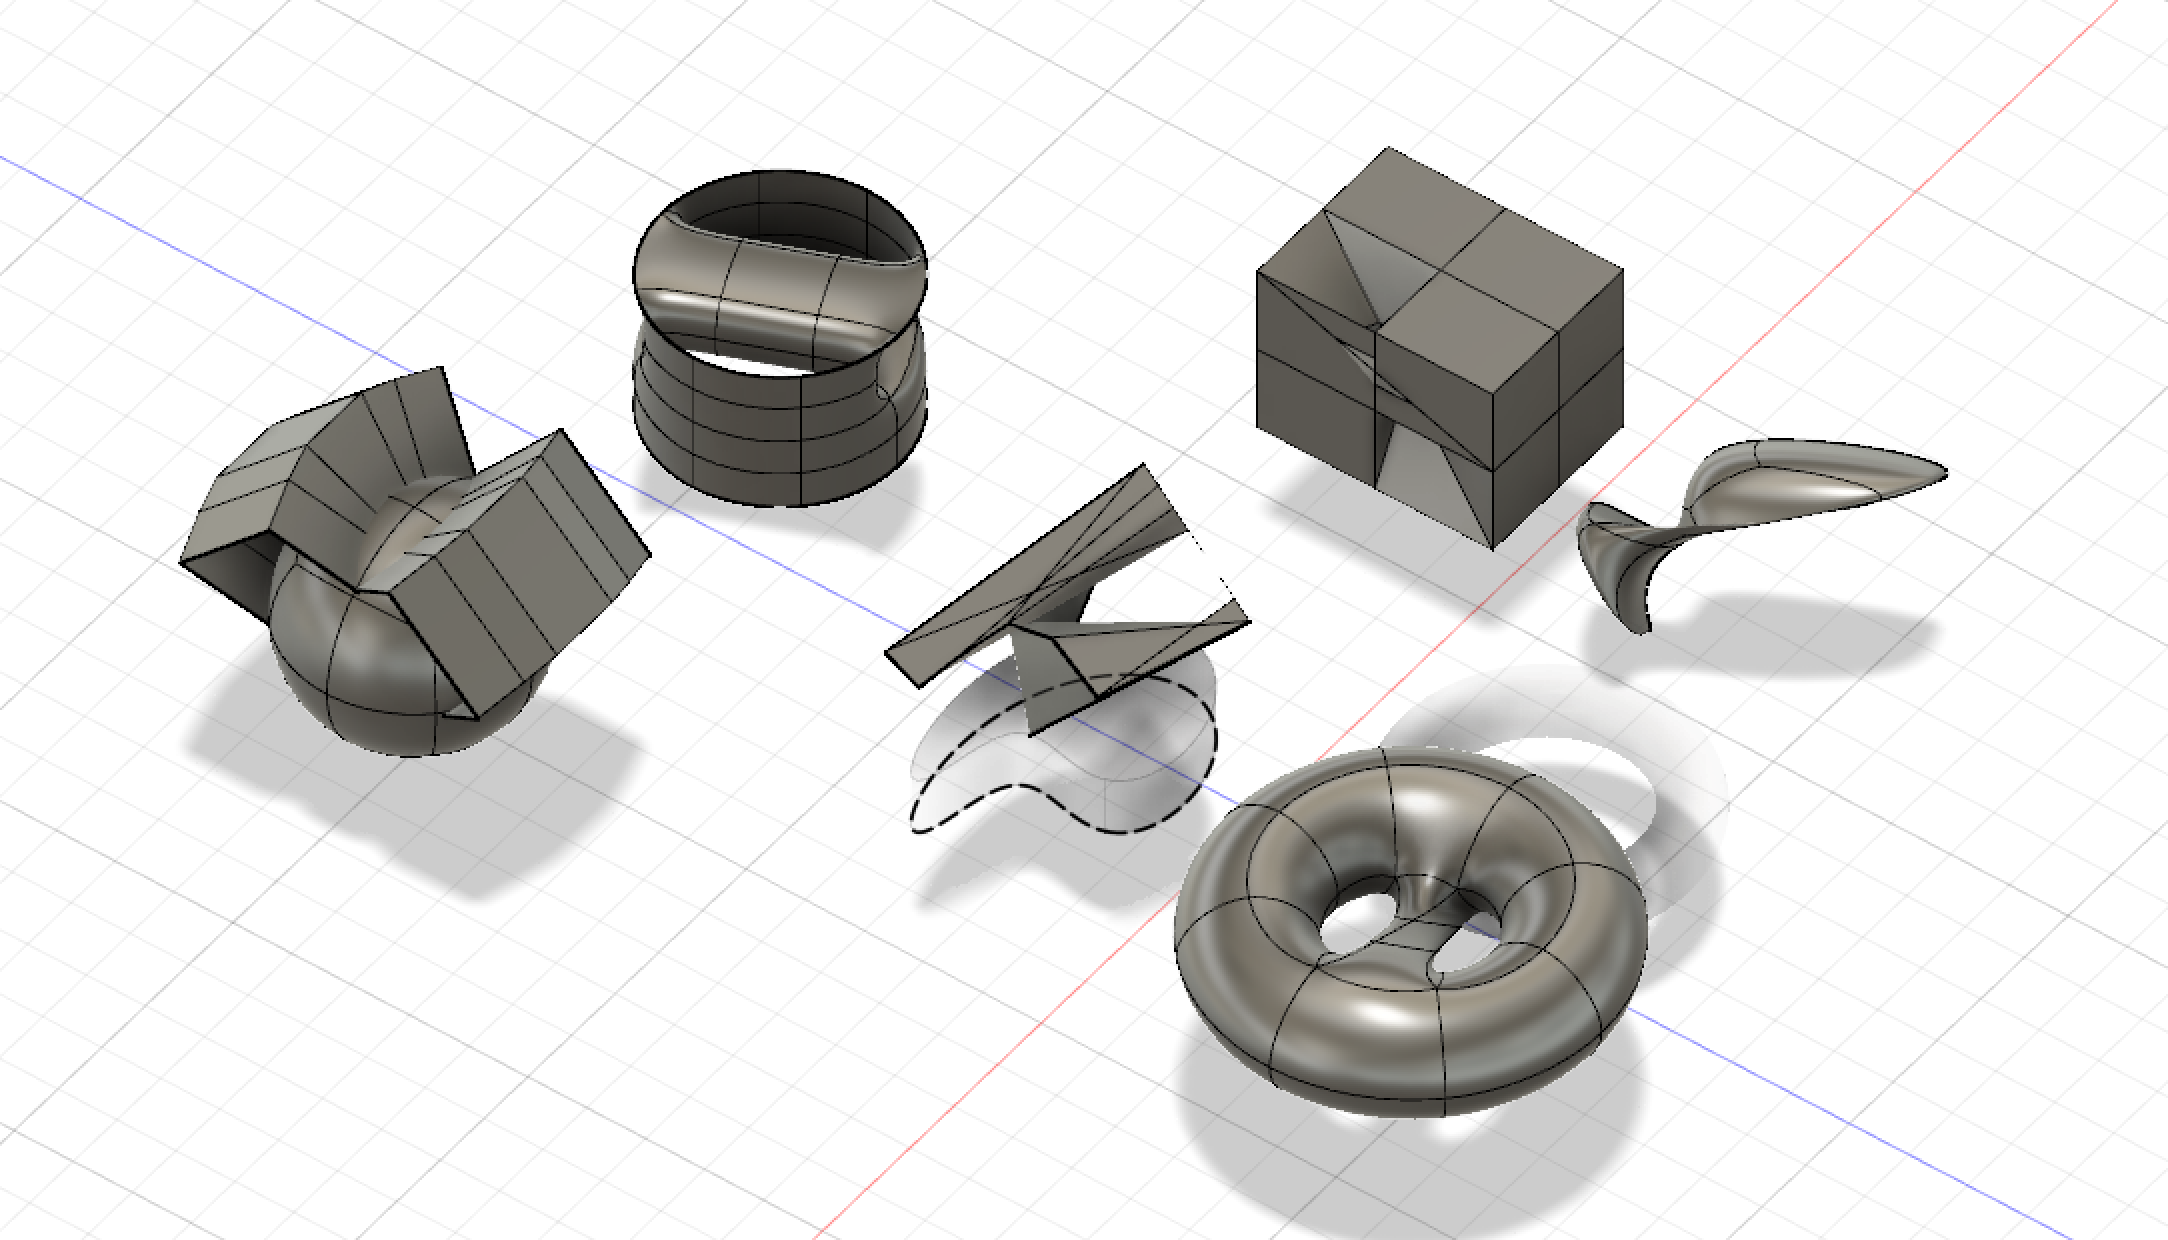
For this set of objects I went into sculpt mode to use the different features. Starting on the left, I made a sphere and then used the the pipe shape to make the tunnel things on top. For the cylindrical object above that I used the cylinder shape and used the bridge feature to make the bridge on top. For the object in the middle I sketched an irregular shape, extruded it, and I merged a bunch of the edges to make it an abstract object. For the square above that, I made a cube and then used the bridge function to connect to top corner to the bottom corner. For the shape next to that, I sketched an irregular shape, extruded it, and used some feature to make it an enclosed shape but I forgot what it was. For the last shape I used the torus shape and used the fill hole feature to do what it did in the middle.
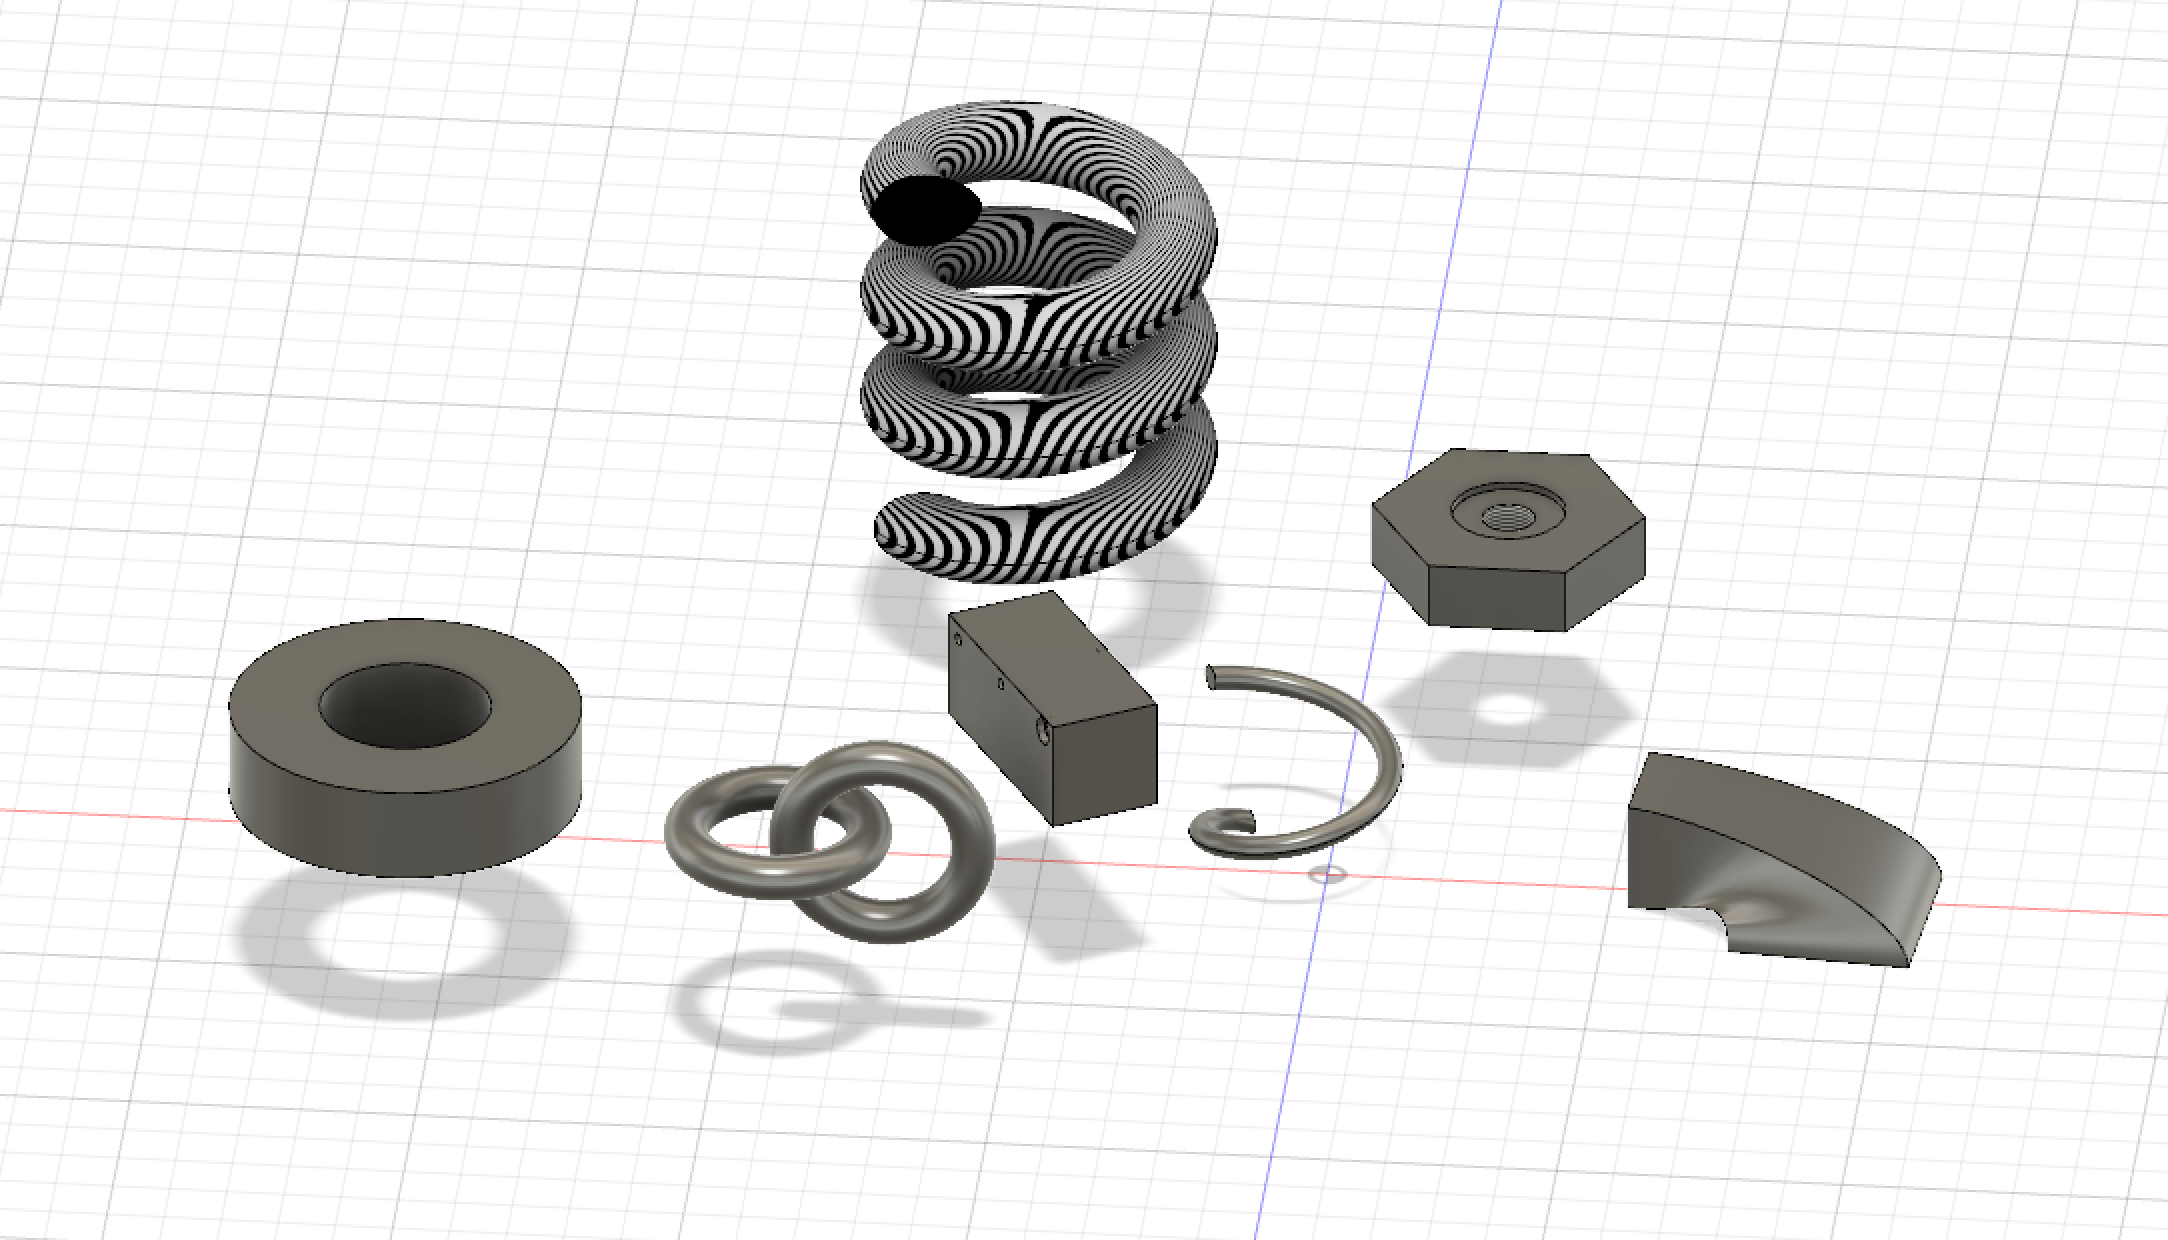
This was my first group of objects I made due to how simple they look. On the left, I made a cylinder and made a hole in it. Directly to the right I combined two torus shapes to make interconnected rings. The rectangle above that I tried to make a peg game by putting holes all around it but I was having trouble make the holes move in different directions. The big spiral above that I used the coil shape and then gave it a zebra print. The half spiral below that I used the coil shape and tried to do modify the shape but it ended up erasing half of it and when I tried to delete the whole shape, it gave me an error message. The shape in the top right I sketched a polygon and used the hole with a thread to make it look like a screw/nut. The shape all the way on the left I sketched two squares on different planes and lofted them together.
Fusion 360 Print

This print printed very successfuly although it is a simple design. I left the support base on for the sake of the picture but, I regretfully removed the base after the picture and now it doesn’t stand up by itself, it just rolls around. I wasn’t sure what I could make of this random design, but looking at it, I feel like I could make it into a little animal if I wanted to modify it for the future.
Fusion 360 Vase Design
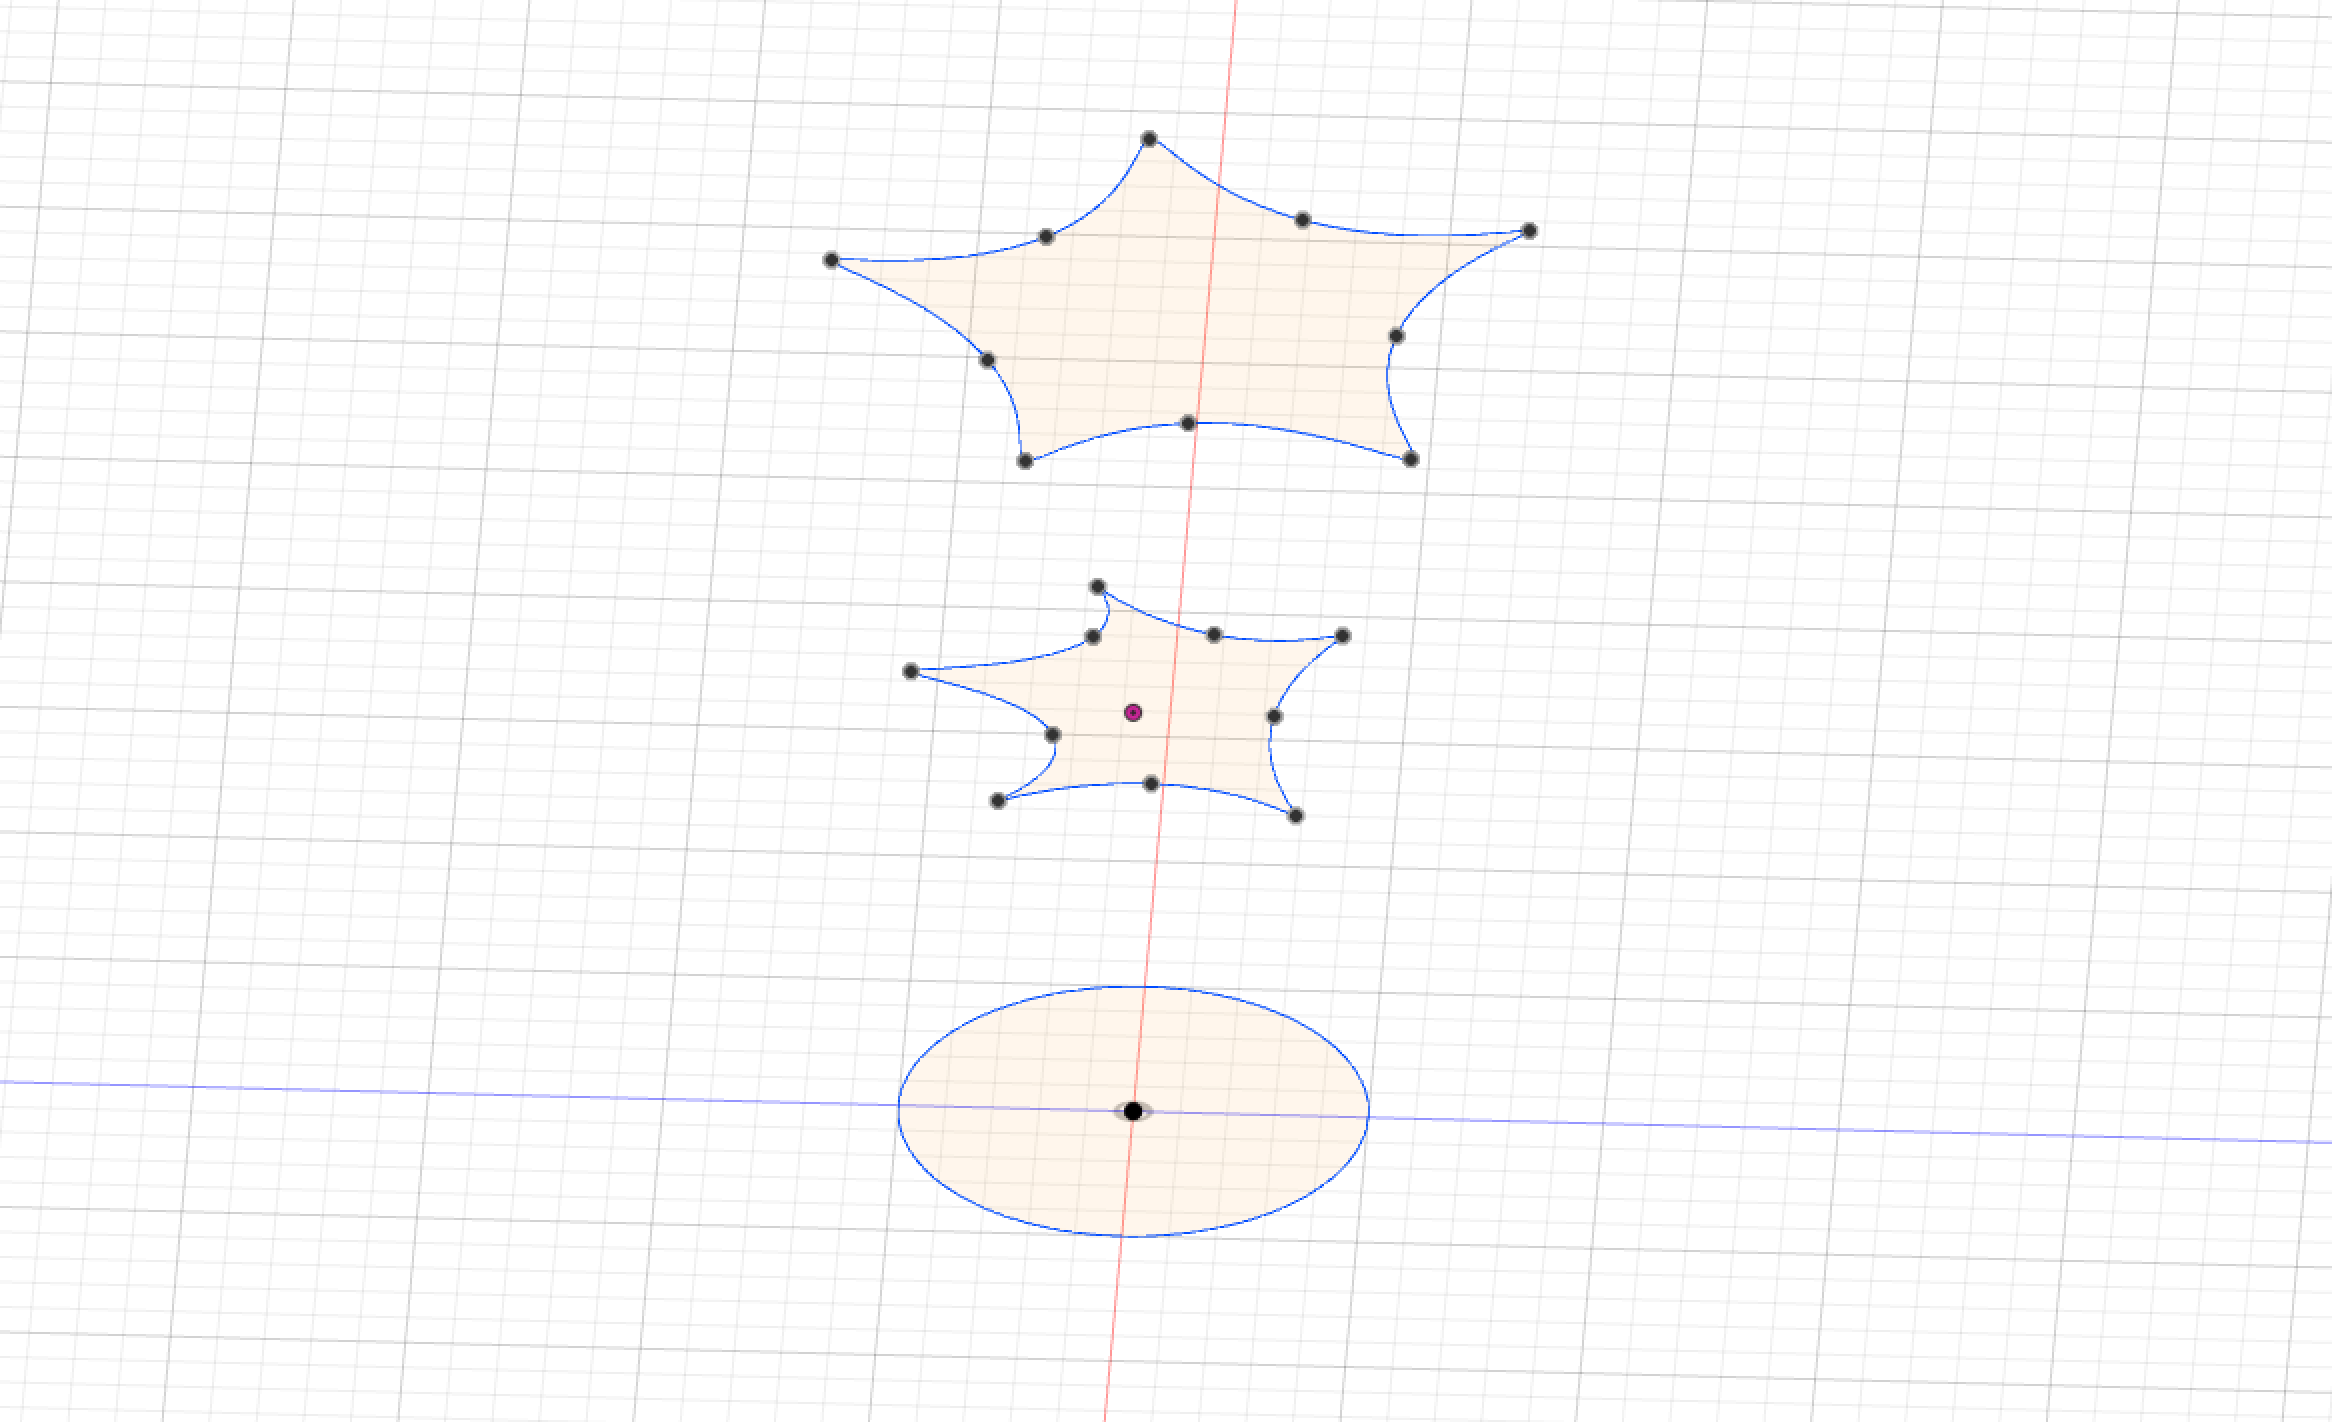

For my design, I used a circle sketch for the base and scribbled my own second and third layers. I made two offset planes to use for scribbling the other layers. After I got the shapes as I wanted, I lofted the three planes together and shifted the little dot around to add a twist to the shape. My design is unique because I did’t use regular geometric shapes for my other planes, I used the fit point spline sketch tool to create an irregular shape for the vase design.
Fusion 360 Vase Prints
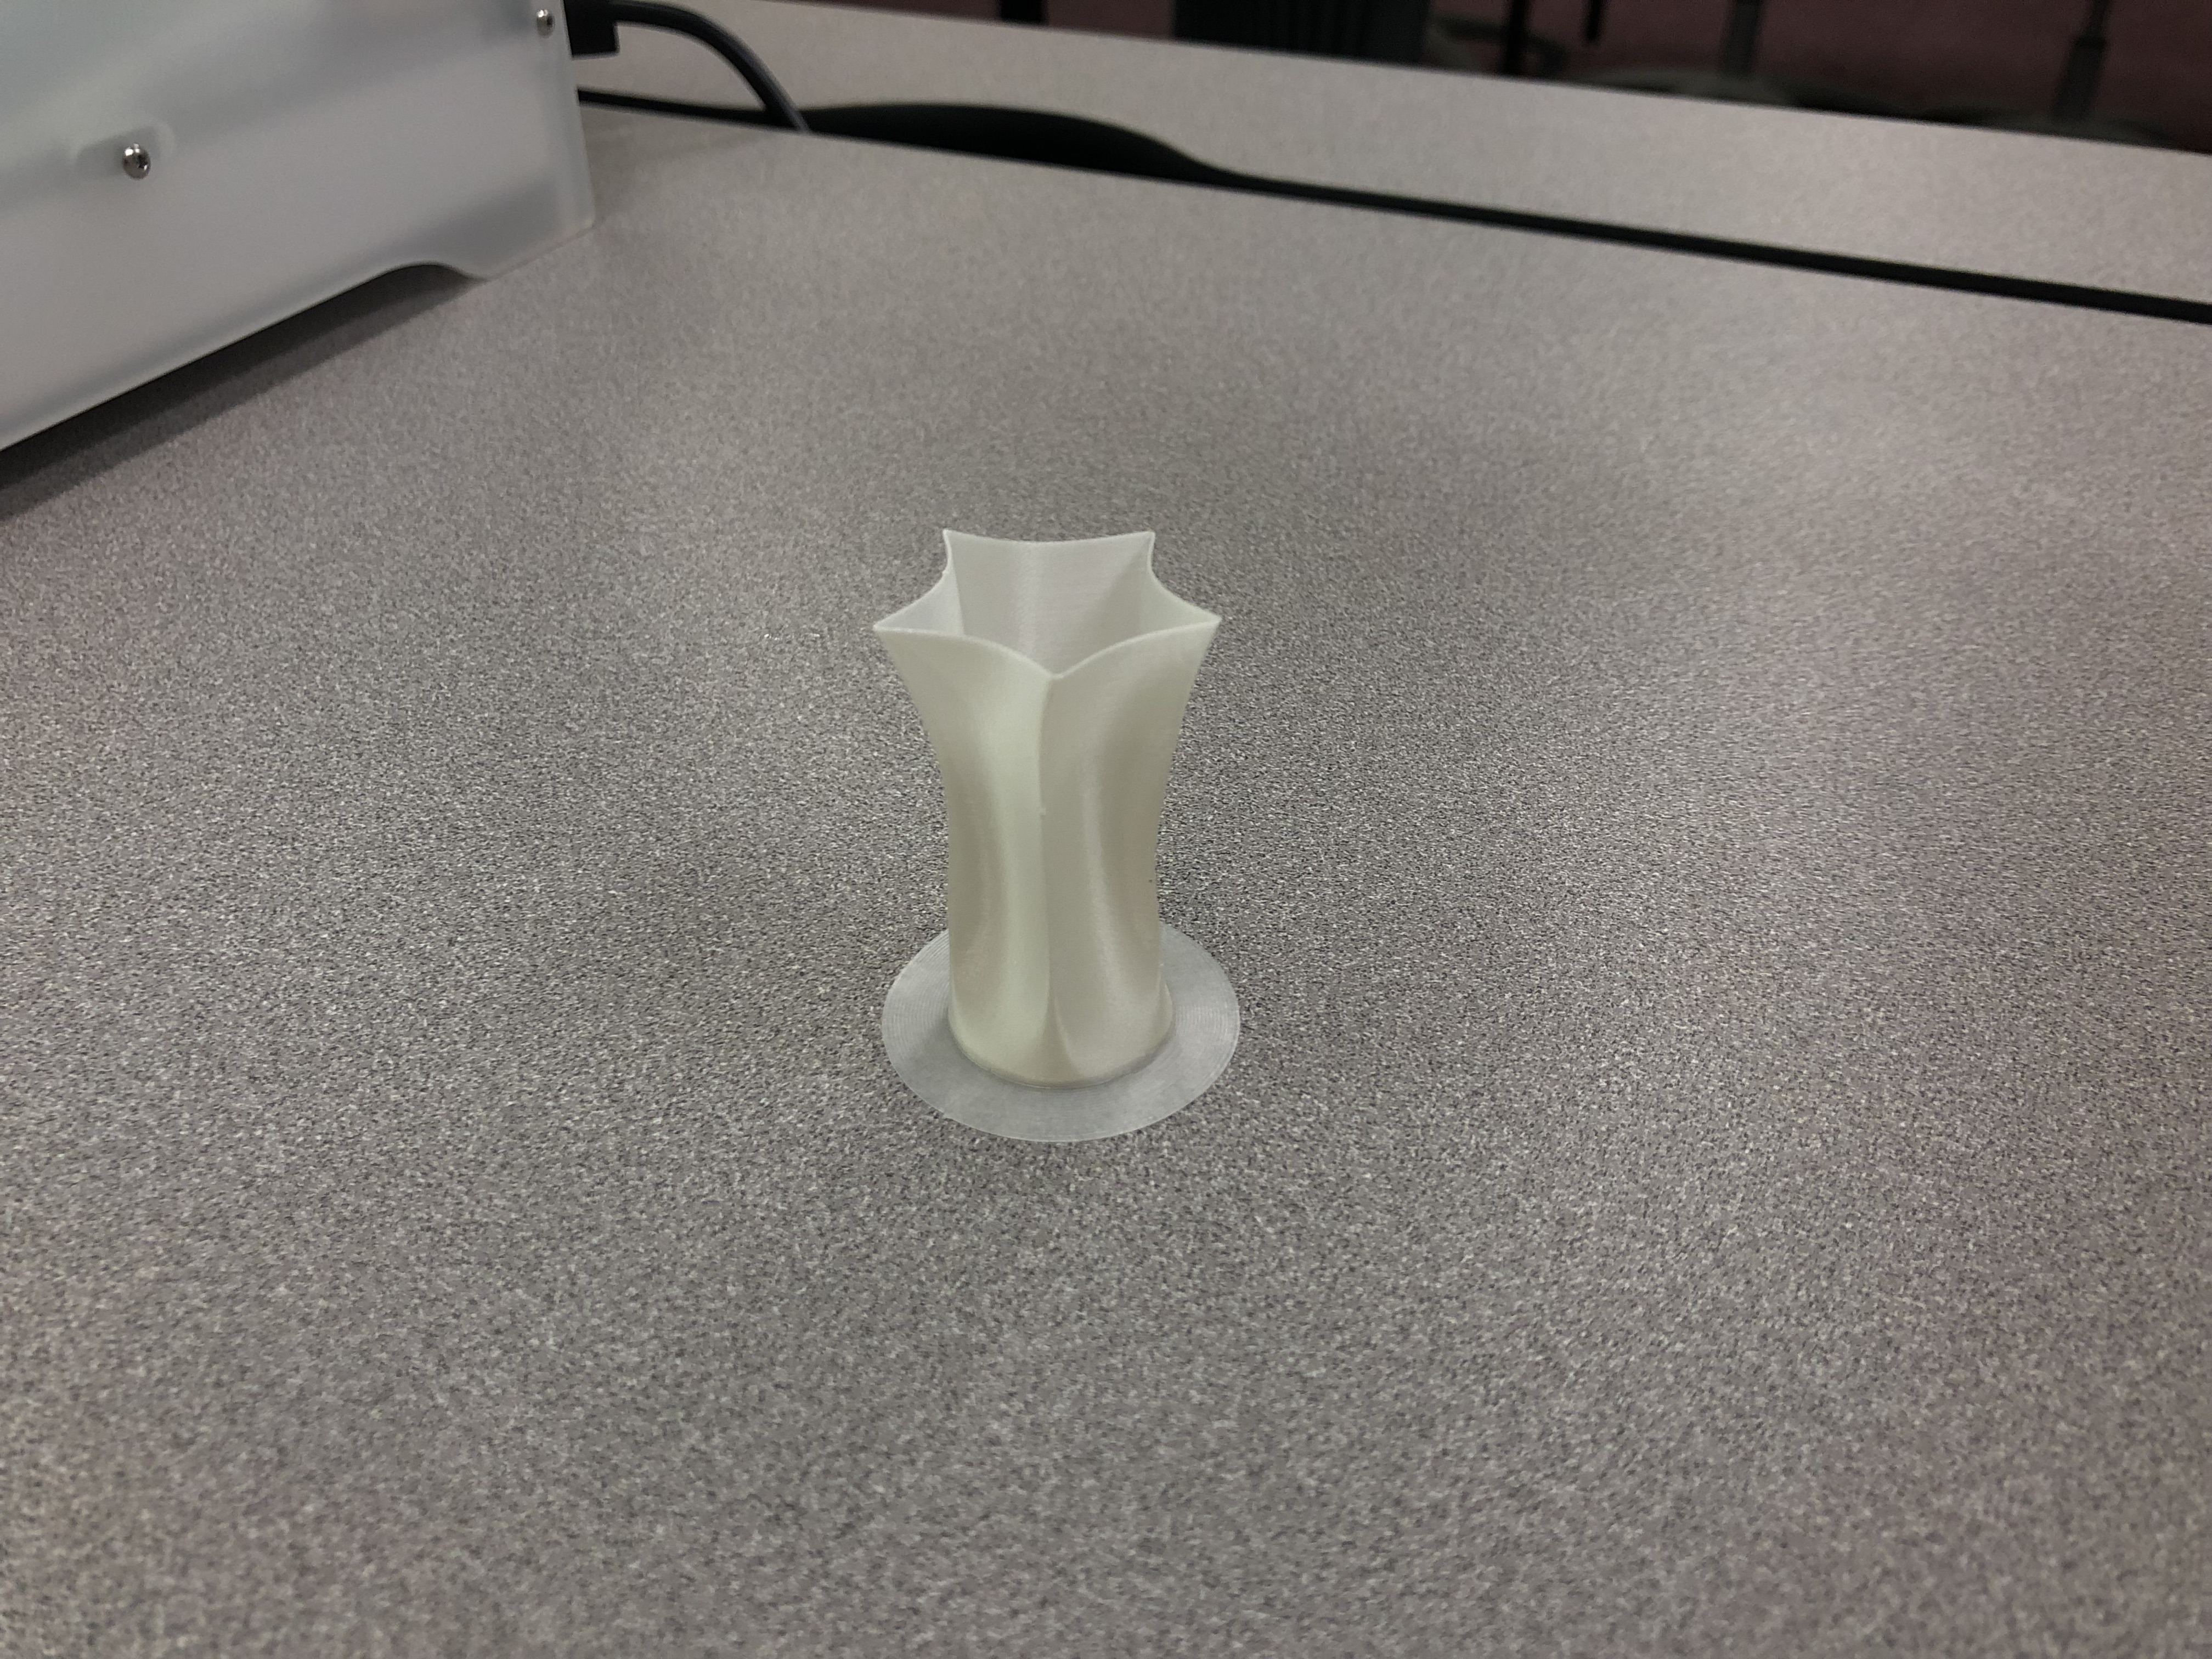
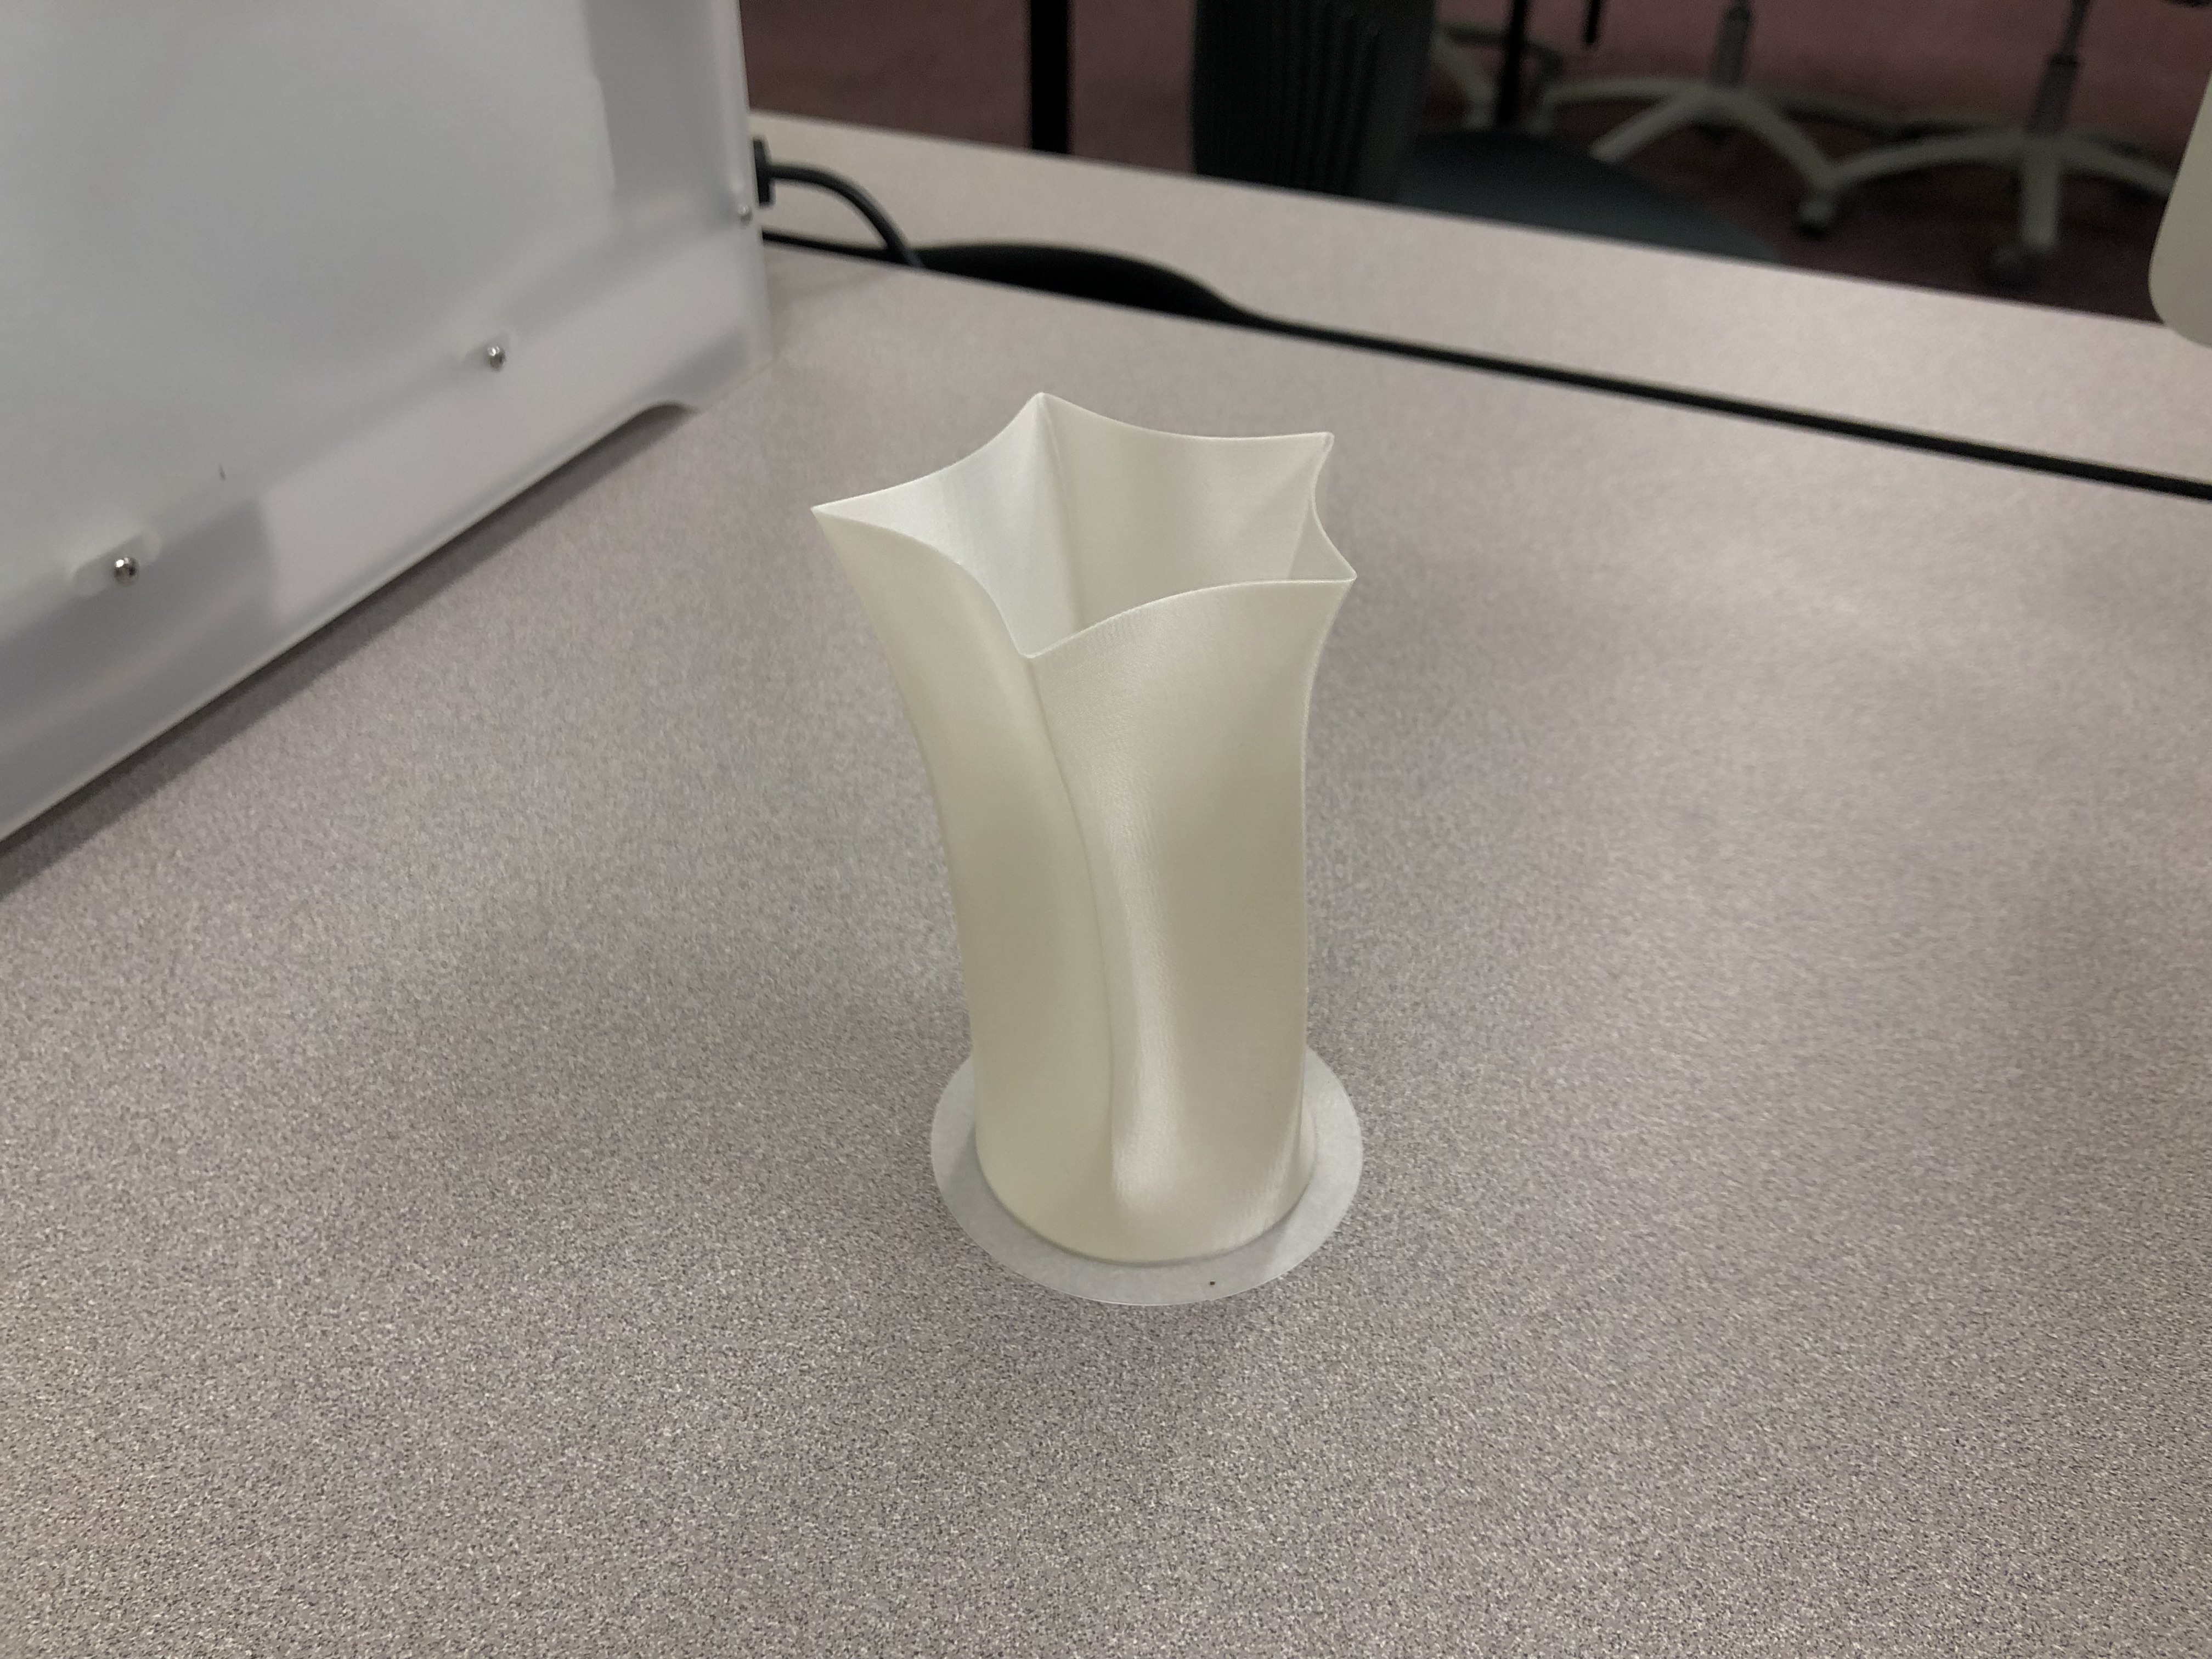
I really enjoyed creating a vase design in Fusion360 and thought my print came out a success. I wanted to keep the design simple, but still abstract enough to be unique and there weren’t any weird overhangs that prevented it from printing. I like how it maintains a narrow shape, but the opening at the top disperses out a little bit.
20 Forms in OpenSCAD
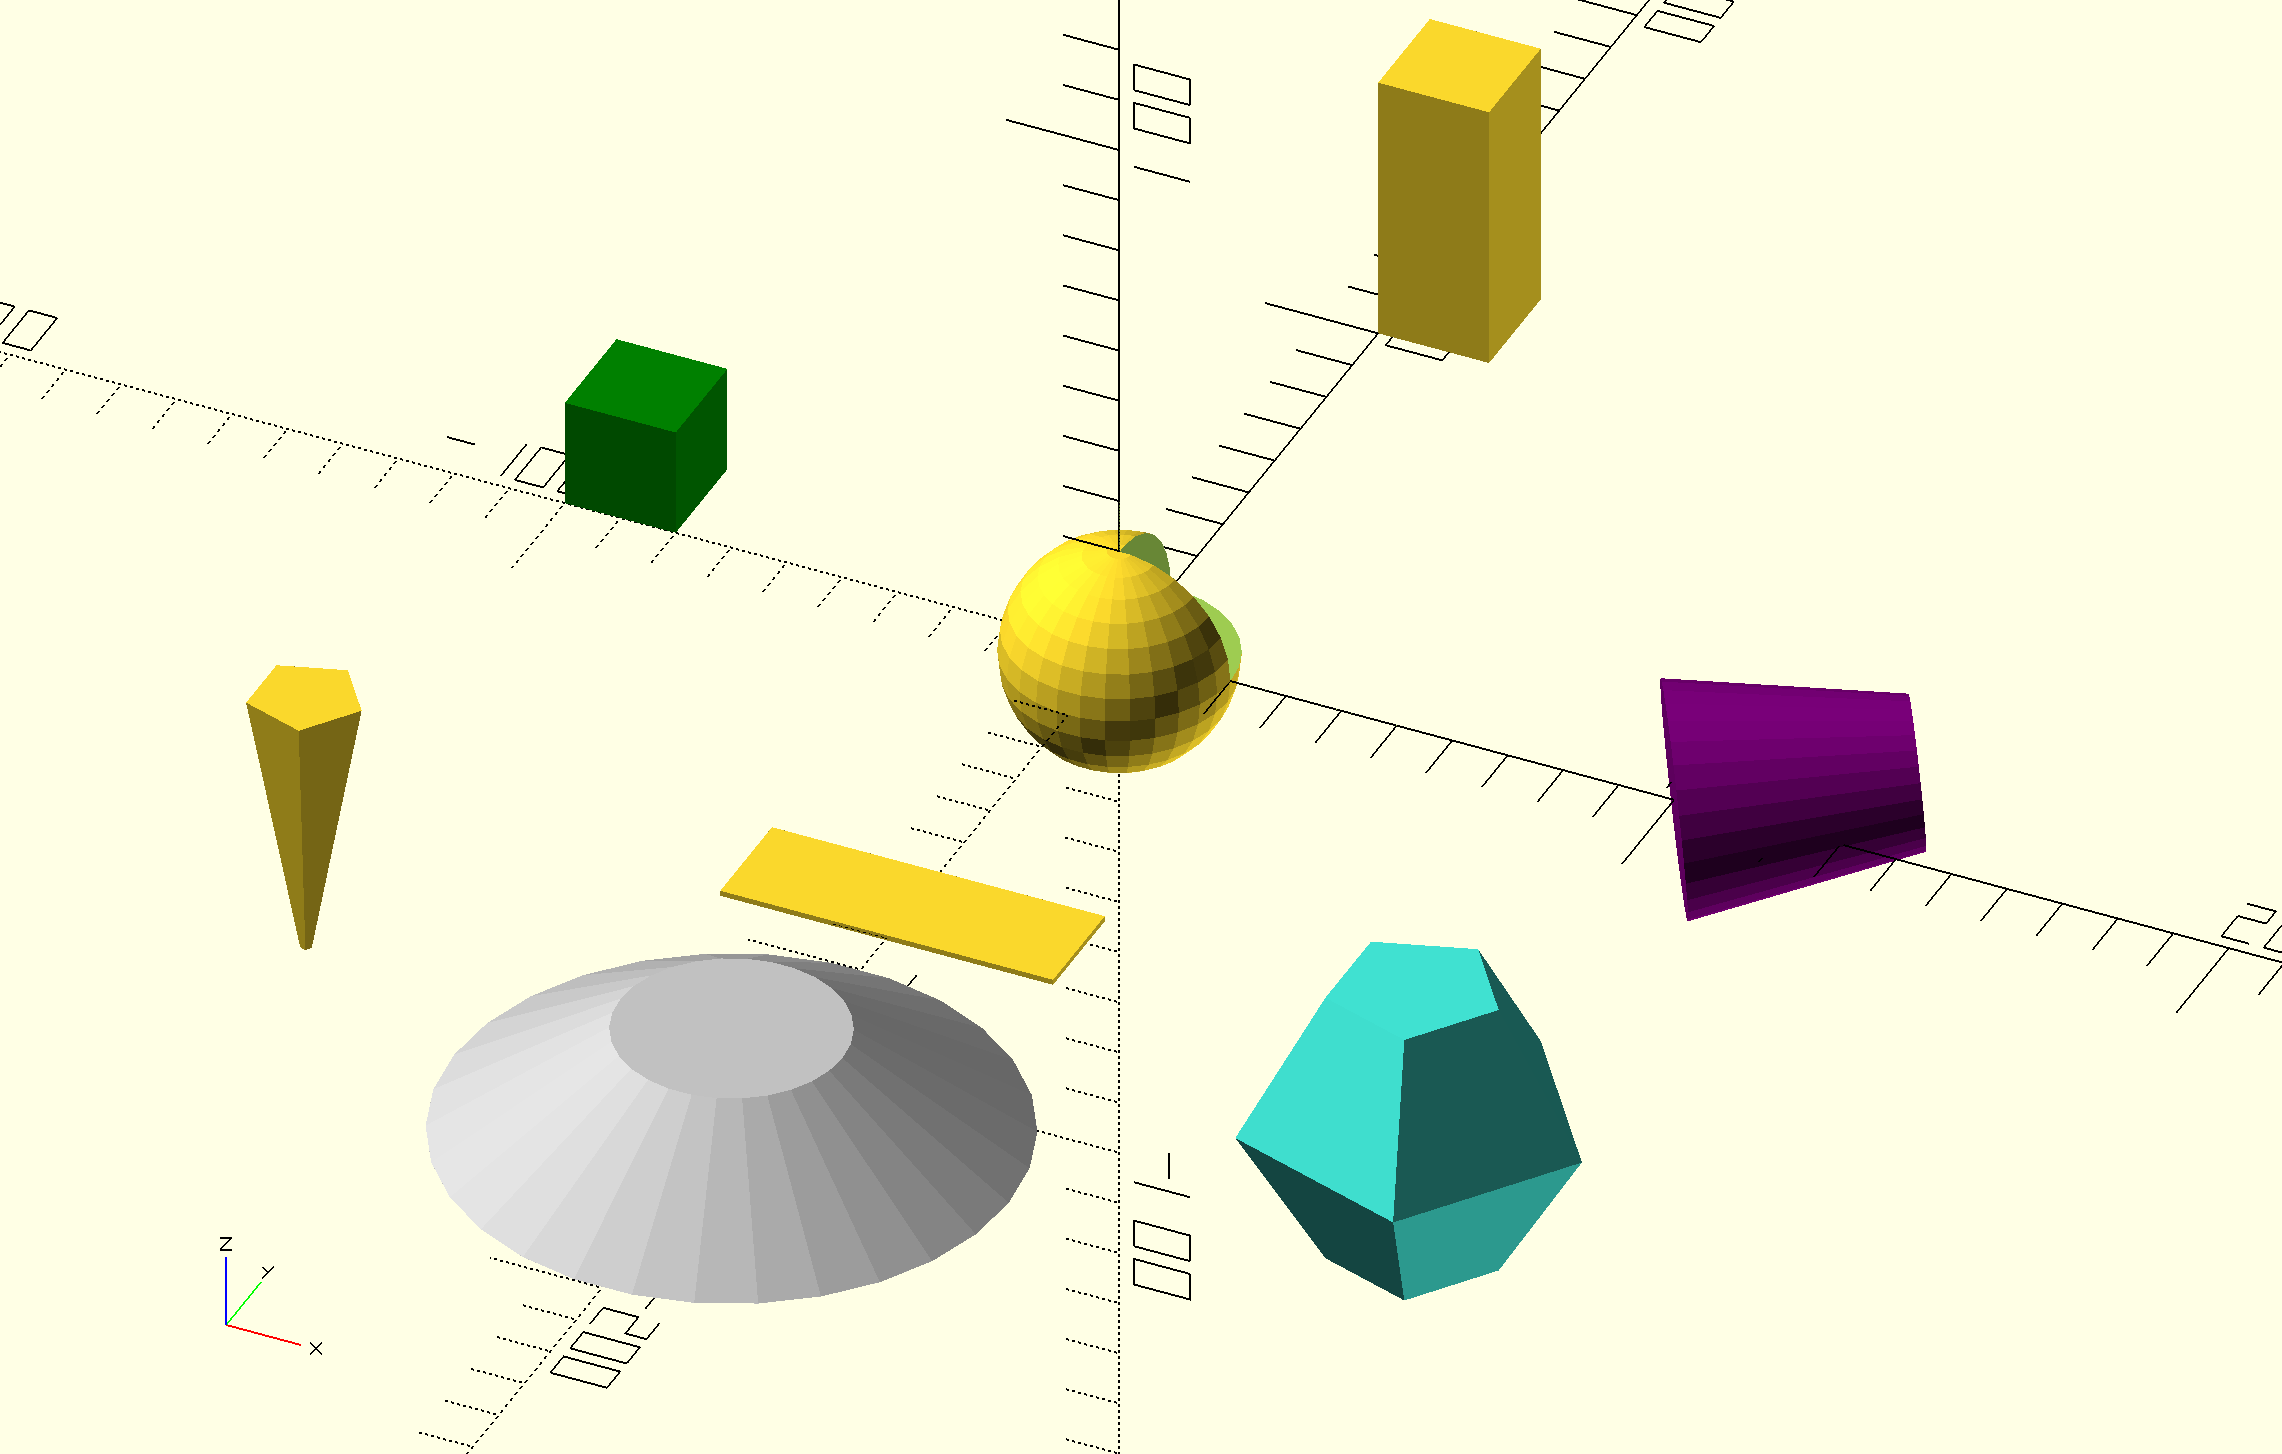
Starting on the far left, I used translate, linear extrude, scale, and a circle with a radius of 1 to scale a 2D shape into a 3D shape. For the grey shape, I changed the color, translated, and used a cylinder shape with coordinates of 20,50,20 to make UFO looking object. For the flat rectangle, I only used coordinates for x an z to make it flat. For the green cube, I simply made a cube, translated it, and changed the color. For the sphere in the middle, I used the default code that was opened with the “Hello OpenSCAD” quickstart guide from mathgrrl and made the hole bigger so a quarter of the top half isn’t showing. For the rectangular prism up top I tried to make a hole with a cylinder rotated through it but I could not figure it out so I got mad and left it as is. For the purple shape, I translated a cylinder shape and made the z coordinate smaller so the top would be flat and changed the color to purple. For the turquoise shape, I translated a sphere with a radius of one and scaled it so it would be larger.
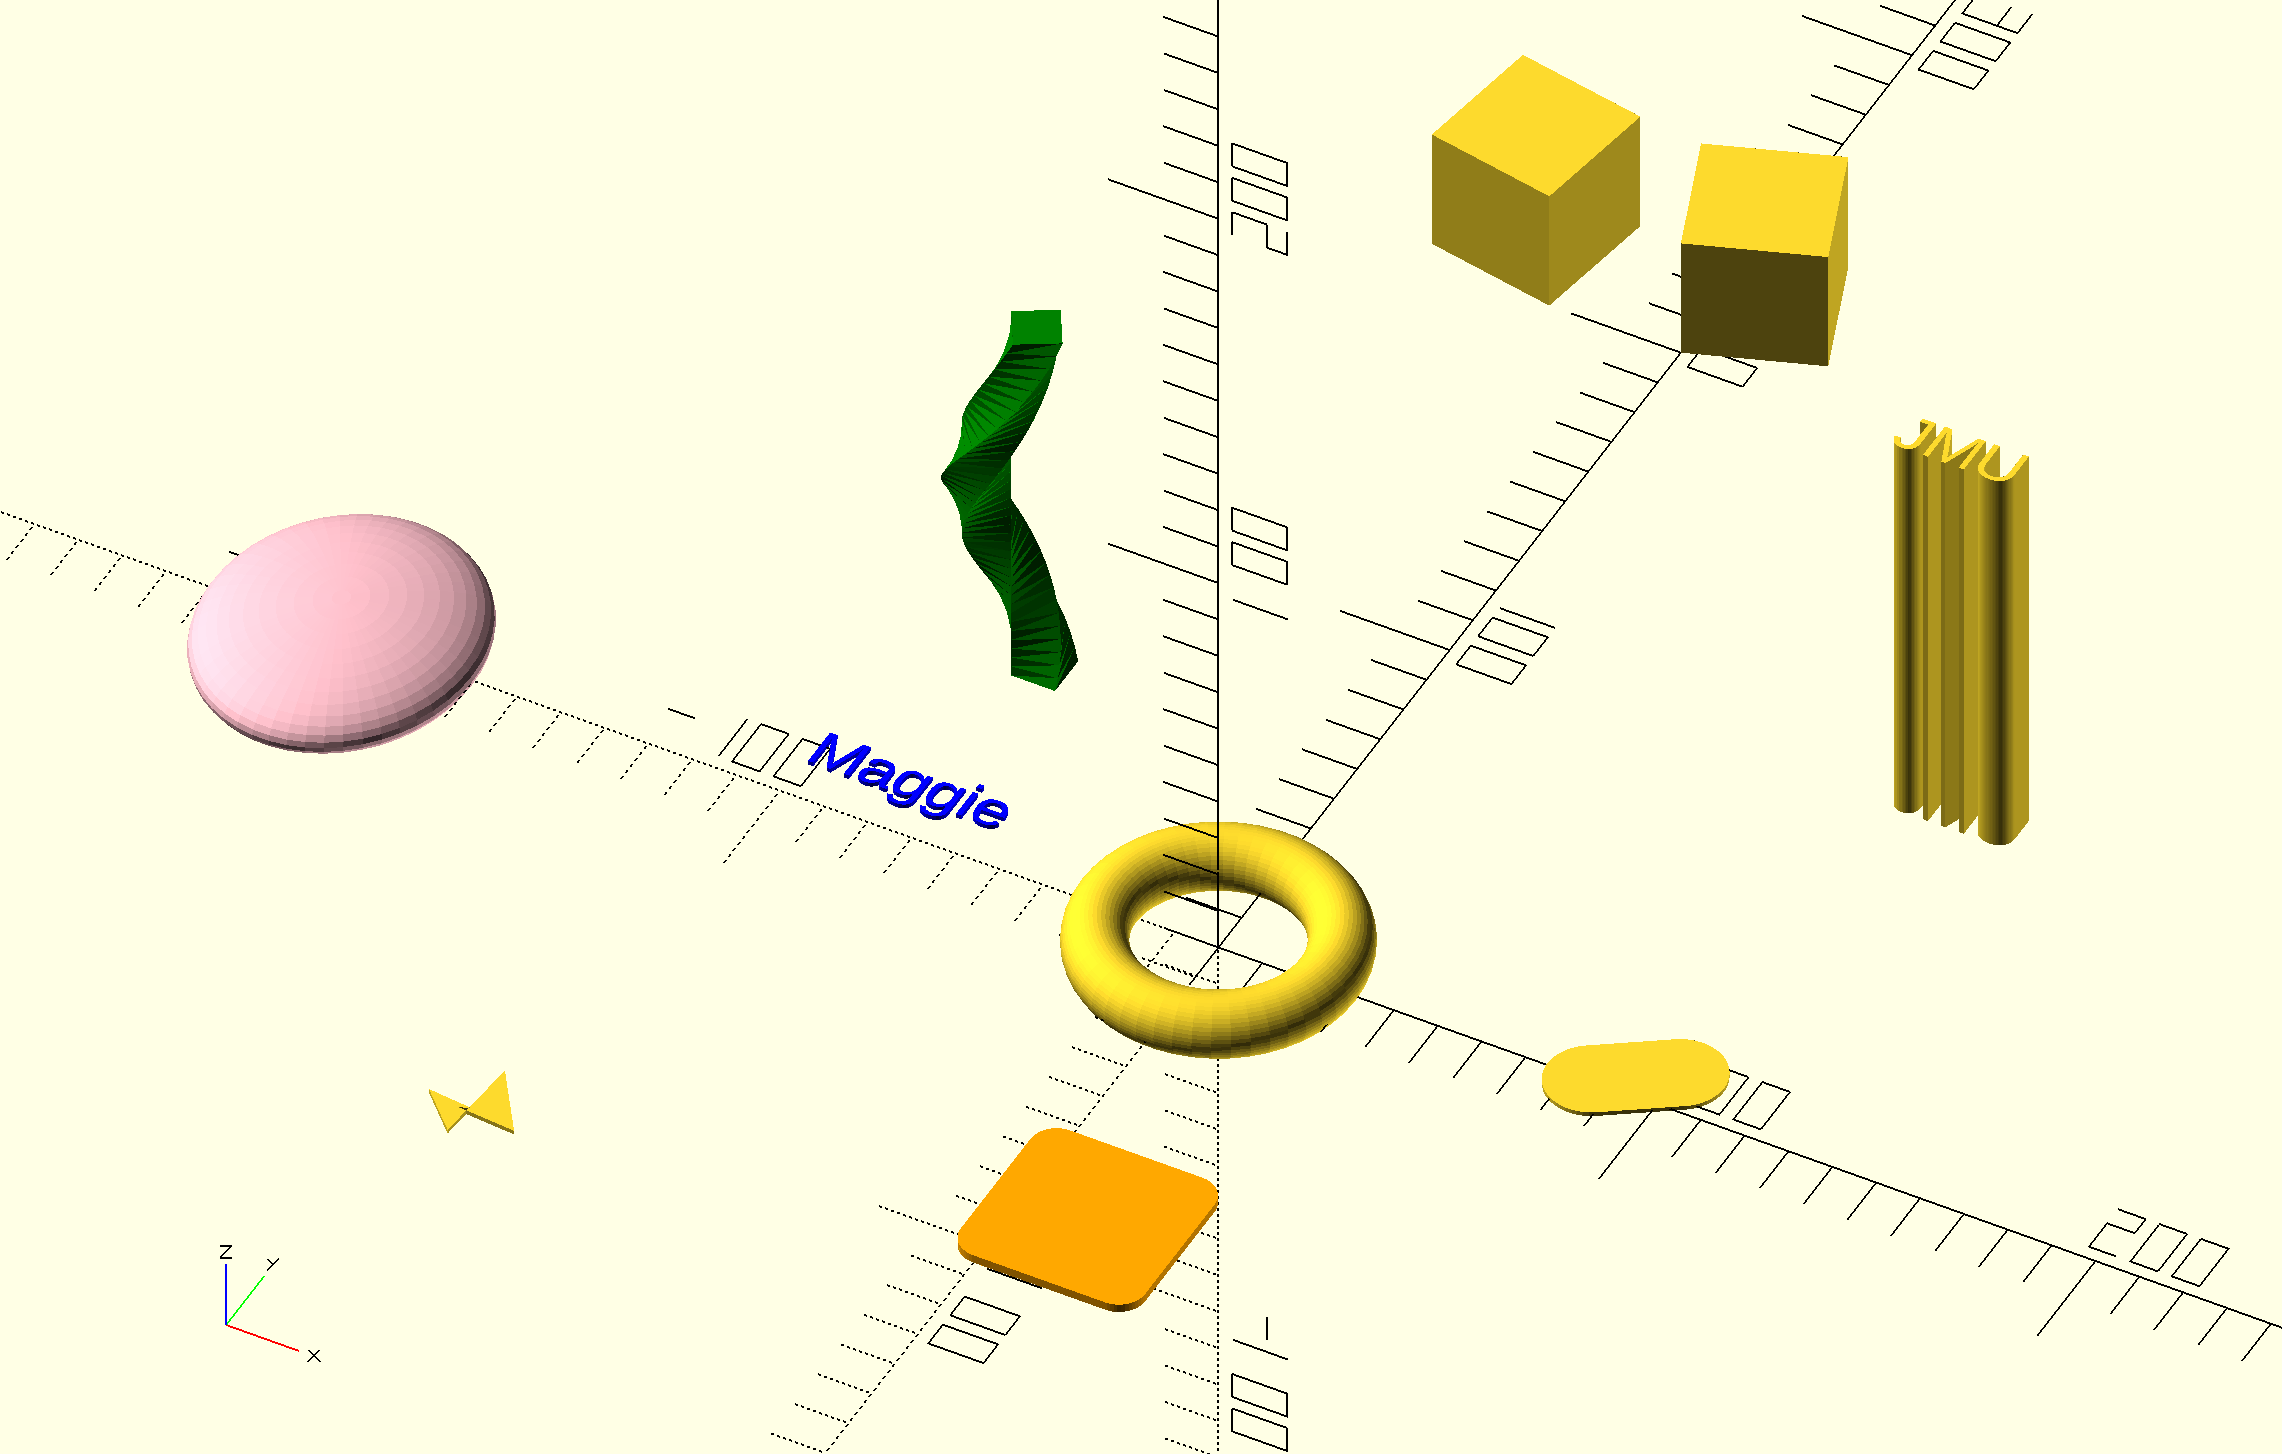
For the pink shape, I translated and used the resize function with a sphere with a radius of 50 to make a more flat sphere. For the small shape below it, I used the the polygon function and put in random, connecting coordinates to make an irregular shape. For my name, I used the text function to type my name and changed the color to blue. For the green shape, I used the linear extrude function with convexity, twist, and square shape. For the ring in the middle, I used to rotate extrude function with a circle to give it the ring a thicker shape. For the orange shape below the ring, I used the minkowski module to give a cube rounded edges with the cylinder shape. For the two cubes at the top, I used the mirror function to mirror the cube across the x-axis. For the JMU text, I used the linear extrude and text function to make the JMU text 3D. For the last shape, I used the hull module to connect two circles together.
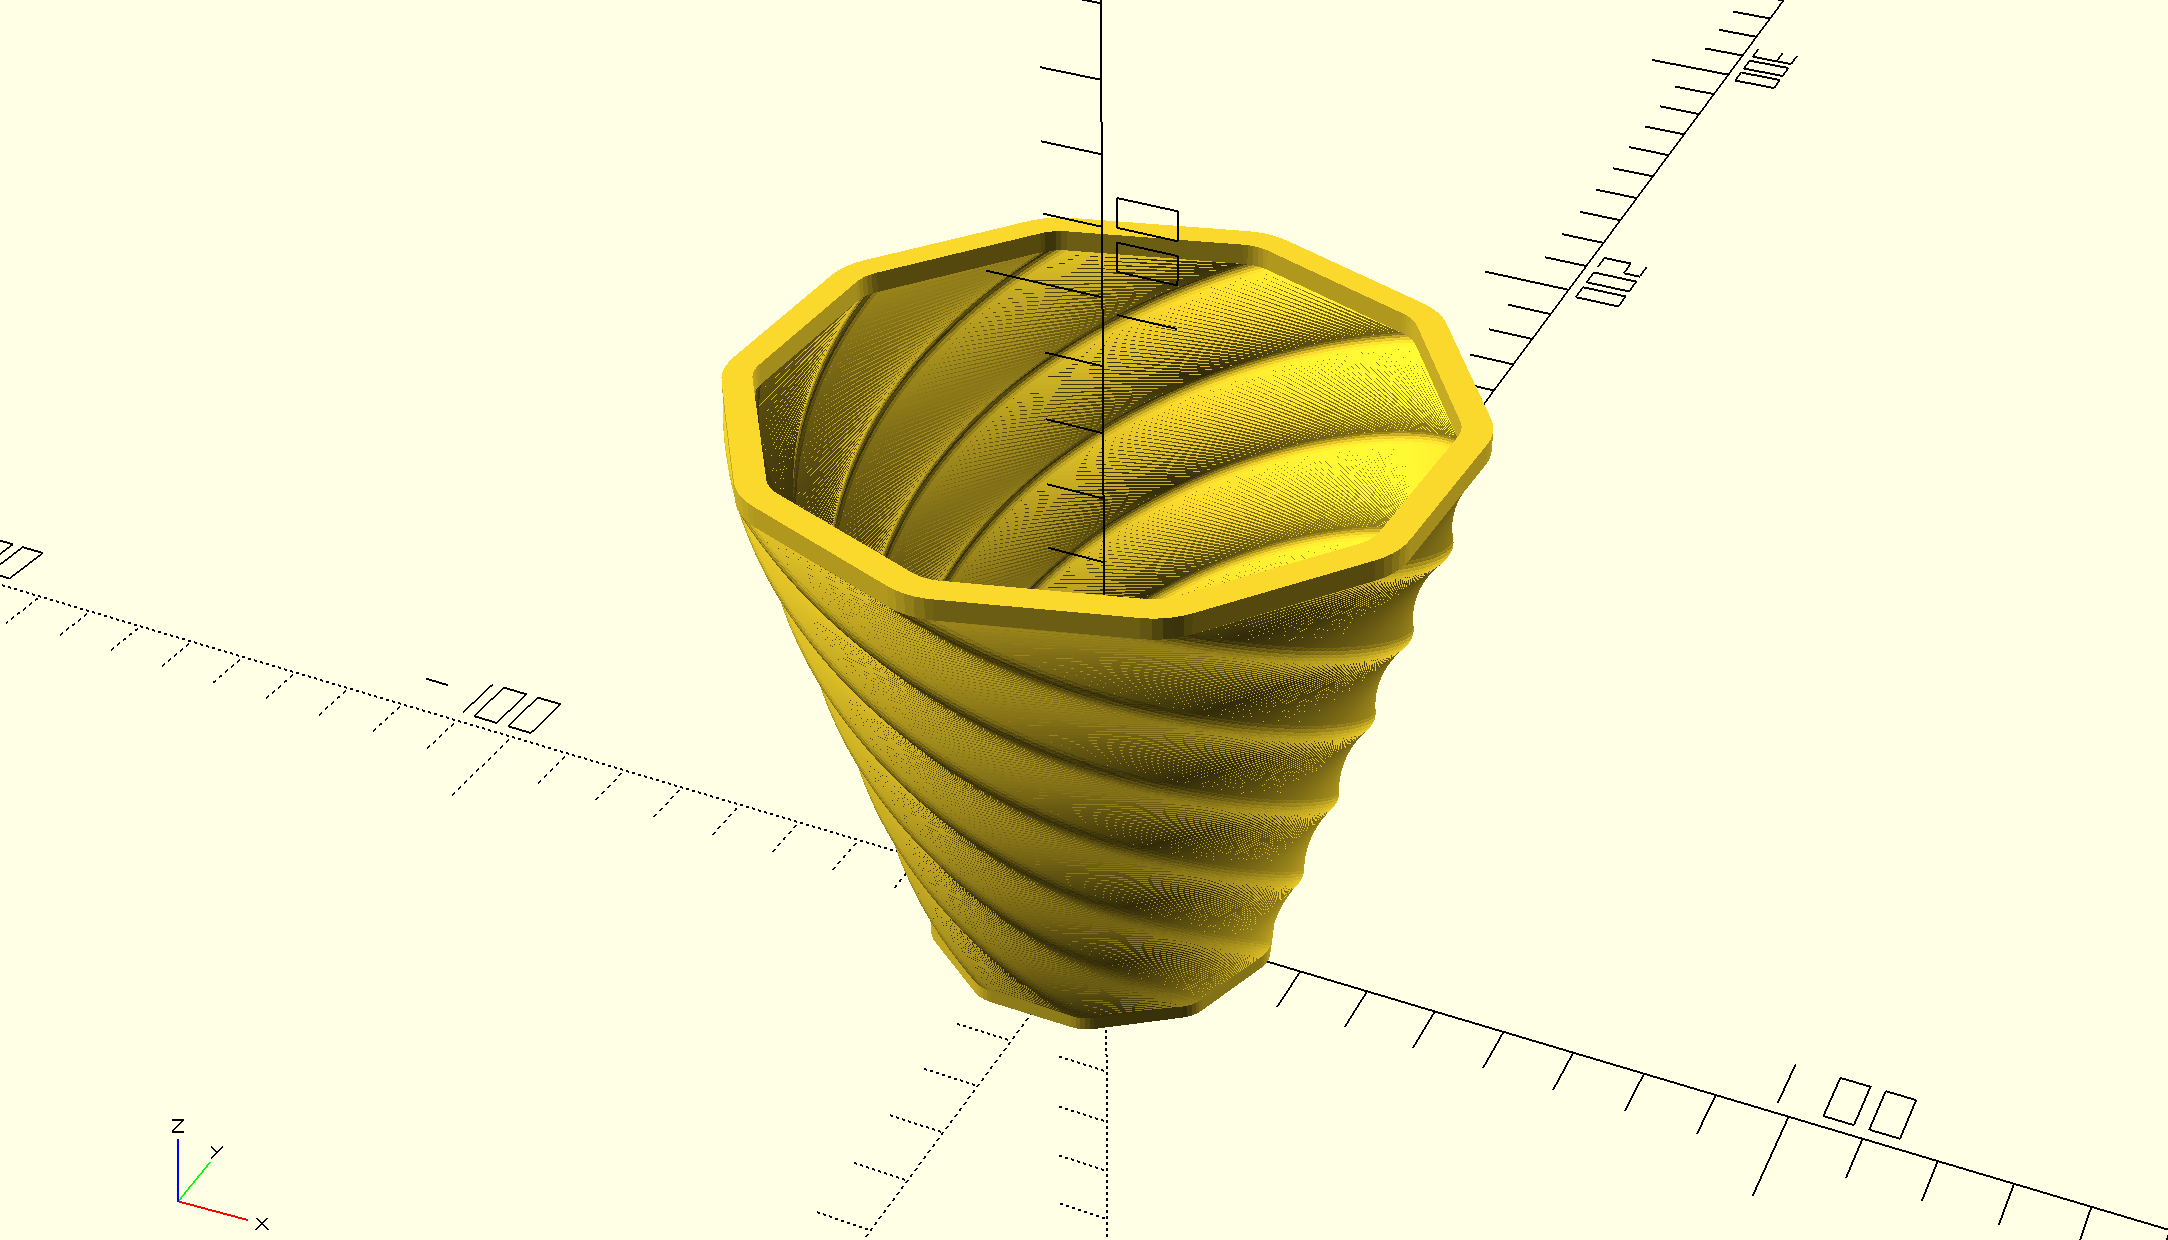

For these two polybowls, I copied and modified the code given from Laura Taalman from this YouTube video by changing the twist, diameter, and height of the polybowl.
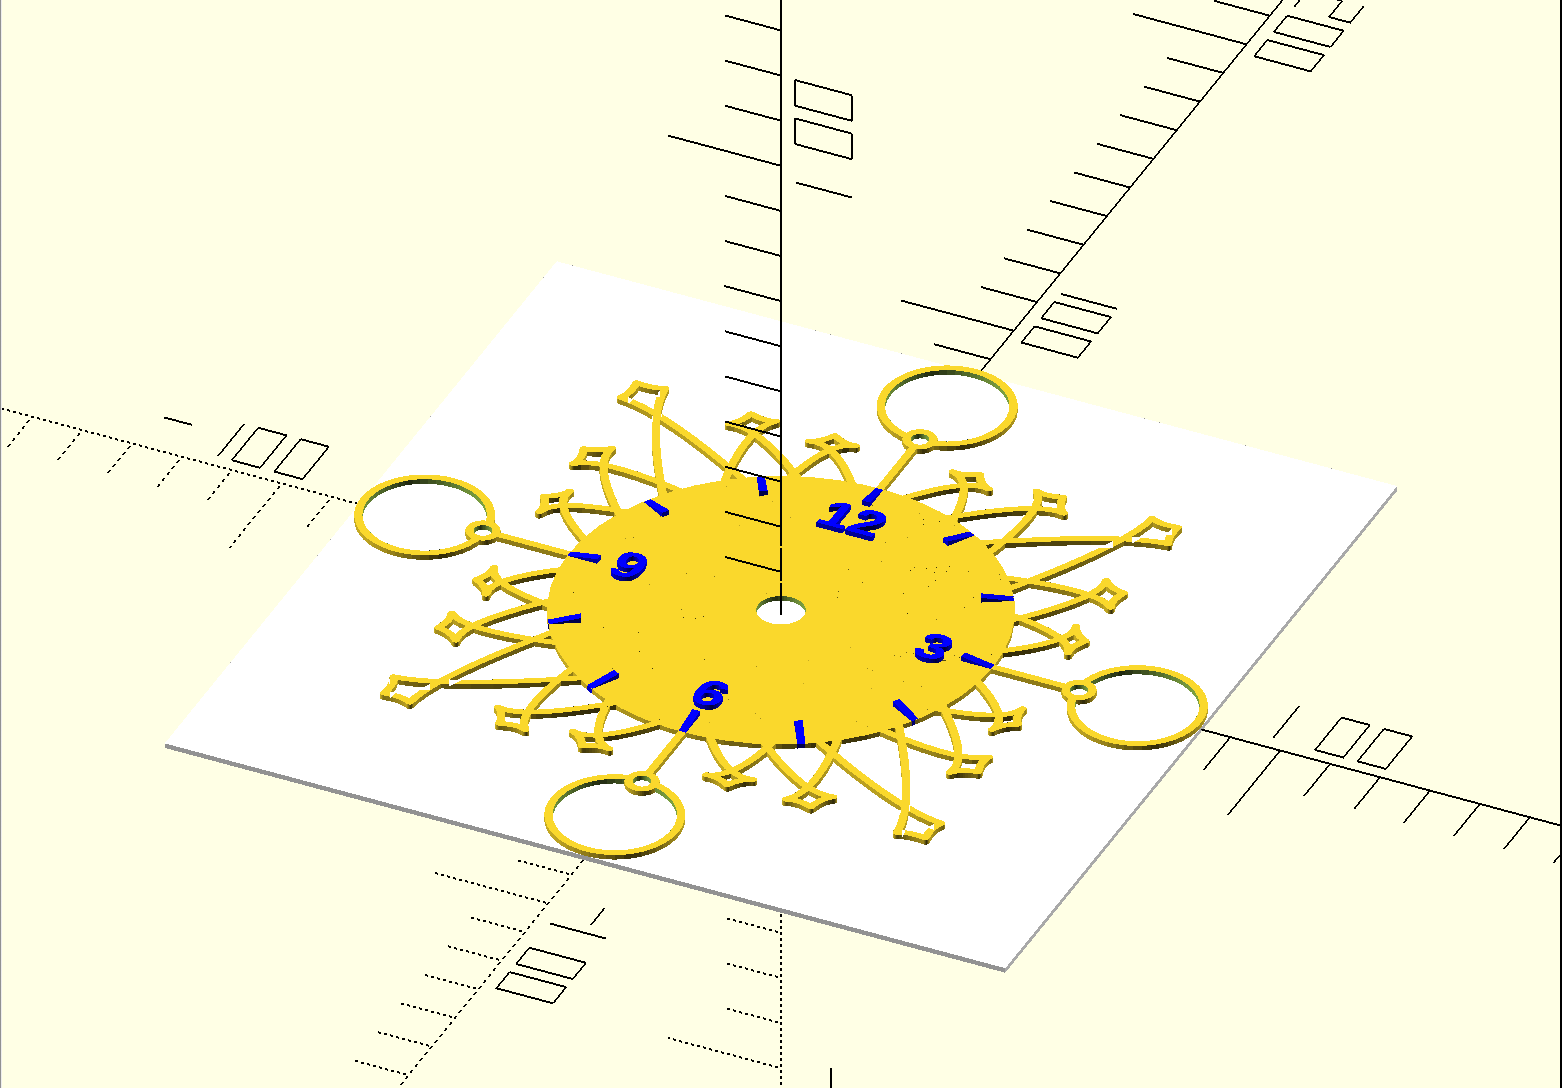
For this customizable clock, I copied and used a random sequence number from code from mathgrrl on thingiverse to customize a sunburst clock.
OpenSCAD Print

I really liked the customizable polybowl design and had fun playing around with the different settings. The print came out pretty successful but I am curious as to how it would print with the spiralize outer contour option. There were some tiny gaps within the outside part of the bowl so I think spiralizing it might turn out better.
Summary of Group OpenSCAD Project
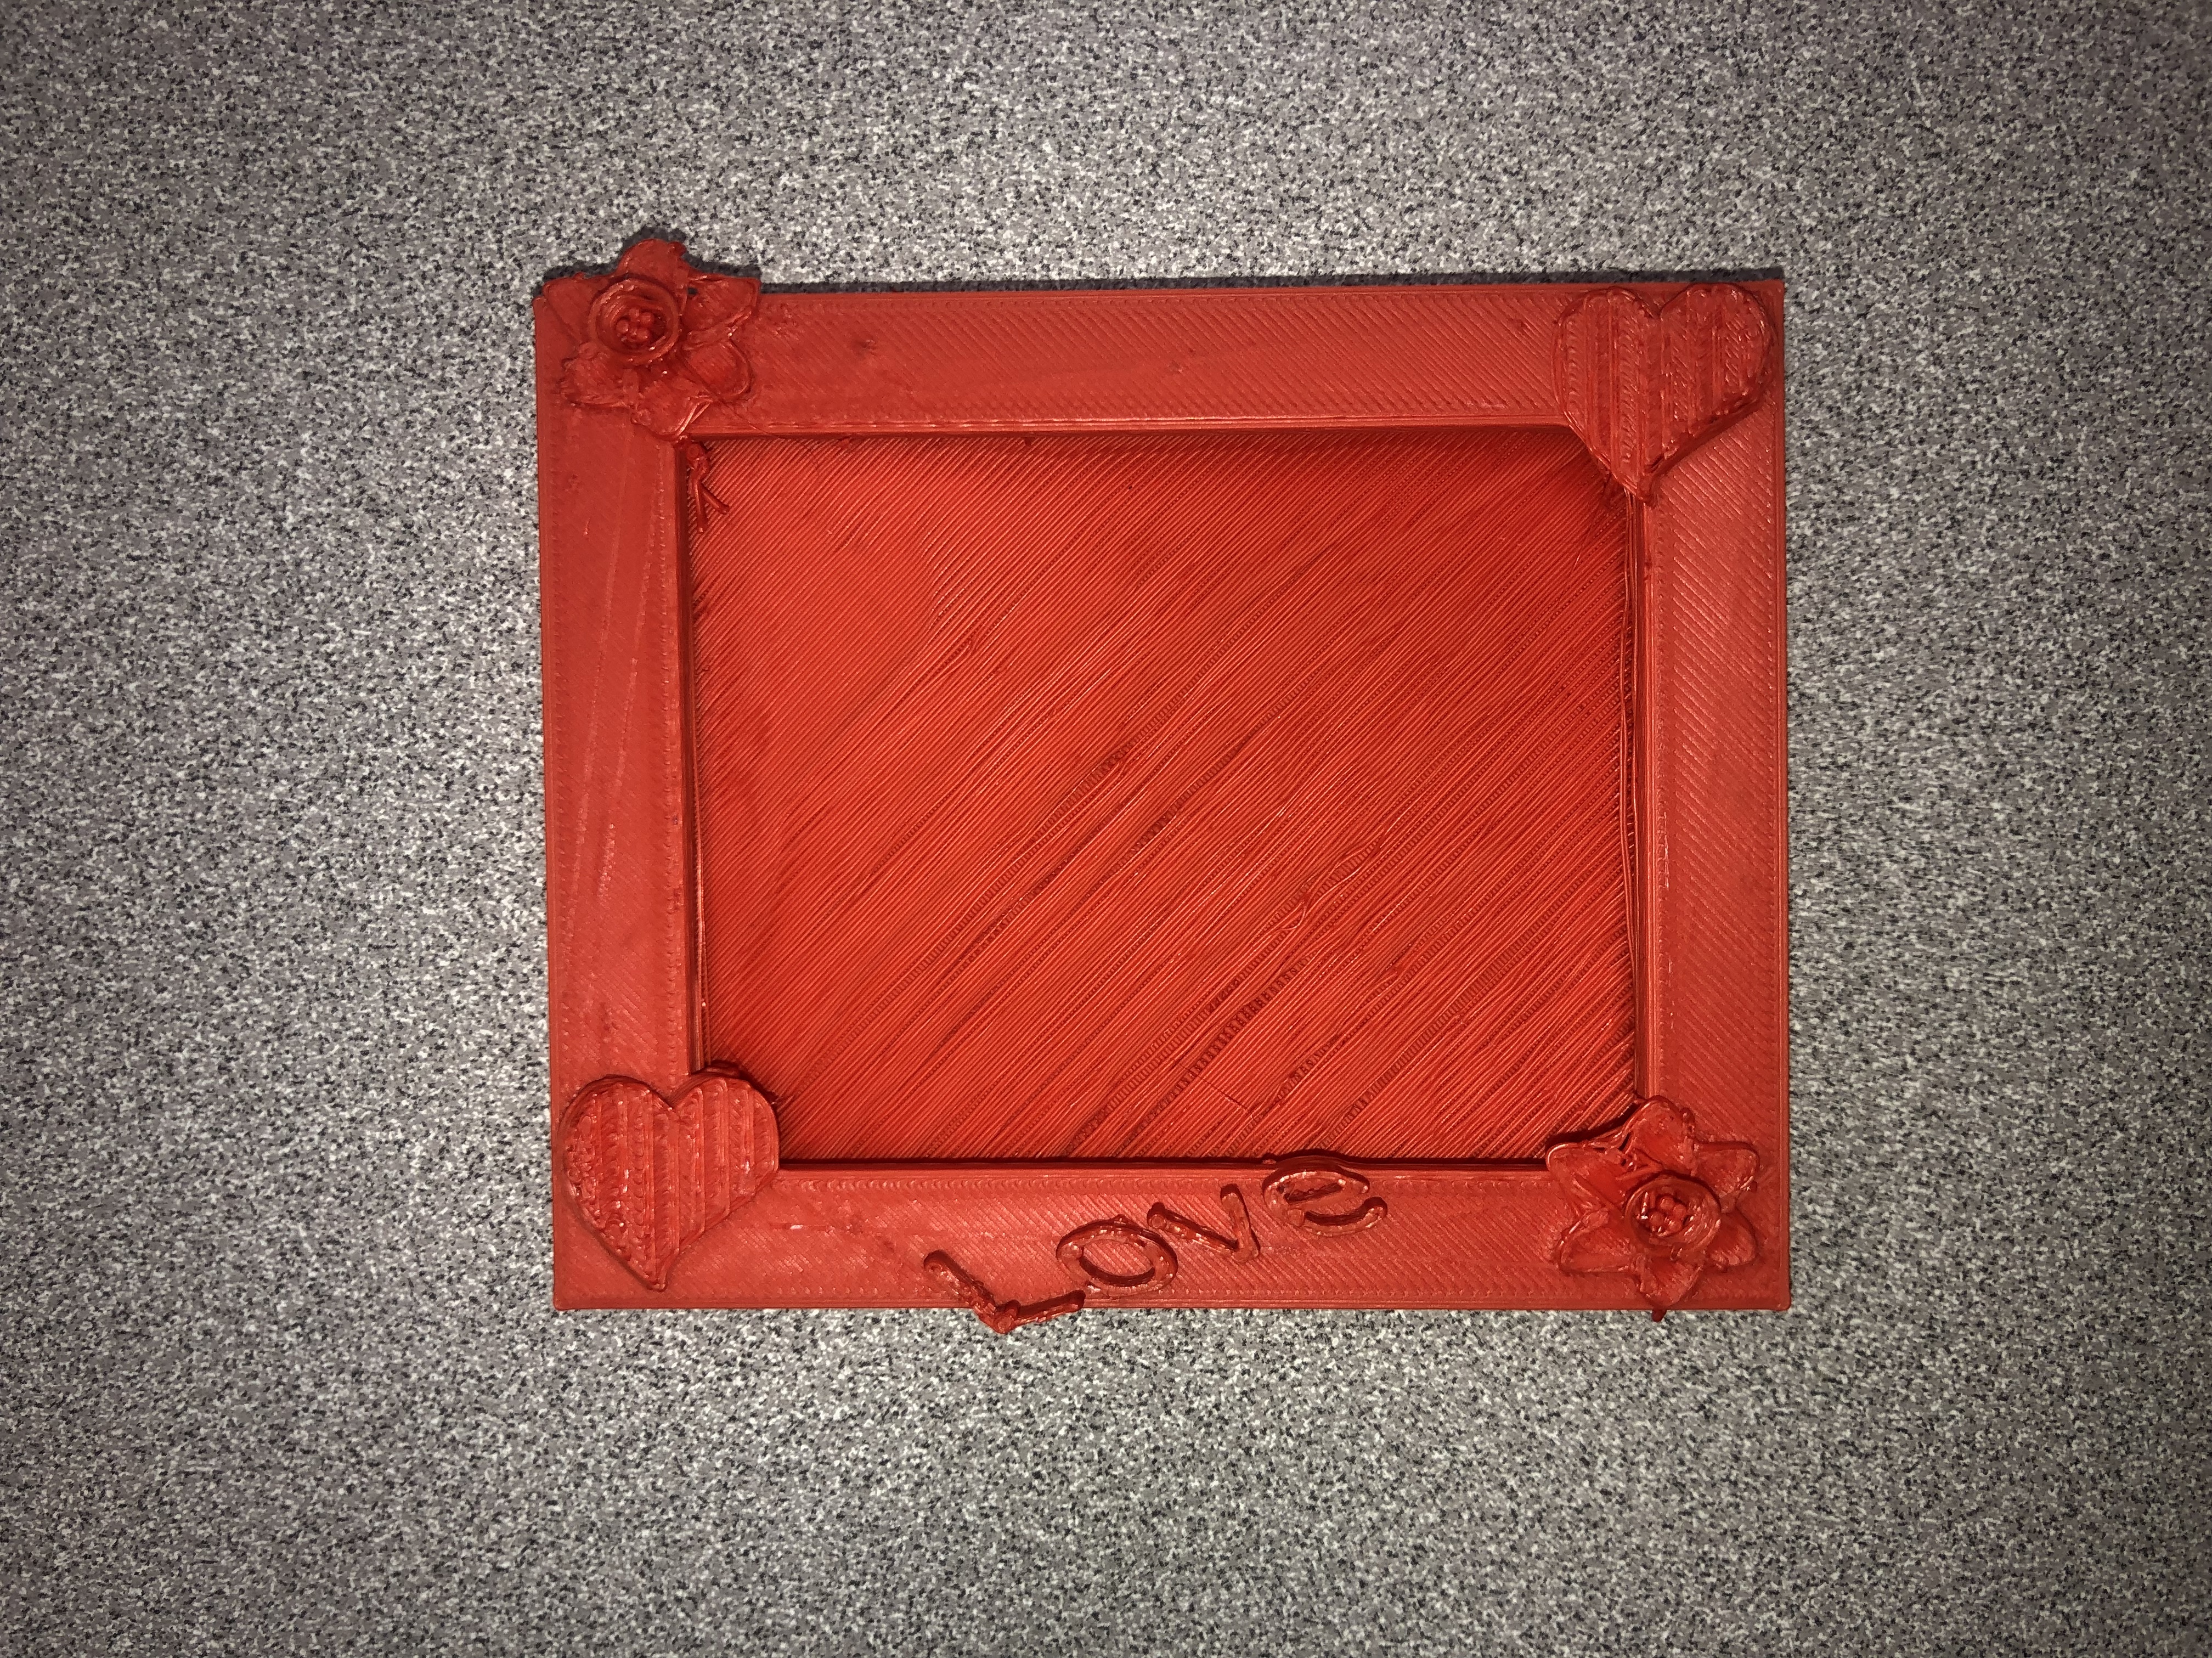
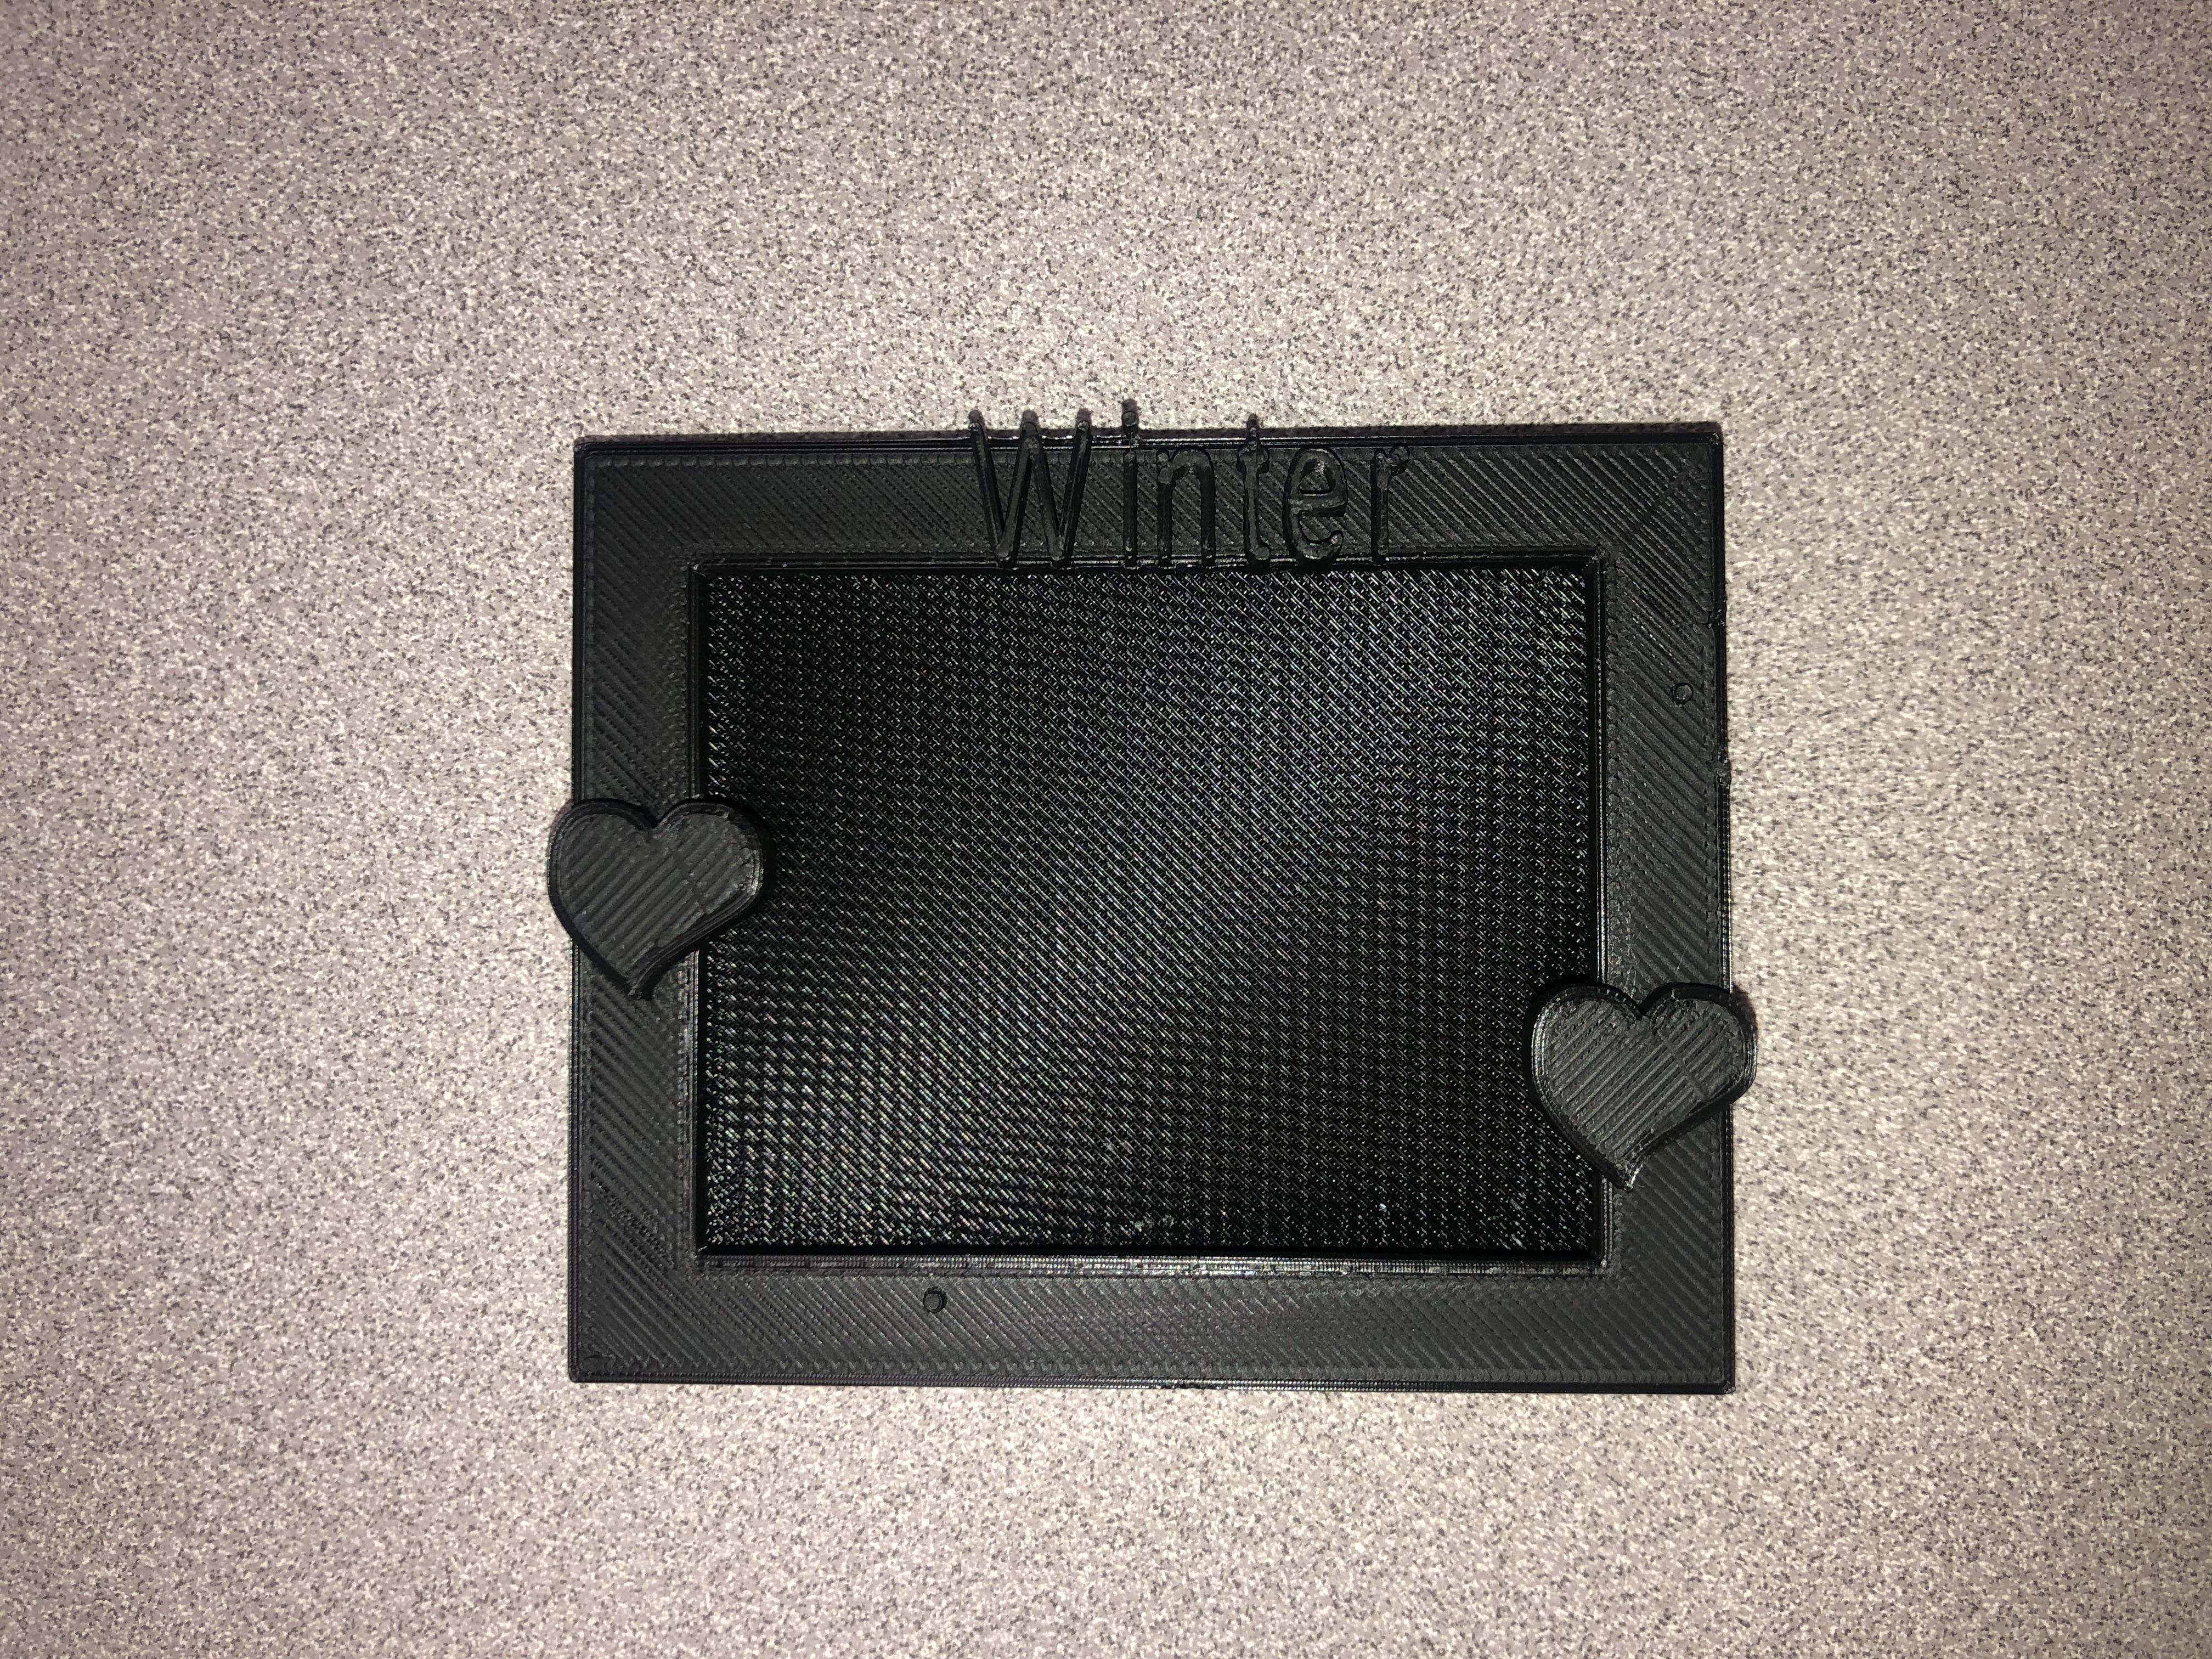
Bailey Callahan and I made a customizable picture frame with holes on the back of the frame for one to put magnets in. We tried to create our own frame but because of our lack of knowledge with openSCAD, we decided to remix a frame already created on Thingiverse. We wanted to make the frame customizable with the seasons/holidays by adding a flower, a snowflake, and a heart as well as text and the size of the frame, which were initially in the code to being with. In order to incorporate the shapes into our code, we had to use blender to convert the STL file into a SCAD file and add that to the end of our code. I liked this project because it was very challenging compared to the other projects we did in class, but also disliked it because it was very difficult to learn OpenSCAD coding language in such a short period of time. I think out project came out fairly successfully because when we uploaded the file to Thingiverse, we have a lot of options in the customizer that the user can work with to truly personalize their picture frame.
Link to group post and Link to Thingiverse post
Reflections and Future Projects
Coming into this course, I thought I knew a lot because of my involvement in the 3D Printing Club. Well, I thought wrong. My knowledge of 3D Printing software has greatly improved throughout this course and the doing of all the projects really helped. Overall, I was happy with my growth of using different 3D printing software because I most likely would not have taught myself. As a CIS major, I would like to go more in depth of learning OpenSCAD sometime in the future, but right now, I need a break from that. I enjoyed the work done and thought I did a decent job on all the projects and it was fun to go in depth of each software and learn the tools needed to use for possible future projects.
Future projects I may want to do are creating practical objects I can use everyday or for my apartment next year. For example, I want to create a phone stand to my liking. I see a lot on Thingiverse, but none of them are to my liking 100%. I also would like to create small things for my apartment next year like small wall decor, a toothbrush holder, and an object to hold and organize all my charging cords. Small things like this come in handy especially in everyday life when you want to be more organized or just need a little something to add on to the wall.